Selling custom rings on WooCommerce is a great way to tap into the growing demand for personalized jewelry, and it often means higher margins too! But to really stand out, your product needs one key feature: customers should be able to design their own ring by choosing materials, stones, and more — and see a live preview of the result.
WooCommerce doesn’t offer this kind of customization by default, so we’ll use the Advanced Product Fields for WooCommerce (APF) plugin to make it work.
In this complete tutorial, we’ll show you how to set up a simple “design your ring” product in WooCommerce with real-time previews that update as the customer customizes their ring.
Time to build it!
What we’ll build
We’ll create a “ring builder” product in WooCommerce with the following features:
- Select the ring metal and diamond shape.
- See a live preview of the ring.
- Select the type of diamond and the weight in carats.
- Customers can choose their diamond type (lab-grown or natural), which will influence the ring’s total price.
- Use helpful popups to guide the customer through the selection process.
Here’s a demo of what the finished “design your own ring” product looks like on our WooCommerce site:
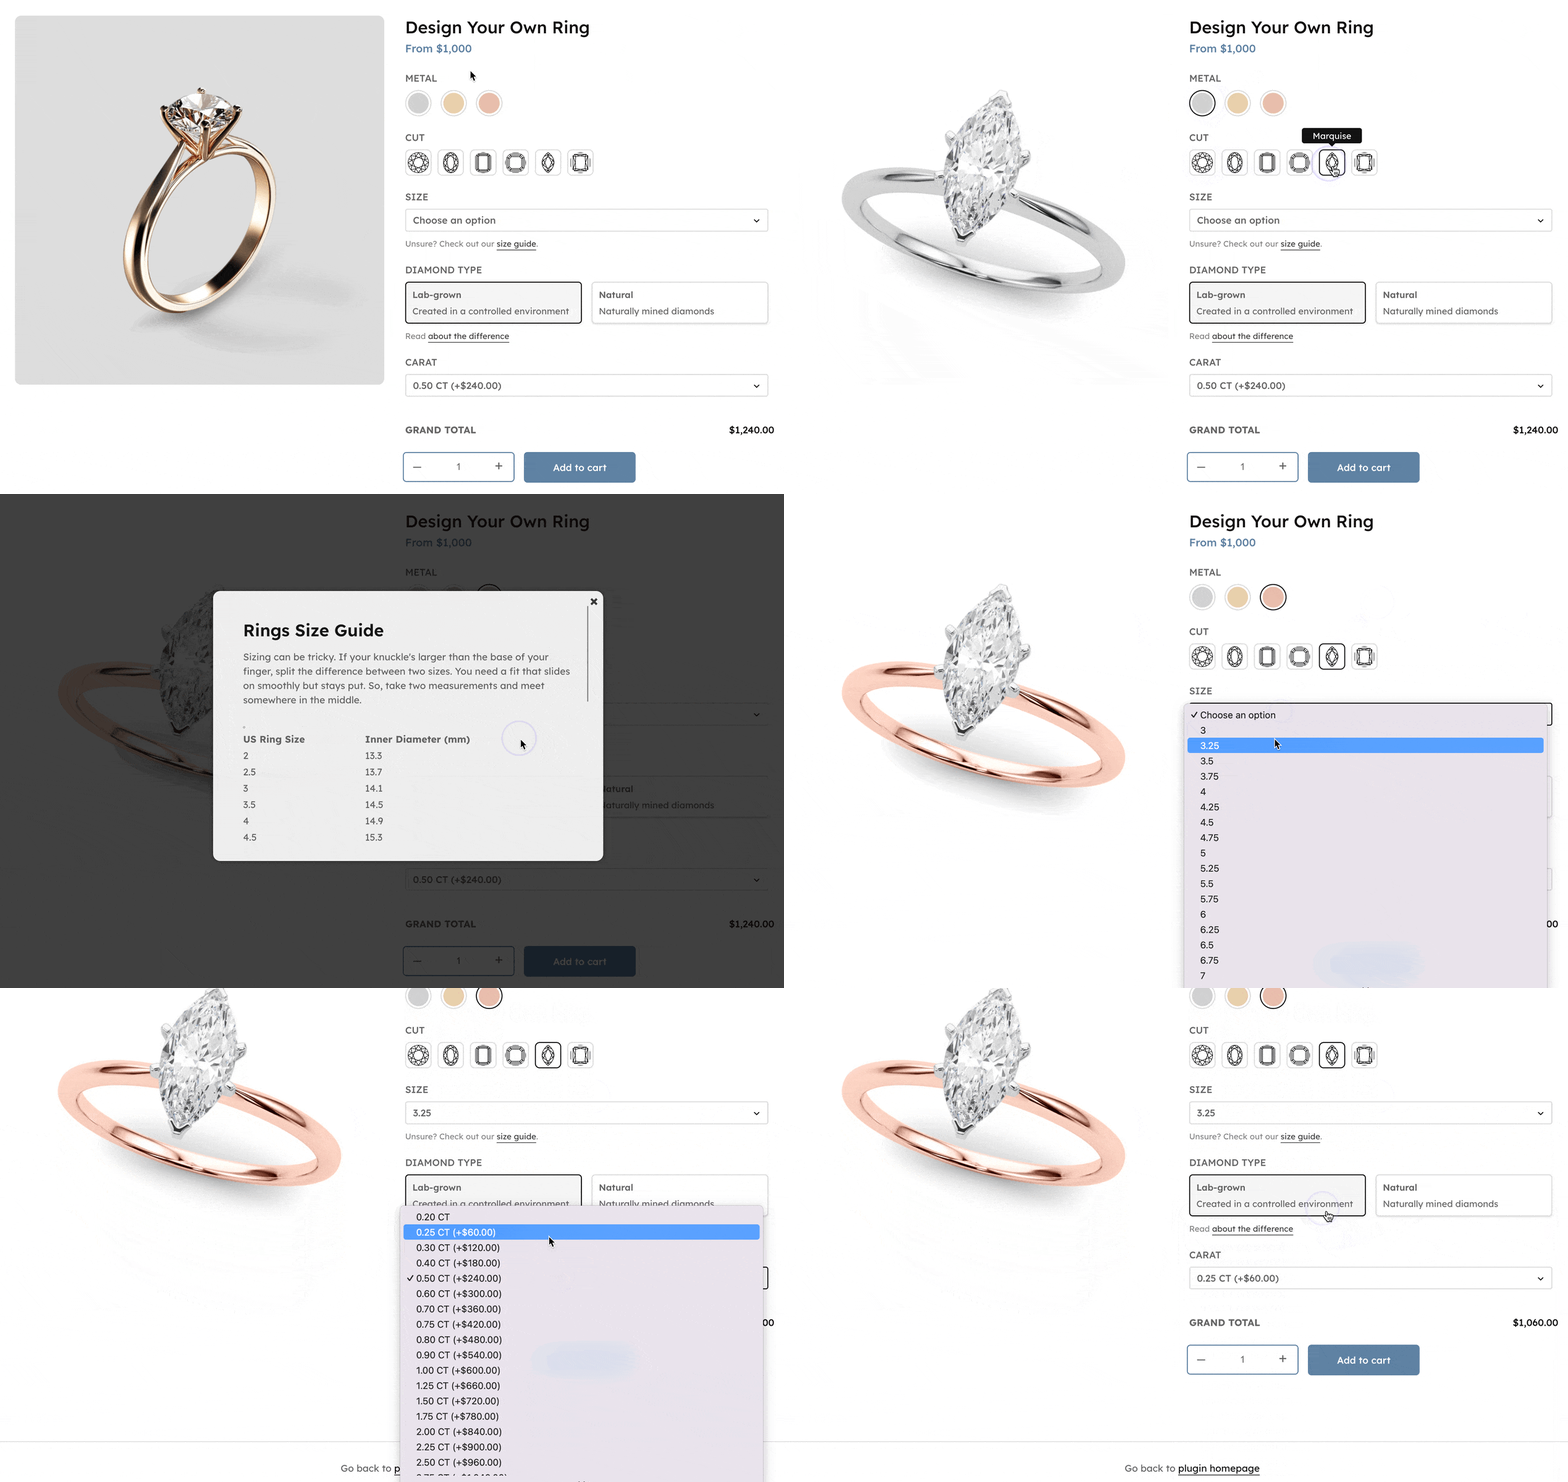
Let’s walk through it step by step — there’s a lot to unpack.
Step-by-step guide to create a simple ring builder with WooCommerce
Before we begin, make sure your store is set up with the basics:
- WooCommerce (version 8.2 or higher) installed and ready to go. New to WooCommerce? Here’s a quick 5-step guide to help you get started. We won’t cover that part in this tutorial.
- A simple product already created. Just give it a title, starting price, and an attractive product image.
- Advanced Product Fields for WooCommerce (APF) installed and ready. This plugin helps you build product configurators that give your customers more choices when shopping.
Step 1: Add the options to your product
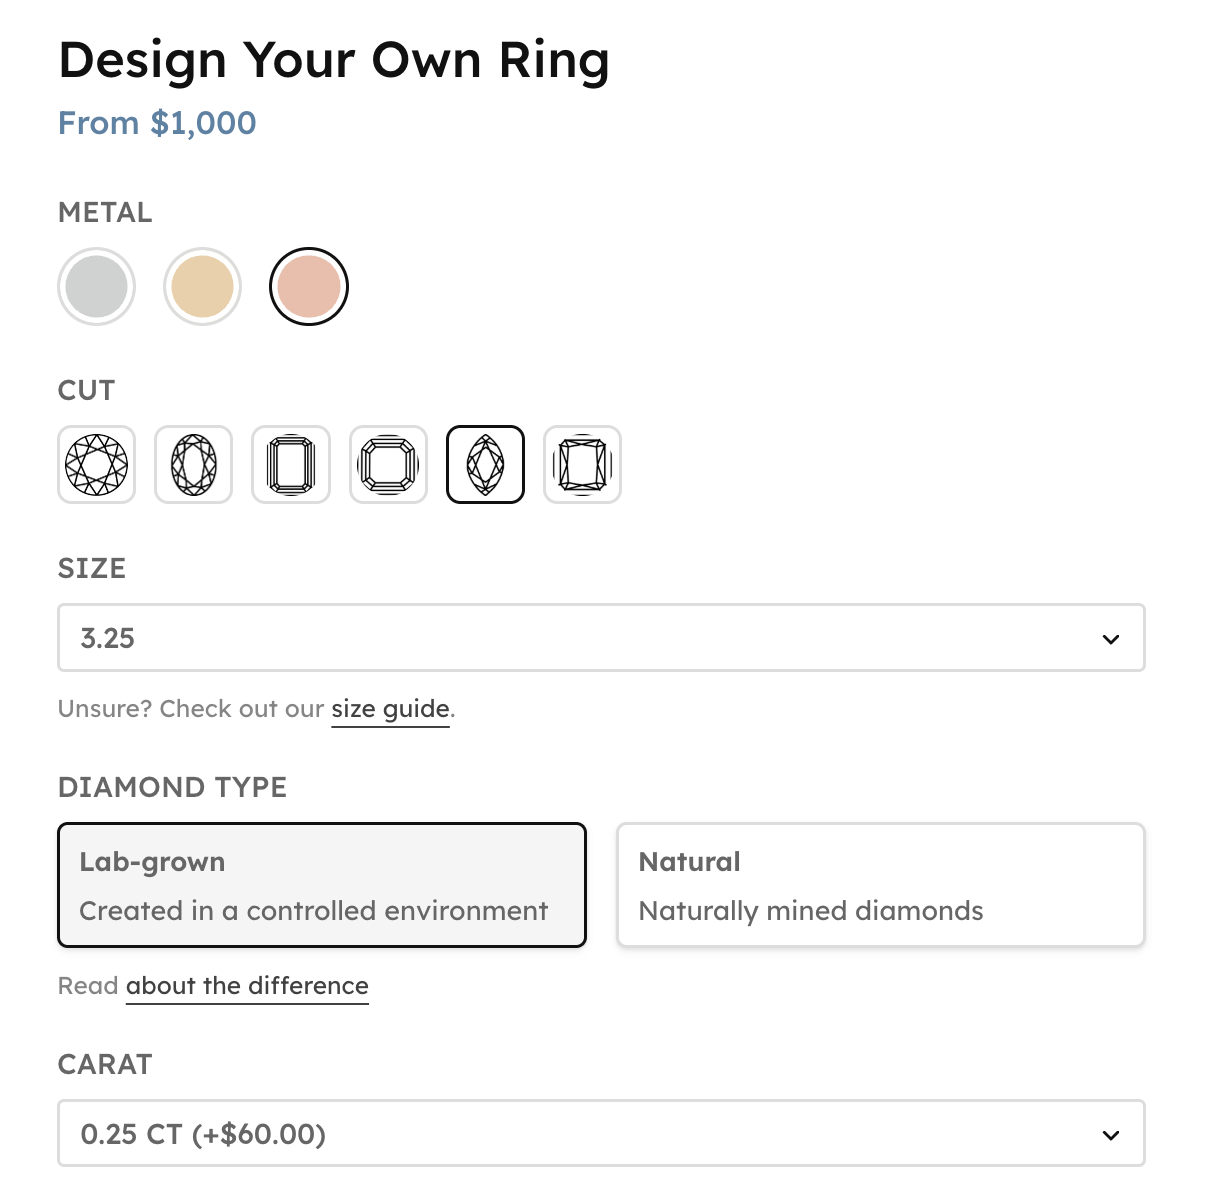
In the first step, we’ll include some of the options customers can select to personalize their ring: choose a metal (usually platinum, yellow gold, or rose gold) and a cut (the diamond shape – round, oval, emerald, etc.).
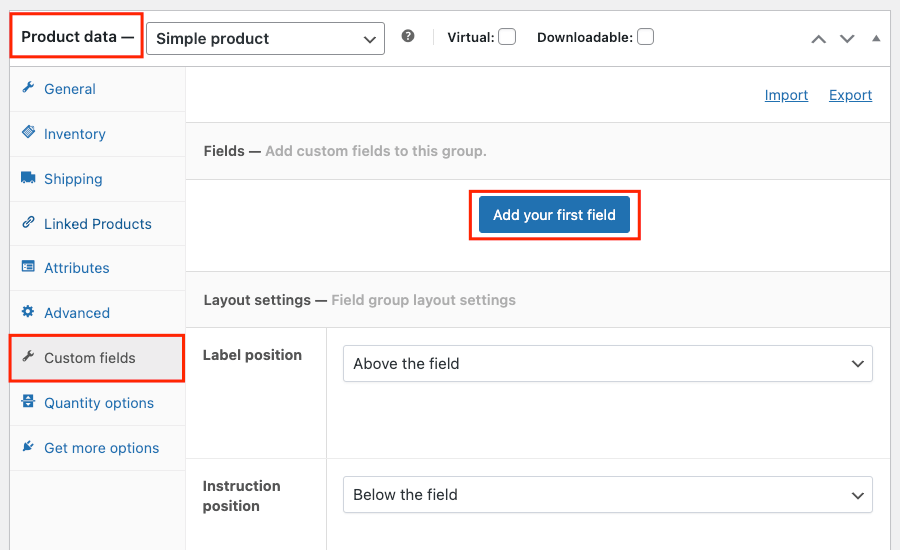
Once you’ve installed the APF plugin, edit your WooCommerce product (the ring) and locate the Custom fields section within the Product data tab. This is where you’ll add all the extra options to your ring product.
Ring metal type
Click Add Your First Field to get started. You’ll see several new settings pop up. Make the following changes:
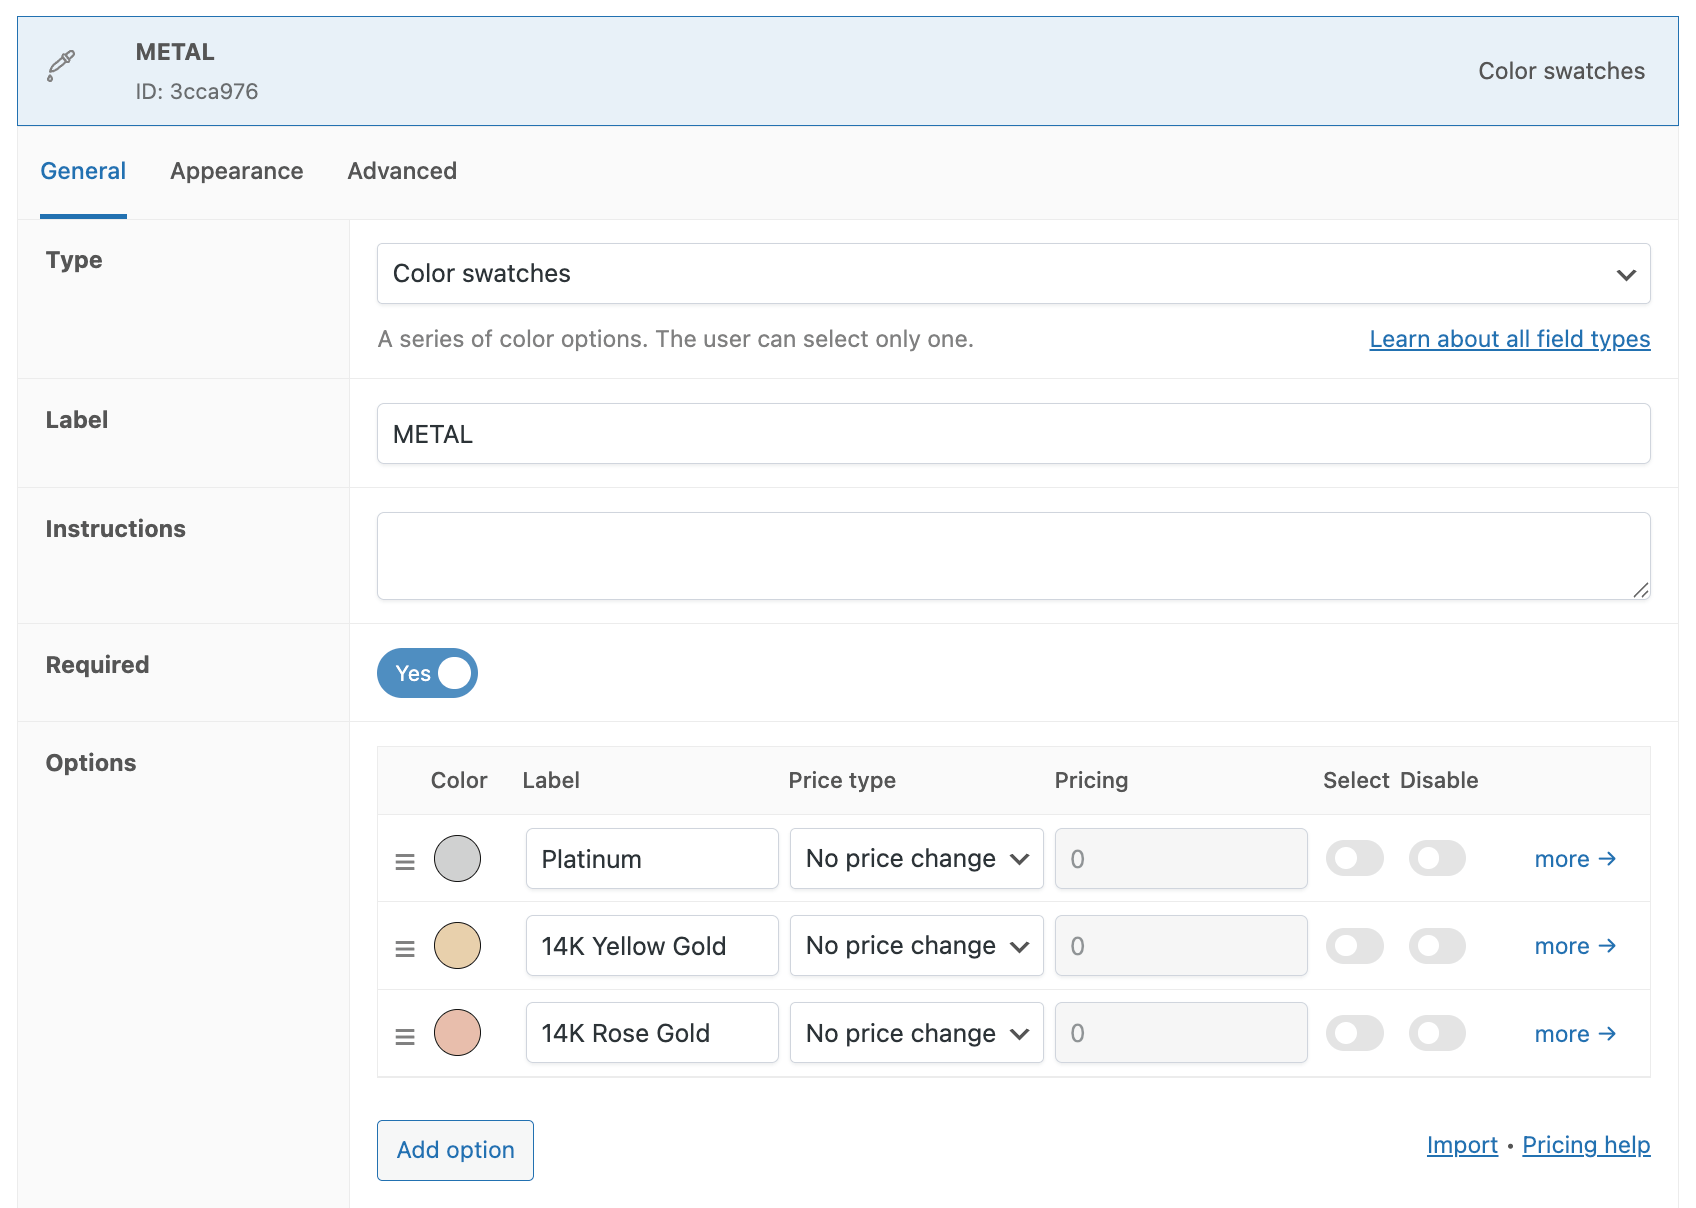
- Set the field Type to Color Swatches. This will display clickable color icons on the product page and makes this option more visually appealing.
- As Label, set “Metal”. It will appear above the color options on the product page, so it should be short and descriptive.
- Mark the field as Required, so the user has to make a choice before they can add the product to cart.
- Add the color options. We chose to offer platinum, gold, and rose gold (which are very standard ring metals).
That’s it! The first product option is now created. On to the next!
Diamond cut
The next option we want to offer the customer is to select the diamond cut (the shape of the diamond). Some popular choices are round, oval, marquise, or asscher.
In the same product admin section as before, click Add a Field to add another option. Use these settings:
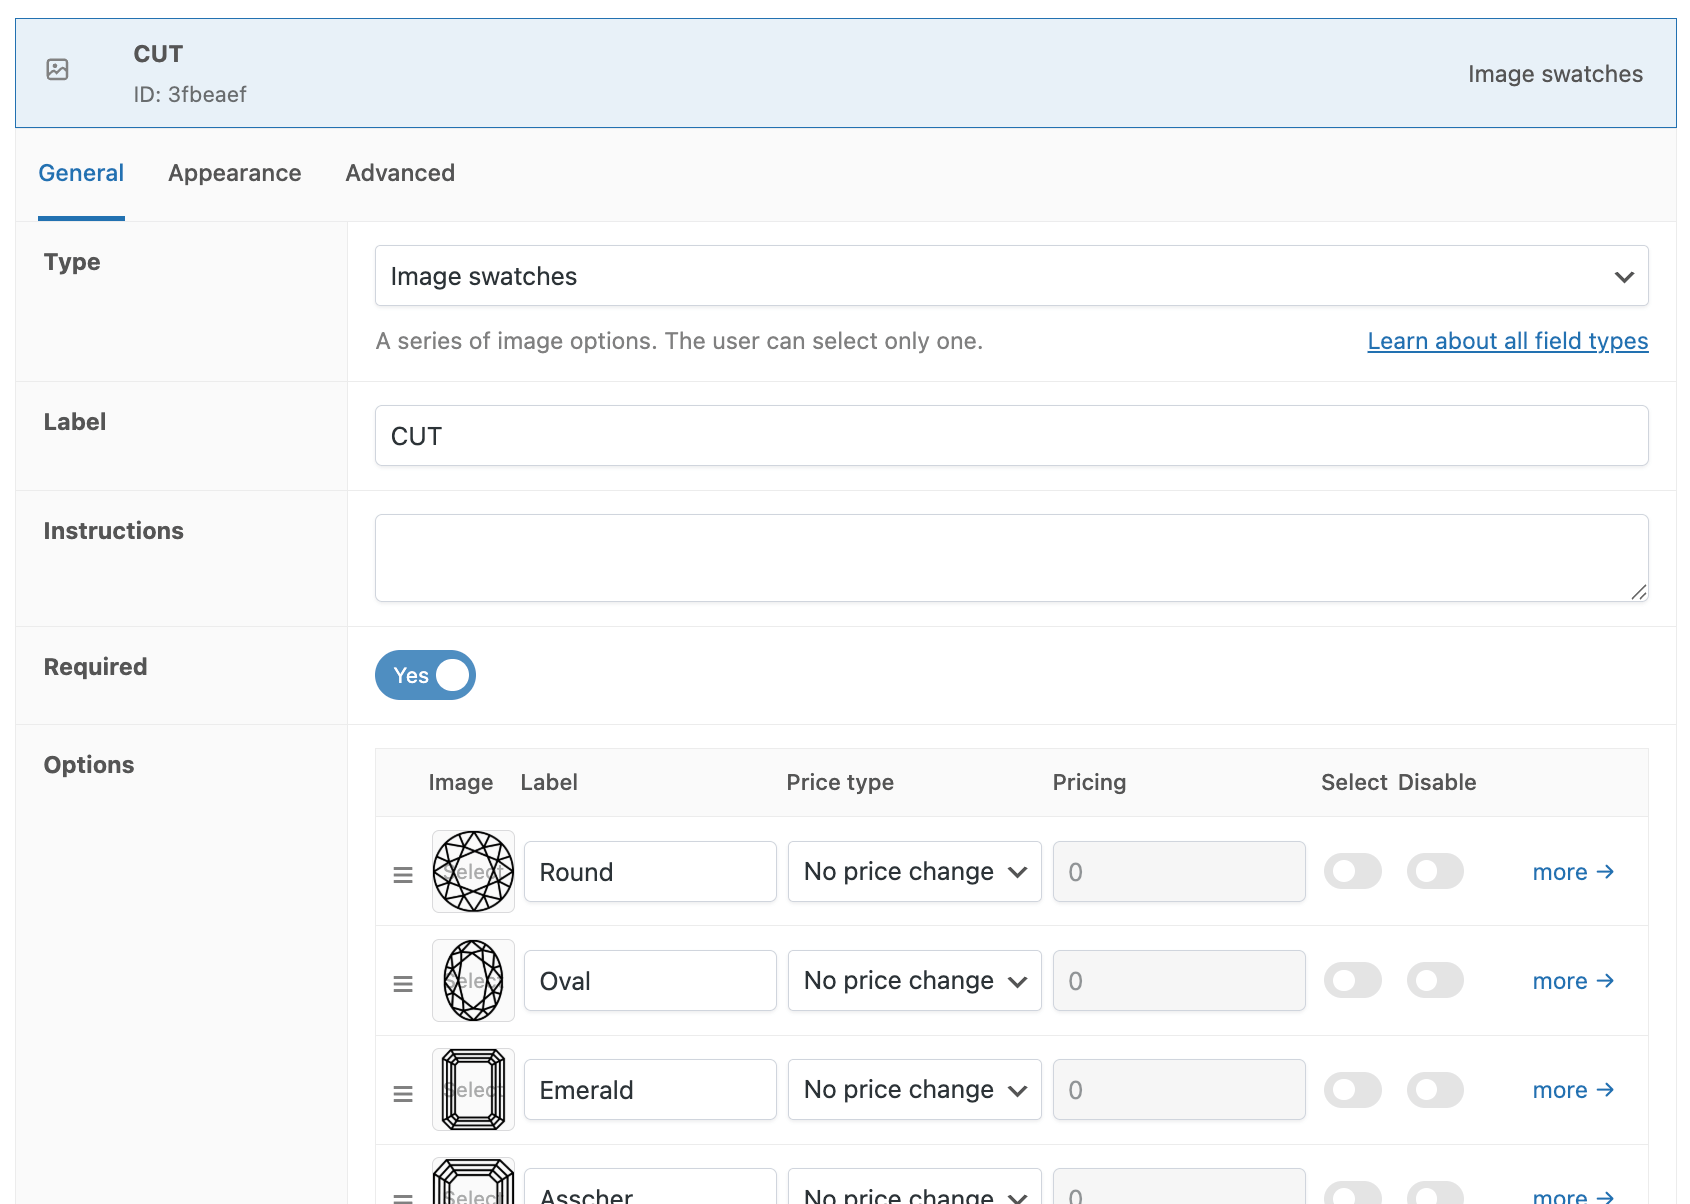
- Set the field Type to Image Swatches. This will display nice clickable image swatches and make this option also visually appealing (and less boring than a dropdown list).
- Also mark this field as Required.
- Add the Options. We’ve chosen to offer all the classic diamond shape options with a nice image of the outline.
Don’t forget to periodically update the product to save your work!
Step 2: Add popups with helpful information
Creating a custom ring isn’t an easy task! We want to be helpful to our customers by guiding them through each step with additional information.
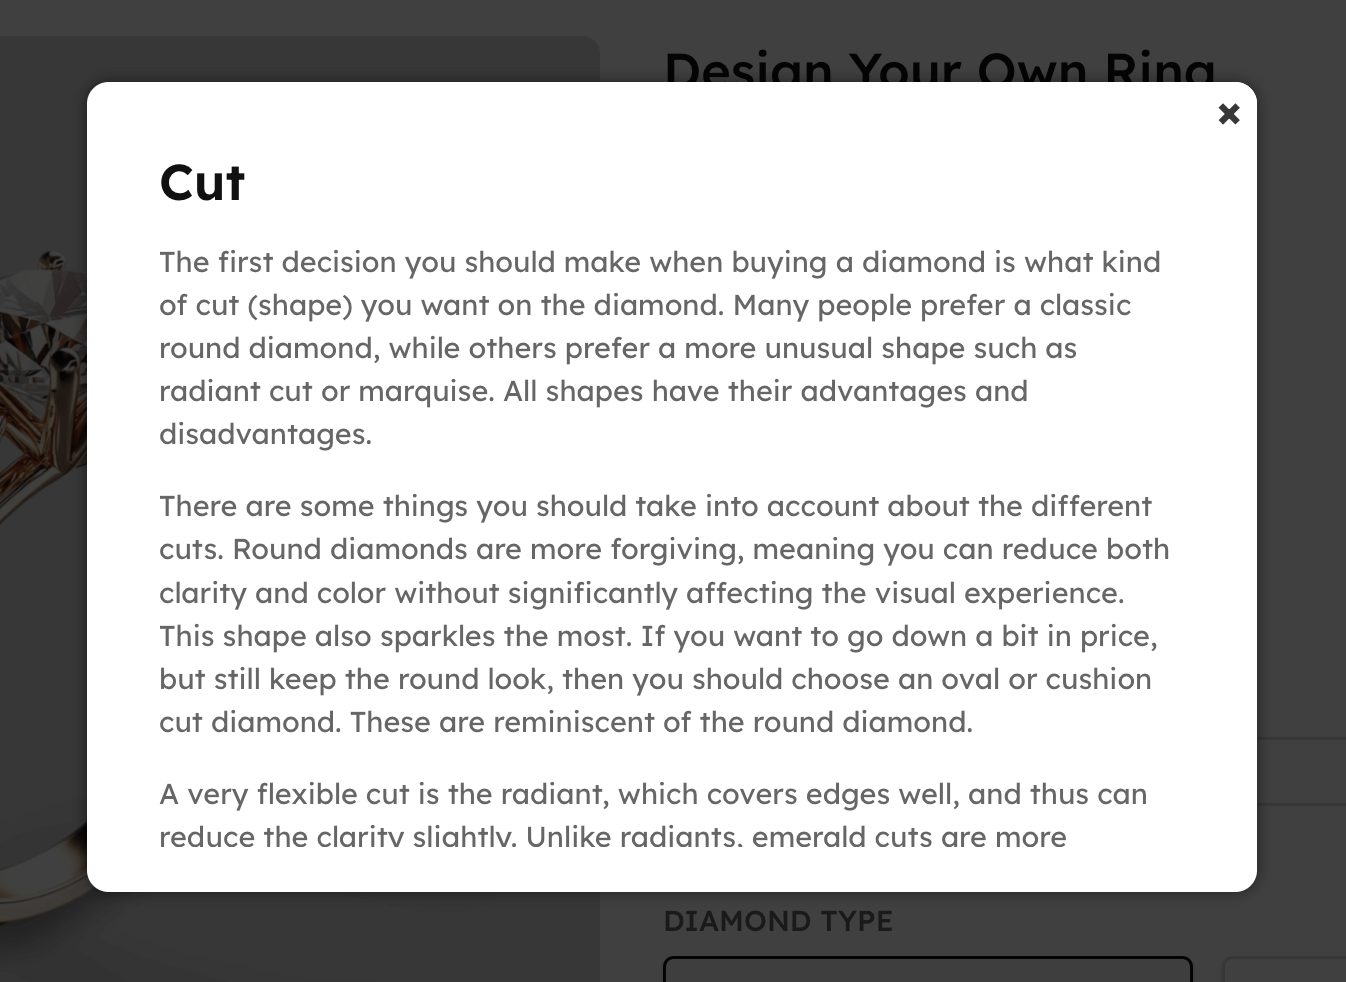
For example, we’d like to explain important notes about the different diamond cut shapes and what’s the best choice for a custom ring.
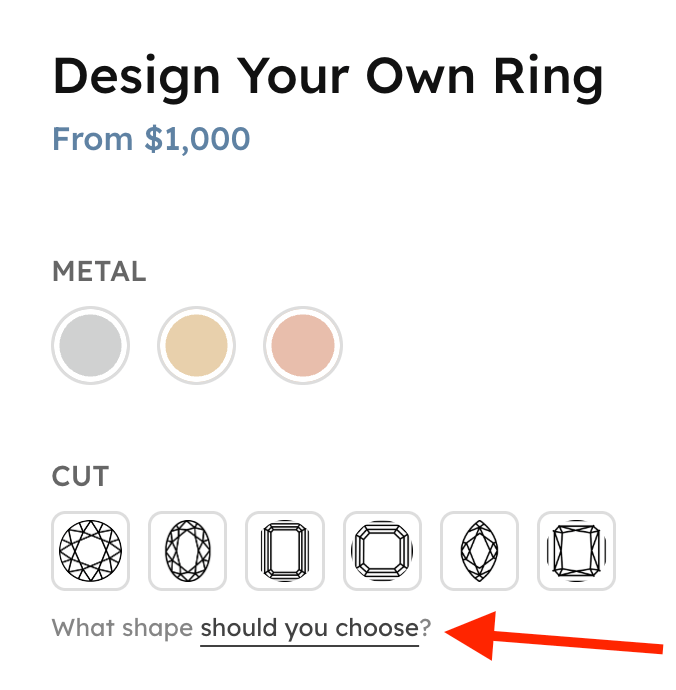
To do that, we’ll open a popup with extra information. Here’s what it will look like:
Building the popup
If you’re using a page builder, there’s a good chance popup functionality is built-in (for example Bricks popup builder or Elementor popups). If you’re not using a page builder — as they may slow things down — then we recommend using the lightweight & free Popup Box plugin.
Whichever method you use, creating popups typically involves a visual editor that lets you add elements and content easily.
We’re keeping things simple with basic text and lists, so there’s no need for complexity:

In the Settings section, make sure Trigger Settings are set to show the popup On Click:
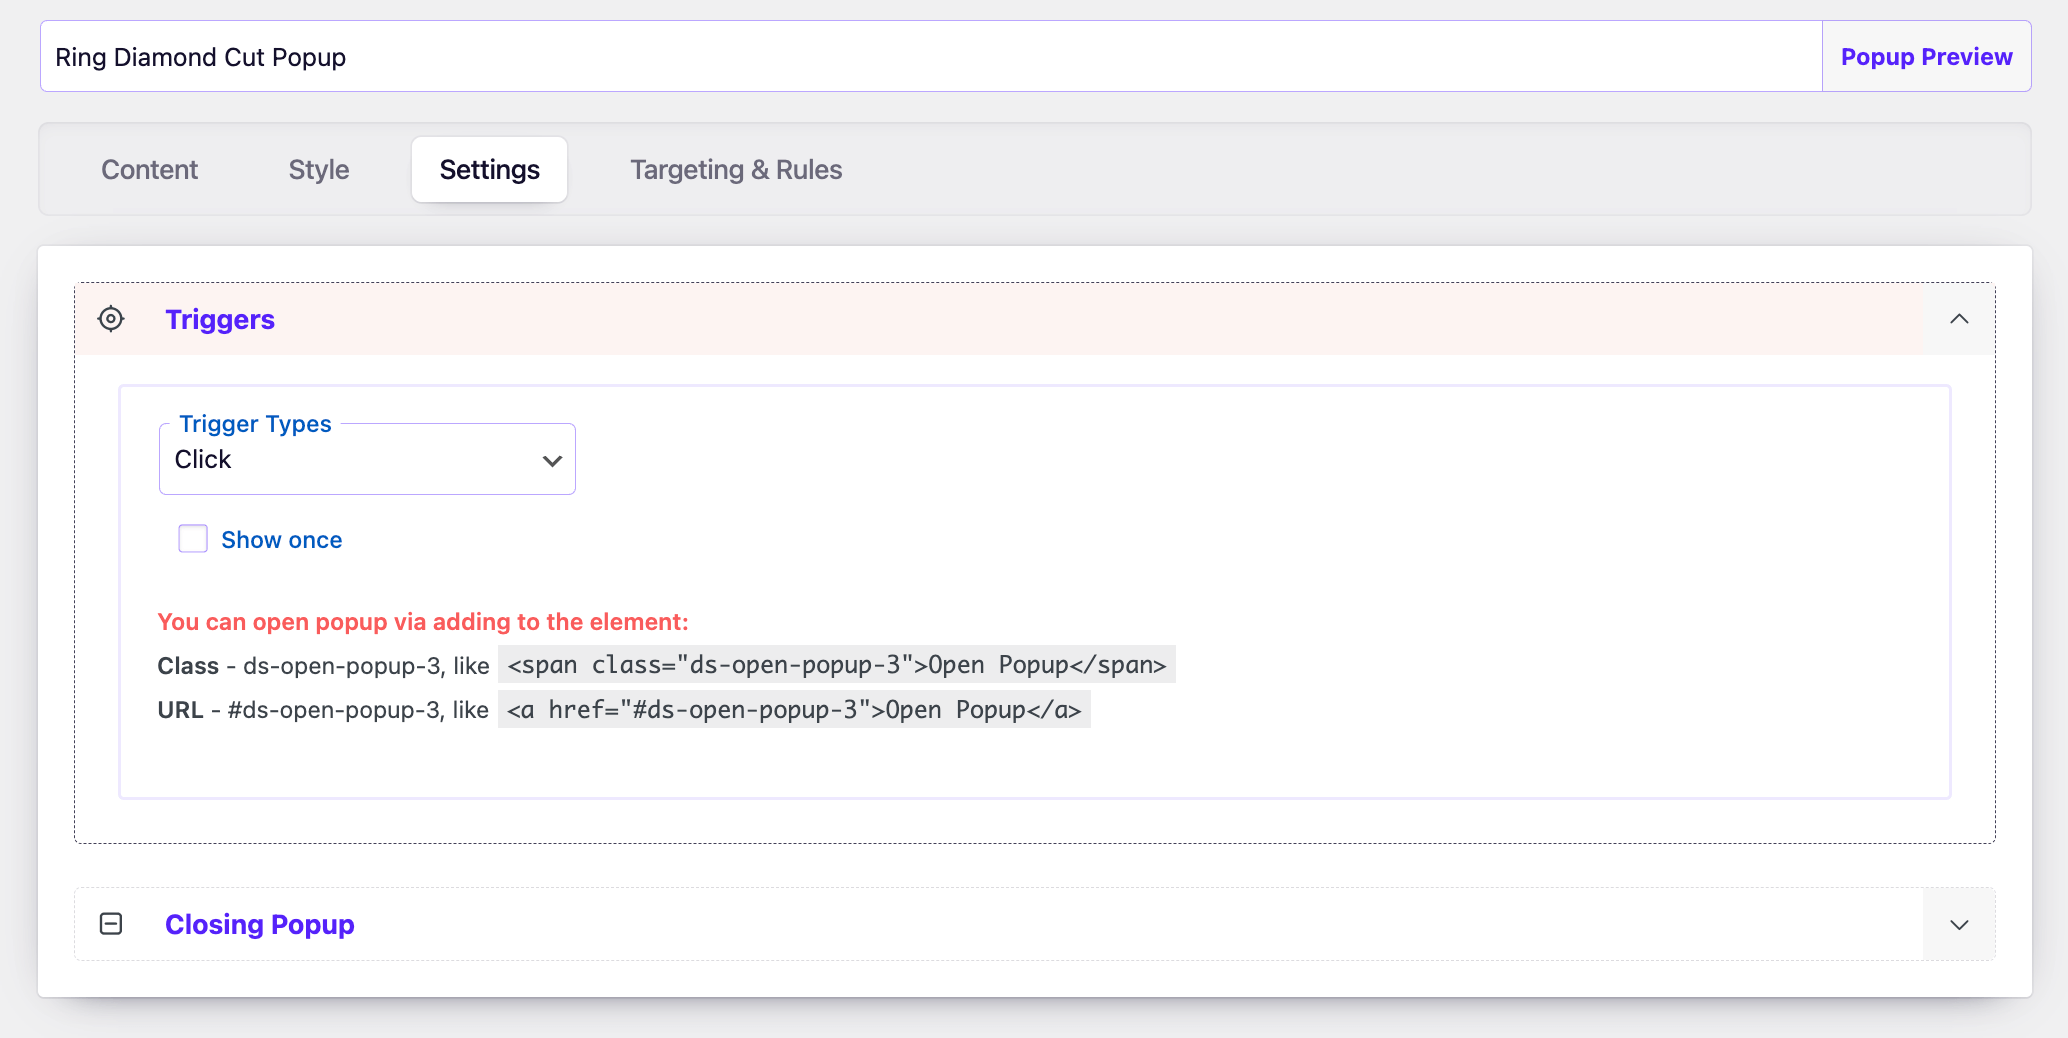
The Popup Box plugin provides you with a URL that you can use to open the popup. In our case, the URL is #ds-open-popup-3 (it will be something similar for you).
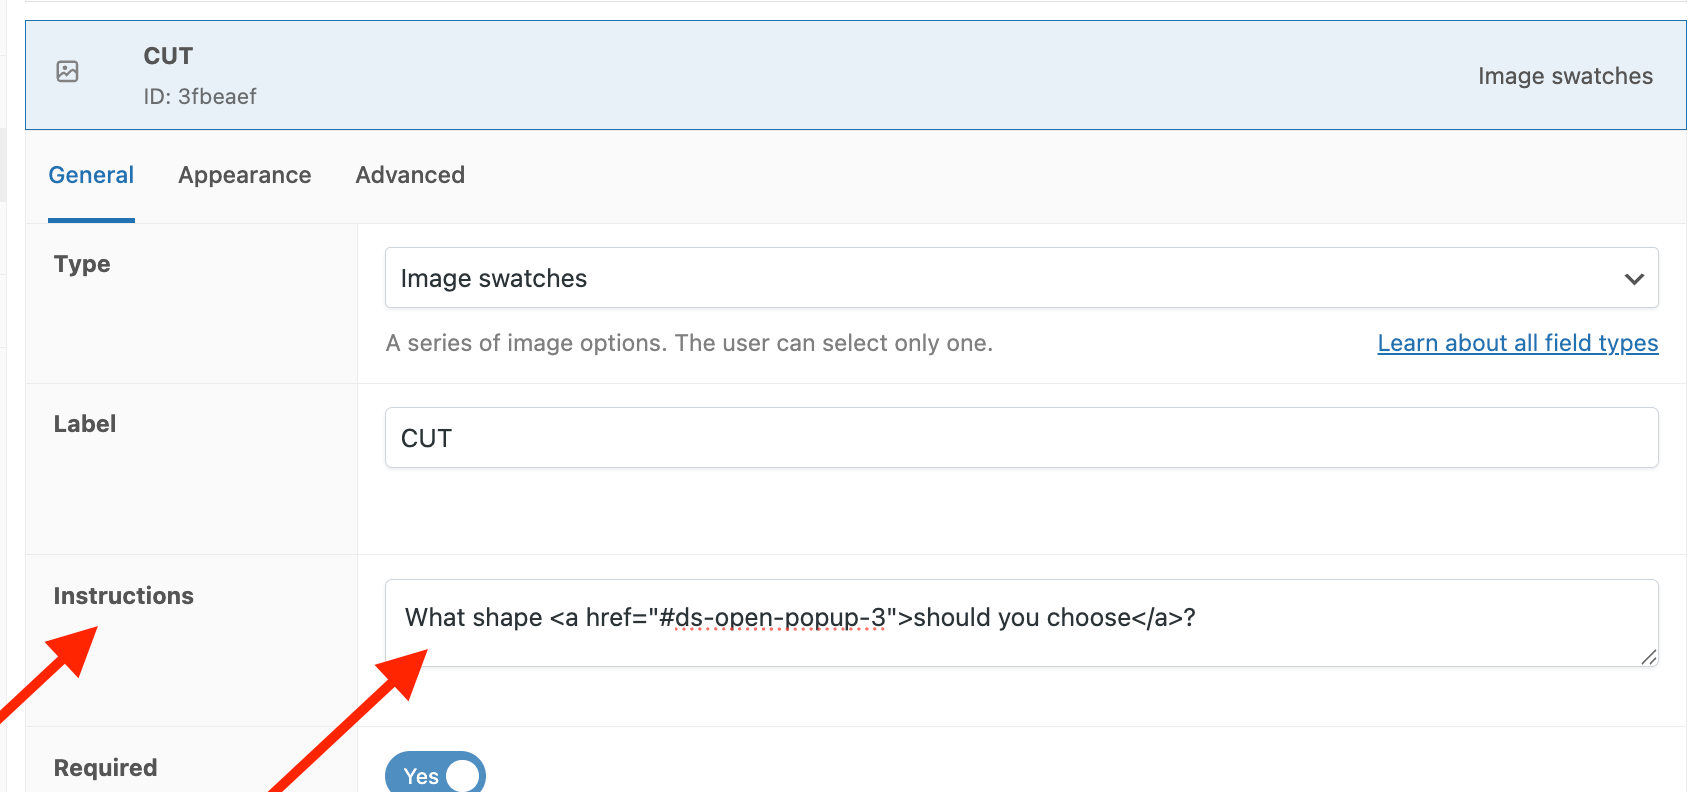
You can add that URL to the Instructions setting of the Cut field created in step 1. We’re using this HTML: What shape <a href="#ds-open-popup-3">should you choose</a>?
Step 3: Add ring size option + popup
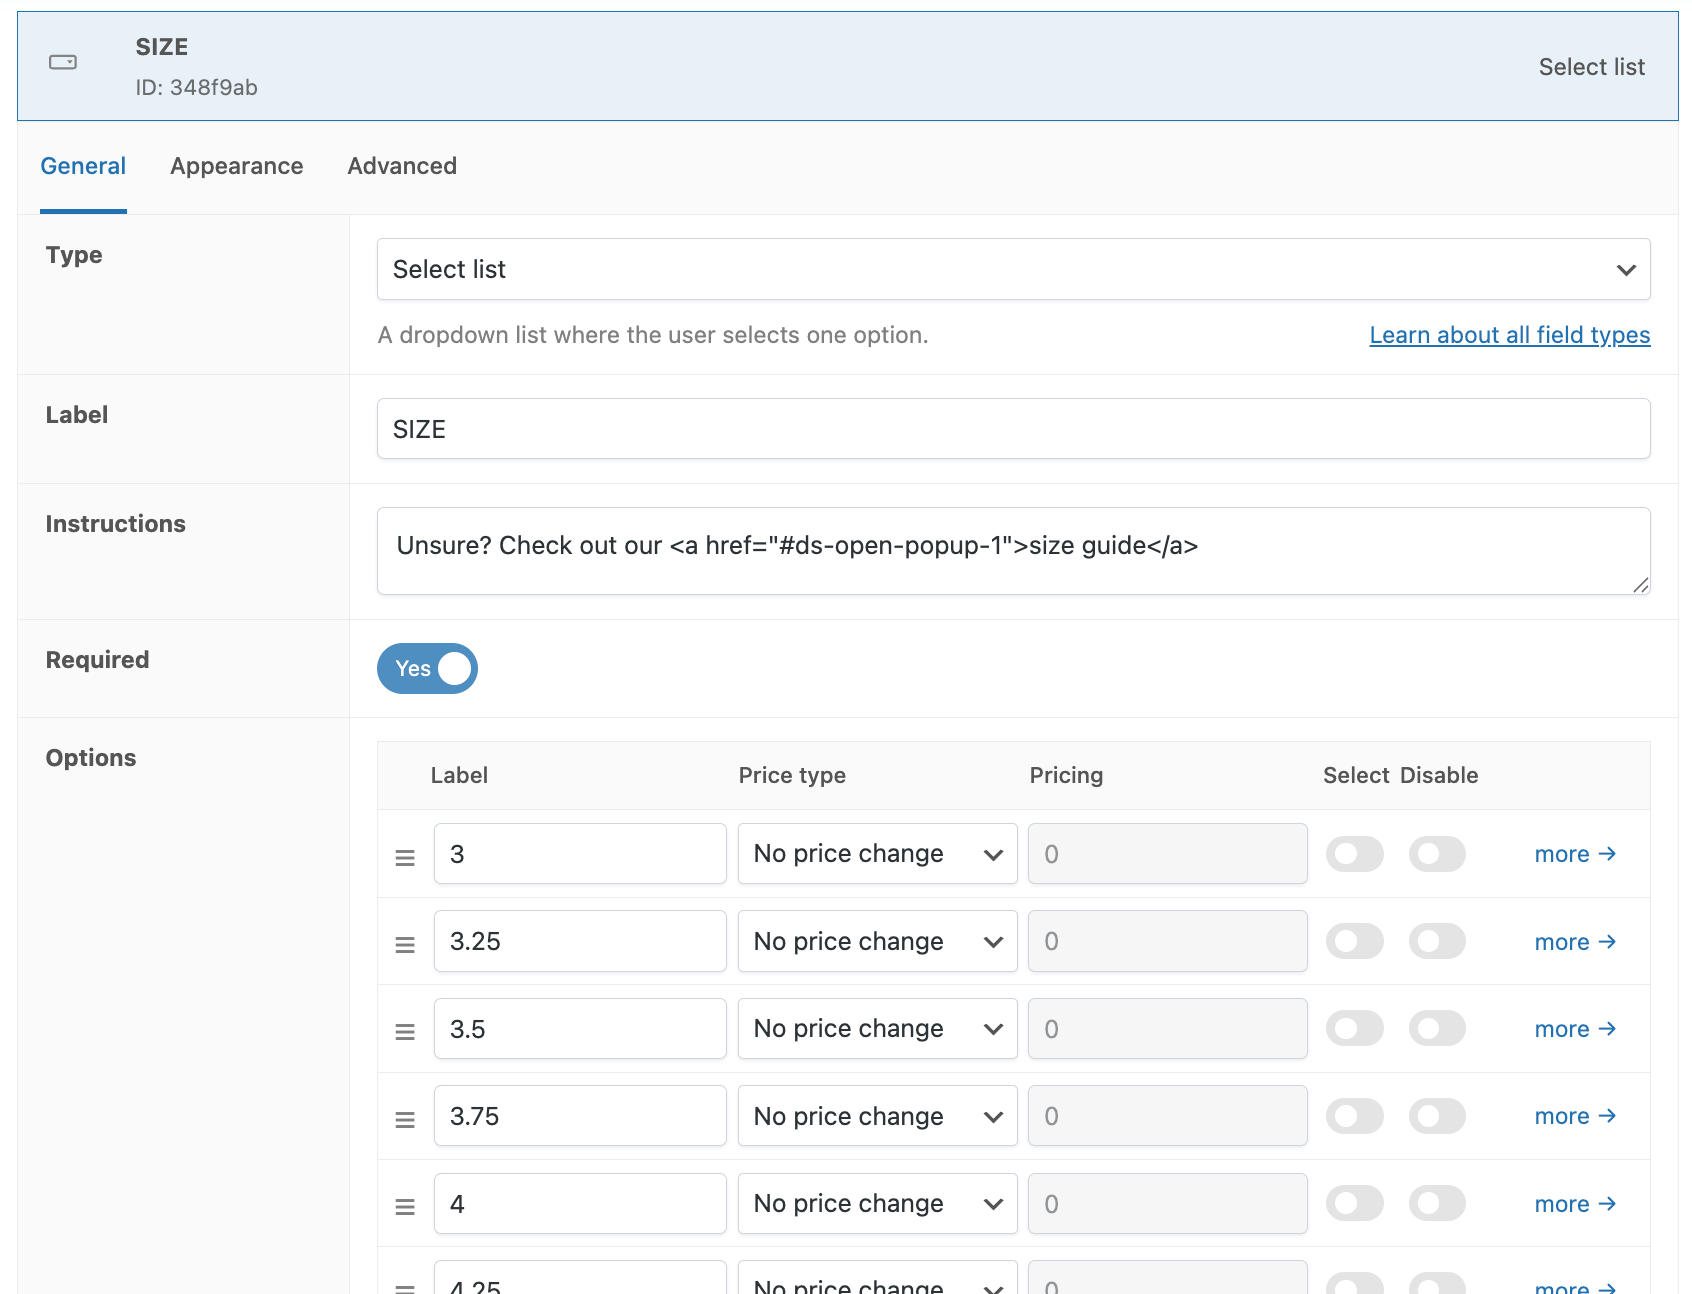
Similar to steps 1 and 2, you can now add a Size option, partnered with another popup. We chose a simple Select List field for this one:
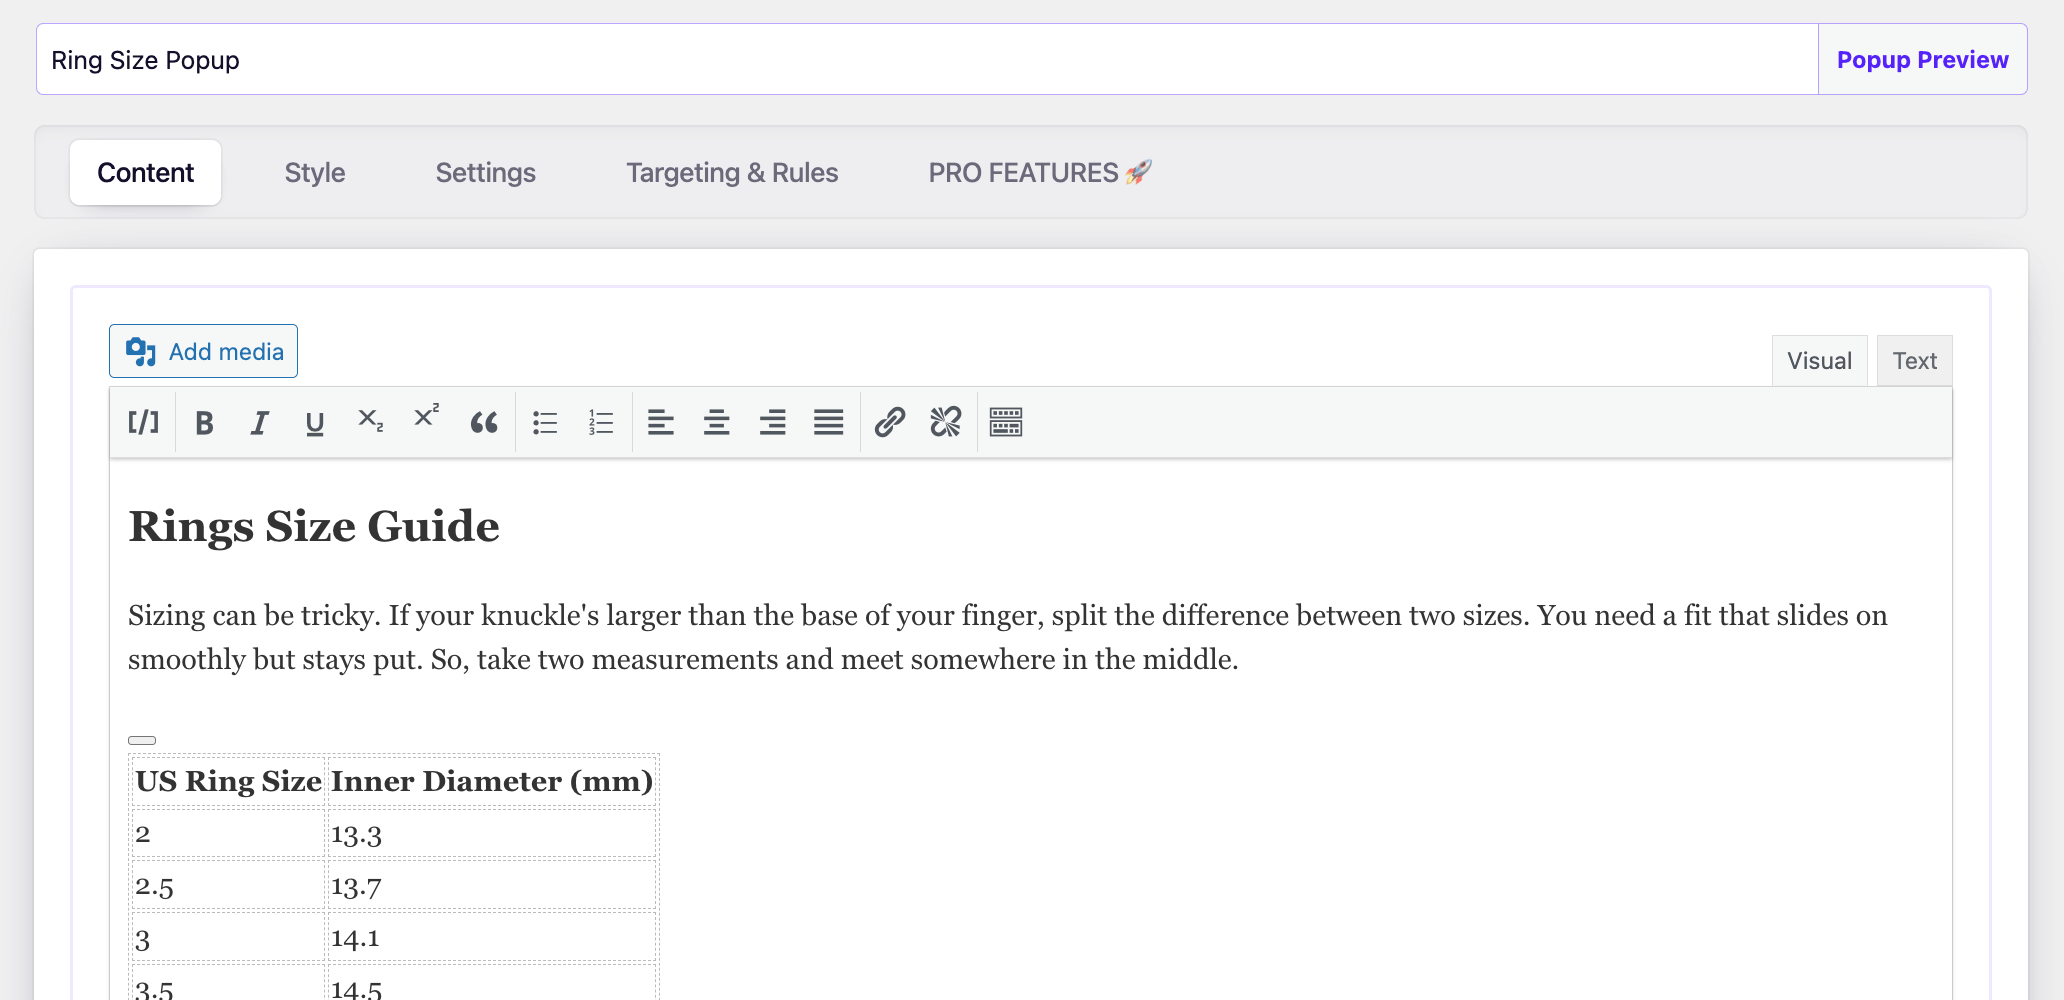
The ring size popup displays a size table (in millimeters) and some helpful tips on how to measure your ring finger:
Step 4: Add diamond weight (in carats) and price conditional logic
Next, the customer can choose the diamond type (naturally mined or lab-grown diamonds) and their desired weight in carats.
The higher the selected carat, the higher the price of the ring will be. Moreover, lab-grown diamonds are cheaper than natural diamonds, so the price needs to vary depending on the selected preference. We’ll be using conditional logic to determine the correct diamond price.
Let’s dive in!
Diamond type
First, let’s offer the customer a choice of diamond type (or quality). There are 2 common choices:
- Lab-grown diamonds are cheaper but perfectly human-made diamonds.
- Natural diamonds are mined from the earth’s crust. They’re more expensive but unique.
For this option, we chose the Horizontal Cards field type, as it offers a way to add some additional text (and even an image if you want) to describe each choice:

Carat choices with conditional price logic
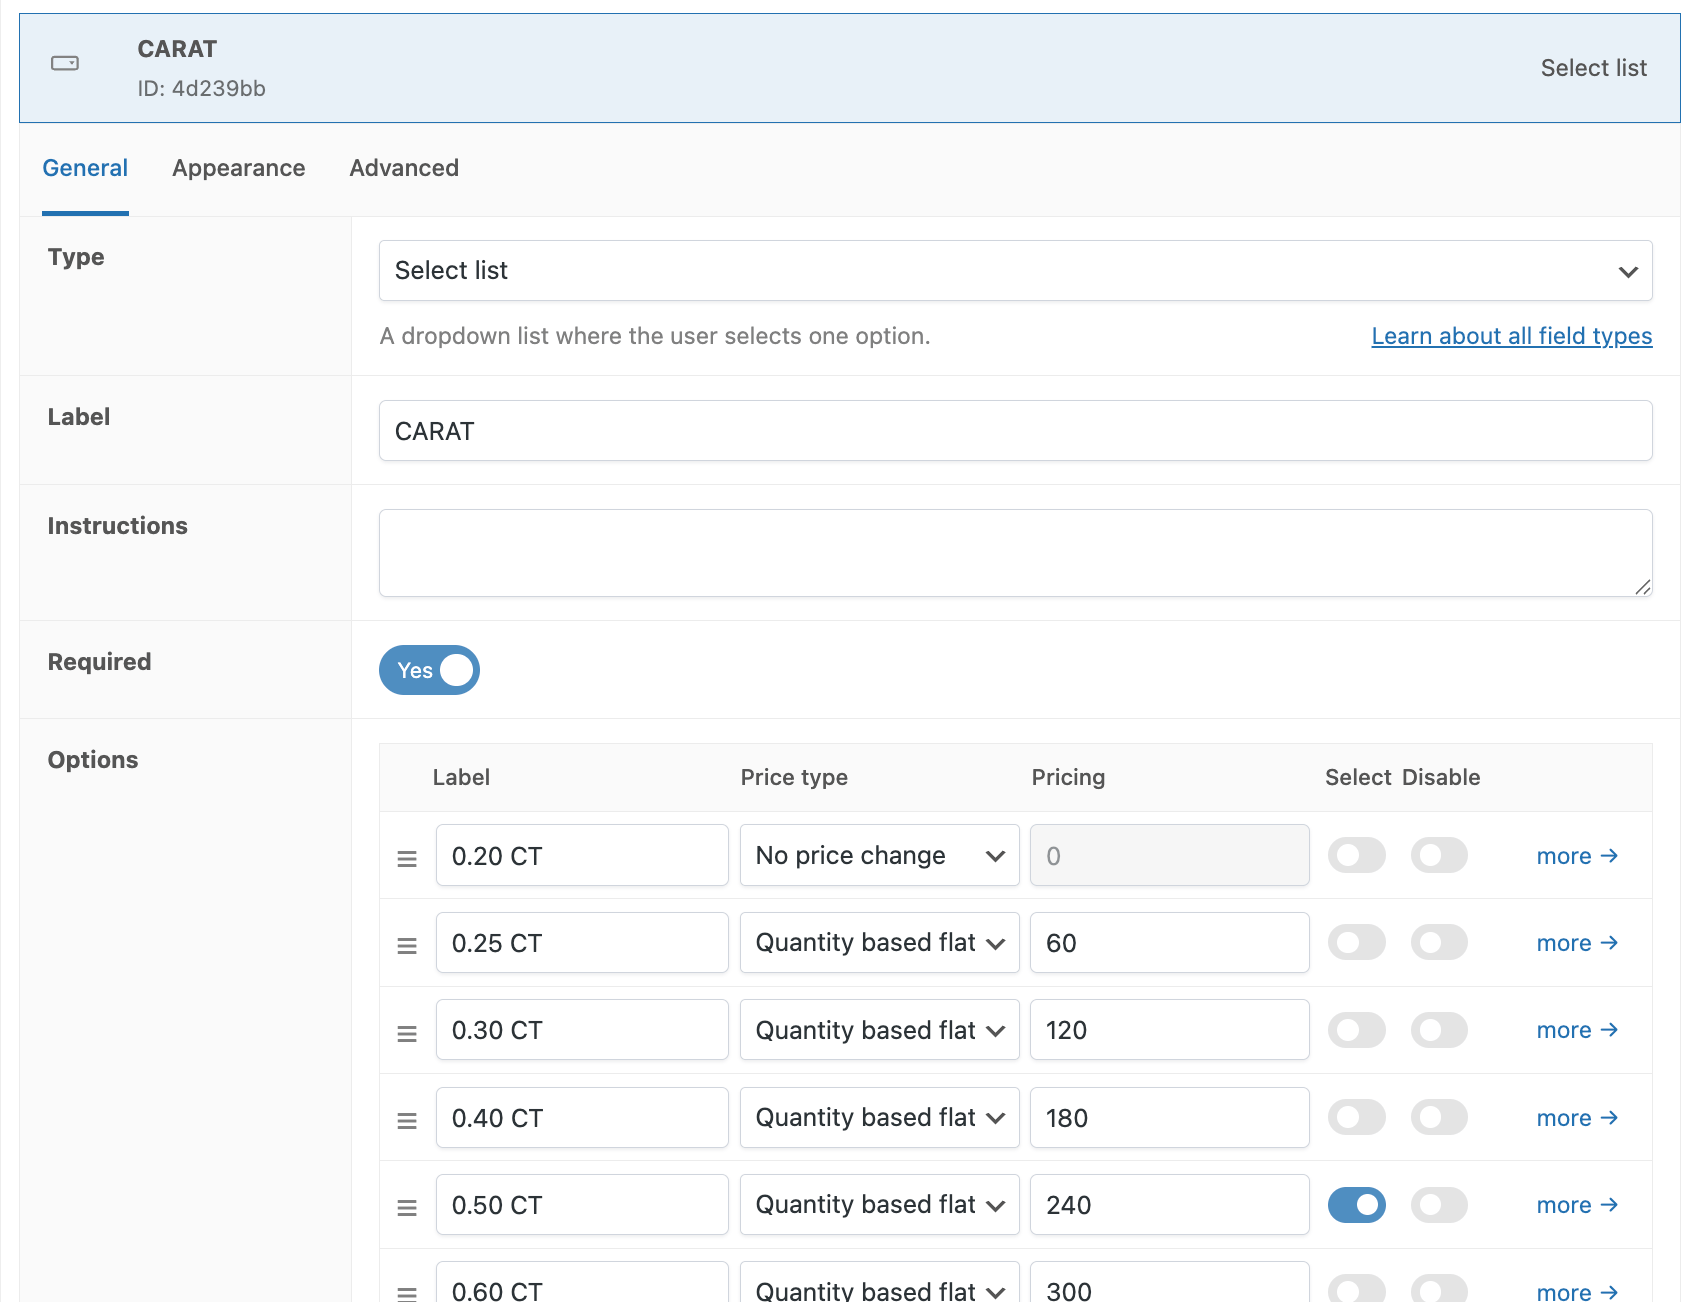
Next, create a simple Select List field so the customer can select their desired diamond weight in carats if they chose lab-grown as their diamond type. The higher the carat, the larger the stone, so this option will adjust the final product price.
In the Options section, add a line for each carat option you want to offer (our demo goes from 0.2 to 3 as the most popular choices). Enable pricing on each line by setting the Price type to Quantity-based flat fee. Enter a price adjustment next to it (this is added on top of the ring’s base price):
Navigate to the Advanced tab of the field and click Add new rule group to add conditional logic. We only want to display this field if the customer selected “lab-grown” as their desired diamond type:
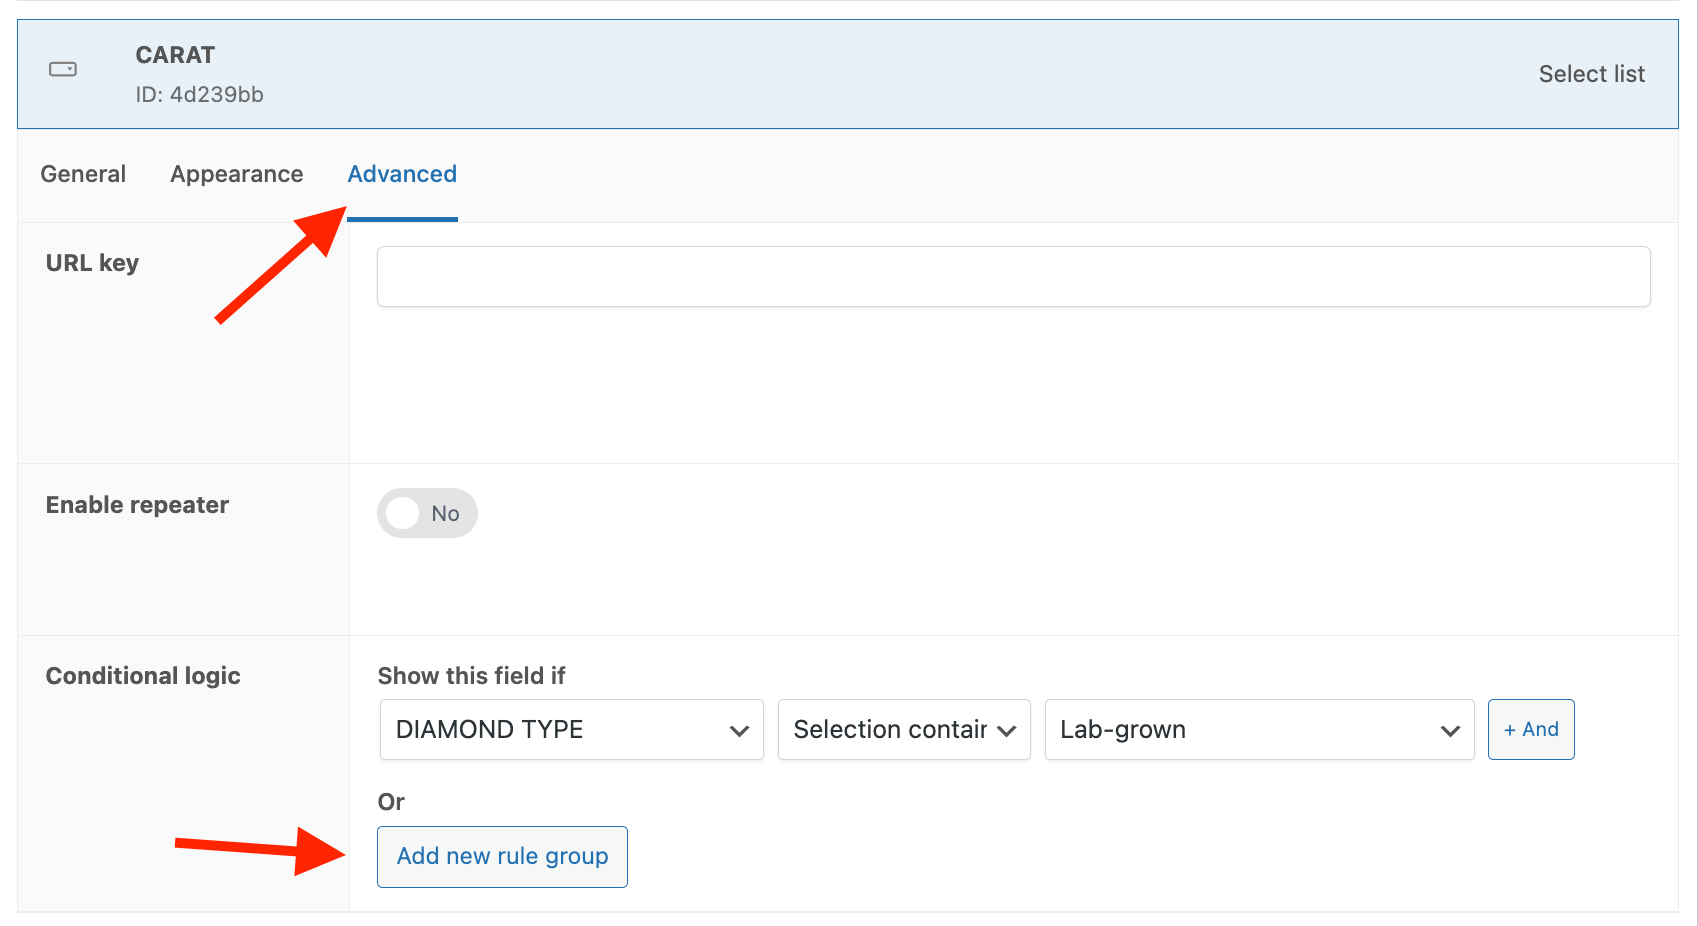
Next, duplicate the field by clicking Duplicate in the field’s blue header. This creates an exact copy:

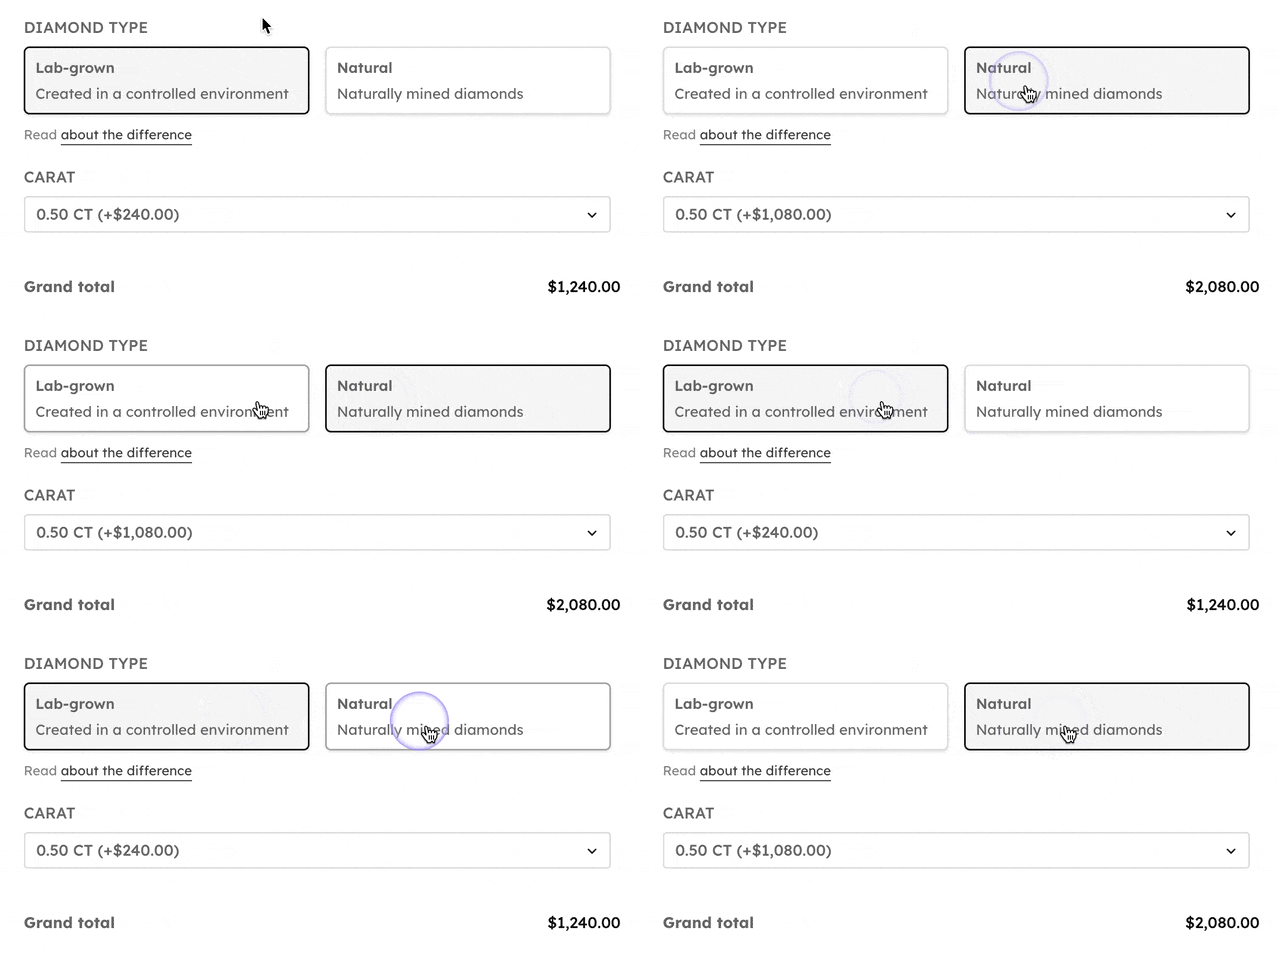
Now, adjust the prices to match those for Naturally mined diamonds (which should be more expensive) and update the conditional logic settings to display the field only if the customer selected “Natural” as their desired diamond type.
Your WooCommerce product page now displays separate pricing when switching between lab-grown or natural diamond type:
Remember to save your work!
Step 5: Show a preview of the ring
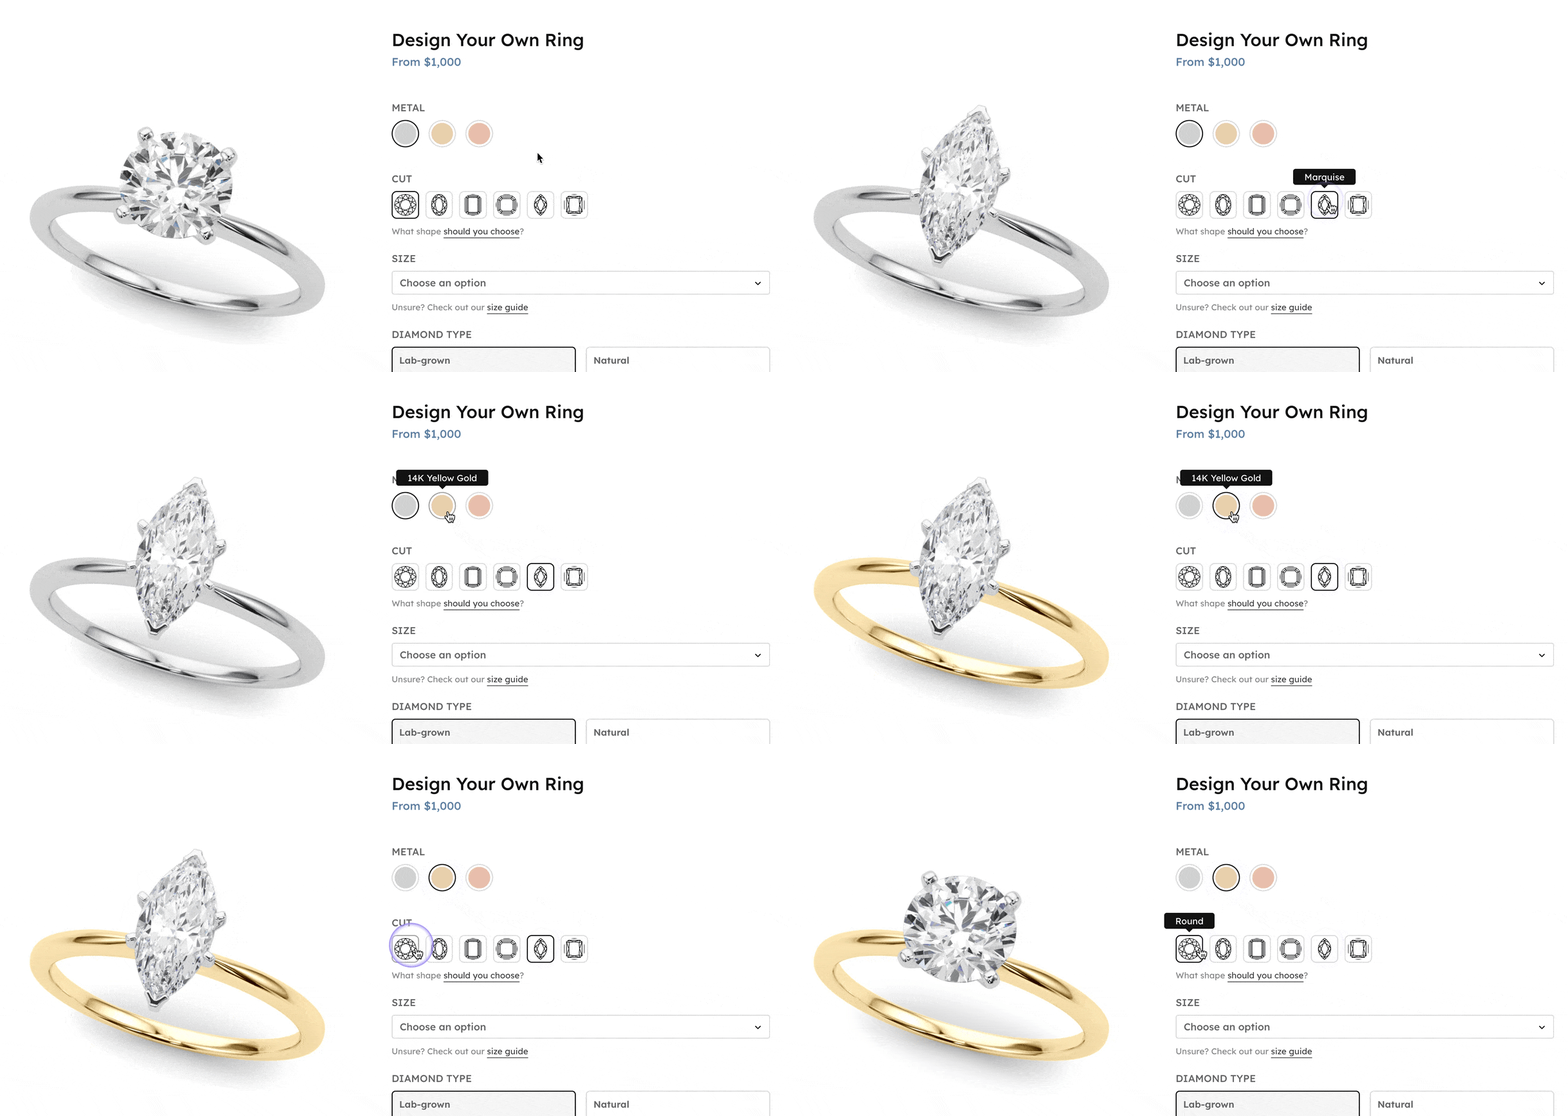
When your customer selects a ring material and diamond shape, we want to update the gallery image to show that version of the ring.
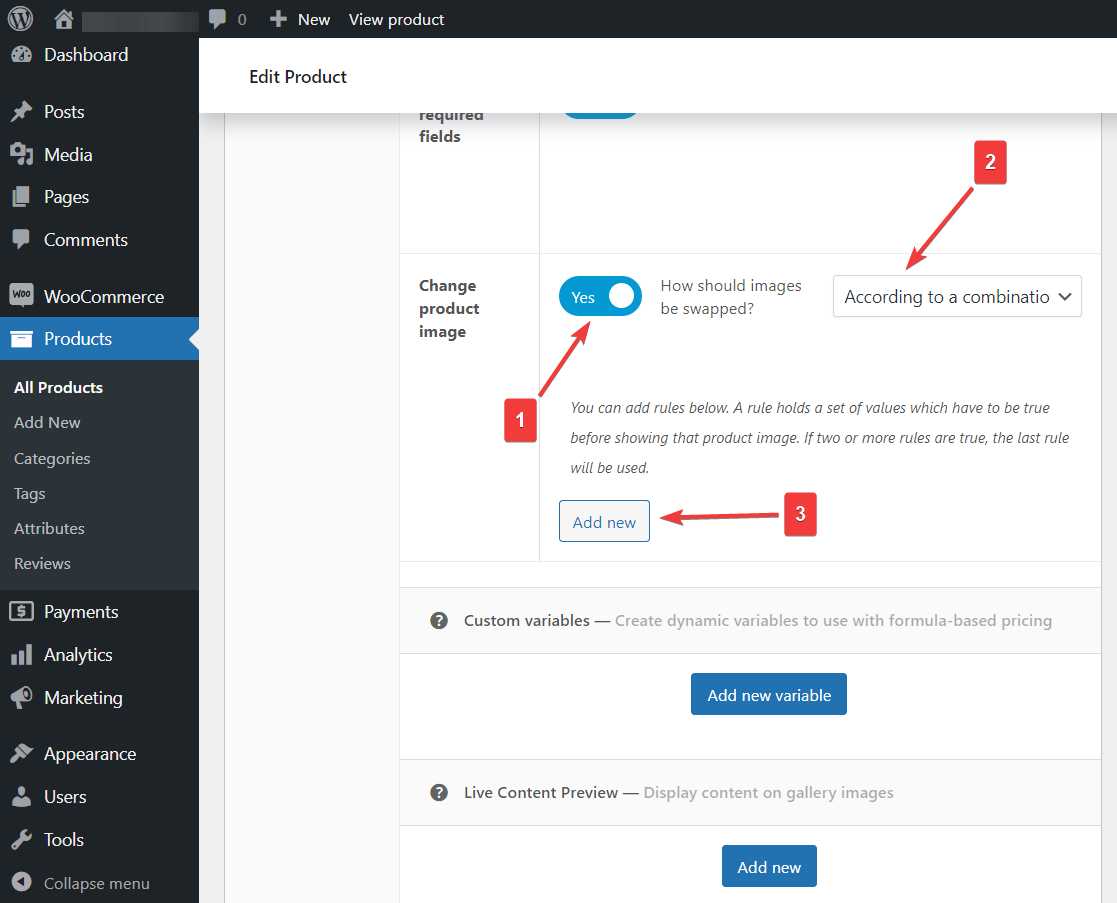
Go back to the Custom Fields tab of the product editor and scroll down to the Layout section. Enable the Change Product Image setting and click Add New:
Now, you can define the correct image based on the “metal” and “cut” selection. Here are 2 rules to display the corresponding image for Platinum – Round and Platinum – Oval:
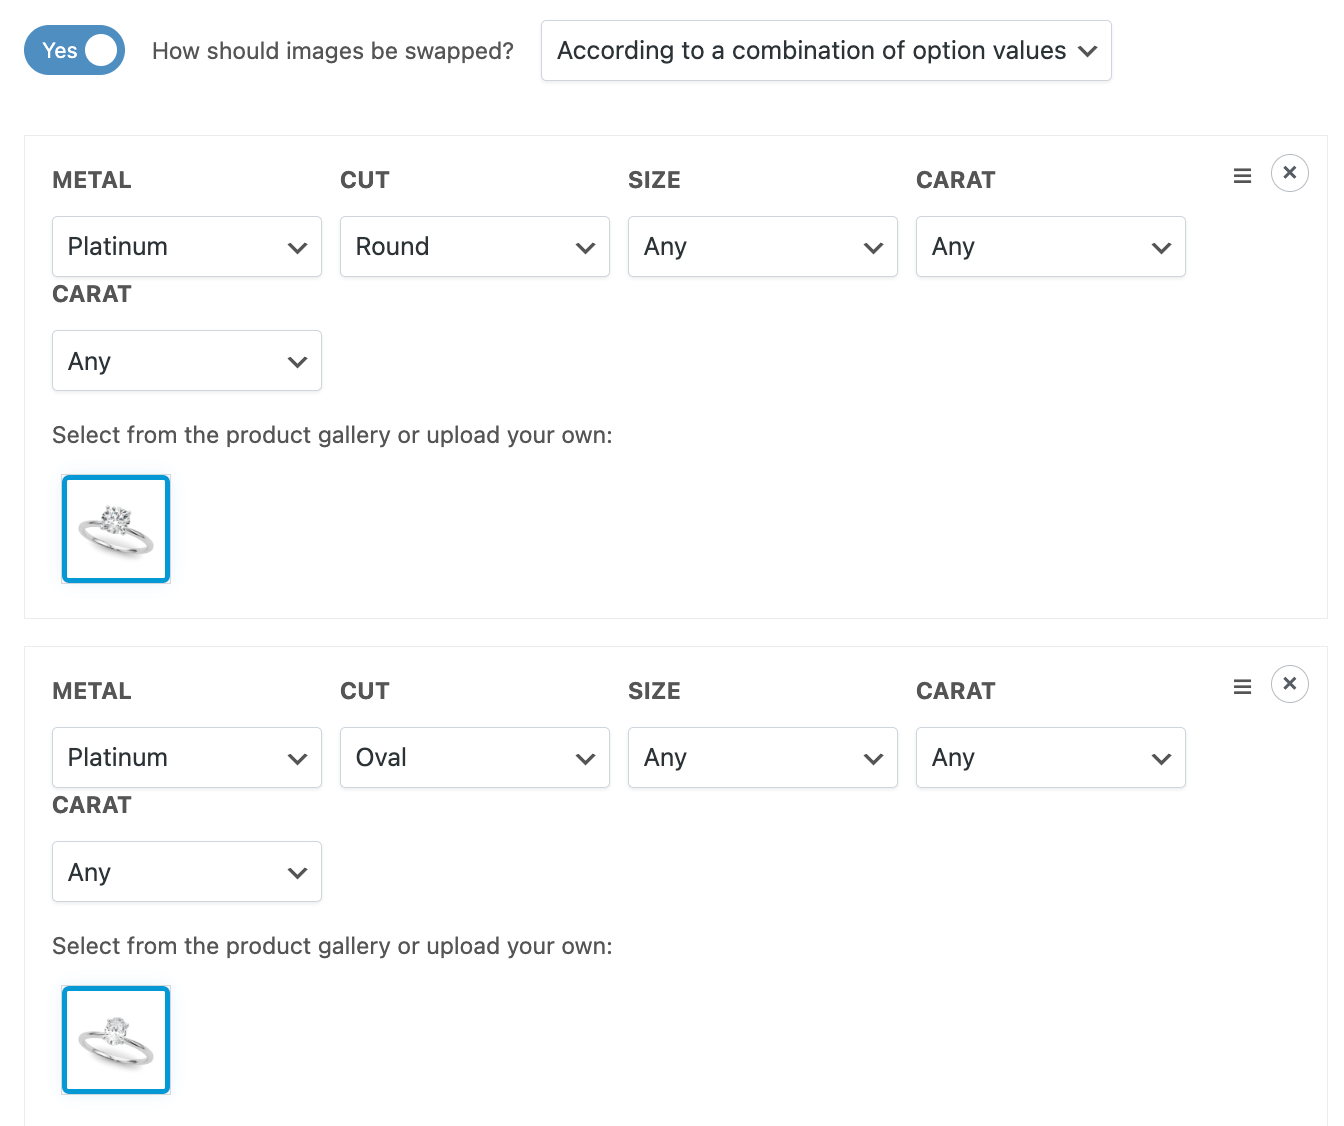
This may takes a few minutes to set up. We defined 18 images: 1 for each combination of Metal and Cut Shape. The result is a stunning live preview:
Step 6: Design the options to match your site’s brand
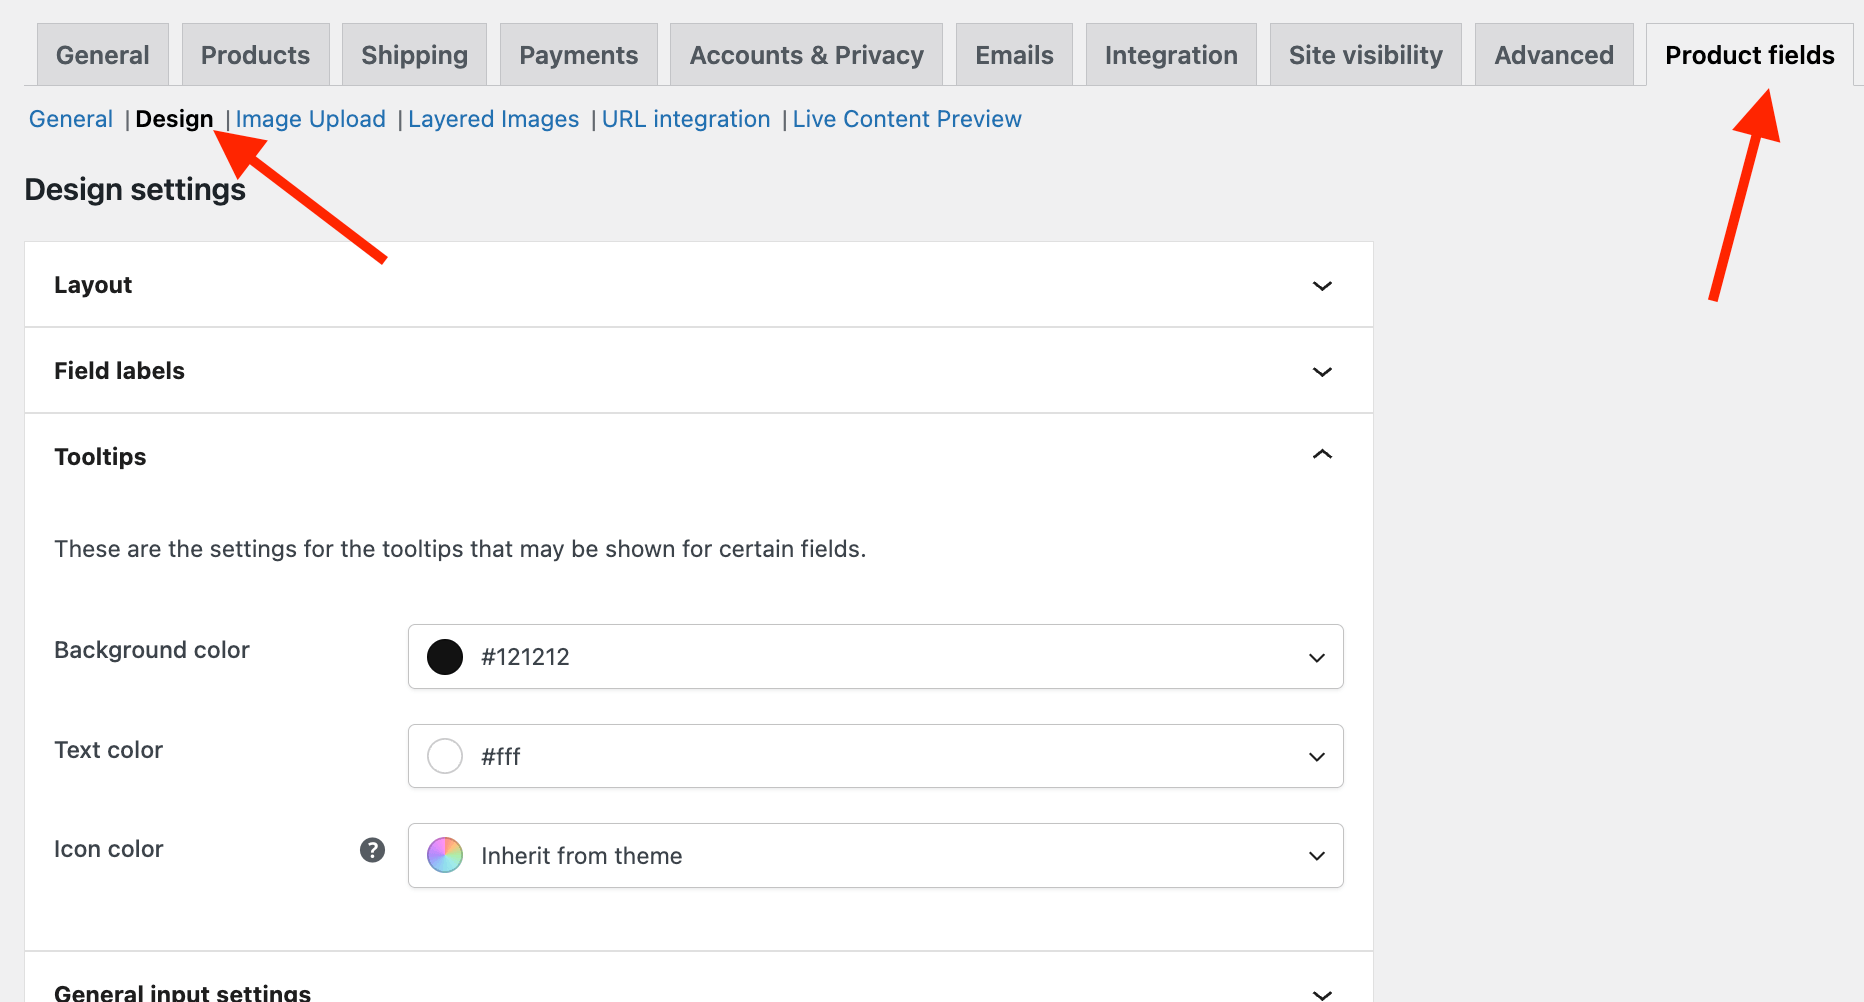
You’ll notice our demo looks “on brand” with neutral colors, rounded corners, and enough spacing. You can change all those design settings to match your site’s brand by going to WooCommerce → Settings → Product Fields → Design:
You’ve now created a custom ring product in WooCommerce!
Bonus: Engraved products
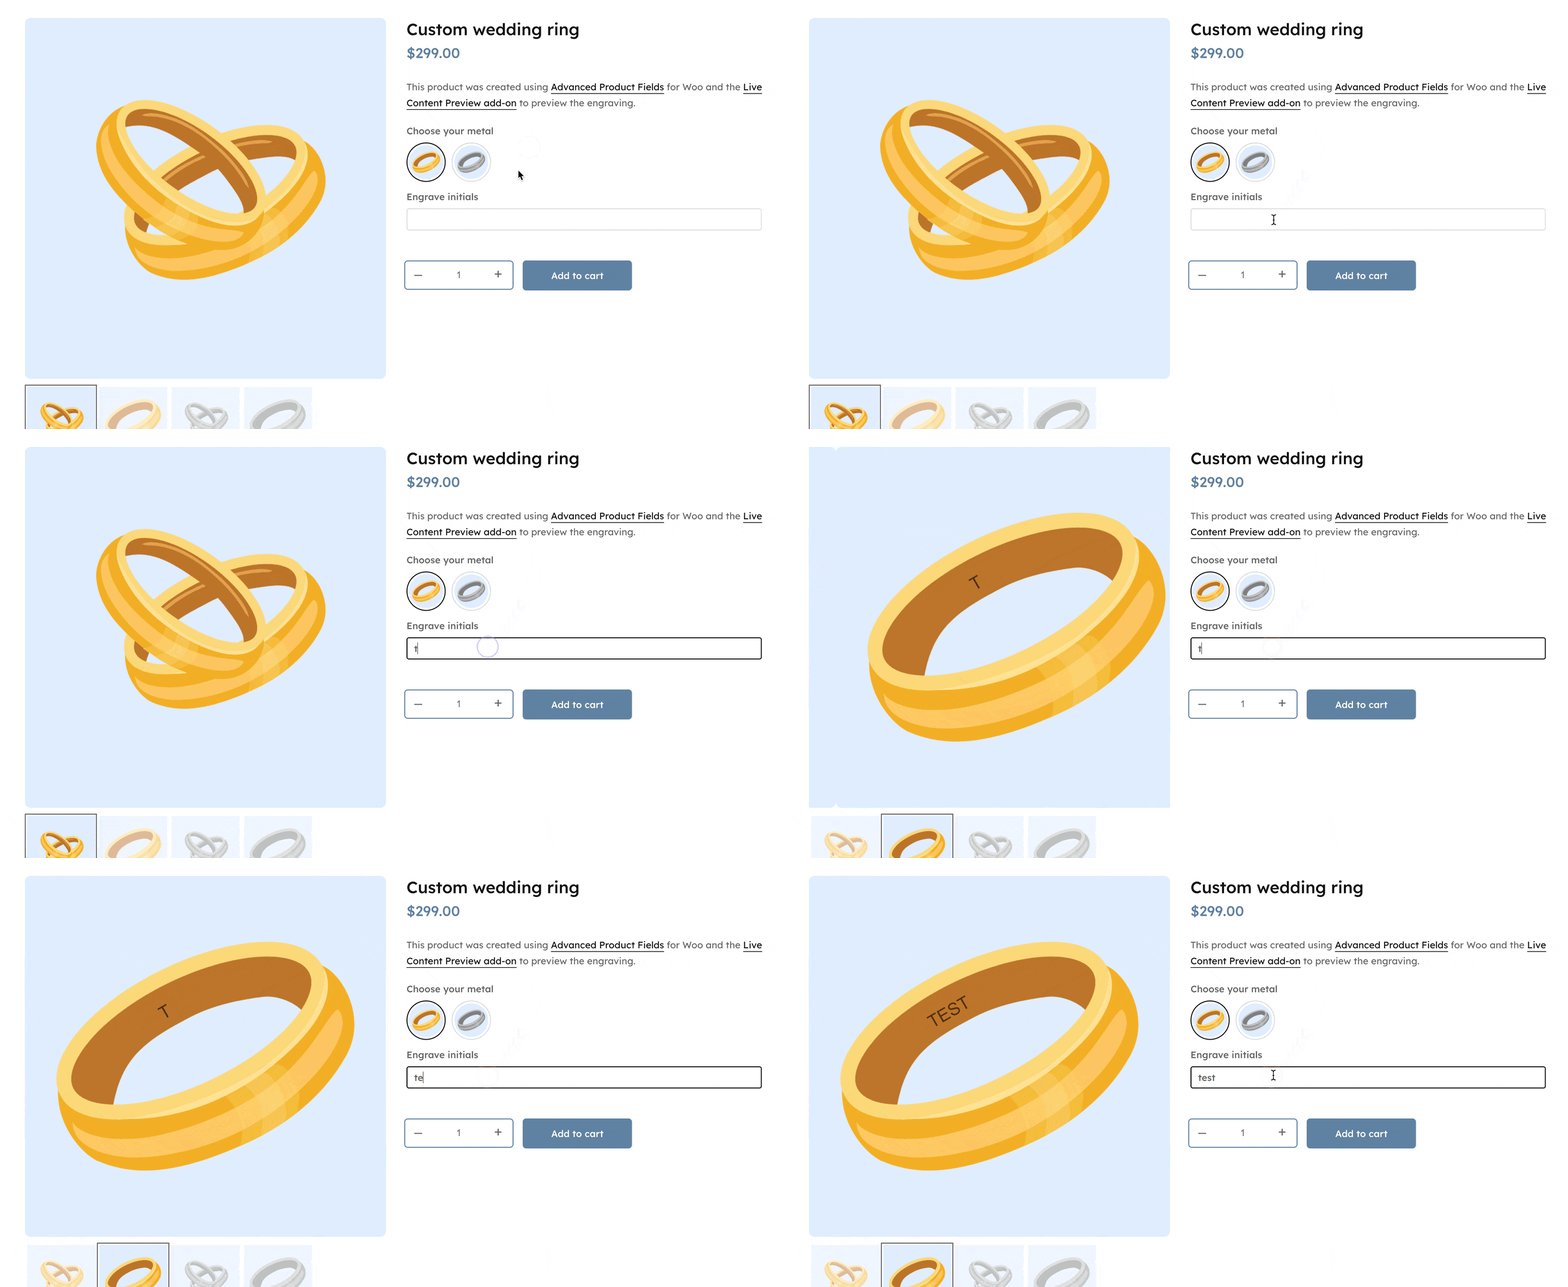
You can go even further than “design your own ring” and use WooCommerce to offer engraving services too! If you’re interested in building an engraving product, read this step-by-step tutorial.
“Design your own ring” just got easy with WooCommerce!
You’ve now created a custom ring builder for WooCommerce! The Advanced Product Fields (APF) plugin lets your customers design, preview, and personalize their custom ring case exactly how they want. This helps customers engage more with your store, cut down on order mistakes, and sell more — and you won’t need to write any code!
Ready to let customers design their own ring through your WooCommerce store? You’ve got everything you need in this post!
