
Giving potential customers a way to visualize a purchase is one of the best methods to make a sale. Personalizing those purchases is part of the purpose of the Live Content Preview add-on for Advanced Product Fields for WooCommerce. A top use case for the pair is building a custom font picker, so customers can view contextual typography choices on the products they want to buy.
In this post, we’ll show you how to build a font picker using Advanced Product Fields for WooCommerce. You’ll learn more about the plugin’s Live Content Preview add-on too. First, let’s look at what a custom font picker is good for.
What a custom font picker can help you achieve
Personalization for your e-commerce store is one of the most impactful ways you can enhance the User Experience (UX). For products that offer variations or customization, you want to provide a way to visualize those differences. That way, the customer can see exactly what the product will look like after purchase.
There are a few use cases for this type of functionality:
- You can offer personalized clothing, such as T-shirts with a custom slogan. In addition, the customer can choose typography that better resonates with them.
- Engravings are often a popular way to customize jewelry. Giving a selection of typefaces for that engraving can turn a thoughtful gift into something much more memorable.
- If you’re a Business to Business (B2B) seller, typeface options could even help your customers match designs to company branding. Promotional materials in particular will benefit from a custom font picker.
However, only offering a choice of typography won’t be enough for the best UX. In addition, you also need to give customers a way to view those font choices — ideally using a live preview.
Leveraging the Live Content Preview add-on for APF
When it comes to including extra options on your store’s product pages, Advanced Product Fields for WooCommerce (APF) is number one.

Whether you want to include text boxes, drop-down menus, color swatches, images, or other elements, you can do that in a snap with this plugin. It offers plenty of scope for tailoring your product pages through using conditional logic, repeatable fields, an editable cart, and lots of other ways.
However, one aspect it doesn’t cover by default is viewing any customizations within the live preview frame. In some cases, this is fine. For instance, T-shirt variations typically only need a new image to display, which doesn’t have to be a dynamic element.
However, consider a situation where you have multiple advanced product fields that could affect the final product. In those cases, simple static imagery won’t be able to meet the need to view many different changes at once.

This is a problem the Live Content Preview add-on solves. It lets the customer make the customizations they need to a product and view them in real time. It’s an excellent way to show a product as the customer personalizes it, and could net you a new purchase.
How to build a custom font picker using Advanced Product Fields for WooCommerce
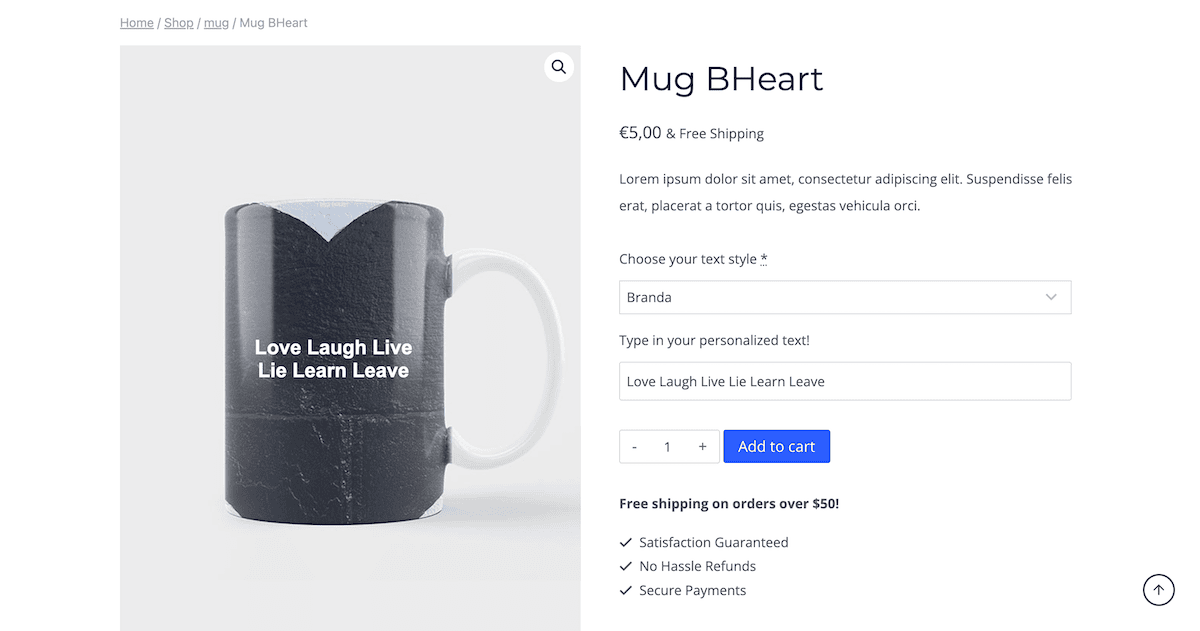
Let’s get into building the font picker! Here’s what we’ll build:
We’ll also show you how to build a variation on this by building a font previewer in WooCommerce like this:
Prerequisites
In the following tutorial, I’m going to go straight to the important part of installing your fonts and creating the picker functionality. This means you’ll need to have some prerequisites in place before you begin:
- Purchase and install 2 plugins: Advanced Product Fields for WooCommerce and the Live Content Preview add-on.
- A working WooCommerce product.
We’ll dive straight in but if you’re looking for the basics on using Advanced Product Fields for WooCommerce. As such, you’ll want to take the plugin for a spin if you’re new to it before you start working with custom fonts and building the picker.
1. Upload your choice of typeface
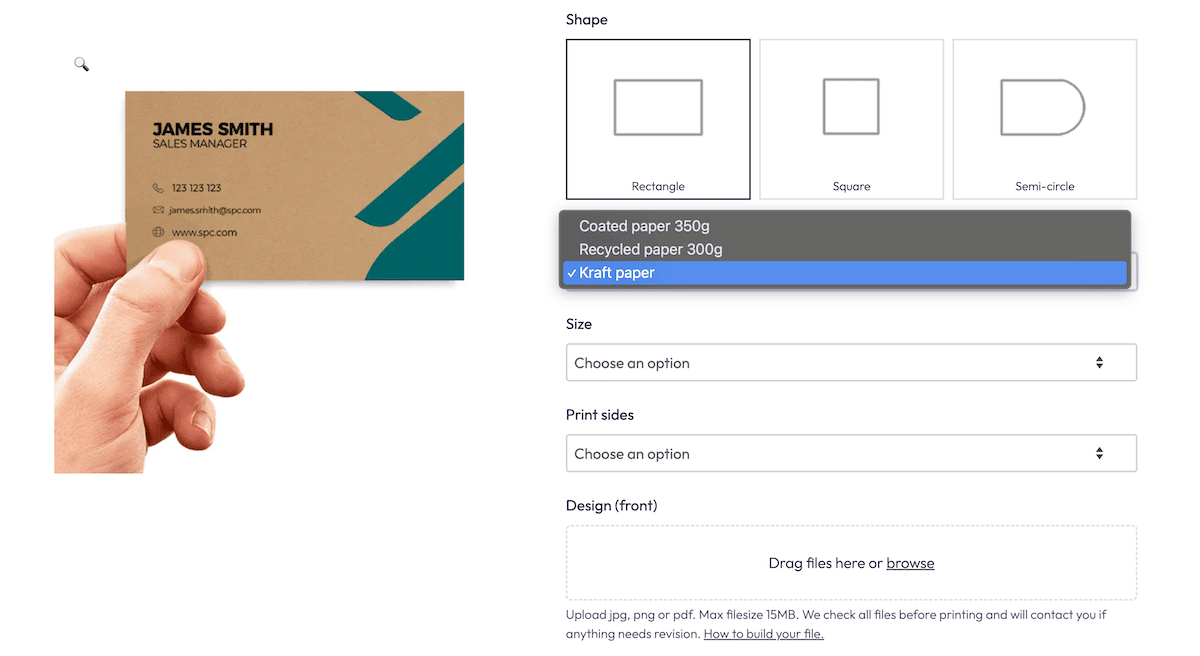
The first step is to get your chosen fonts into WordPress. You can use any web-safe font, or you can upload your own. If you have the right font files available (the file name should end in .woff or .woff2 – we recommend .woff2), you can upload them within WooCommerce.
First, go to the WooCommerce → Settings page, then the Product fields → Live Content Preview screen.
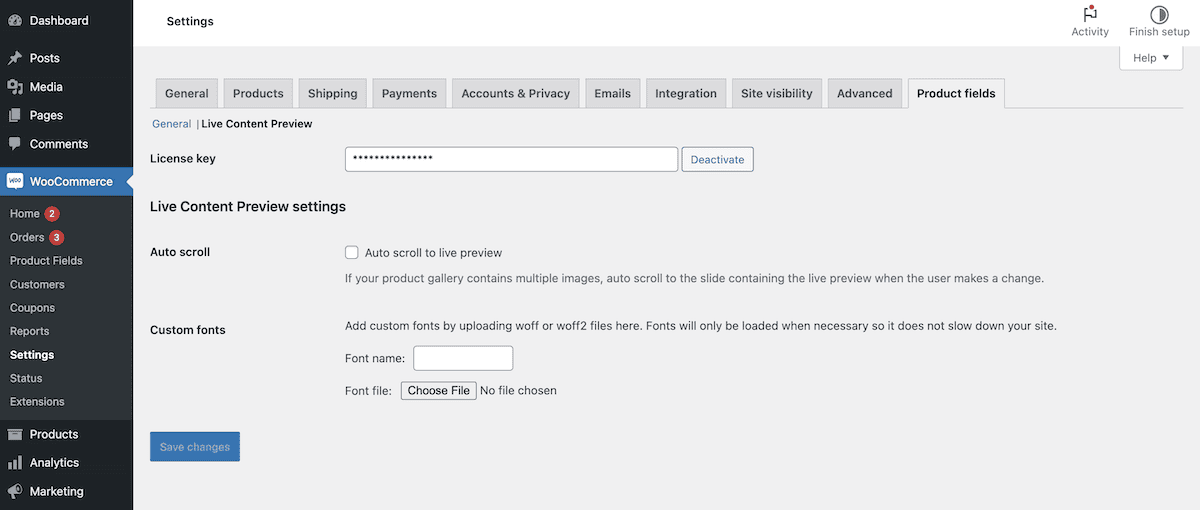
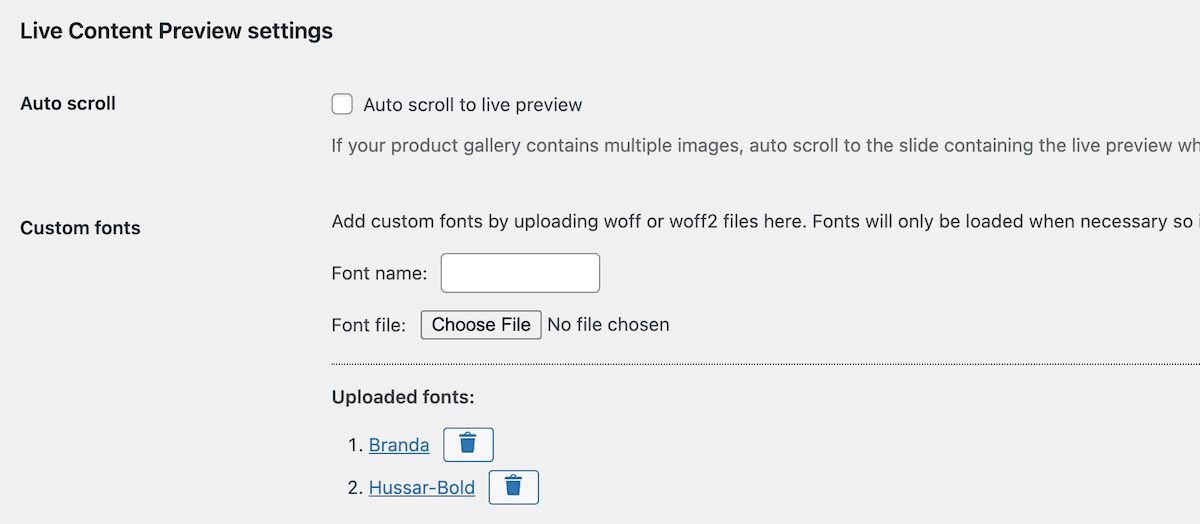
Here, give your custom font a name — and remember it for later — then choose the font file from your computer using the uploader dialog. Once you do this, you’ll see a list of fonts within WooCommerce underneath the dialog:
Next, save your changes. The process for building the font picker diverges from the “norm” but is still straightforward.
2. Create a font dropdown with Advanced Product Fields for WooCommerce
Now that we’ve added our font files, it’s time to build the actual font picker. Usually, that’s a simple dropdown list where customers can select their desired font. AS mentioned earlier, we’ll use the Advanced Product Fields for WooCommerce plugin to do that.
Note that for performance reasons, this dropdown will display the font names in plain text (and not the actual font). Since we’ll be previewing the font immediately anyway, this is not necessary.
Let’s get started by editing your WooCommerce product and heading to the Custom fields tab within the Product data metabox. Click on Add Your First Field and a new field with lots of settings appears:
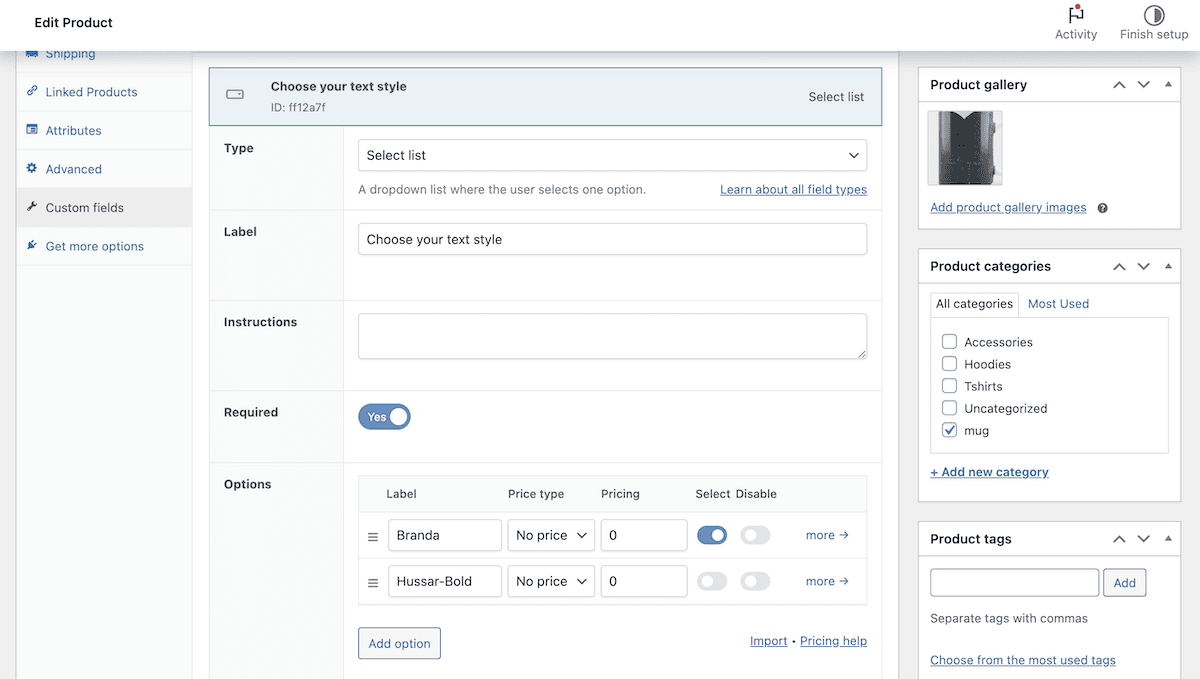
- Switch the Type to Select List.
- Add a Label, which will appear above the dropdown list. We used “Choose your text style”.
- In the Options setting a bit further down, you can add the font choices by clicking Add Option for each of your fonts. The “label” you add with each option is typically the name of the font.
3a. Add a text input
If you want to give customers the ability to type some text that should be previewed on a product image, this step is for you. Otherwise, you can skip this step.
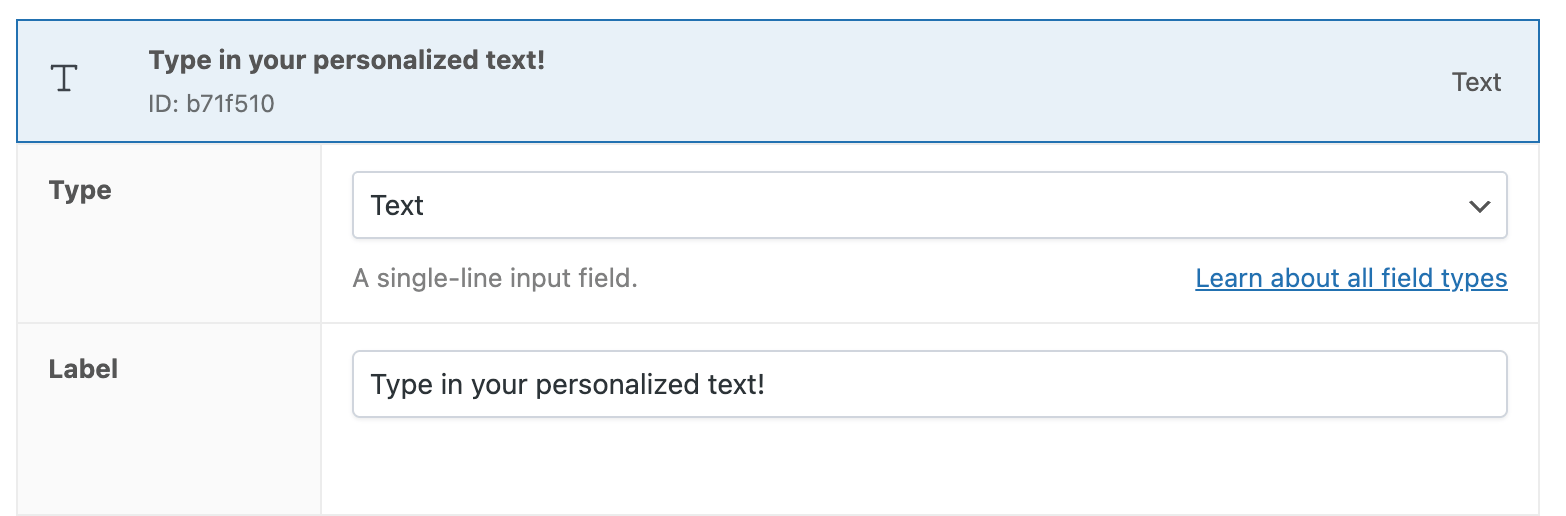
In the same way as in the previous step, we’ll add a text field to our product page. Click Add a Field to add another input field to your product page:

- Switch the Type to Text.
- Set a matching Label.
3b. Add a grey image
If you want to preview the font underneath the dropdown list, this step is for you. Otherwise, you can skip this step.
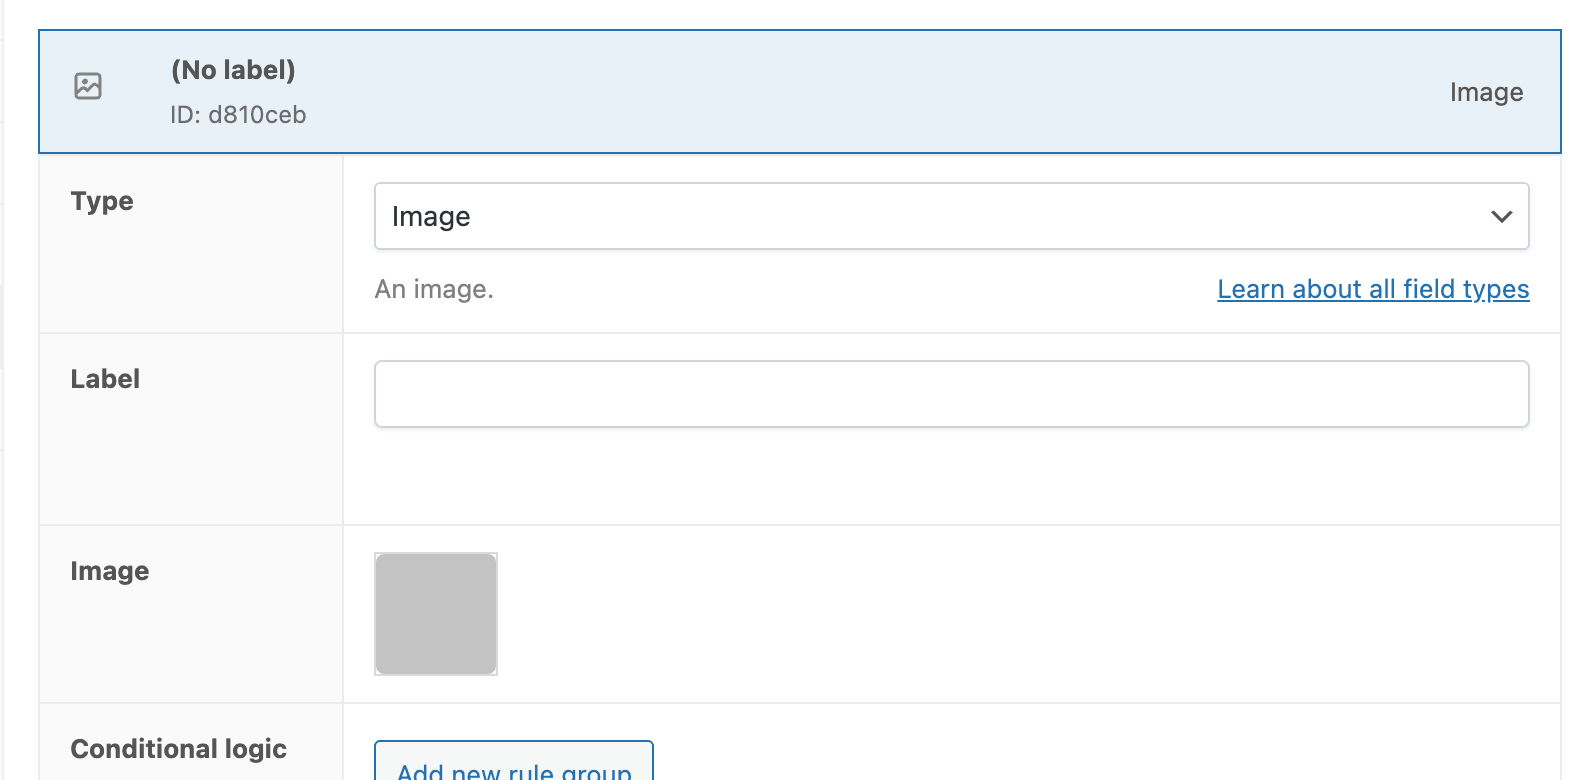
In the same way as in the previous step, we’ll add a grey image to the product page. This is meant as a background to preview the font. Click Add a Field to add another input field to your product page:
- Switch the Type to Image.
- Remove the Label.
- Browse to a grey background image. Here’s the image we used, feel free to use that.
4. Create the live preview
Now that we’ve added our options to the product page, it’s time to create the live preview!
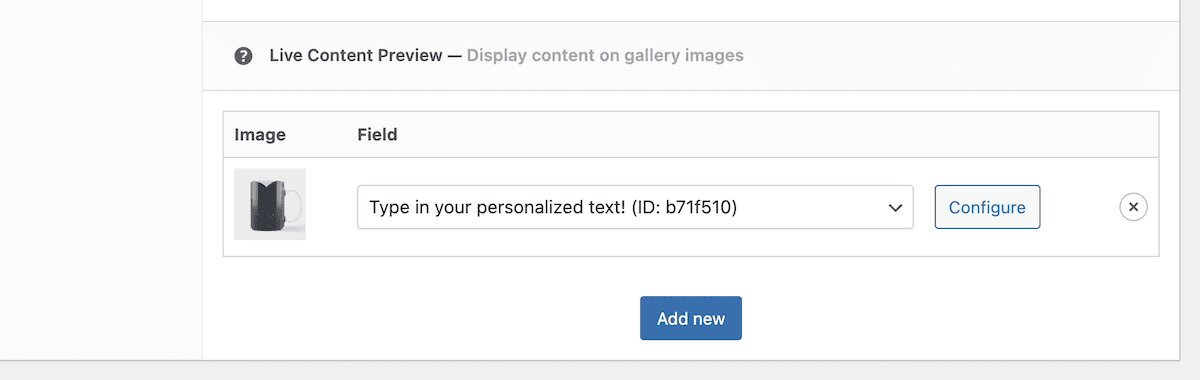
We’re still in the Custom fields tab within the Product data metabox. Scroll down until you see the Live Content Preview section and click Add New:

In the next step, you can choose which product image to display the live preview on. If you’ve followed step 3a, you’ll want to choose any of the gallery images displayed underneath the “Select Gallery Image” section. If you’ve followed step 3b, you’ll to select the image field you created under “Or Select An Image Field“.
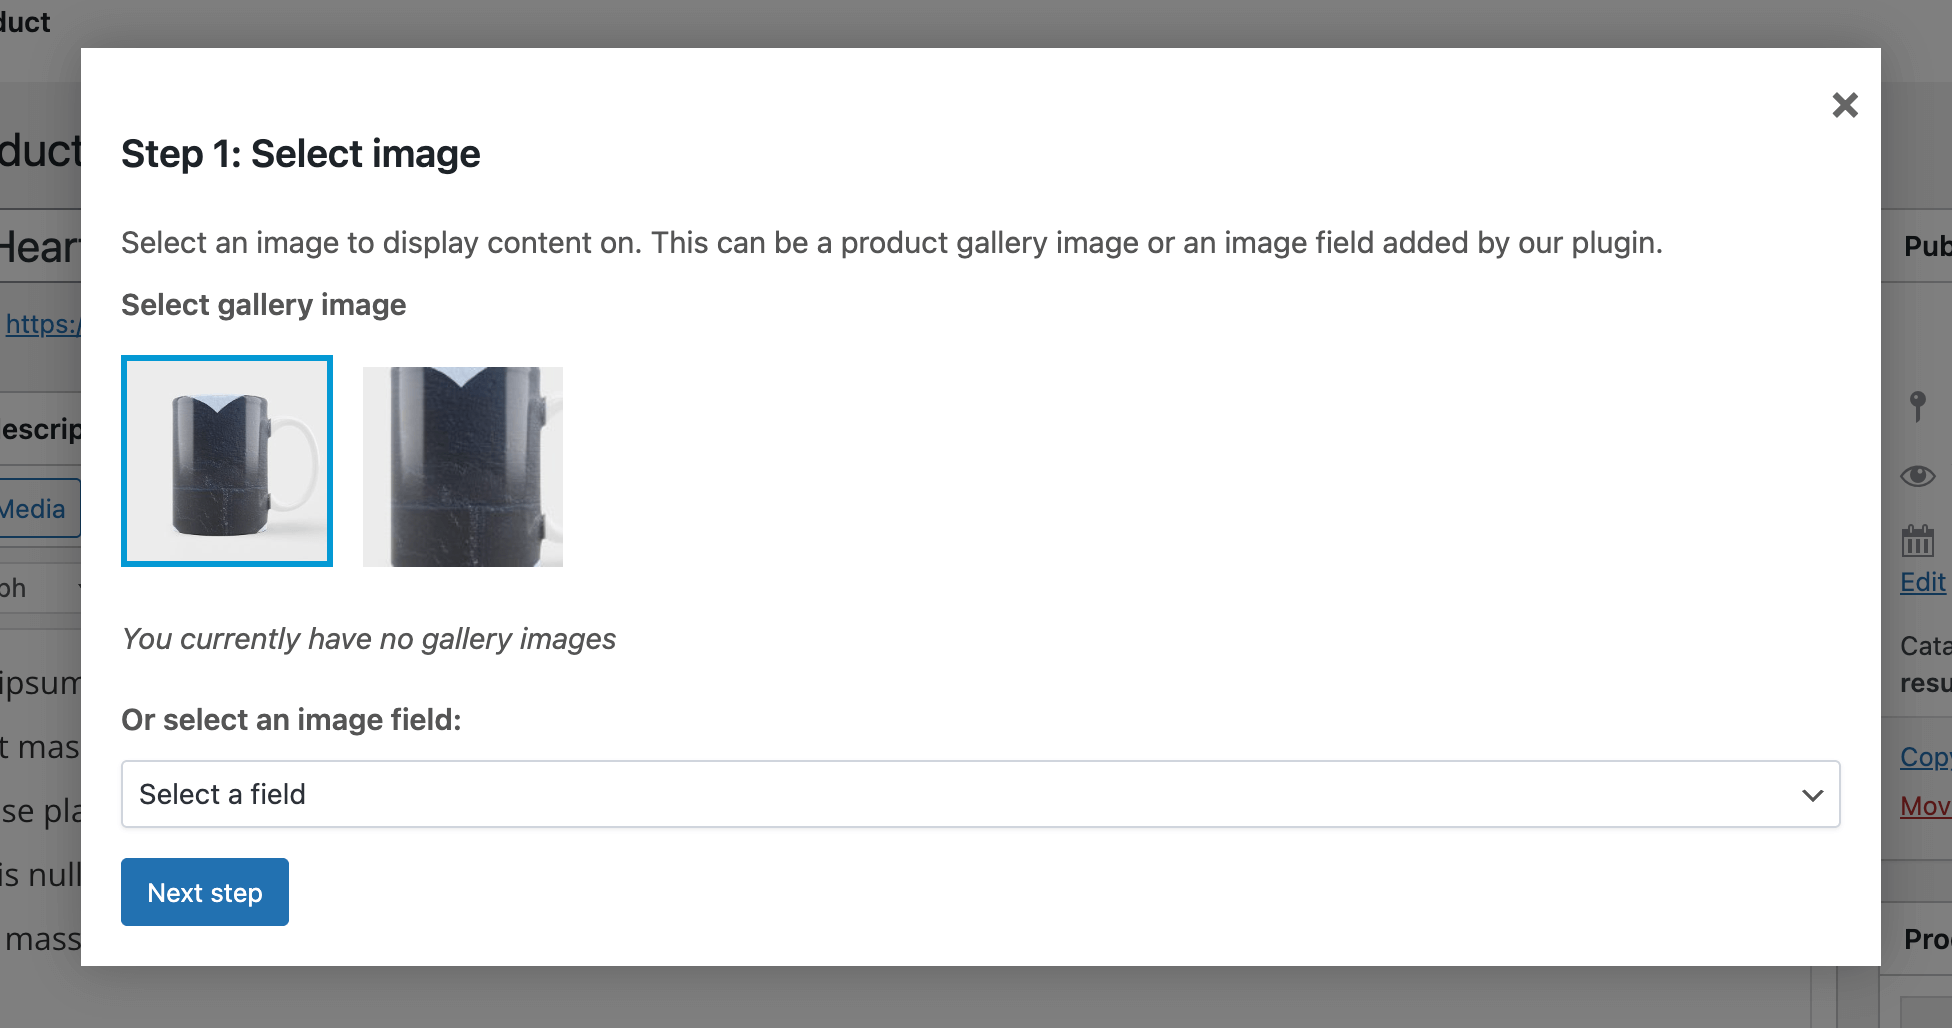
Press Next Step to move on and select the field which content should be previewed:
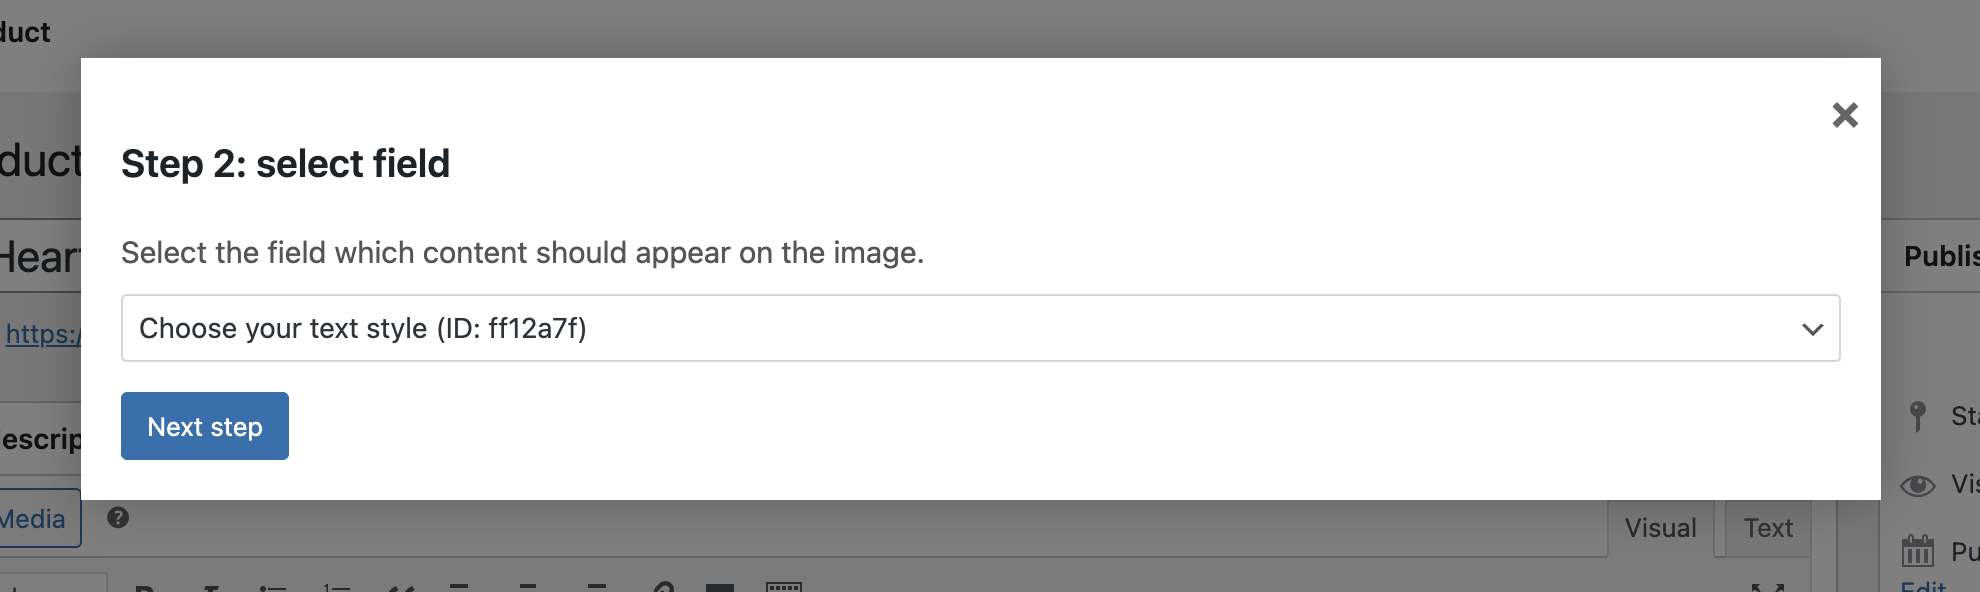
Press Next Step to move on.
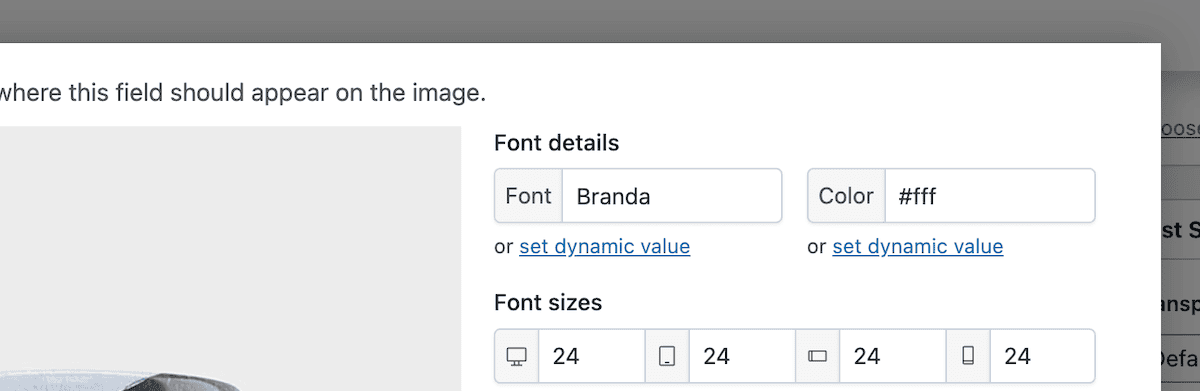
In the next step, you can customize the look of the live preview:
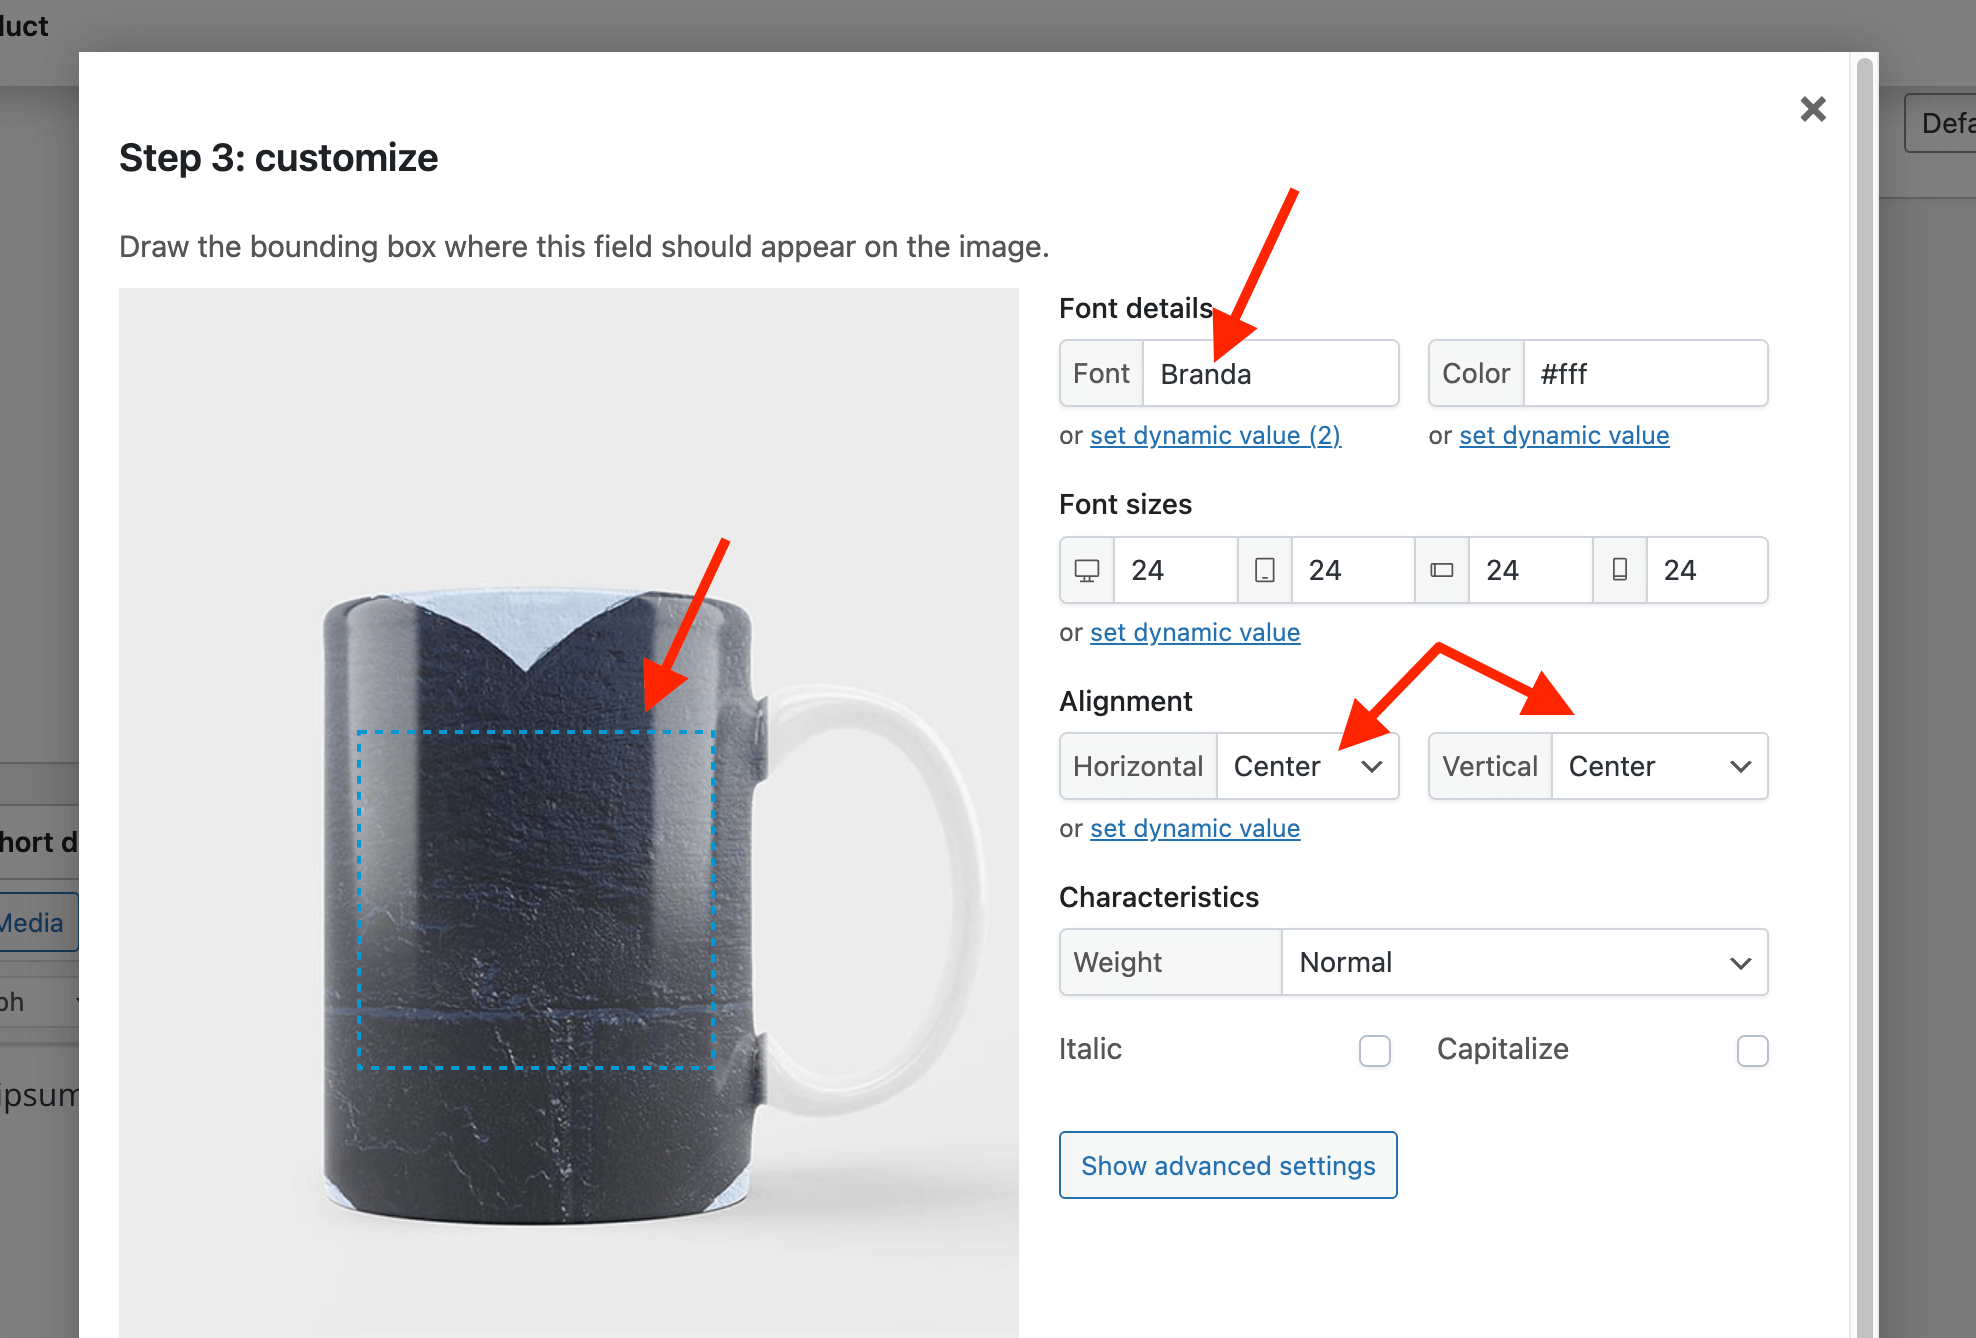
- On the image (displayed on the left), you can draw where the text should appear. Click and drag the mouse on the image to draw a bounding box.
- Set the Font to the default font that should be used for the live preview.
- Set the Font Color to anything you want.
- Set the Horizontal and Vertical alignment both to Center so the text appears centered in the bounding box you drew.
If you save your changes and check out the front end, you’ll see the fields are in place and a live preview is shown. Choosing a font option doesn’t update the live preview yet:
I’ll show you how to fix this in the last step, but setting a default font to something from your list keeps the UX consistent.
5. Link the option type field to your custom font
To link fonts to your live preview, head back to the Live Content Preview section of the Product data metabox and click the Configure button:
Within the live content configurator, choose to Set dynamic value from underneath your font name:
In the dialog window that pops up, you’ll spot the font name you already specified. If you click Add New Condition, you can begin to link each font. Here’s what to enter for each field:
- Condition type. Choose If product field value changes. This should be the default selection.
- Field. This will link to the created select list for your fonts.
- Field value. Here, choose your desired font.
- New value. This should be the name of the font from the point of upload.
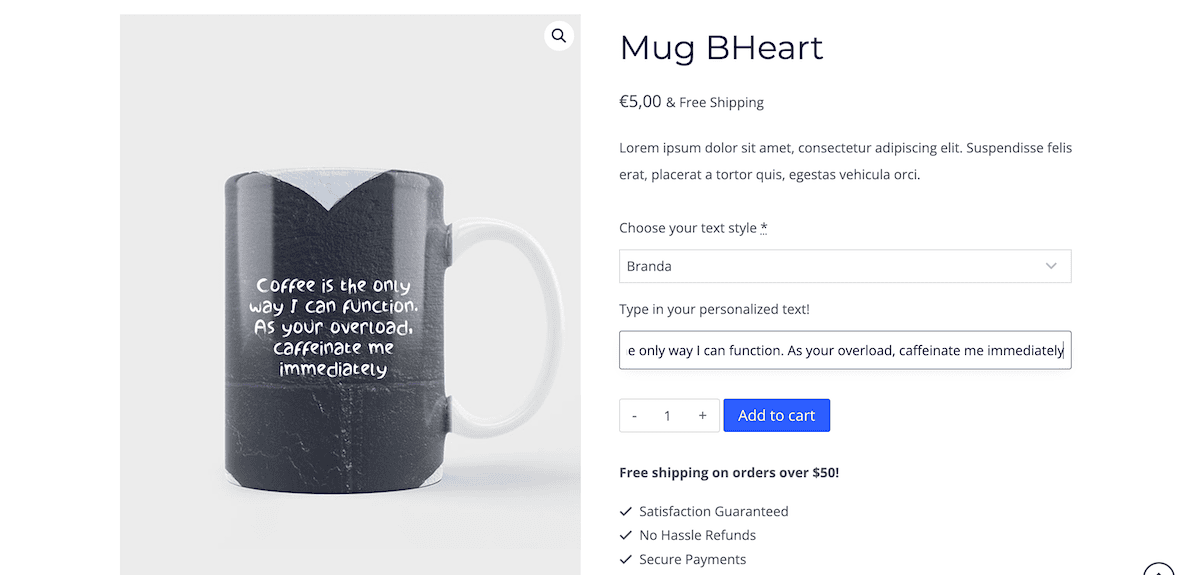
From here, click to save your changes. If you check out the front end, you’ll see that all of the functionality now works:
Of course, you can take things further using the Live Content Preview add-on or any of the other options available within Advanced Product Fields for WooCommerce.
Build a custom font picker using Advanced Product Fields for WooCommerce without code in almost no time!
For a maximum amount of sales, giving customers a way to personalize and customize their purchases can have a huge impact. When it comes to those customizations, you also need to make sure the live preview displays them with accuracy and detail. For typography, a custom font picker is almost essential.
The Advanced Product Fields for WooCommerce plugin provides a way to build out the functionality without the need for code. To display those font choices as the user selects them, you can install the Live Content Preview add-on. In combination, you have an ideal, no-code way to develop the ability to view font options with a live preview for your WooCommerce store.
Do you have a specific need for a font picker that Advanced Product Fields for WooCommerce can potentially solve? I’d love to hear your use cases in the comments section below!

I’m seeing a grey box below the input box on my product page.
Hi
Sounds like a technical issue we can help with. Please send us a support ticket here. Thank you!