
Selling custom phone cases with WooCommerce is a smart move — there’s a strong demand and solid profit potential. But one feature is essential: customers should be able to personalize their case — and “live preview” the result — by uploading images, resizing, rotating, and positioning them exactly how they want on the phone case.
WooCommerce doesn’t support file upload and live previews out of the box, so we’ll use the Advanced Product Fields for WooCommerce (APF) plugin to make it happen.
In this tutorial, we’ll show you how to create a custom phone case builder in WooCommerce, and allow customers to personalize their phone case by uploading & positioning imagery.
What we’re building
We’ll create a WooCommerce product that allows customers to select their phone model and upload an image to be printed on the custom phone case. Customers will be able to preview their image on the case and interact with it: they can reposition, resize, or rotate it. Here’s a demo video of the product we’ll build:
Let’s dive in, there’s a lot to cover!
How to create a custom phone case builder (+ live preview) with WooCommerce
Before you get started, make sure your store has the following:
- WooCommerce (6.0 or higher) installed and configured. If you’re new to it, here’s how you can get started with WooCommerce in 5 steps!
- A configured simple product. This means the product should have a title, regular price, product image, and optional gallery images.
- The Advanced Product Fields for WooCommerce (APF, for short) plugin. This plugin is capable of adding extra options to your product pages, such as a file upload option.
- The Live Content Preview add-on, which allows you to create live previews of images and text.
Step 1: Add phone model and file upload options to your product
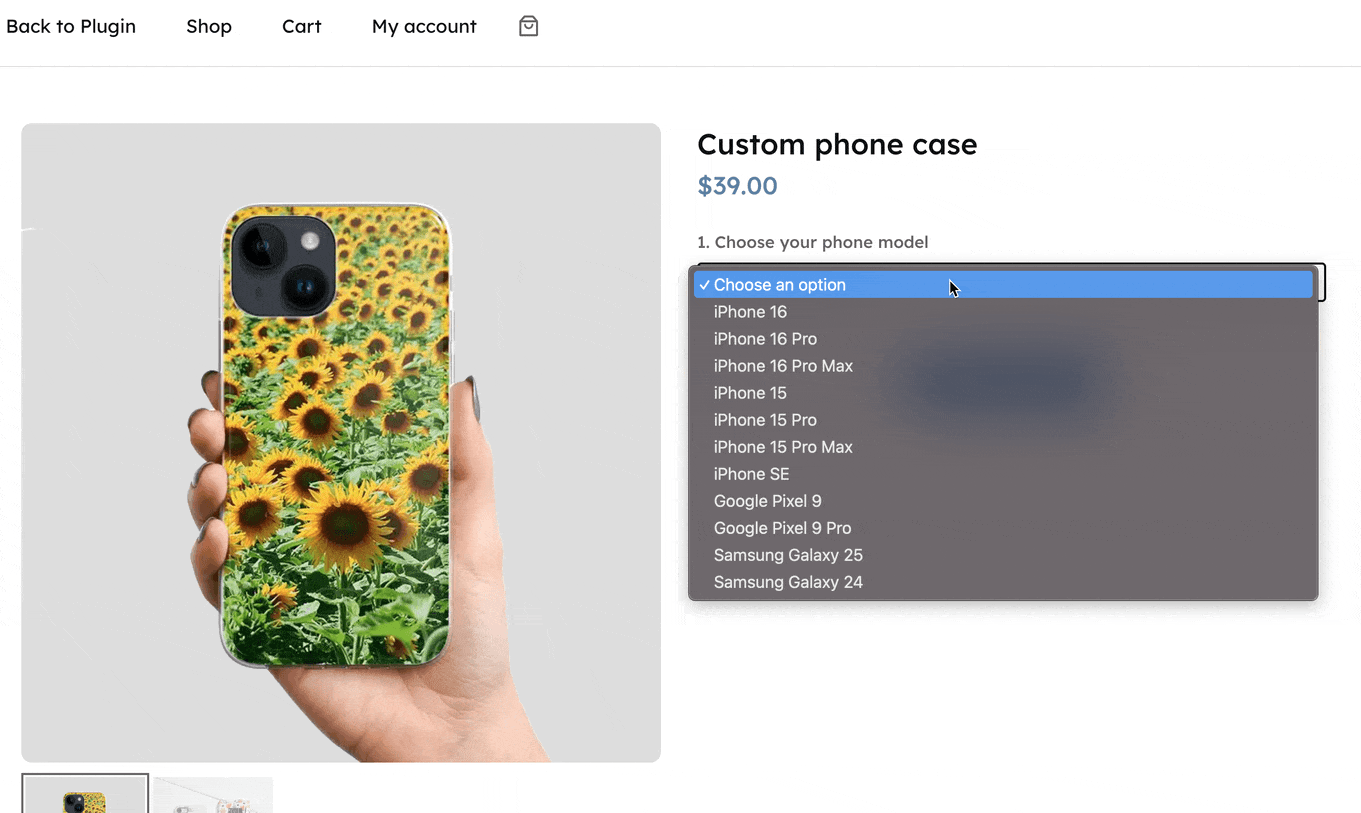
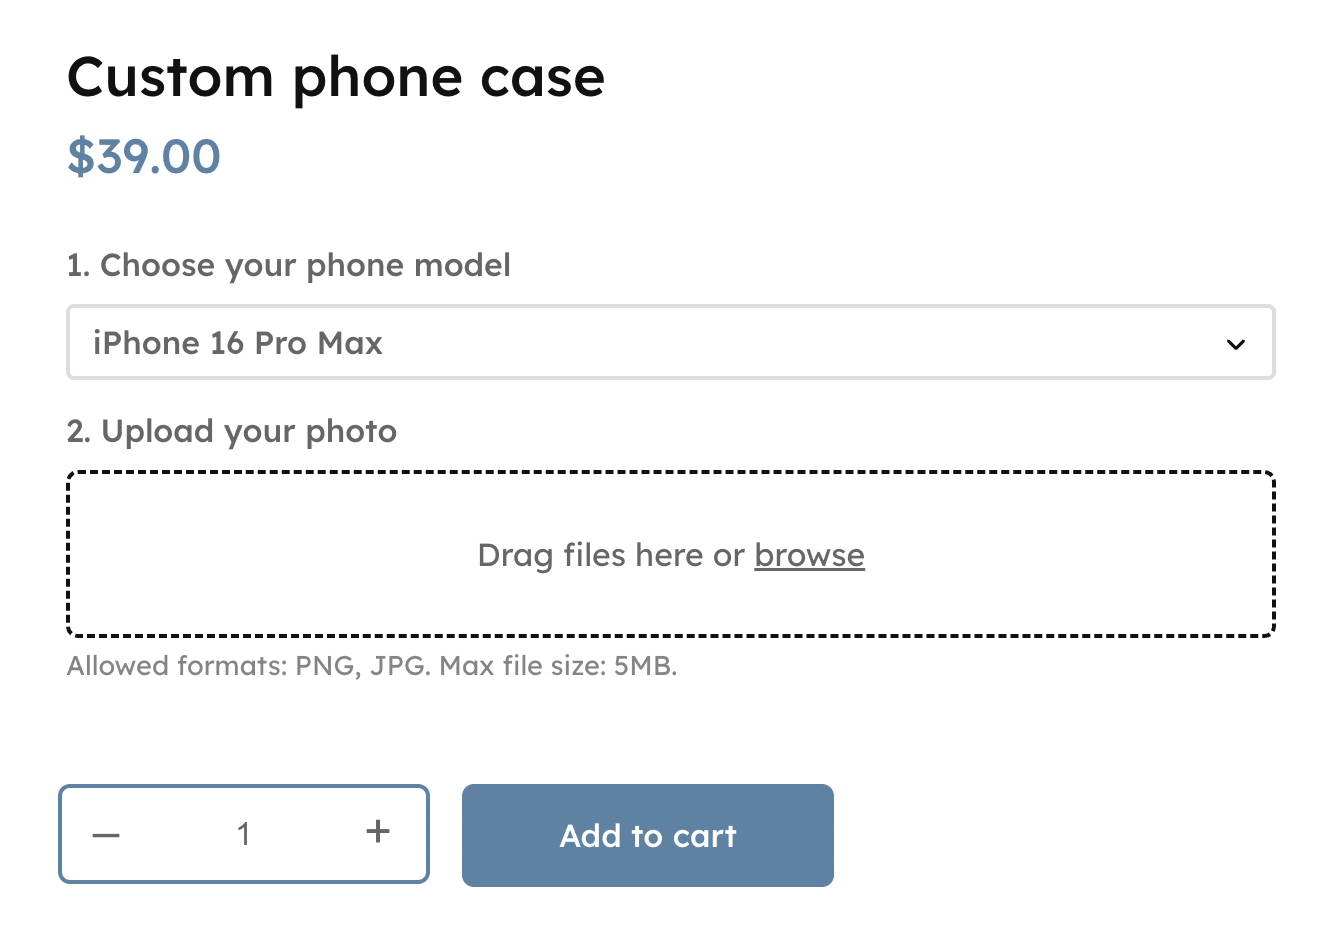
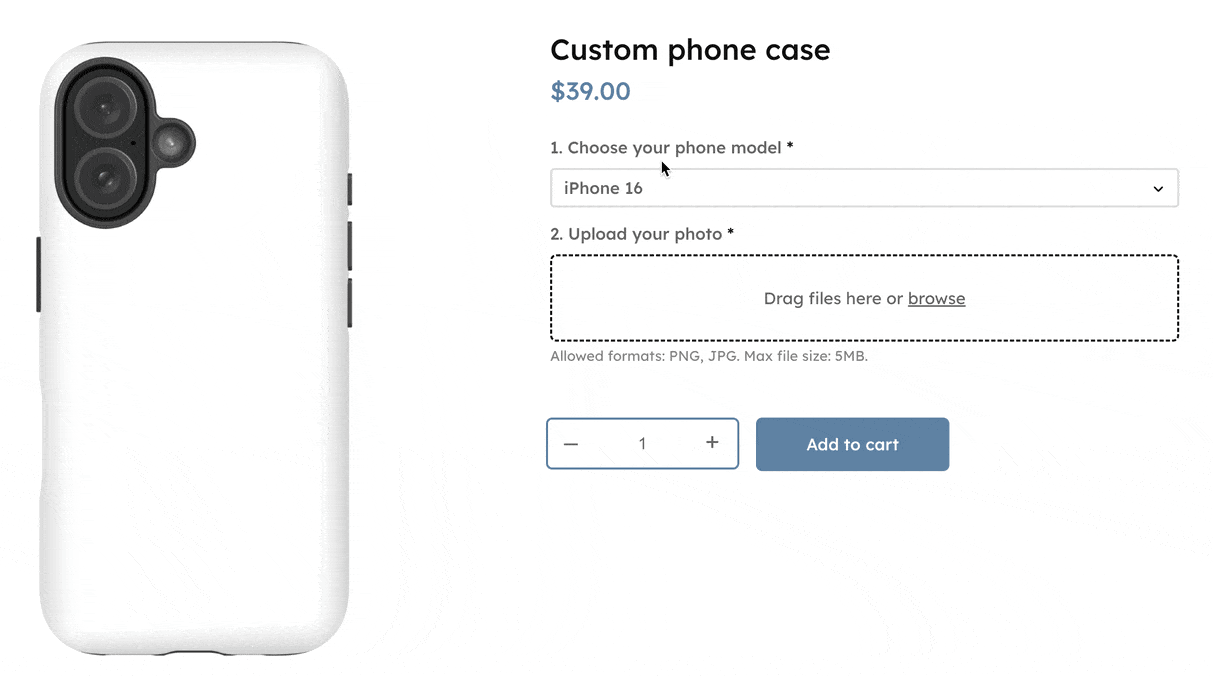
We want to offer the customer a way to select their phone model and allow them to upload an image to print on the custom phone case. First, we need to add those options (form fields) to the product page. This is what the end result will look like:
If you have APF up & running, edit your WooCommerce product and find the Custom fields section under Product Data.
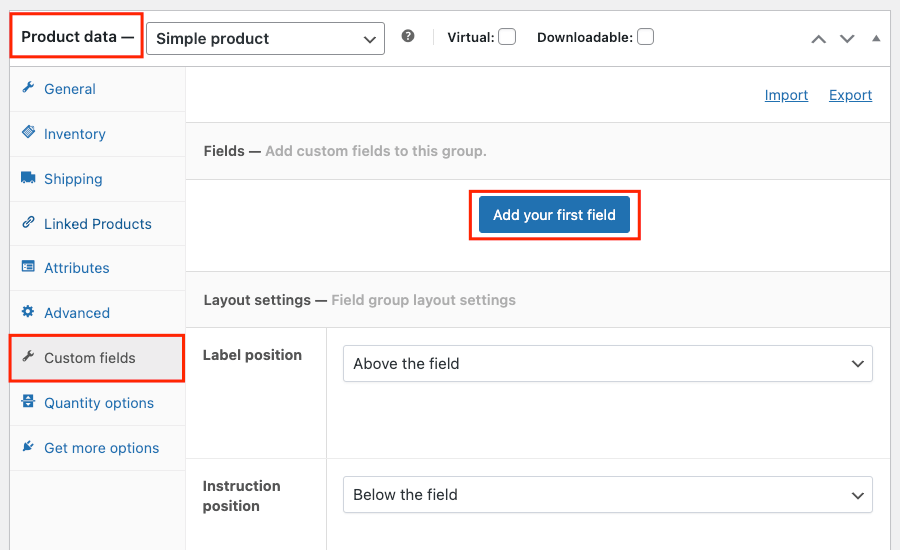
In this section, you can add all the options that belong to your product.
Phone model option
Click Add Your First Field to get started. You’ll see several new settings pop up. Make the following changes:
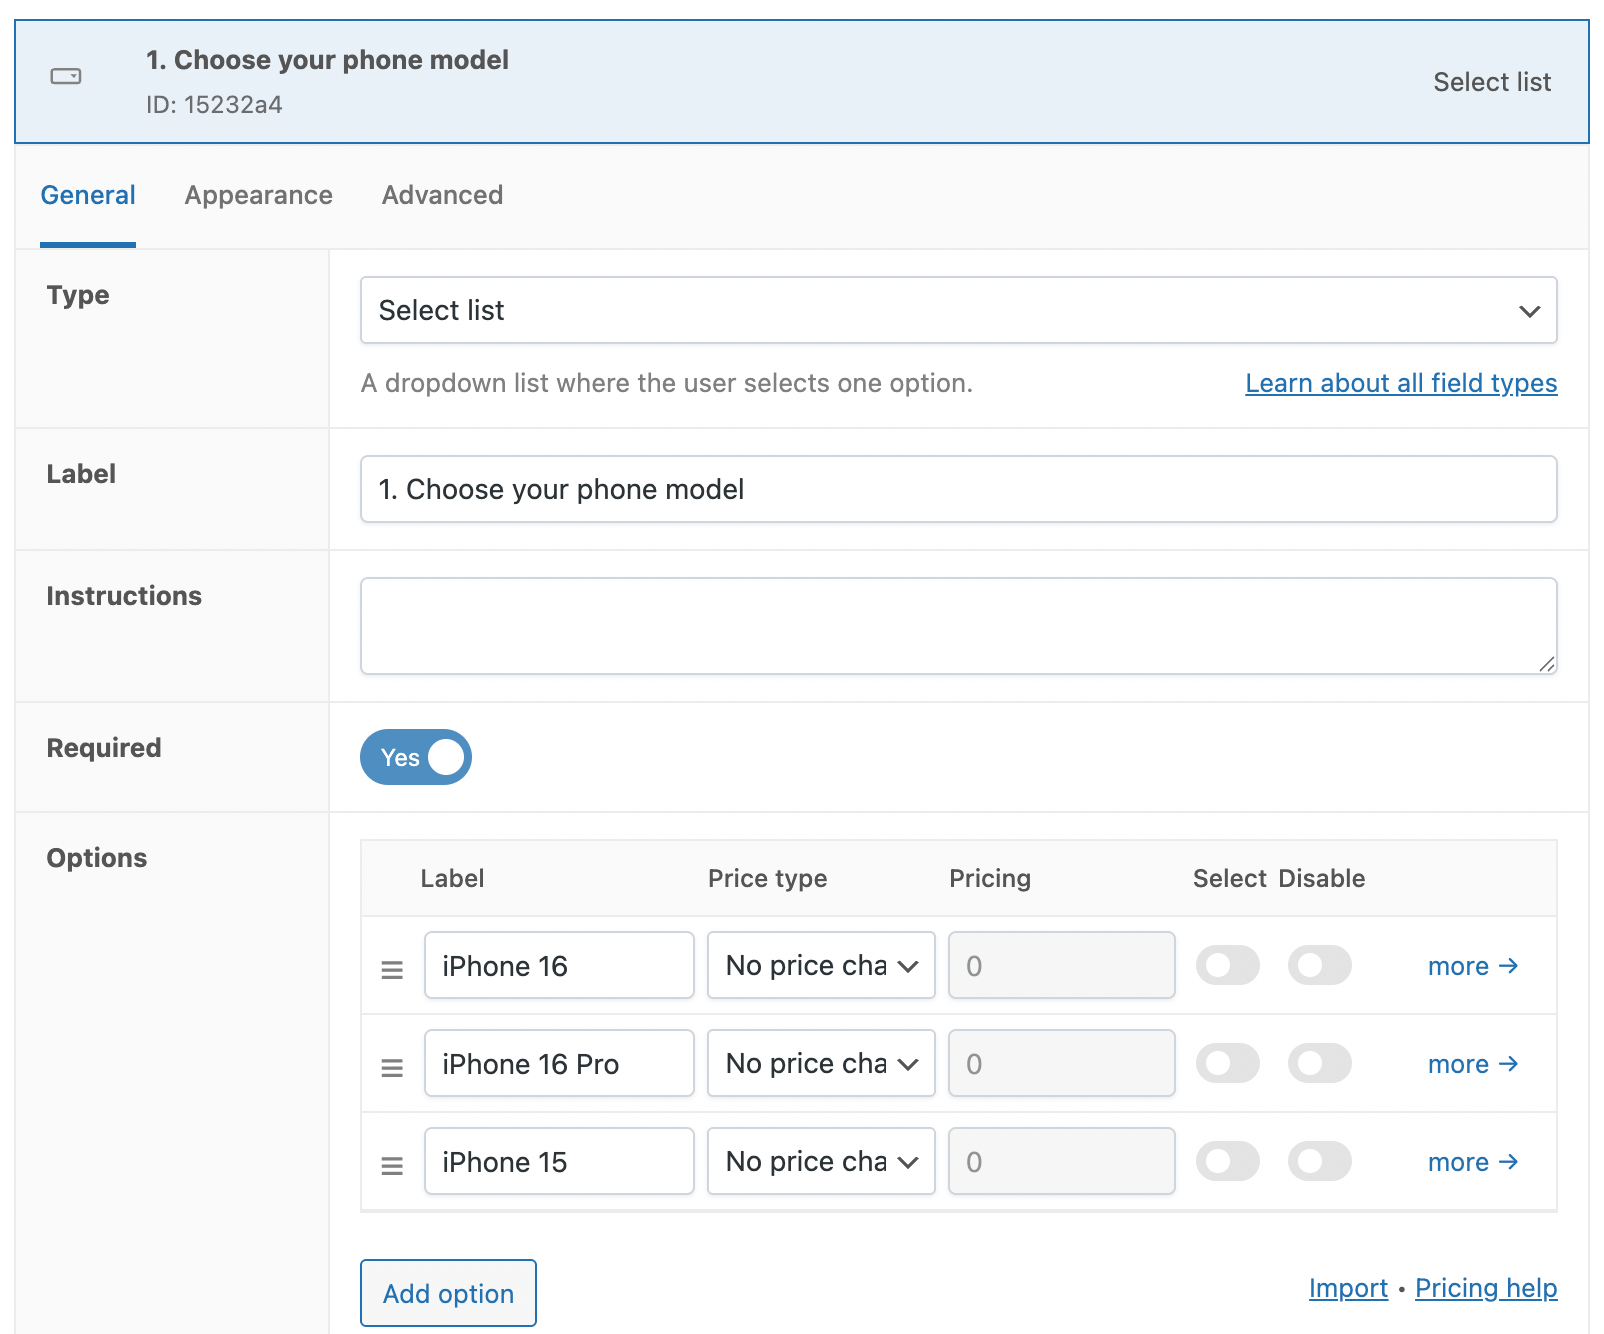
- Set the Type to Select List. This will display a dropdown field with options on the product page.
- As Label, we chose “1. Choose your phone model”. It will appear above the dropdown list, so it should be short and descriptive.
- Mark the field as Required, so the customer is obligated to select a phone model.
- In the Options section, you can add the entries for the dropdown list. You can add as many as you like! Click Add Option to get started.
Image upload option
Next step is to offer the customer a way to upload an image they can put on the custom phone case. In the same product admin section as before, click Add A Field to add another option. Use these settings:

- Set the Type to File Upload. This creates a file upload option on the product page.
- As Label, we chose “2. Upload your photo”. It will appear above the upload field.
- We’ve added some extra Instructions to inform customers about the allowed file types and maximum file size.
- Mark the field as Required, because we need the user to upload an image.
- Do not enable Allow Multiple as we only need 1 image.
- Set the Accepted File Types to JPG and PNG, as those are standard formats for working with print.
- Define the maximum file size (in megabytes). We chose 5MB, as the image will be used for print so it shouldn’t be too small.
Don’t forget to update the product to save your work!
Bonus: Conditional logic
We want to give the customer the best user experience (UX) possible, so we want to hide the upload field and only show it when the user has selected a phone model. To do this, we can add conditional logic to the second field. Head over to the file upload field’s Advanced tab and define the conditional logic:
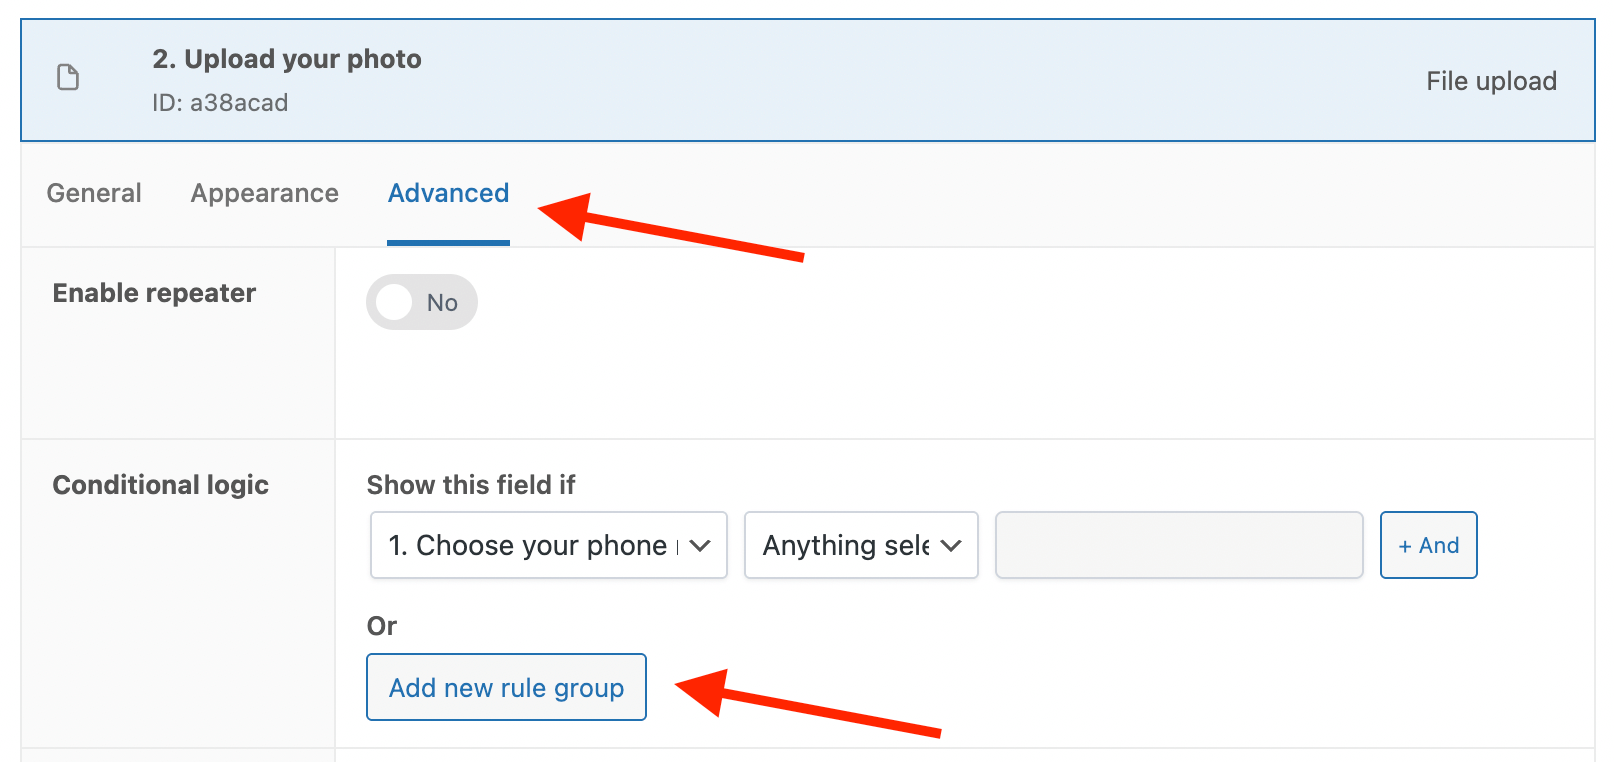
This approach makes sure the image upload field is displayed only after customers choose their phone model, which helps you to keep the page clean and organized.
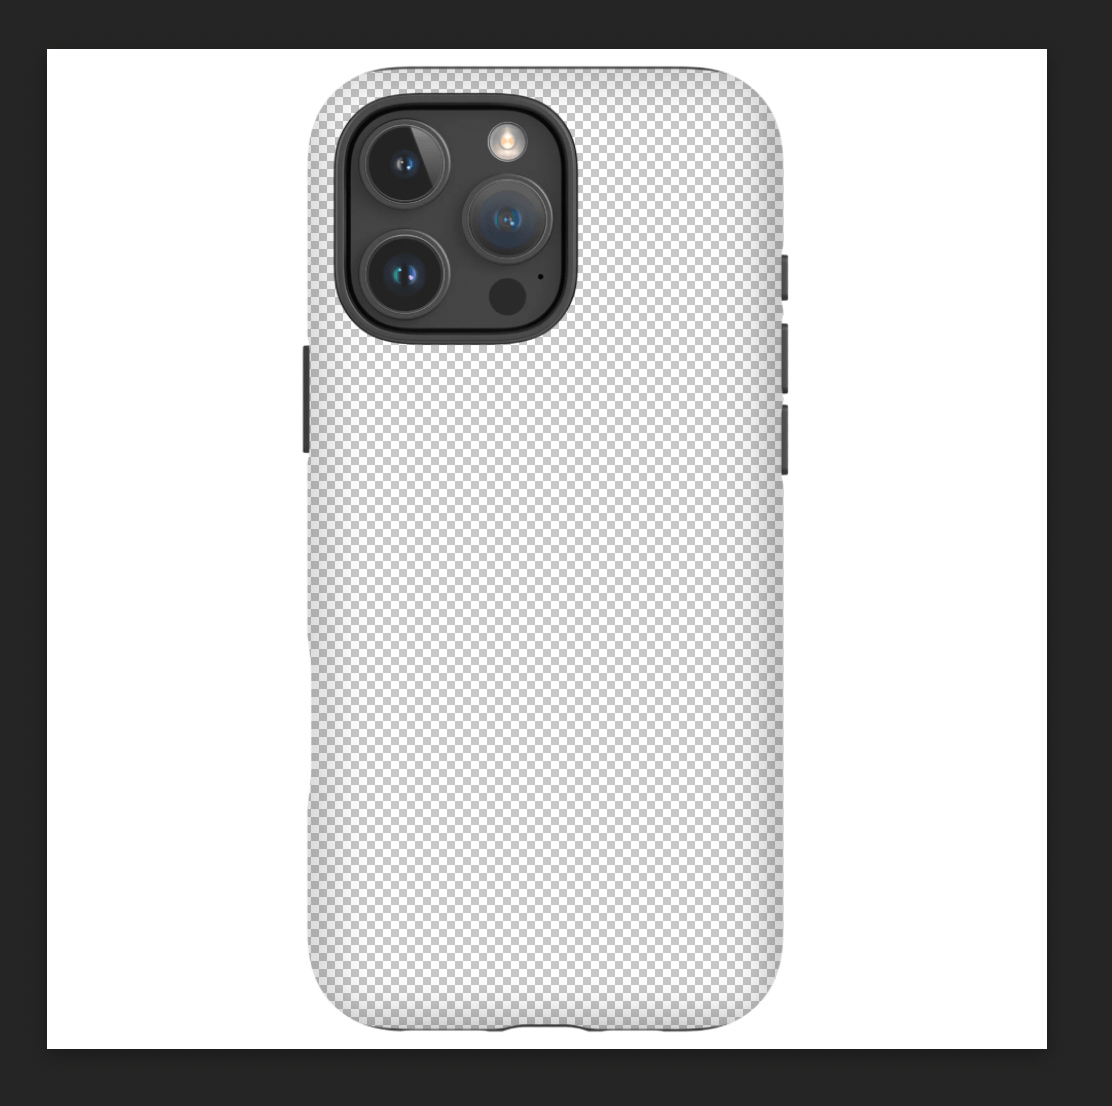
Step 2: Prepare your base images
When customers select their phone model, we want to replace the main product image with a blank model-specific image. This blank image acts as a canvas for displaying the uploaded picture.
This means you’ll have to create a basic PNG image of each phone case you offer. The area that should show the custom case needs to be transparent, so the Live Content Preview plugin can insert the customer’s image. This step takes a bit of preparation, but the end result is well worth it!
For our demo, we found some images of phone models online and used Photopea (free image editor) to create uniform 1000×1000 pixel images, positioning the phone at the center and adding white margins around it:
You’re free to use the images we created for demo purposes: iPhone 16 Pro (Max), iPhone 16, iPhone 15 Pro (Max), iPhone 15, iPhone SE, Samsung Galaxy 25, Samsung Galaxy 24, Google Pixel 9 Pro, Google Pixel 9.
Step 3: Swap out the main image
Now that you have the base images, we need to display them on the product page when the customer selects their phone model.
Head back to the Custom fields section on the product admin screen, scroll down until you find the Change product image setting and turn it on. Click Add New to add a new image:
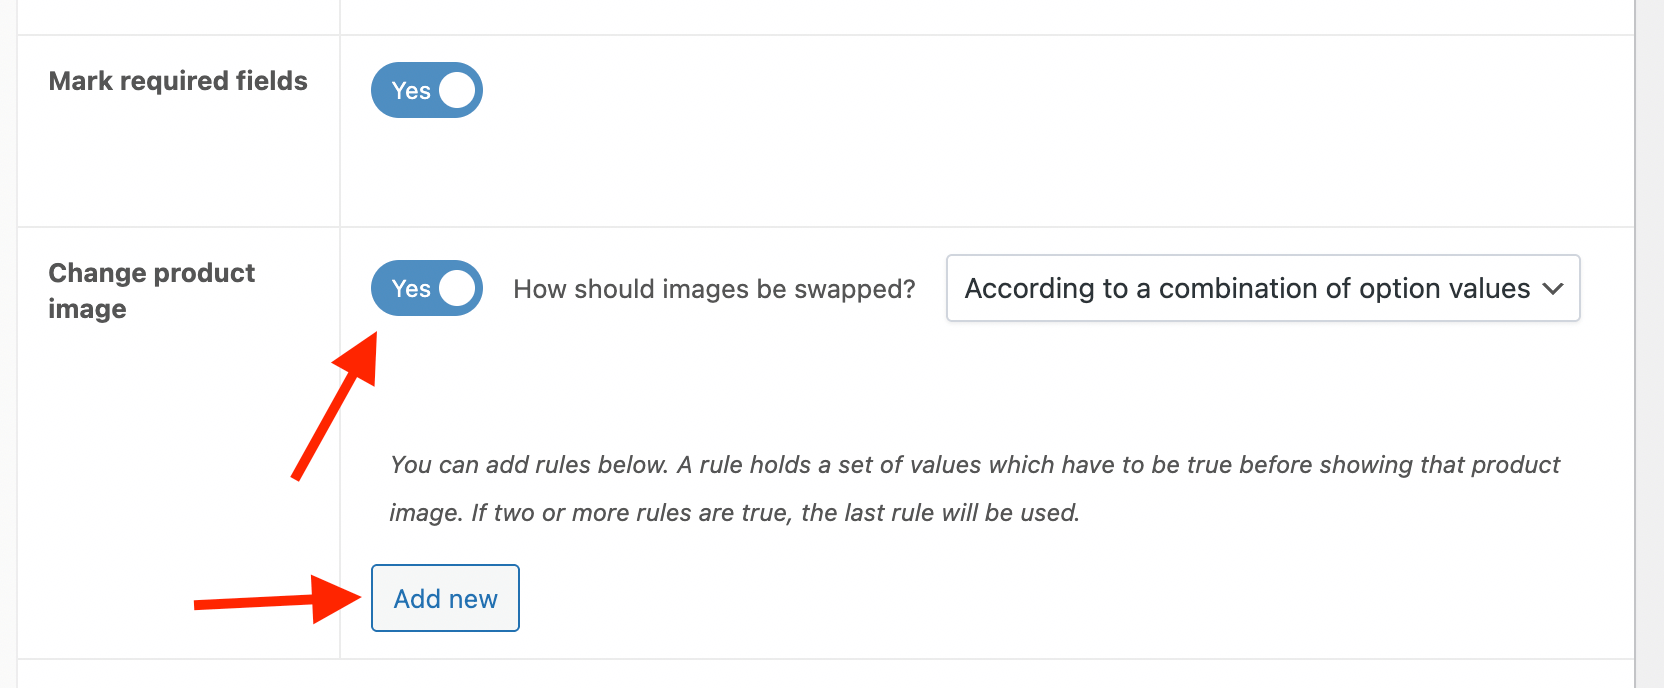
Now, you can change the main product image to a new one for each phone selection:
Once you save your product, check the product page for the result:
Step 4: Configure the live preview
In the last step, we’ll offer the customer a way to position, rotate, and resize their uploaded image and preview the final result.
Head back to the Custom fields section on the product admin screen, and scroll all the way down until you find the Live Content Preview section. This is where we’ll define all the live preview functionality.
Click Add New to get started.
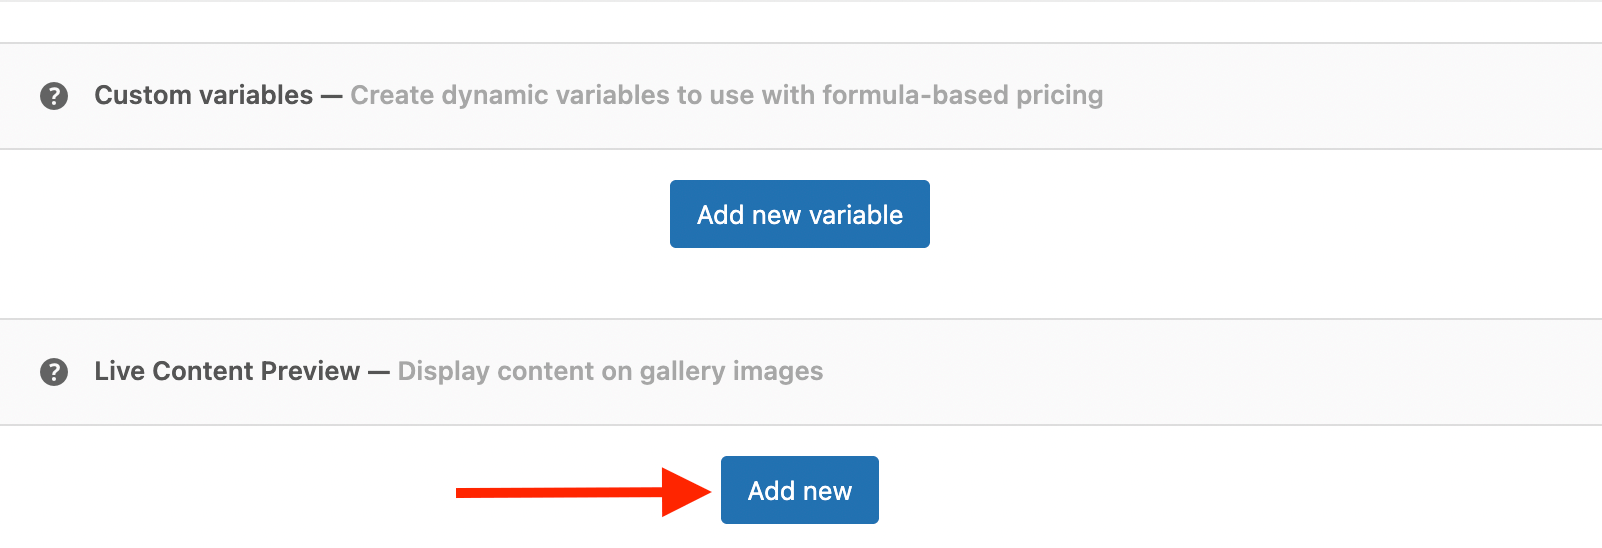
Next, you can define everything in 3 easy steps.
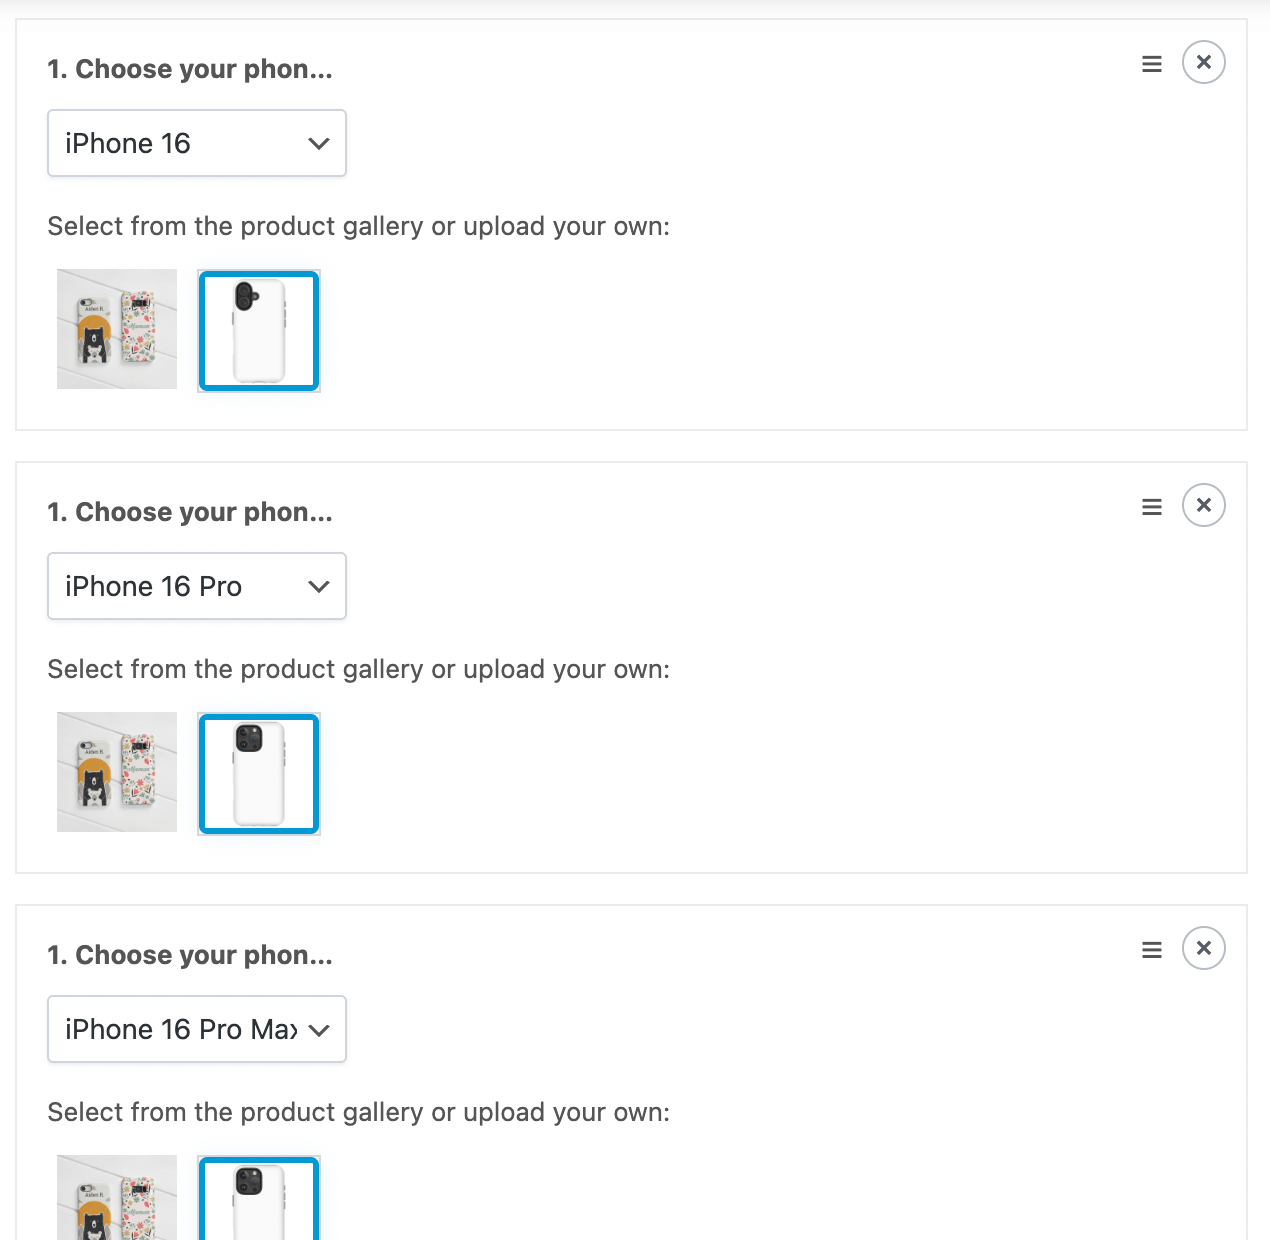
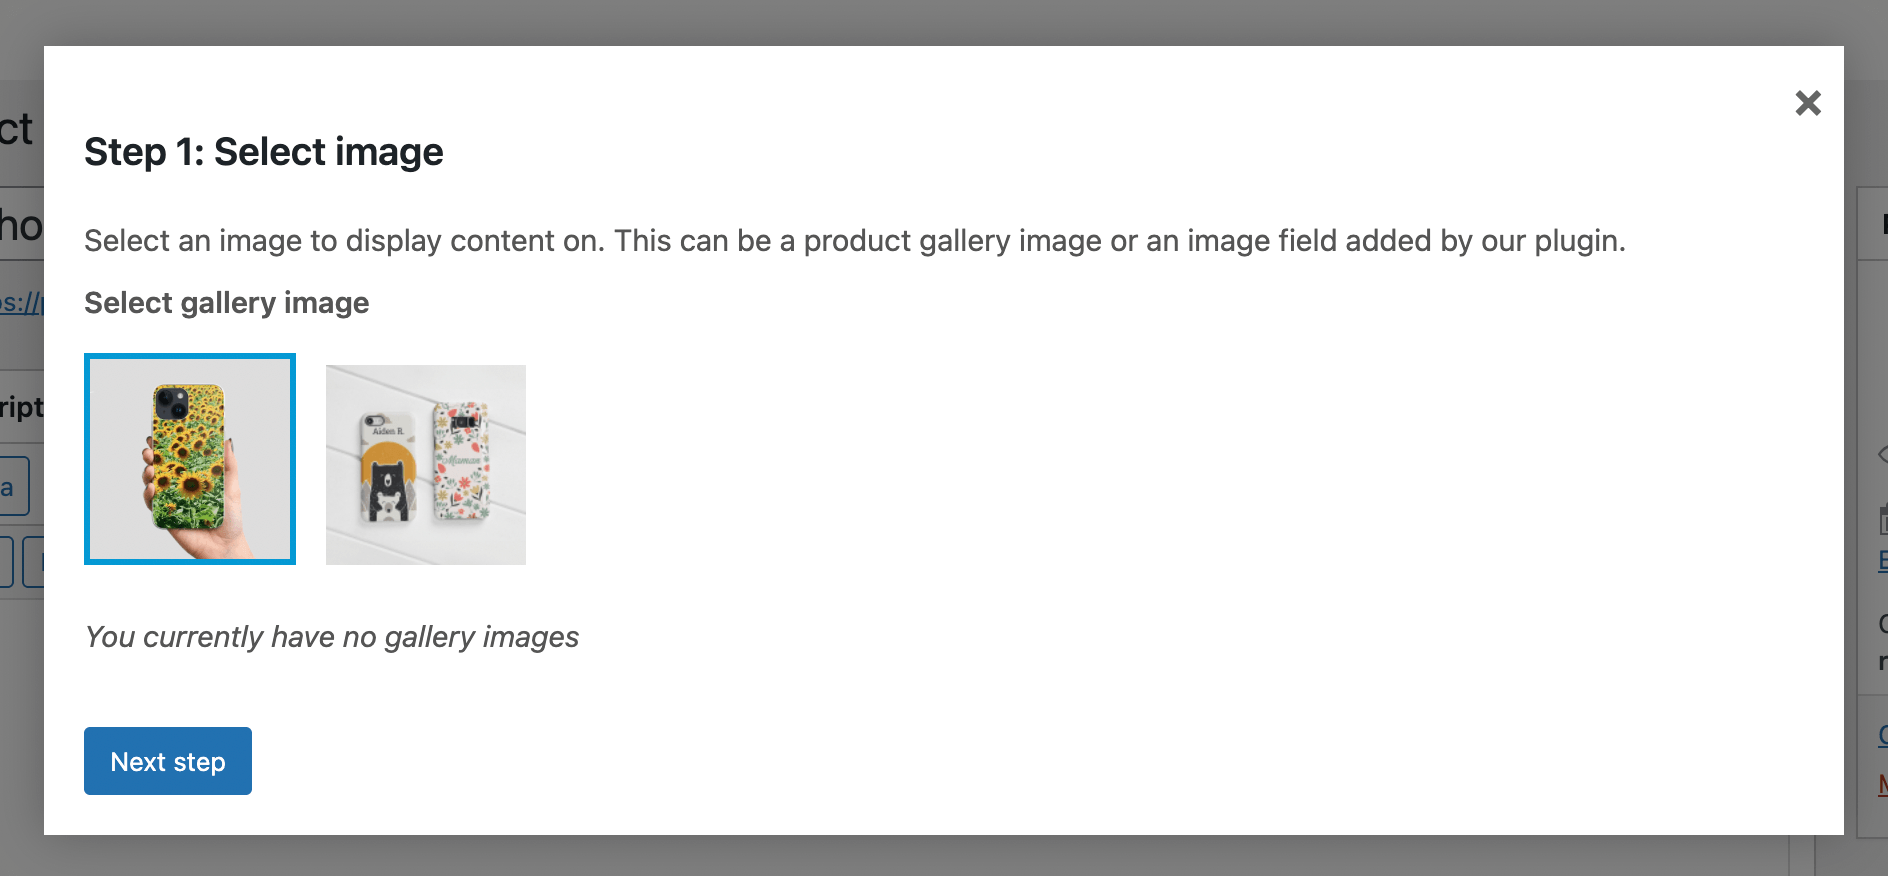
In step 1, you need to select the image to add the live preview to. Select the first image in the list as that’s the main product image:
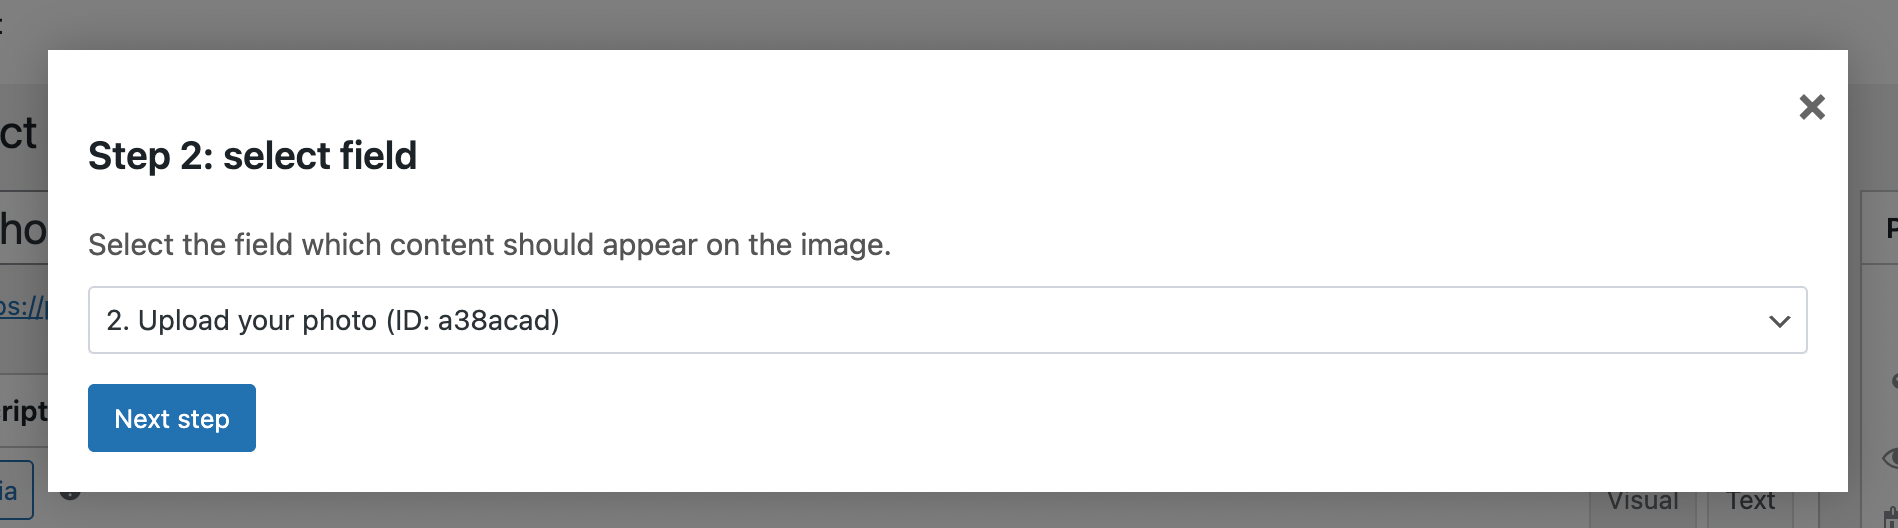
In the next step, you can select which content to display. We want to display the customer’s uploaded image, so select the file upload field you created earlier in this tutorial:
The next (and final) step consists of 2 parts: on the left, you can define the area where the live preview should appear. On the right, you can further define how the live preview should behave.
First, make sure to select one of the phone case images in the “Display Image Variation” dropdown, then draw where the image should appear. You can use the bottom position settings to further define the area if drawing itself is not accurate enough. See this demo:
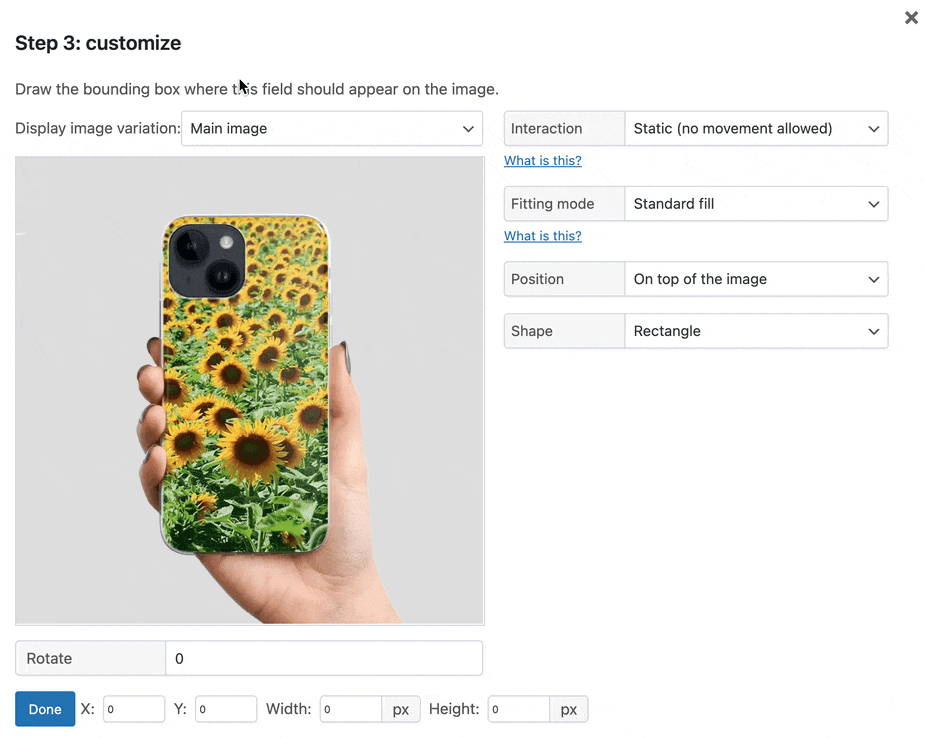
On the right side, you can define how the live preview should behave. Use these settings:
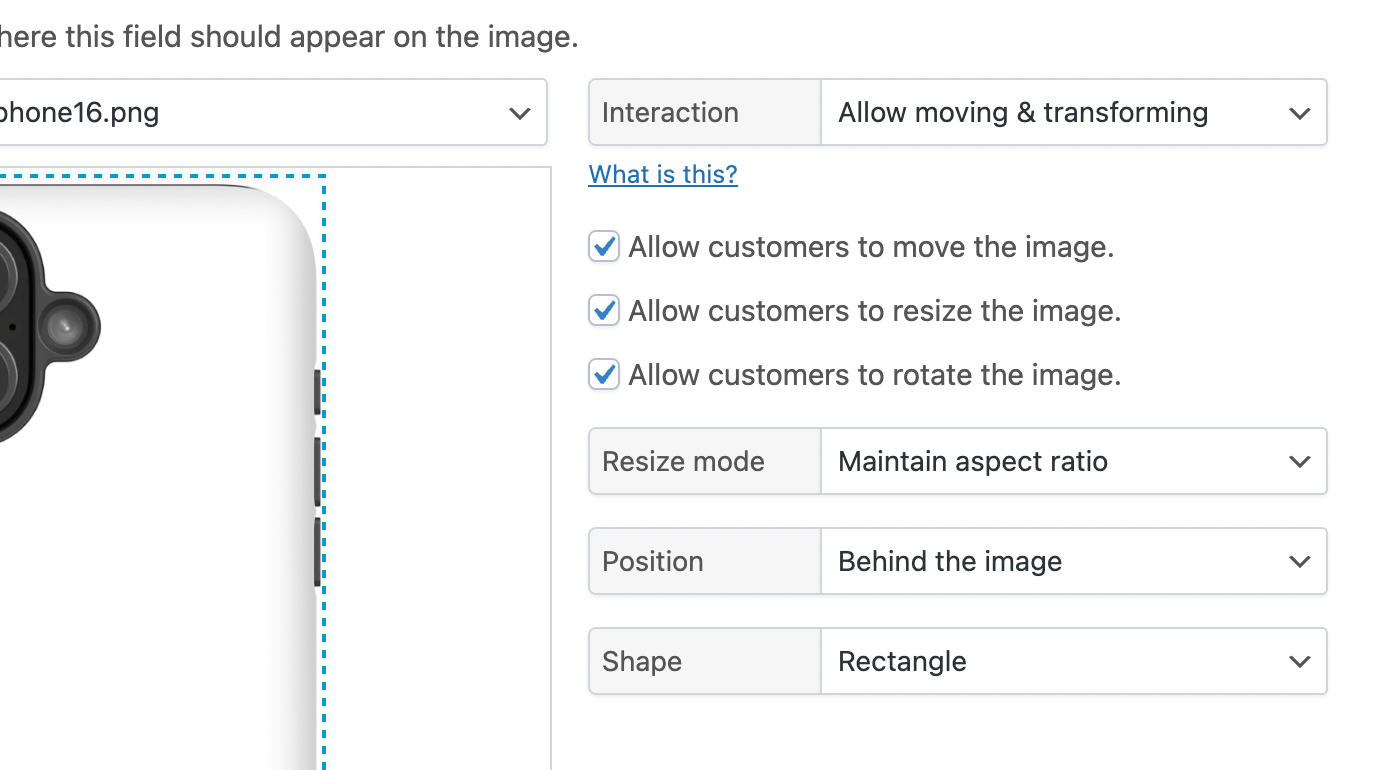
- Set Interaction to Allow moving & transforming, which allows the customer to change the position and size of their image freely.
- You can enable or disable certain image transformations. For our demo, we allow everything.
- Set Resize Mode to Maintain aspect ratio resize mode. This lets users resize images while keeping the original proportions intact, so the width and height adjust together without distorting the image.
- Set Position to Behind the image as the uploaded image should appear behind our base image.
Update the product when you finish to save your work. When you visit the product page, customers can upload, manipulate, and preview their custom phone case.
Creating custom phone cases with WooCommerce the easy way
And that’s it — you’ve now built a fully interactive custom phone case product in WooCommerce! With the Advanced Product Fields plugin and its Live Content Preview add-on, you can give your customers exactly what they want: the freedom to design, preview, and personalize their custom phone case in real time. It’s a powerful way to boost engagement, reduce order errors, and increase conversions — all without writing a single line of code.
Ready to launch your custom case store with WooCommerce? You’ve got everything you need in this post!

Why can’t I find the “make sure to select one of the phone case images in the “Display Image Variation” dropdown”?
Hi there,
Sounds like you need some technical support. Can you start a support ticket here? We’ll reply ASAP!