
Everybody loves a customizable product box. From curated gift baskets to build-your-own subscription boxes, customers really appreciate the personal touch of selecting exactly what goes into their purchase.
And in this case, what’s good for your customers is also great for your business. Stores offering custom product boxes typically see higher average order values, improved customer satisfaction, and a unique edge over competitors selling fixed bundles.
The best part? You don’t need a developer or coding skills to add this feature to your WooCommerce store.
This guide walks you through implementing custom product boxes using Advanced Product Fields for WooCommerce. You’ll learn everything from basic setup to advanced customization options, complete with real examples and practical tips.
By the end, you’ll have all the tools and knowledge to launch professional custom product boxes that your customers will love – possibly within hours of reading this.
Examples of custom product boxes
A custom product box lets customers handpick items to create personalized bundles – transforming a simple purchase into an interactive experience that increases engagement and order values.
Here’s what’s working for successful stores:
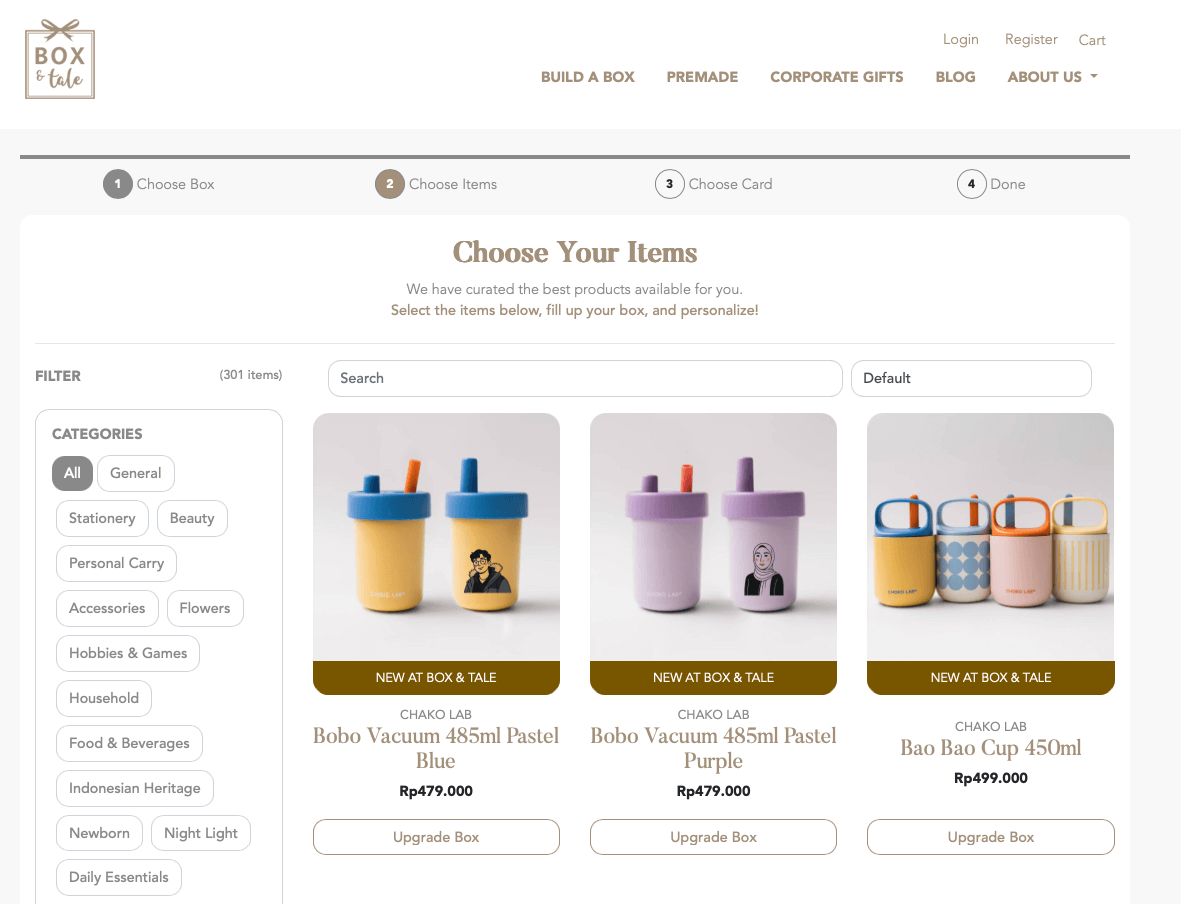
- Custom gift baskets: Box & Tale lets customers choose themes, select basket styles, and then fill their basket with hundreds of specialty products. Giften Market, on the other hand, allows customers to build custom gift boxes from 250+ small businesses.
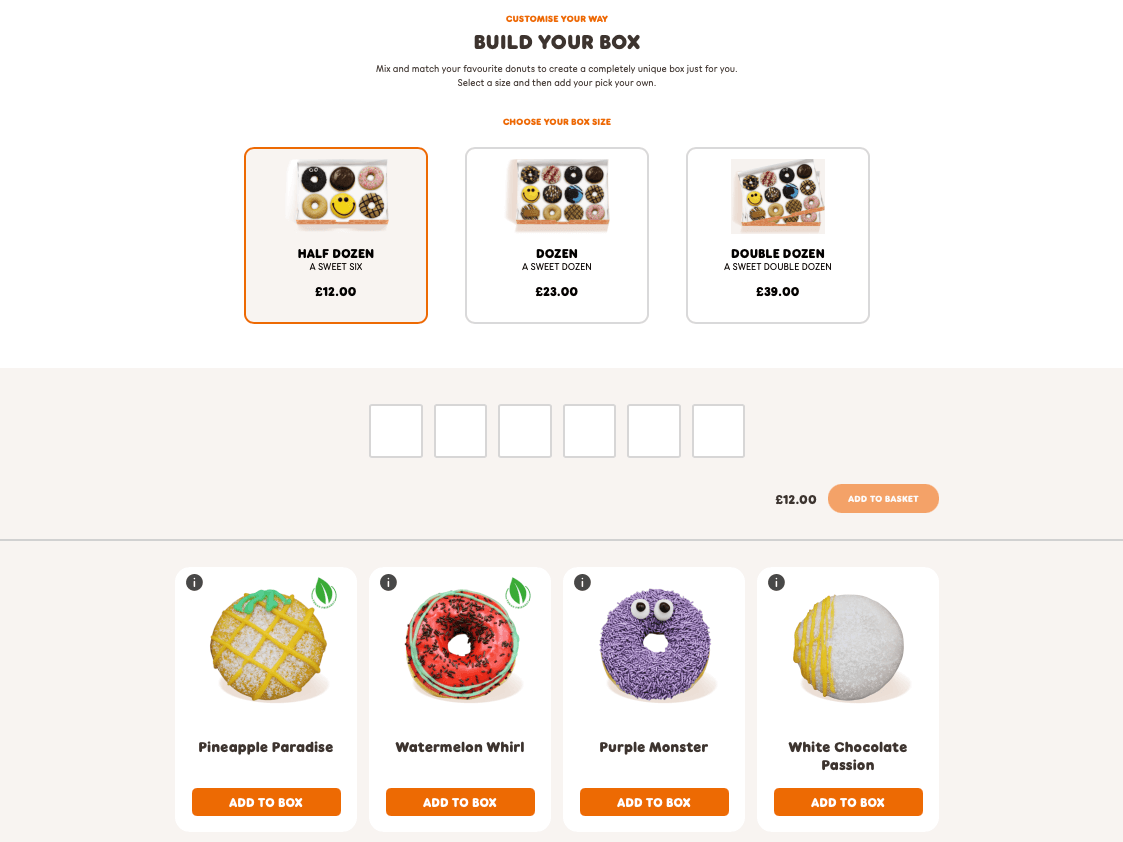
- Build-your-own food products: This is very popular with sweet treats like cupcakes and donuts: Dunkin Donuts, for example, lets customers mix and match flavors in half dozen, full dozen, or double dozen sizes. And while not technically a box, many pizza places offer custom pizzas for their customers.
- Mix-and-match boxes: Perfect for seasonal promotions – think “winter skincare essentials” or “summer BBQ collection”.
- Themed kits: Birthday party supplies, crafting collections, or home spa sets.
- Corporate gifting: Professional bundles for employee appreciation or client gifts.
How to add custom boxes to your WooCommerce store
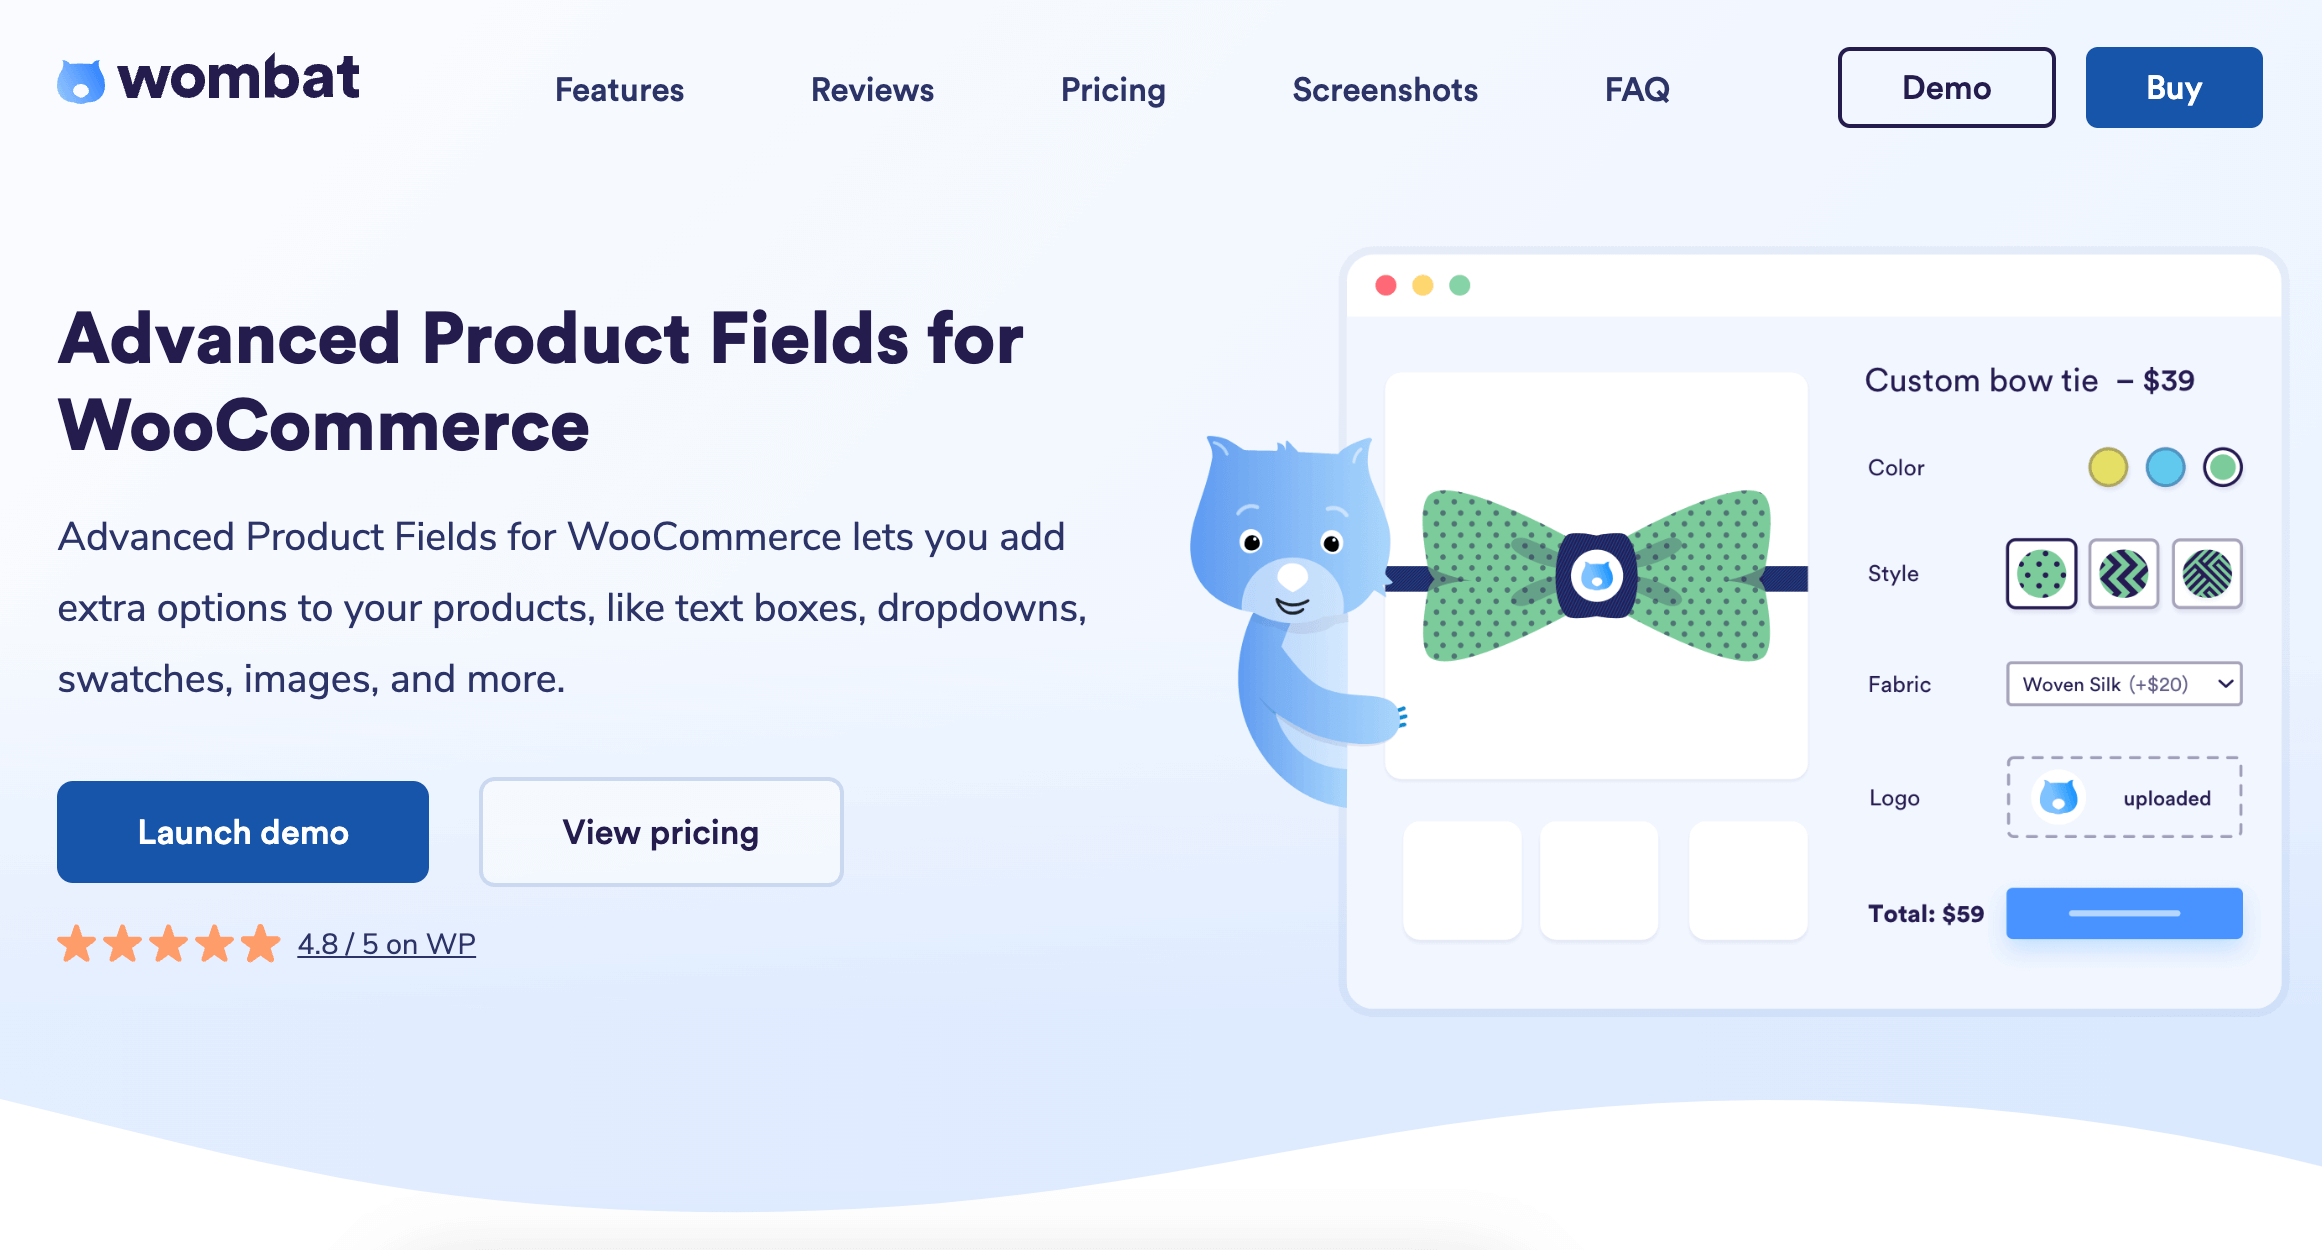
Advanced Product Fields for WooCommerce transforms standard products into interactive custom box builders – no coding required. The plugin offers 18 different input types, including child product selection, making it perfect for creating personalized product boxes.
So, let’s build a beauty box together!
Step 1: Install and activate APF
First, purchase Advanced Product Fields from Studio Wombat. After downloading, go to WordPress dashboard → Plugins → Add New → Upload Plugin to upload your downloaded zip file.
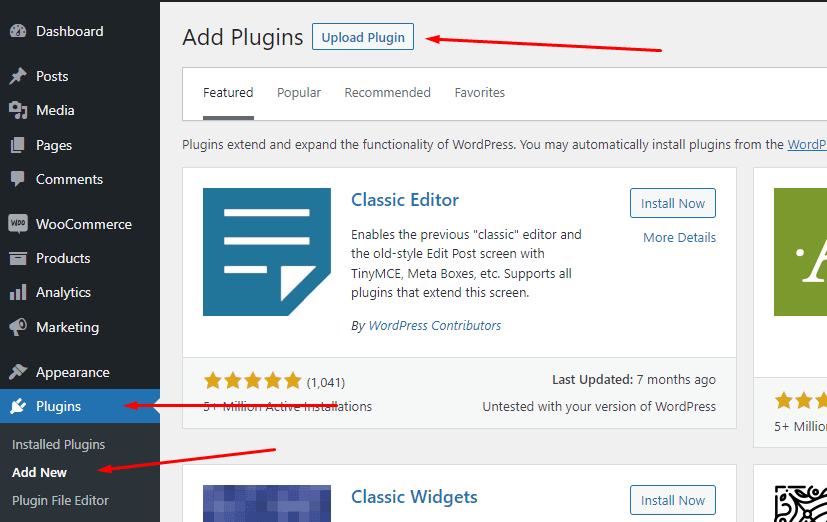
After that, click Install Now, then Activate.
Step 2: Create your box product
Start by creating the main “box” product that users will customize:
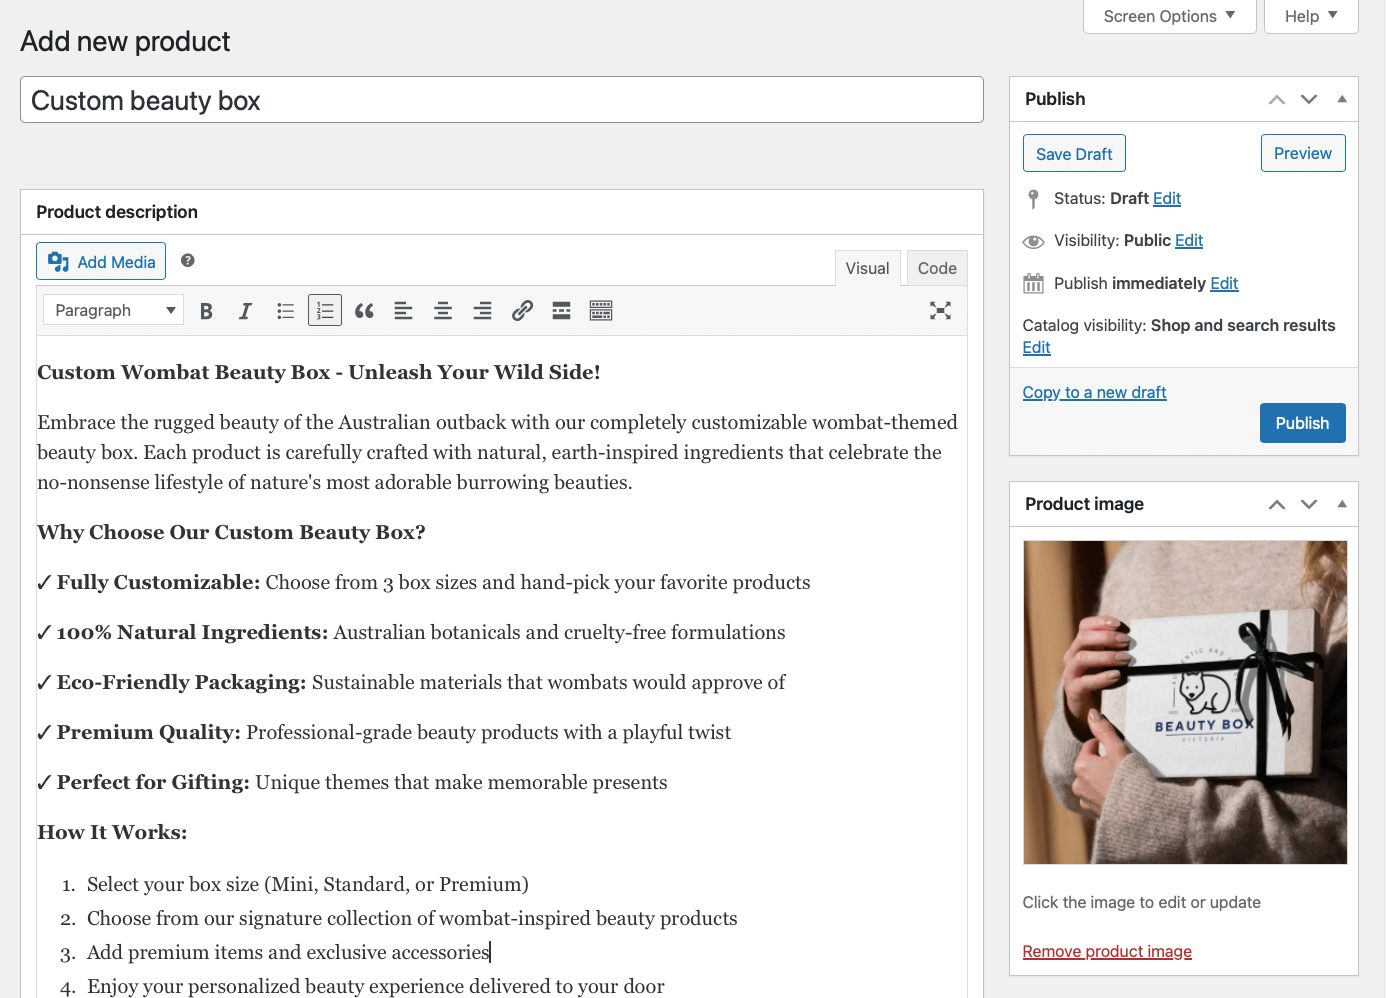
- Navigate to Products → Add New.
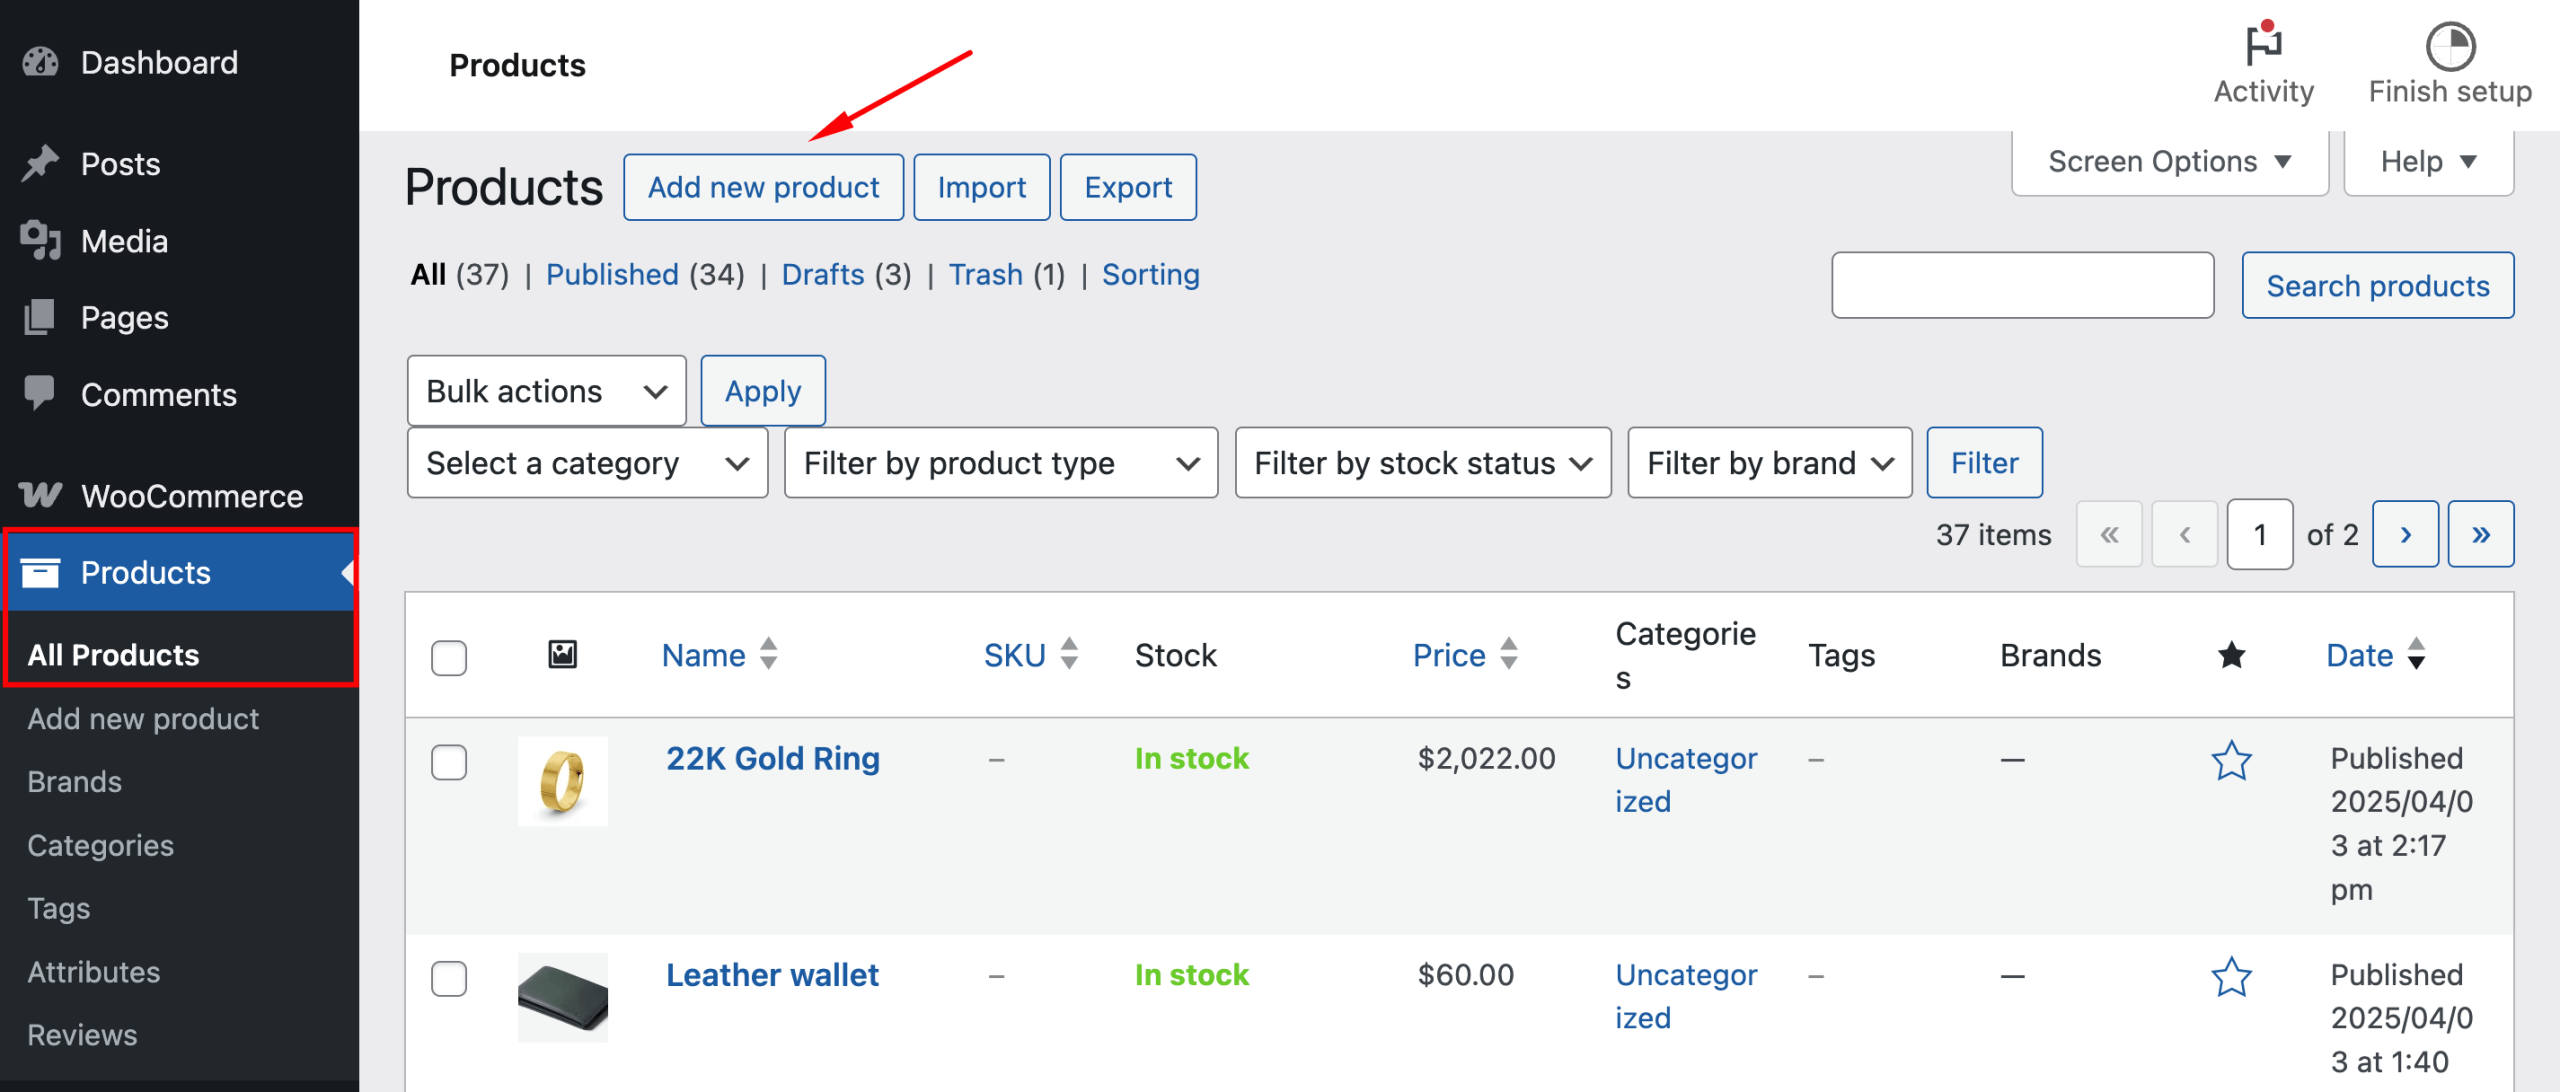
- Give your product a name and give it a good description. Don’t forget to add a short description, as this will appear next to your product.
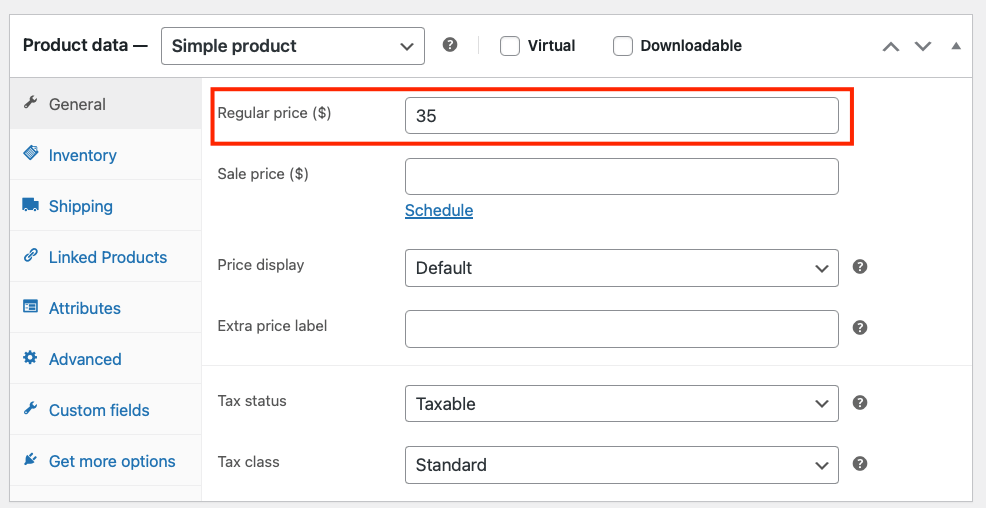
- Set your base price (or leave at $0 if pricing depends on selections).
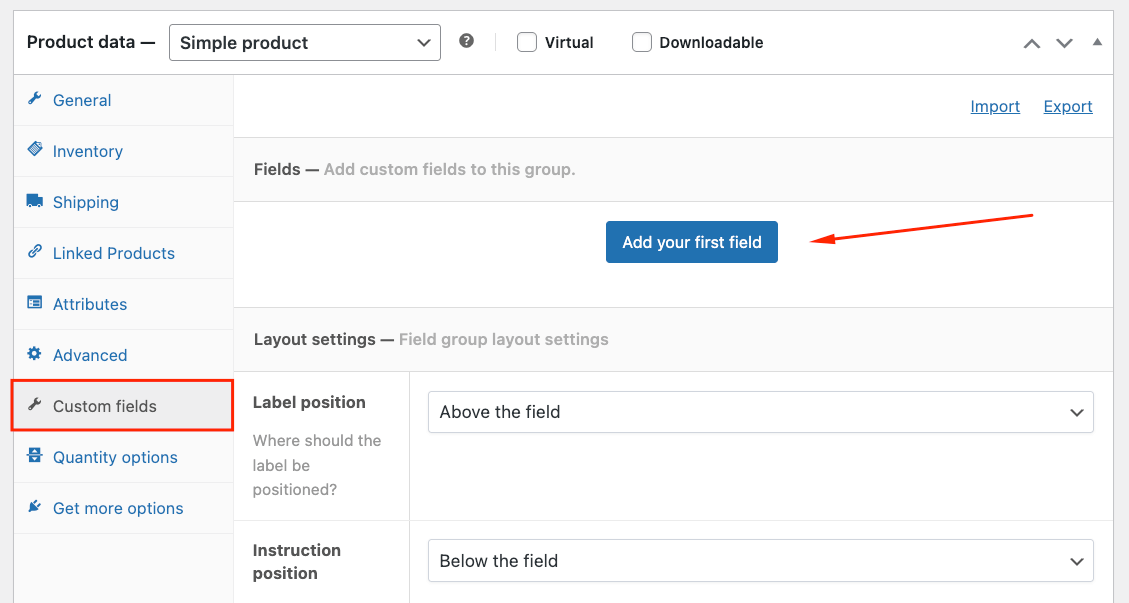
Step 3: Add custom fields to your box
Now comes the magic. With custom fields, you can add a lot to your products. For example, you can create different tiers of boxes that each allow a different number of products. Let’s see how you can do this.
- In your box product, select the Custom Fields tab on the left and click “Add your first field”.
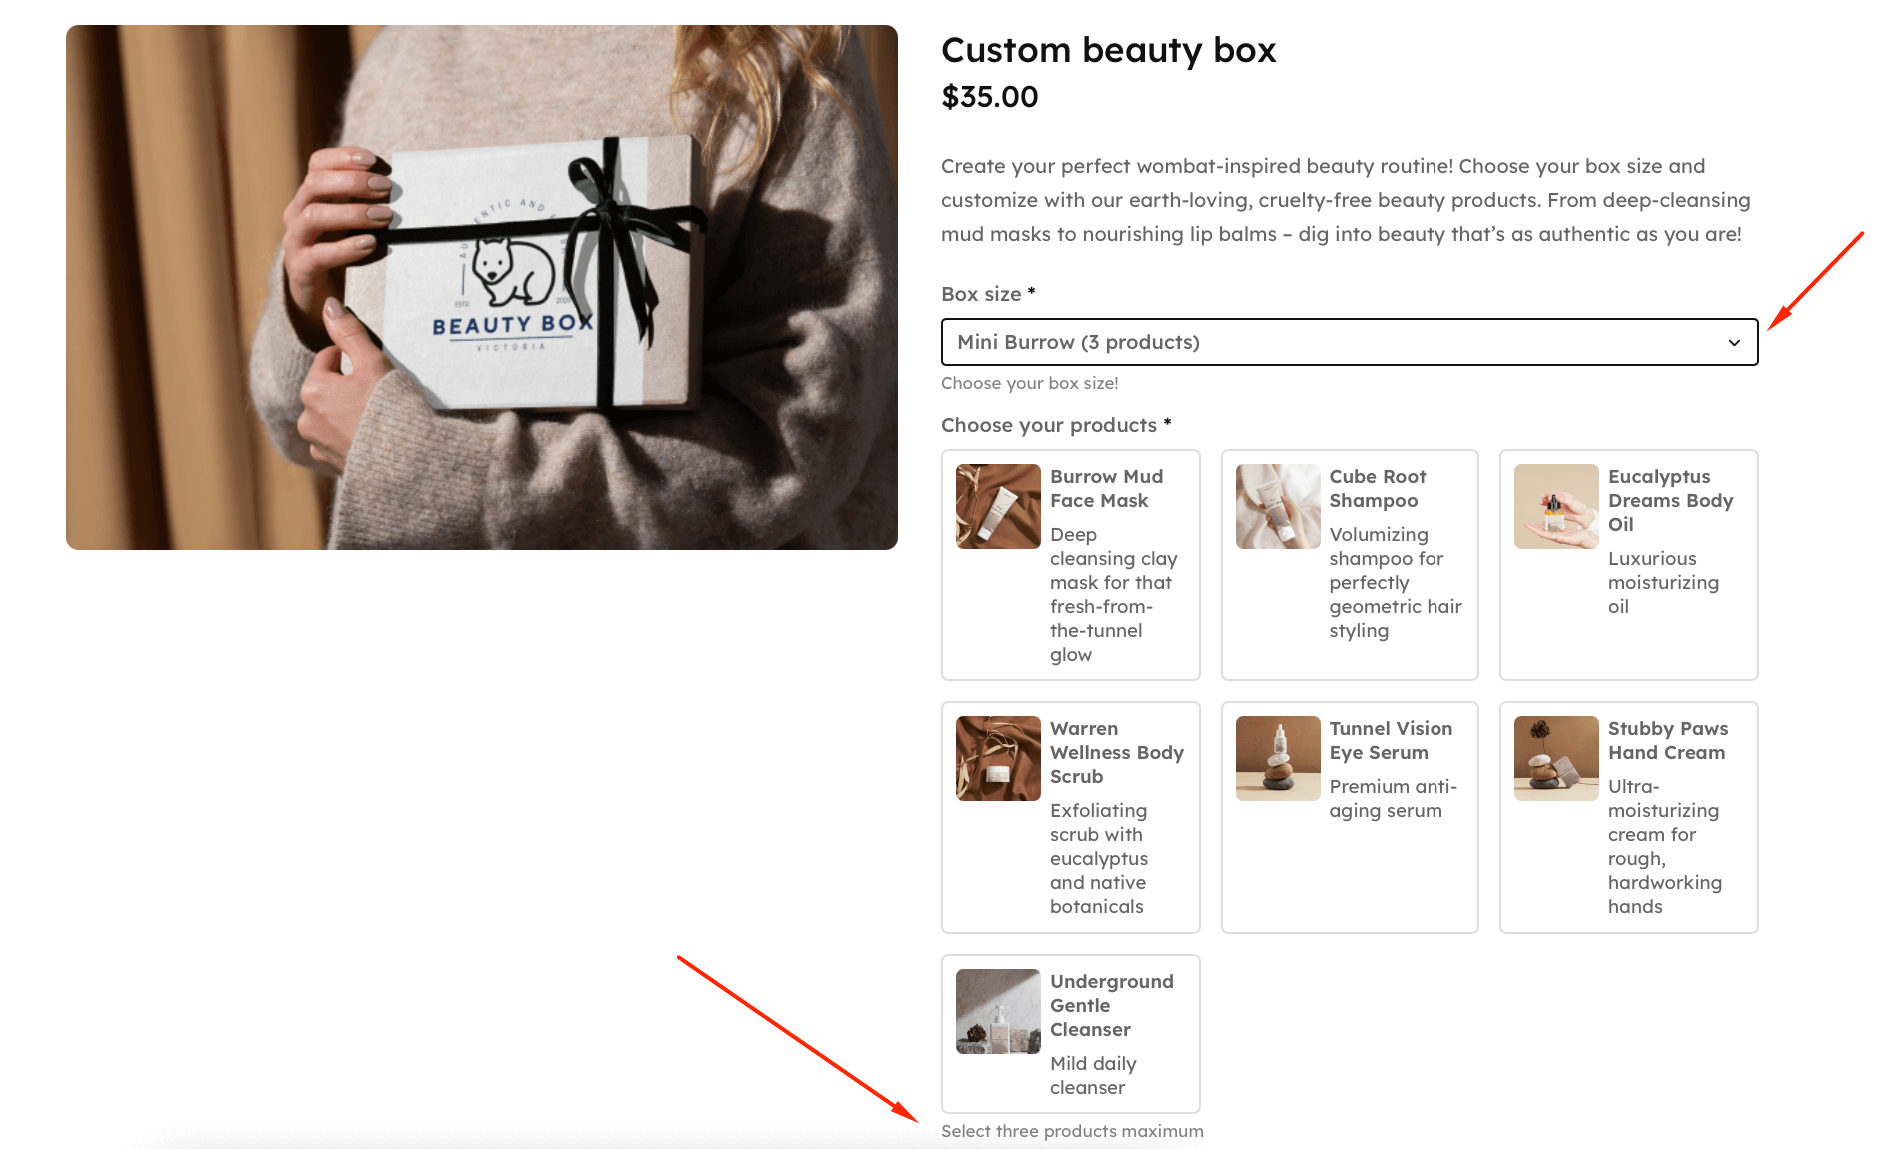
- Choose the “Select list” field, name it “Box size”, and make it a required field.
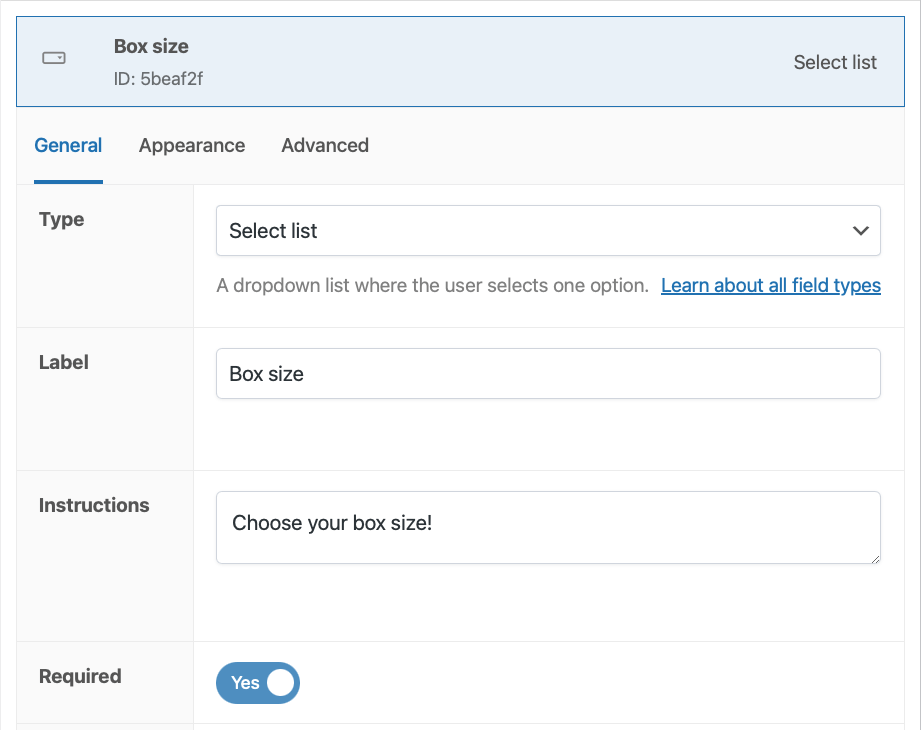
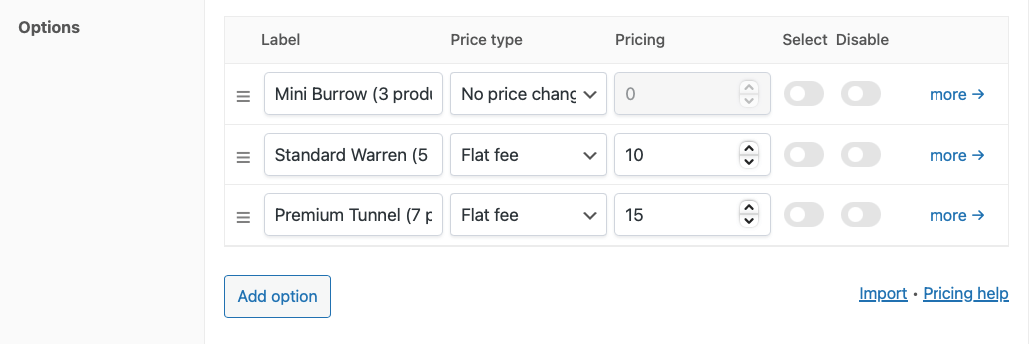
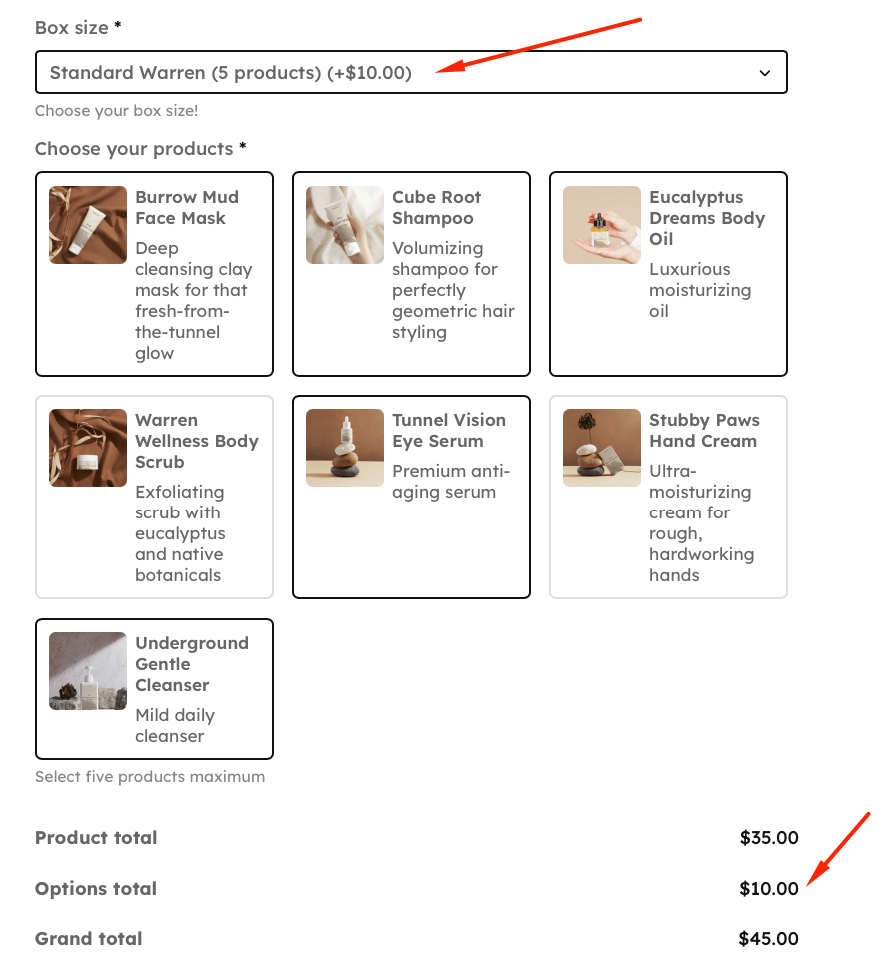
- Add different options such as “Mini Burrow Box”, “Standard Warren Box”, and “Premium Tunnel Box”. Then, choose the pricing. A flat fee will add on top of the base price, so what you can do is make the smallest option free, and then add the according top-up fee for the subsequent tiers.
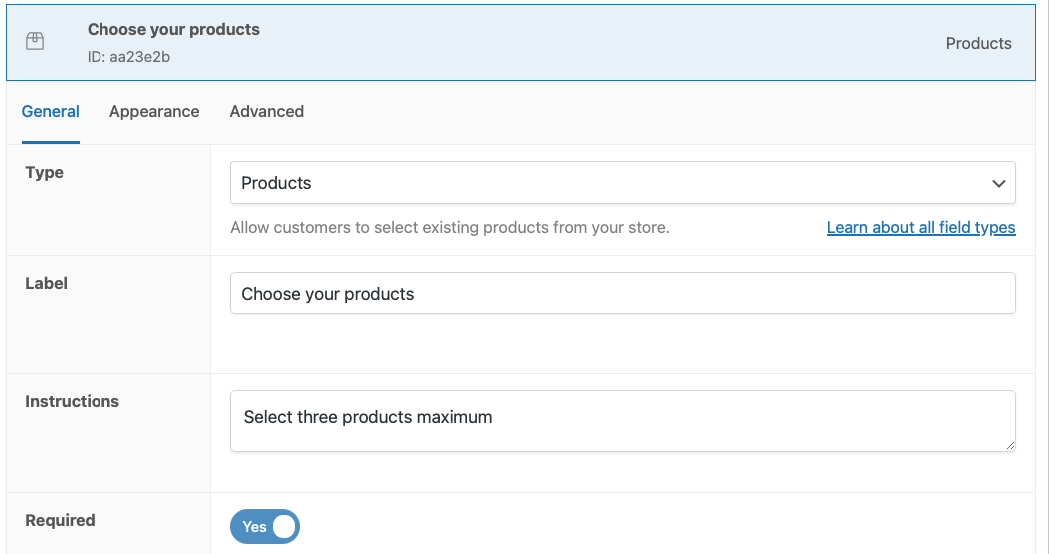
Next, we need to create the custom field with the actual products people can choose from.
- Add a new custom field and choose the “Products” type. Give it a label, add instructions for clear messaging, and make it a required field.
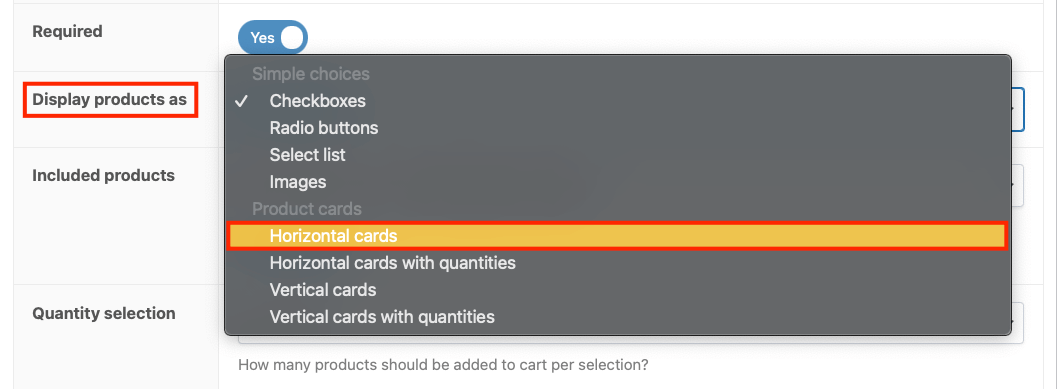
- Then, select how you want the products to appear. We’ll go for horizontal cards without quantities – if you choose with, people can add as many as they want to the box.
- Then, in the “Included products” section, you can choose what to display. For our box, we’ll go for specific products, which we will then add as options. We’ll also set their price to free, because in this case we want the box price to be determined by the previous Box size field, not the actual product prices.
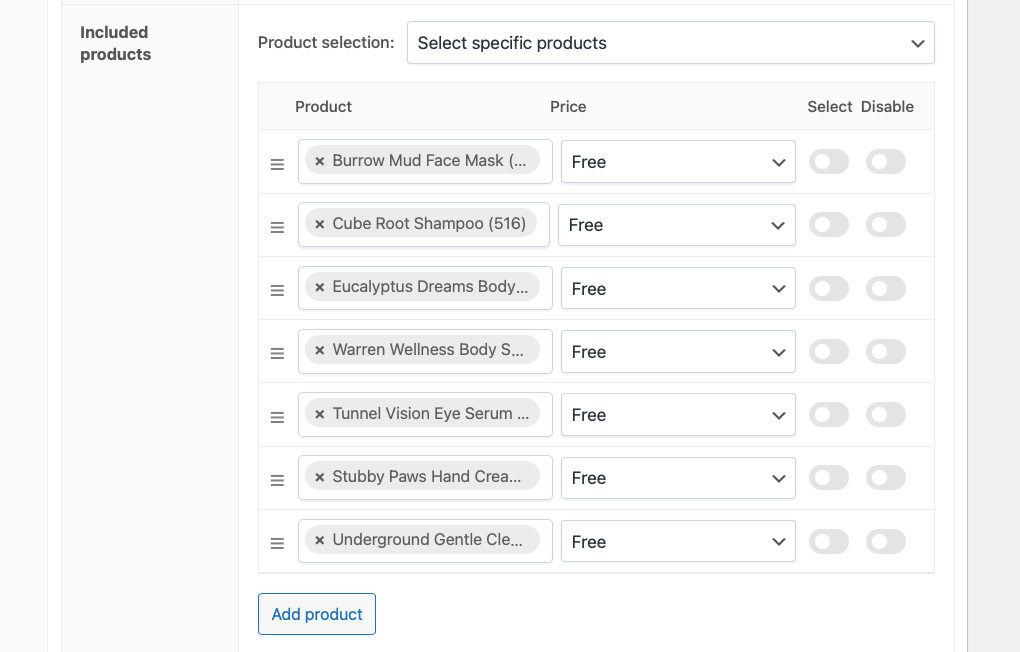
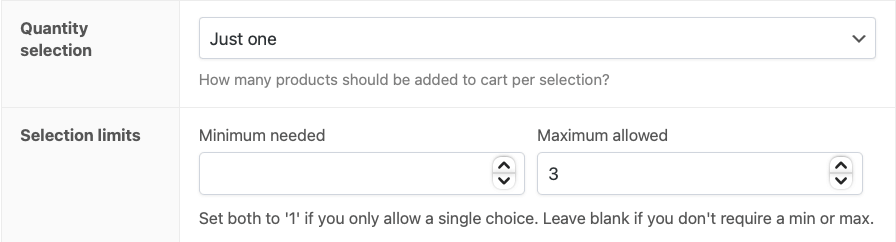
- Adjust the quantity limits. Since we have different box sizes, we’ll put a limit of 3 products for this field.
- Go to the Advanced tab to create a special conditional rule that makes this specific field appear only when the customer has chosen the “Mini Burrow” tier.

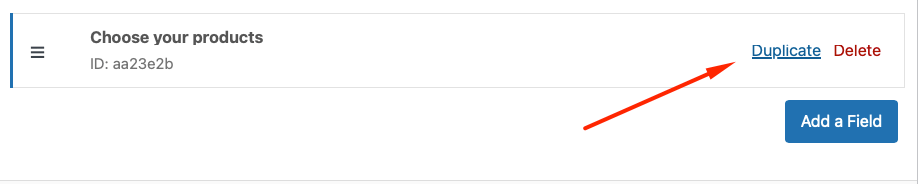
- For the other 2 tiers, we’ll create 2 more copies of the same field, and the only thing you’ll need to change is the maximum number of products and the conditional rule.
Step 4: Test and publish
Before going live, preview your product page and make sure everything works correctly.
- The beauty box product should have only one field initially – the box size select list.
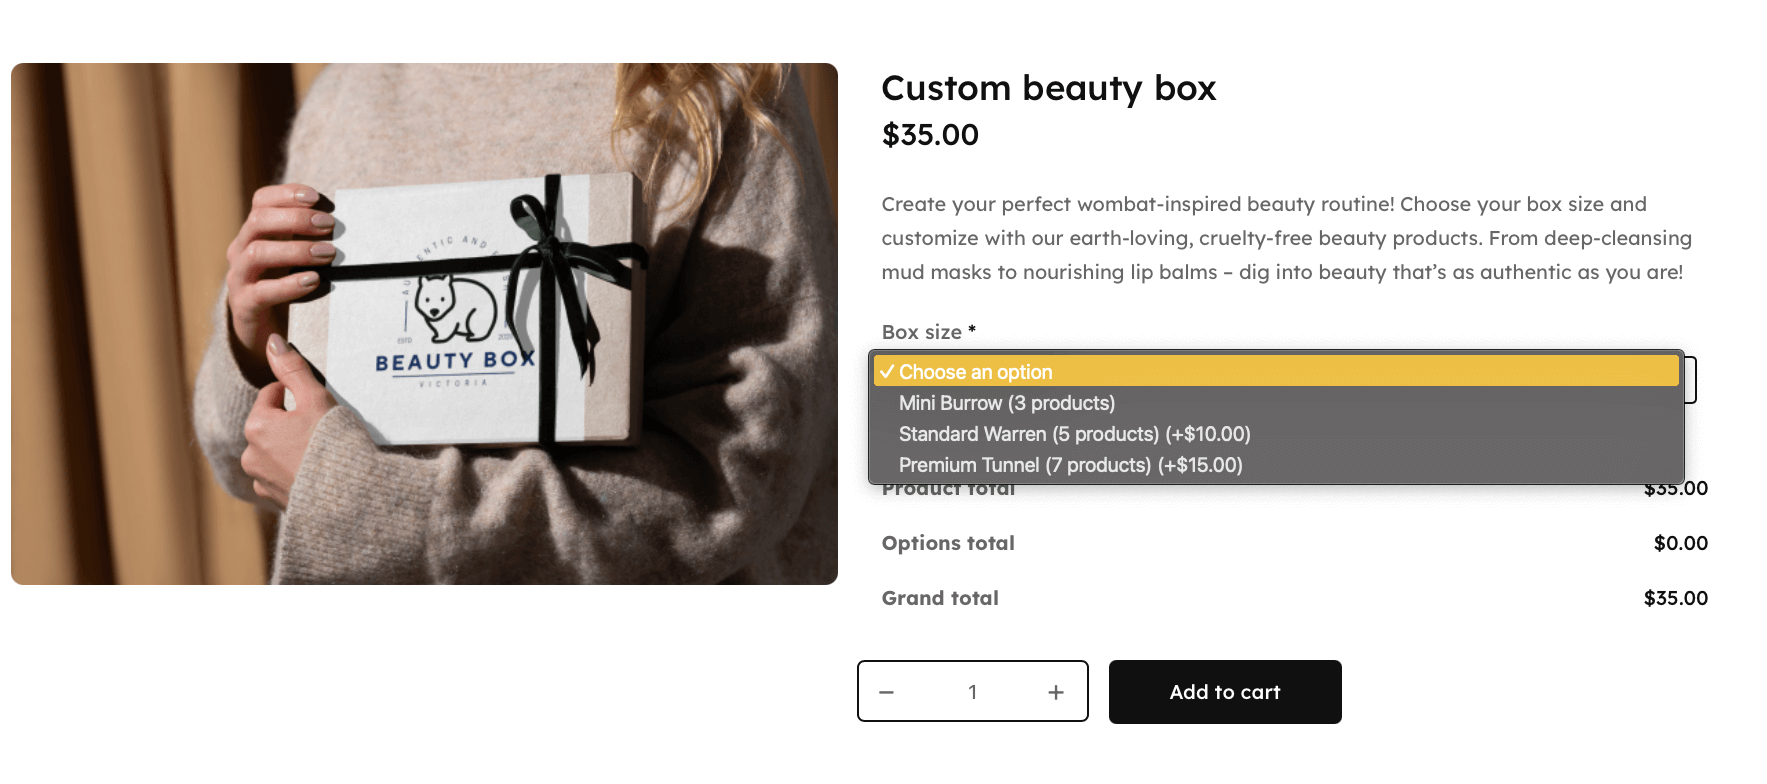
- Then, depending on the user’s choice, they will see a product selection field that allows them to add a specific number of products – 3, 5, or 7.
- When the customer adds products, the price shouldn’t change – it should only change when they select their box size.
- Finally, all products should be visible in the cart so that the buyer can confidently finish their purchase.

Did you know? You can create seasonal variations by duplicating your box product and swapping available child products – perfect for “Summer Skincare Box” or “Holiday Pamper Collection”.
Once everything works smoothly, publish your product and watch customers enjoy building their personalized beauty boxes!
Adding gift messaging to custom product boxes
Gift messaging transforms product boxes into thoughtful presents. Here’s how to implement it smoothly:
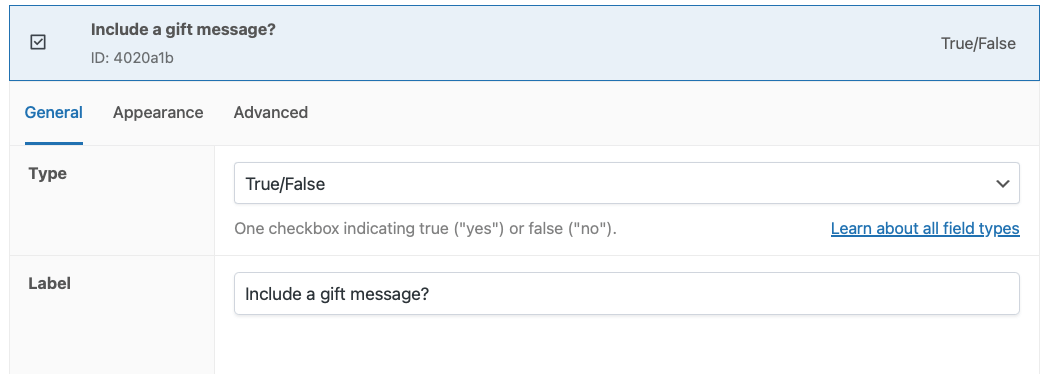
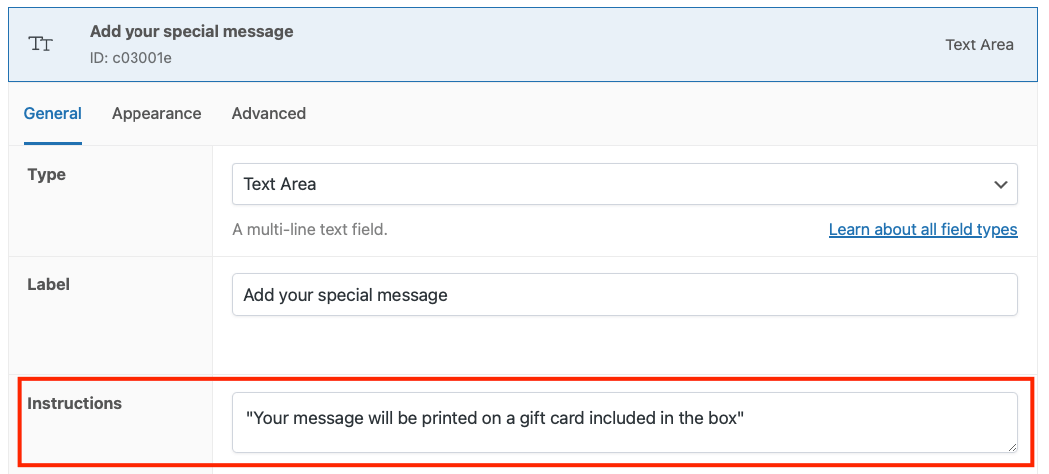
- First, add a True/False field labeled “Include a gift message?” to your product.
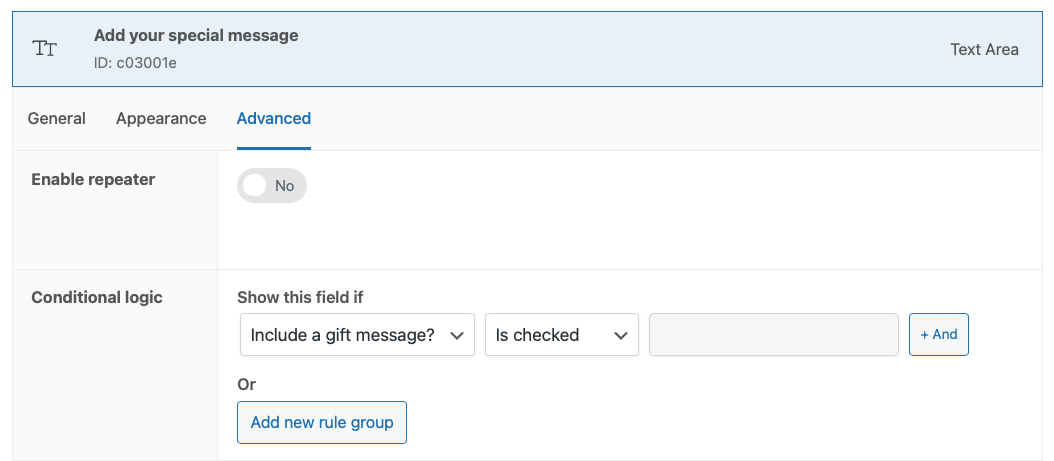
- Then create a text area field for the actual message.

- In the Advanced tab, use conditional logic to show the message field only when the gift checkbox is selected. This keeps your interface clean until needed.
Be crystal clear about delivery. Add helper text explaining exactly how the message reaches recipients:
- “Your message will be printed on a gift card included in the box.”
- “We’ll handwrite your message on our signature gift tags.”
- “Message will be emailed directly to the recipient.”
Pricing options for gift messages:
- Free add-on: Builds goodwill and encourages gifting
- Small fee ($2-5): Covers premium presentation like handwritten notes
- Tiered pricing: Basic printed message free, calligraphy upgrade for $5
Remember: Clear communication prevents disappointed customers expecting engraved products when you’re providing gift cards.
Designing an intuitive custom box product page
Creating a user-friendly custom box interface requires thoughtful design that guides customers without overwhelming them.
- Start with visual hierarchy. Place your most important information – box name, price, and quantity limits – at the top. APF lets you organize child products into clear sections, making navigation effortless.
- Embrace simplicity through progressive disclosure. Use conditional logic to reveal options only when needed. For instance, show gift message fields only after customers check “This is a gift.” APF’s conditional settings make this seamless – no coding required.
- Group products logically:
- By category (face, lips, eyes)
- By price tier (essentials vs. premium)
- By benefit (hydrating, anti-aging, cleansing)
- Visual elements matter. APF supports image swatches and product cards, letting customers see exactly what they’re selecting. Product images build confidence and reduce decision fatigue.
- Make pricing transparent. The biggest question customers have: “How much will this cost?” APF handles pricing in 2 ways:
- Variable pricing: Each product adds its individual price to the total.
- Fixed pricing: Set 1 price for the entire box regardless of selections.
Launch your custom product box solution today
Custom product boxes deliver measurable results: Higher average order values, deeper customer engagement, and a unique selling proposition your competitors can’t easily copy.
Advanced Product Fields for WooCommerce makes implementation remarkably simple. Its conditional logic creates dynamic experiences, while flexible field options accommodate any product type – from beauty boxes to gourmet bundles. The intuitive drag-and-drop interface means you’re not wrestling with code.
Most importantly? You could have custom boxes live within hours, not weeks.

Start capturing those higher-margin bundled sales today. Download APF and transform your single-product pages into interactive, personalized shopping experiences.
Find out moreCustom product boxes FAQs
Can the customer change the number of products in the box?
Yes! With custom product boxes, you can control whether customers can modify quantities in several ways:
- Set minimum and maximum quantities for each product type in the box using quantity fields.
- Create fixed-size boxes that customers can choose between e.g. “Select 3 products”, “Select 5 products”, or “Select 7 products”.
- Use conditional logic for complex quantity rules (e.g. “You can only add 6 cookies if you select the correct option.”).
Is the price of the box fixed or variable?
Custom product boxes can use different pricing models depending on your business needs:
- Fixed pricing: 1 set price regardless of which items customers select.
- Variable pricing: Price adjustments based on customer selections and product prices.
- Flat fees: Add a custom flat fee to different box sizes.
- Quantity-based fees: Add a flat fee depending on the number of products added.
How does this align with my inventory of items?
With the “Products” field, all products are child products, so individual inventory is tracked when included in custom boxes. This means that stock status can be configured to handle component products going out of stock, and you can use inventory data to forecast demand for specific products in your boxes.
Can I pre-create boxes that customers can modify?
Yes! For example, if you wanted to create a beauty box that contains lipstick, foundation, and mascara, you could build that, and then customers can select which shade of each item they would like.
Is Advanced Product Fields for WooCommerce compatible with my current WooCommerce setup?
Most likely! The plugin is compatible with any theme that adheres to WooCommerce standards. Our plugin is also designed to take over the styling from your theme, so it integrates gracefully.
It also works well with a wide range of 3rd-party plugins. However, it’s practically impossible to test all of them, so please check out the published list of compatible plugins here.
The situation is similar for the various page builders – the plugin is compatible with any page builder that supports WooCommerce. We have successfully tested the plugin with Elementor, Oxygen, WPBakery, Beaver Builder, and Divi. However, there are a few notes about page builders to keep in mind, so please refer to this document.
