
Using WooCommerce to accept donations might not be your first choice, as there are dedicated plugins out there that offer donation functionality. The issue with those plugins is that they’re often quite expensive.
Implementing a donation system on your WooCommerce store is quite easy and it comes with all the power of WooCommerce out of the box: payment gateways, reporting, etc. so we think it’s an excellent choice for donations!
In this guide, we’ll go over all the steps needed to build a donations product in WooCommerce!
Pros & cons of using WooCommerce to build a donations form
Everything has pros and cons; so does using WooCommerce for donations:
- ✅ Using WooCommerce is cost-effective. There are dedicated donations plugin, such as GiveWP or WP Charitable, that also offer donation functionality. The problem with those plugins is that they’re quite expensive, and often do more than you need.
- ✅ WooCommerce has powerful features out of the box: WooCommerce comes with the payment gateway and reporting built-in, so you don’t have to worry about those features and you don’t have to pay for them either. Moreover, there are tons of free & paid plugins that allow you to do just about anything with WooCommerce.
- ❌ You need 2 plugins. WooCommerce doesn’t have anything built in to accept custom dollar-amount donations, so you need another plugin to build that functionality. This means you’ll end up with 2 extra plugins: WooCommerce and one to build a donations form (more on that later).
- ❌ If you need advanced donation features, such as peer-to-peer donations or donor management, WooCommerce is not the right choice. Then you should opt for a donation-specific plugin that has all the bells and whistles to create complex donation campaigns.
In short: if you only want customers to select a dollar amount or a custom donation amount, then WooCommerce is a solid choice! If you want advanced features, you should probably look into other plugins.

Building a donations form with WooCommerce
As mentioned, you’ll need an additional plugin to build the donations form on top of WooCommerce. Introducing Advanced Product Fields for WooCommerce (APF)! Luckily, the plugin is inexpensive and powerful enough to handle multiple use cases!

APF is a versatile plugin that lets you add custom forms to your WooCommerce products, essentially allowing you to ask your customers any information before they add the product to their cart. The plugin can also change the price depending on options selected, which is the perfect feature to build a donations product.
Let’s jump into the tutorial! For the purpose of this guide, we assume you have WooCommerce installed and up & running.
Here’s a demo of the product we’ll be building:
Step 1: Install the plugin
To get started, purchase Advanced Product Fields for WooCommerce from the store and follow these steps:
- Go to Plugins → Add New → Upload Plugin.
- Choose the .zip file you downloaded, upload it, and then click Activate.
You’re now ready to create a donation form!
Step 2: Create a donation product in WooCommerce
Via the main menu in WordPress, go to Products → Add New to create a new product. Make sure it has the following data:
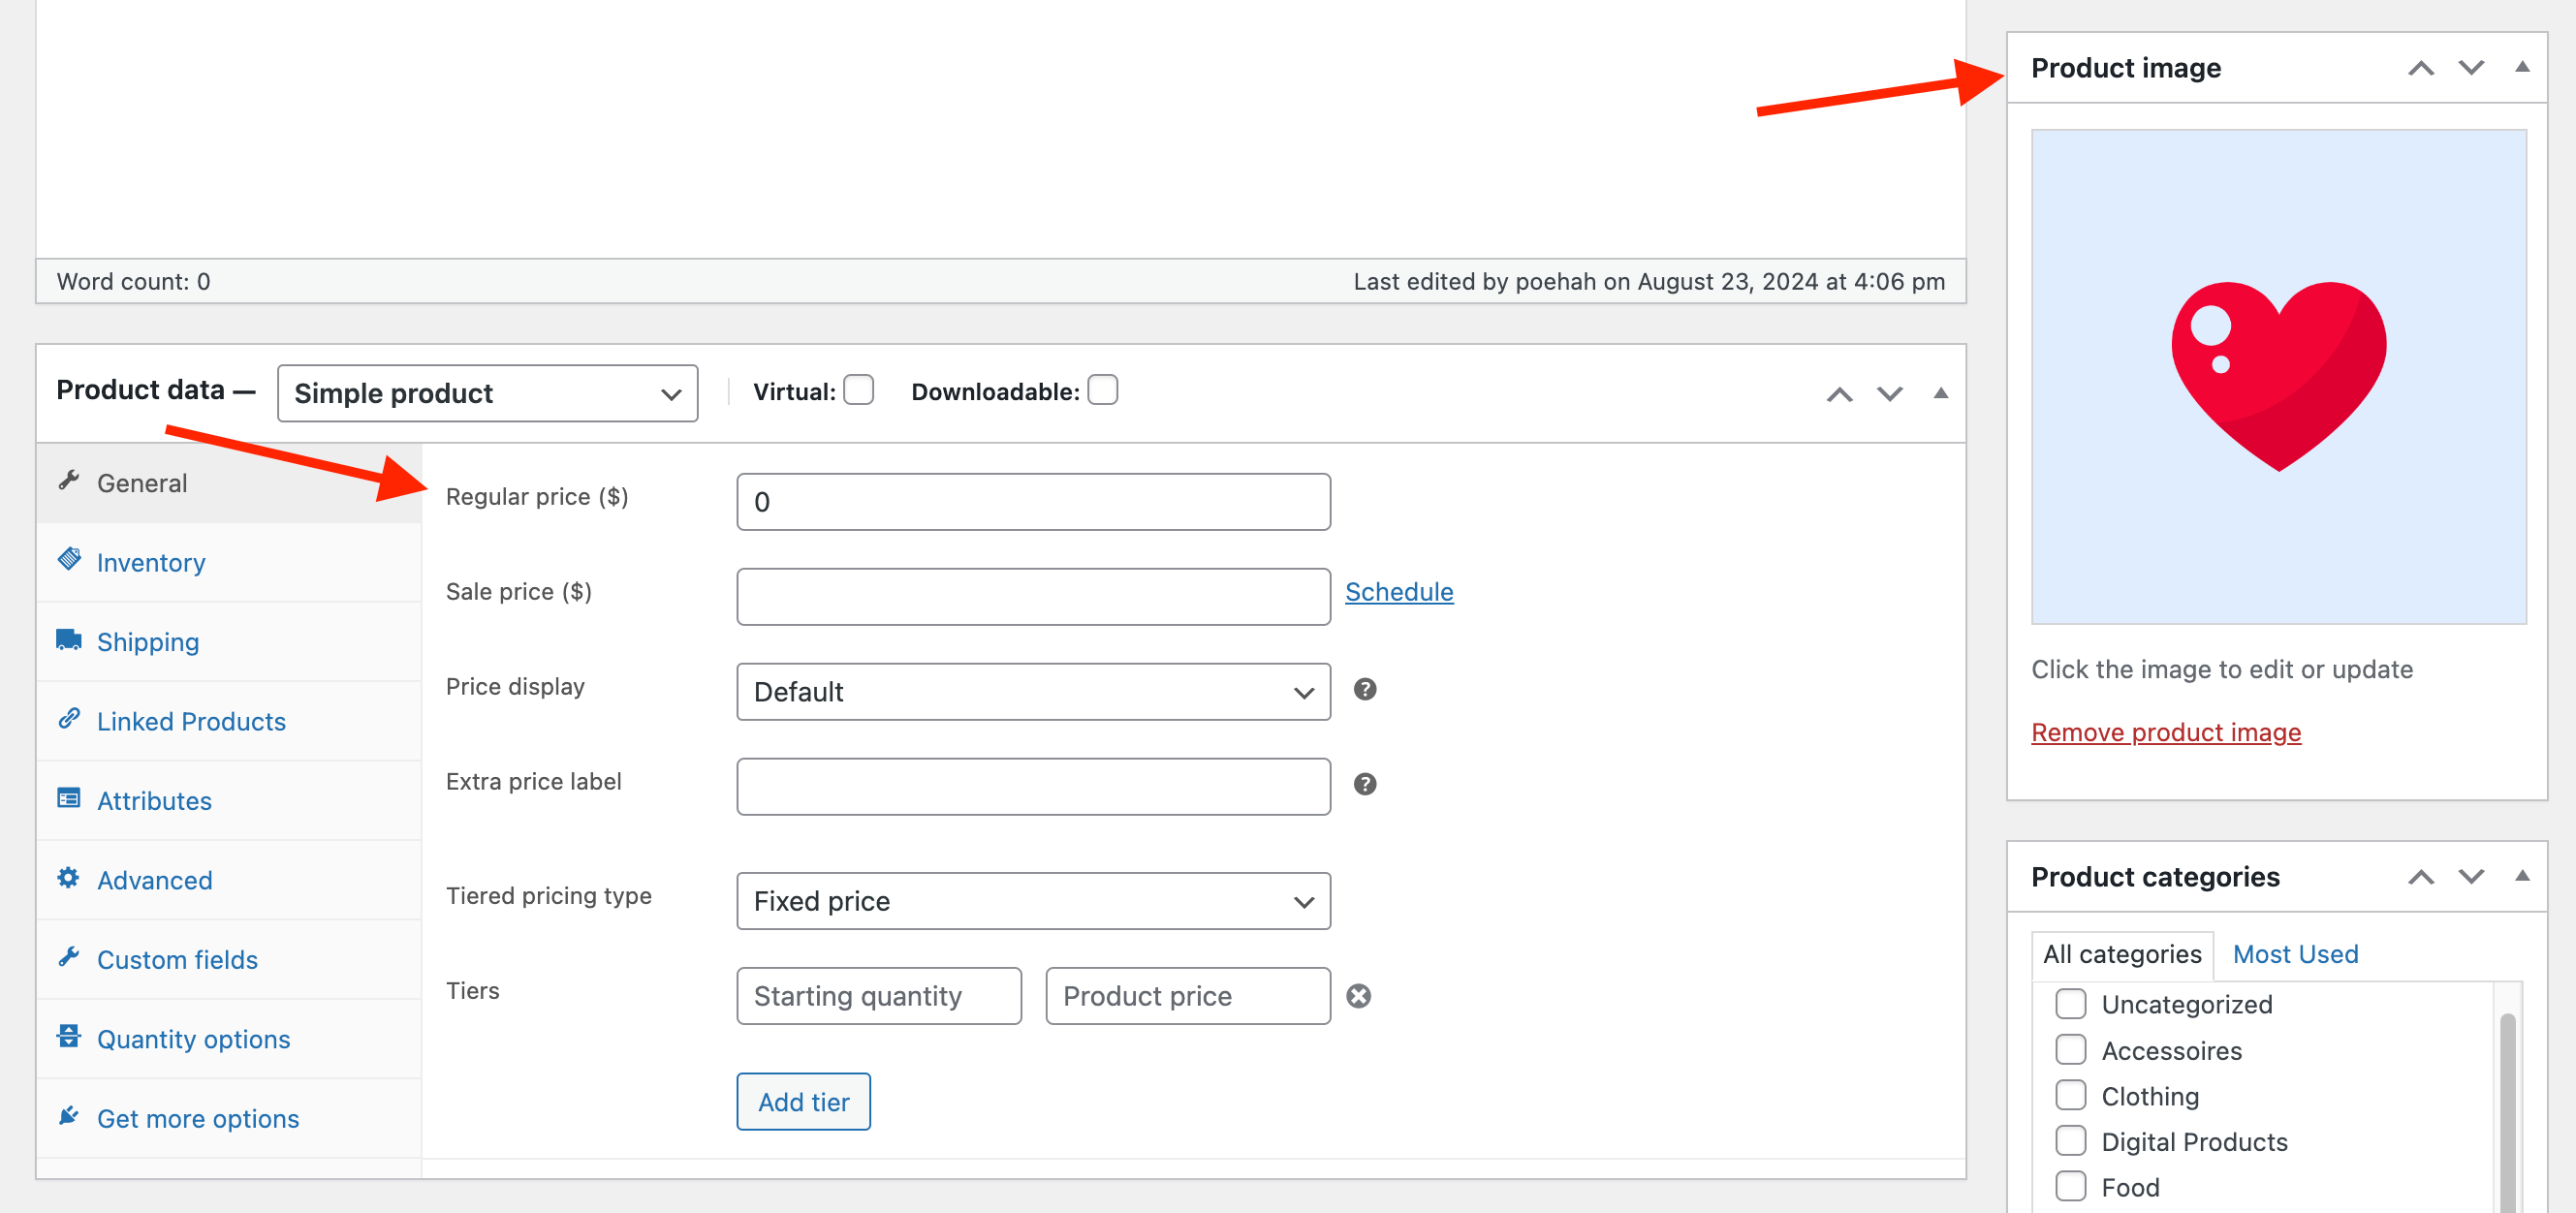
- In the General tab, set the Regular Price to zero. The base price of this product is zero as customers will be able to choose how much they want to donate.
- Add a nice Product Image.
- Enter a Product Short Description if you want to add some content about the charity or donation customers will be supporting.
Step 3: Create the donations form
This is where the magic happens. We’ll offer customers a choice between some pre-defined amounts (as clickable buttons), or they can enter a custom amount (in a number field):
- In the Custom Fields tab, you can add the form fields that should appear on this product page. Click Add Your First Field to get started. We’ll create the first field: clickable buttons for the fixed dollar choices.

- Now let’s configure the field:
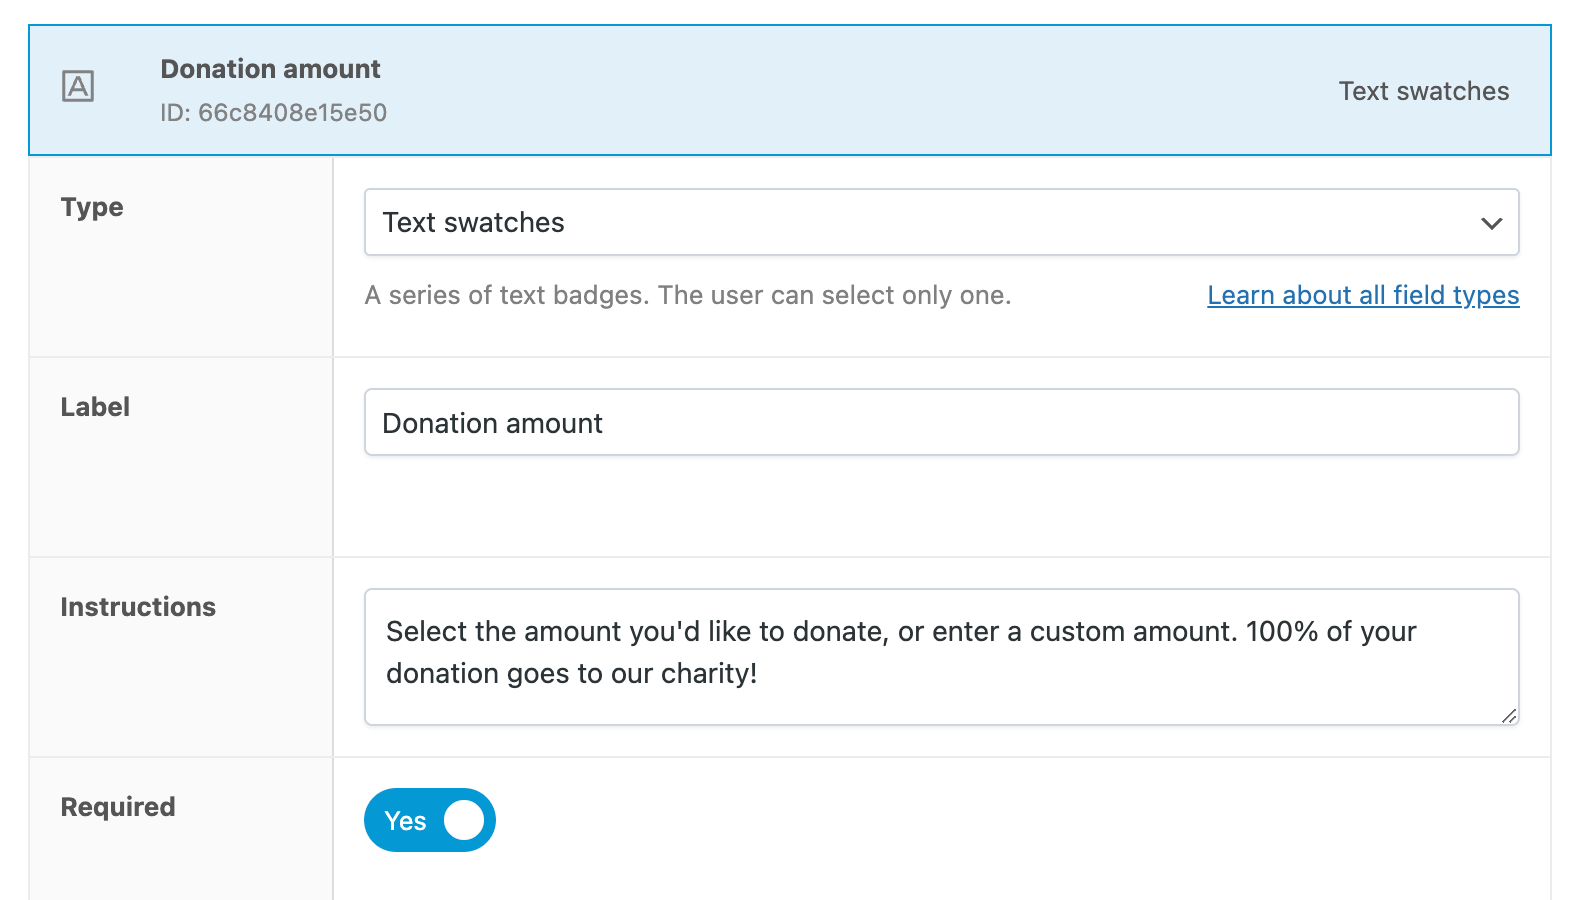
- Set the Field Type to Text Swatches.
- The Label is the field’s title that appears above the choices on the product page. We chose to label it as “Donation amount”.
- Add additional Instructions to make it more clear for your customers what to do. The instructions will appear below the field’s title.
- Mark the field as Required so the customer has to make a choice before they can donate.
- You can create the donation choices in the field’s Options settings:
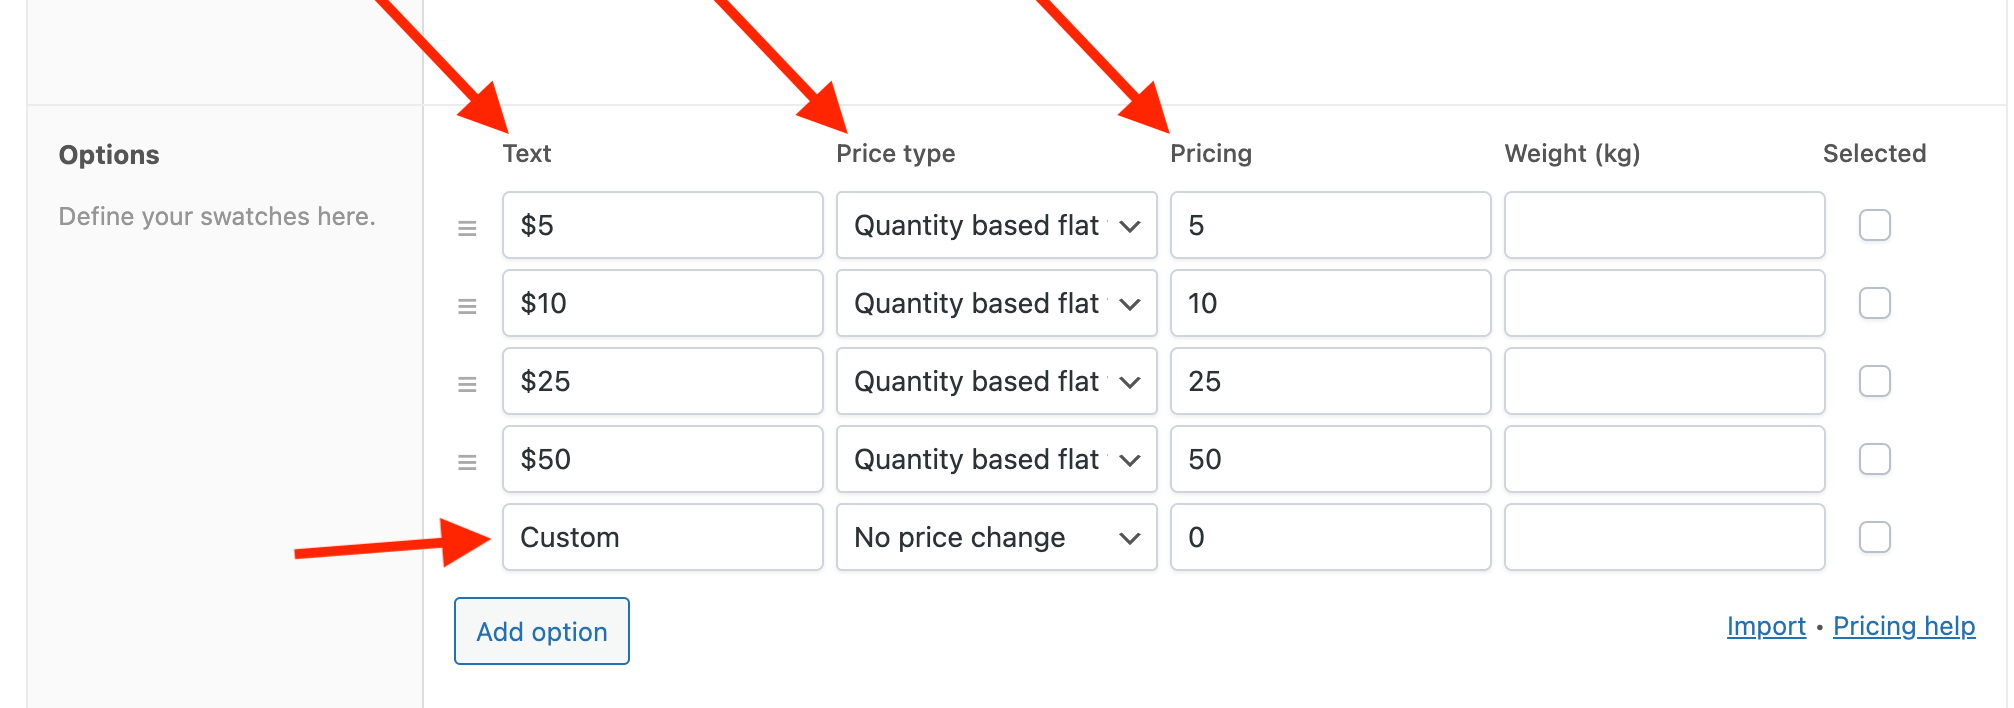
- The Text is what will appear on the clickable buttons.
- Each choice should change the product price, so set the Price Type to Quantity Based Flat Fee. In the adjacent Pricing setting, define the actual donation amount.
- As last choice, set the button text to “Custom”. When the user clicks that button, a new field will appear where they can enter a custom donation amount.
- Now it’s time to create our 2nd field: a number field where users can enter the custom amount they wish to donate instead of any of the pre-defined choices.
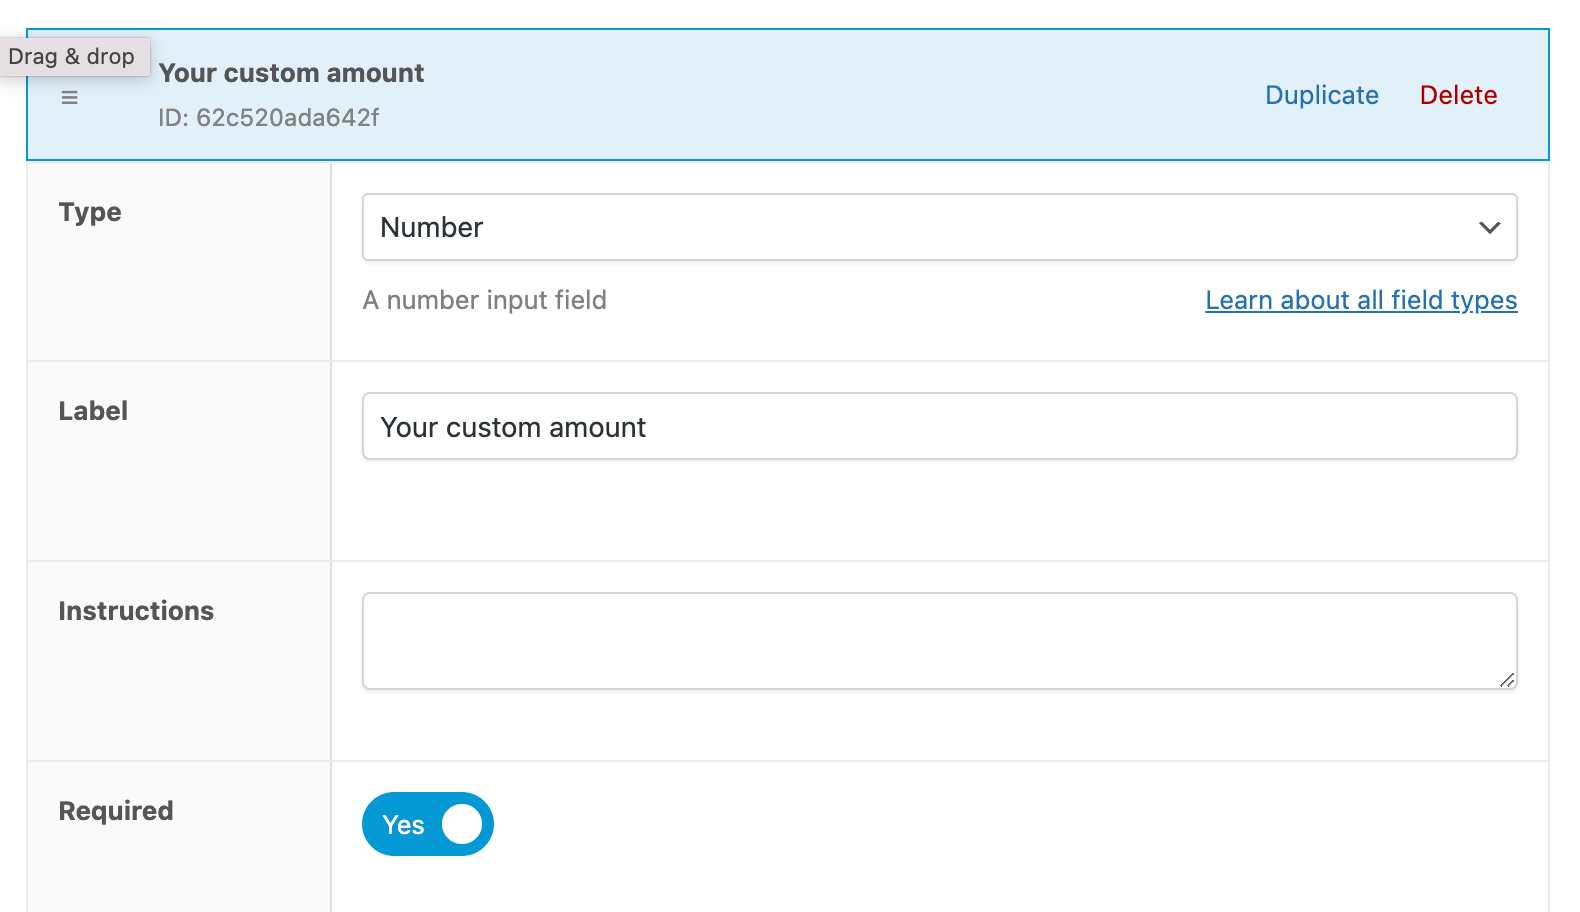
- Set the field type to Number, allowing customers to only input valid numbers.
- Don’t forget to mark the field as Required.
- The custom input field should only appear when the customer chose “Custom” as their donation amount. This can be done by setting up conditional logic. Navigate to the Advanced tab and click Add New Rule Group in the Conditional Logic section:
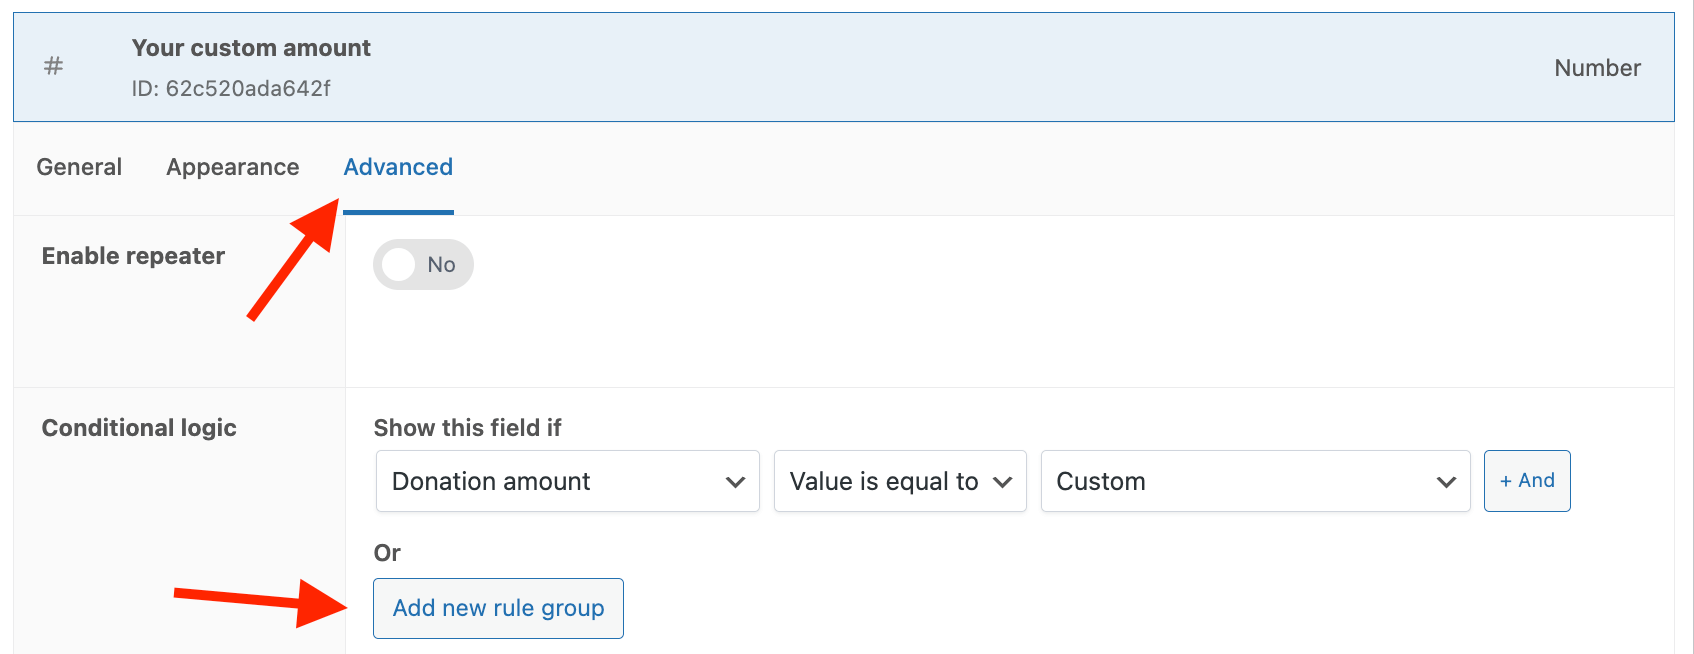
- Now define the conditional as in the image above.
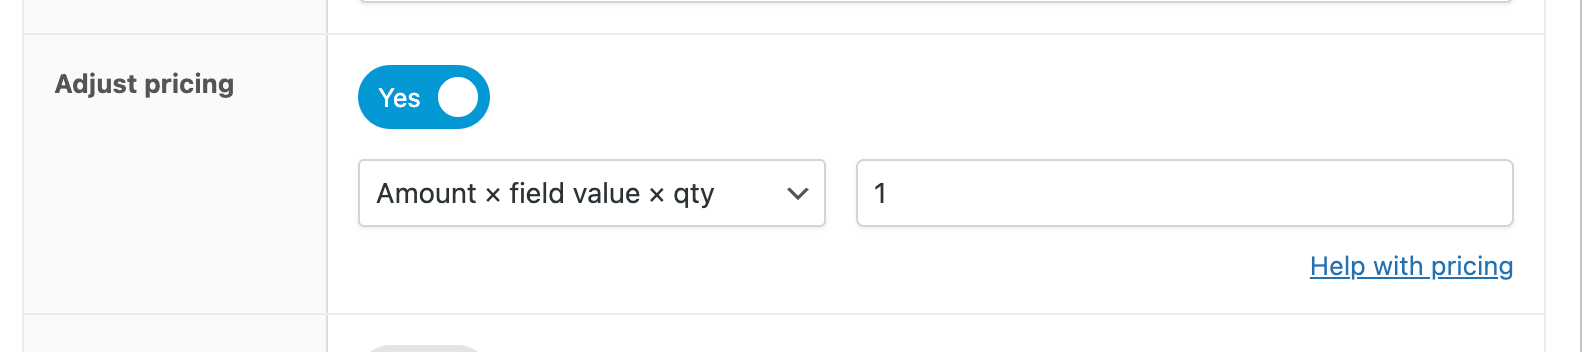
- This field should change the final product price to any amount the user enters. Go back to the General tab, and enable the Adjust Pricing setting and set the pricing type to Amount x Field Value x Qty and define the value as “1” in the adjacent setting.
That’s it! Save or update the page and you now have a donation product! WooCommerce takes care of the rest.
Bonus: Change the “add to cart” text to “donate”
By default, WooCommerce includes an “Add to Cart” button, but it looks better if the button reads “Donate”. This can be done by adding a simple code snippet to your site:
add_filter( 'woocommerce_product_single_add_to_cart_text', 'wc_custom_single_add_to_cart_text', 10, 2 );
function wc_custom_single_add_to_cart_text($text, $product) {
	return 'Donate';
}Code language: PHP (php)
If you want to change the button just for one product, you can add the product ID to the code snippet, like so:
add_filter( 'woocommerce_product_single_add_to_cart_text', 'wc_custom_single_add_to_cart_text', 10, 2 );
function wc_custom_single_add_to_cart_text($text, $product) {
   if( $product->get_id() === 123 )
      return 'Donate';
   return $text;
}Code language: PHP (php)
Bonus 2: Skip cart and go straight to checkout
We’d like our customer to pay for their donation directly. We don’t need them to go to the cart page first. Here’s how you can make that possible:
- Within your store’s WordPress dashboard, navigate to WooCommerce → Settings → Products → General.
- Locate the Add to Cart Behaviour section and tick the checkbox to redirect to the cart page after successful addition. Now scroll down to the bottom and click Save Changes.
- Next, navigate to WooCommerce → Settings → Advanced → Page setup. Type Checkout Page in the Cart Page dropdown. Finally, save your settings again.
Use WooCommerce to build a donations form
WooCommerce is so versatile that any use case is possible. This tutorial proves that building donation products is just as easy!
Start with APF today, and witness a remarkable difference in your fundraising initiatives!

The easiest way to accept donations with WooCommerce
Check out the plugin