
Do you run an online store with hundreds or thousands of products? If yes, you’re probably aware that manually adding each item to WooCommerce is time-consuming and a recipe for errors and frustration. Thankfully, there are bulk uploading options that let you import products efficiently while maintaining accurate data, no matter if you’re updating your current catalog or starting an online store from scratch.
In this guide, we’ll walk you through three reliable methods for bulk adding products to WooCommerce: using the built-in CSV importer, using a plugin, and importing with WP-CLI. You’ll learn how to prepare your data, execute successful imports, and verify your results. Plus, we’ll show you how to enhance your imported products with custom options that improve the shopping experience.
How to manually import CSV files into WooCommerce
Step 1: Create your CSV file
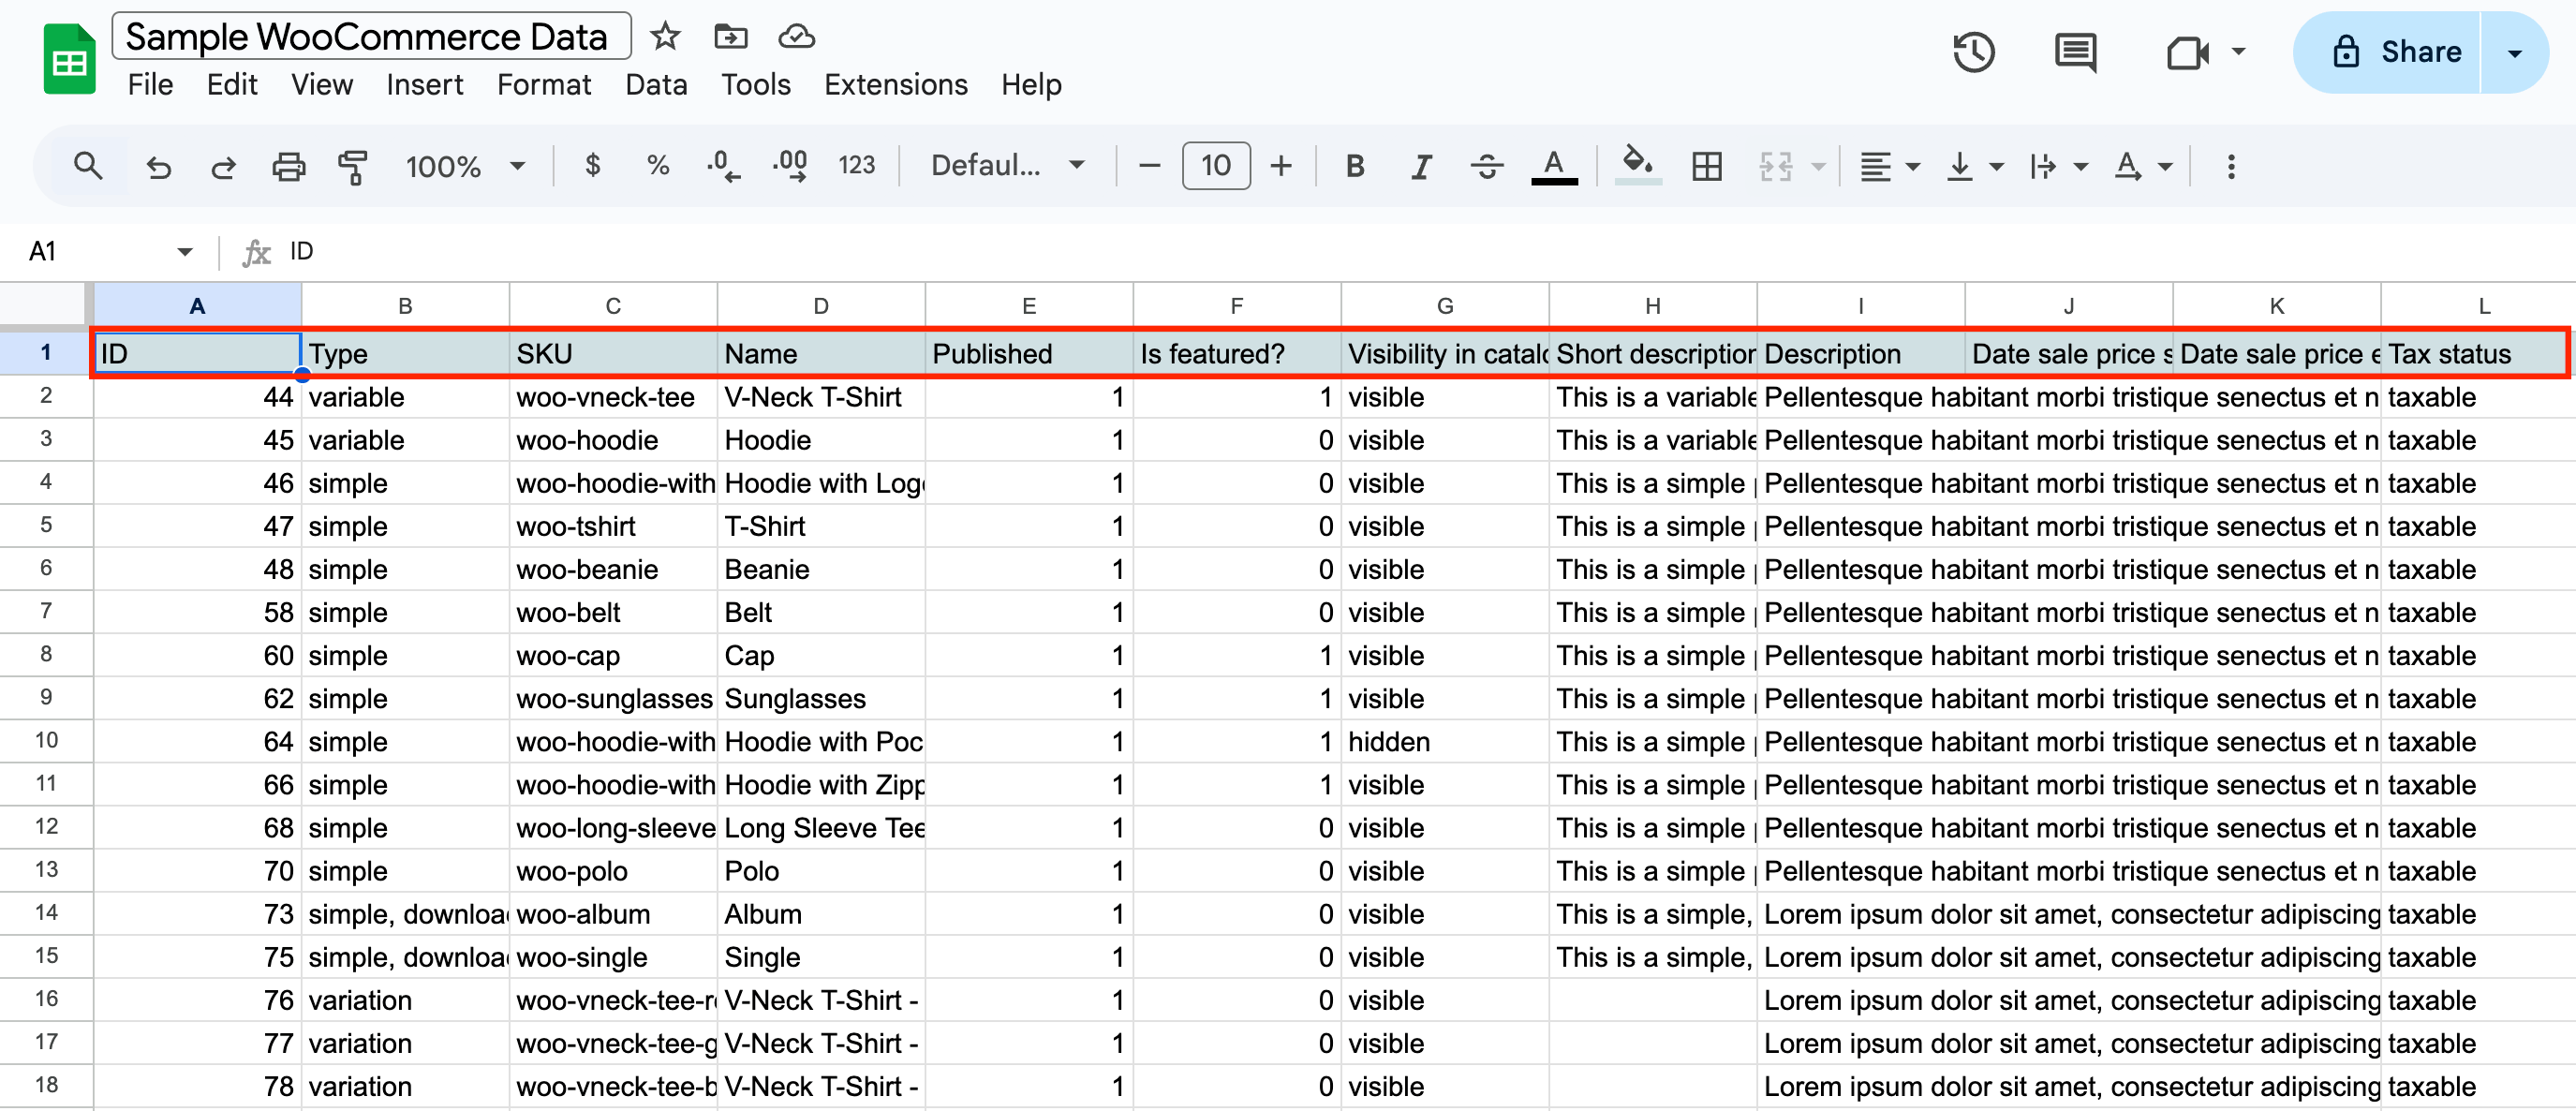
Before starting your import, you’ll need a properly formatted CSV file. The easiest way to ensure correct formatting is to use WooCommerce’s sample CSV file, located in the plugin folder under “sample-data”. This template includes all the necessary column headers and shows you exactly how to structure your product data.
You can create your CSV file using:
- Microsoft Excel
- Google Sheets
- Apple Numbers
- Any spreadsheet software that can save files in CSV format
Important formatting tips:
- Save your file in UTF-8 encoding to prevent special character issues
- Use commas as delimiters between fields to separate the data
- Keep your file under 128MB to avoid upload limits
- Remove any blank rows or columns
- Double-check that dates match your WordPress timezone
Step 2: Input products to the CSV file
When filling out your CSV, include these essential product details:
- SKU (unique product identifier)
- Product name
- Regular price
- Sale price (if applicable)
- Description
- Categories
- Stock quantity
- Product type (simple, variable, etc.)
- Weight and dimensions
- Tax status and class
- Shipping class
- Featured product status
- Product visibility settings
For advanced product features:
- Separate multiple values within fields using commas
- Use “>” to indicate category hierarchy (example: “Clothing > Shirts > T-Shirts”)
- Set visibility with “visible”, “catalog”, “search”, or “hidden”
- Mark featured products with “1” for yes or “0” for no
- Include image URLs for product photos (must be accessible online)
Step 3: Upload the CSV file to WordPress
Navigate to Products → All Products → Start Import in your WooCommerce dashboard.
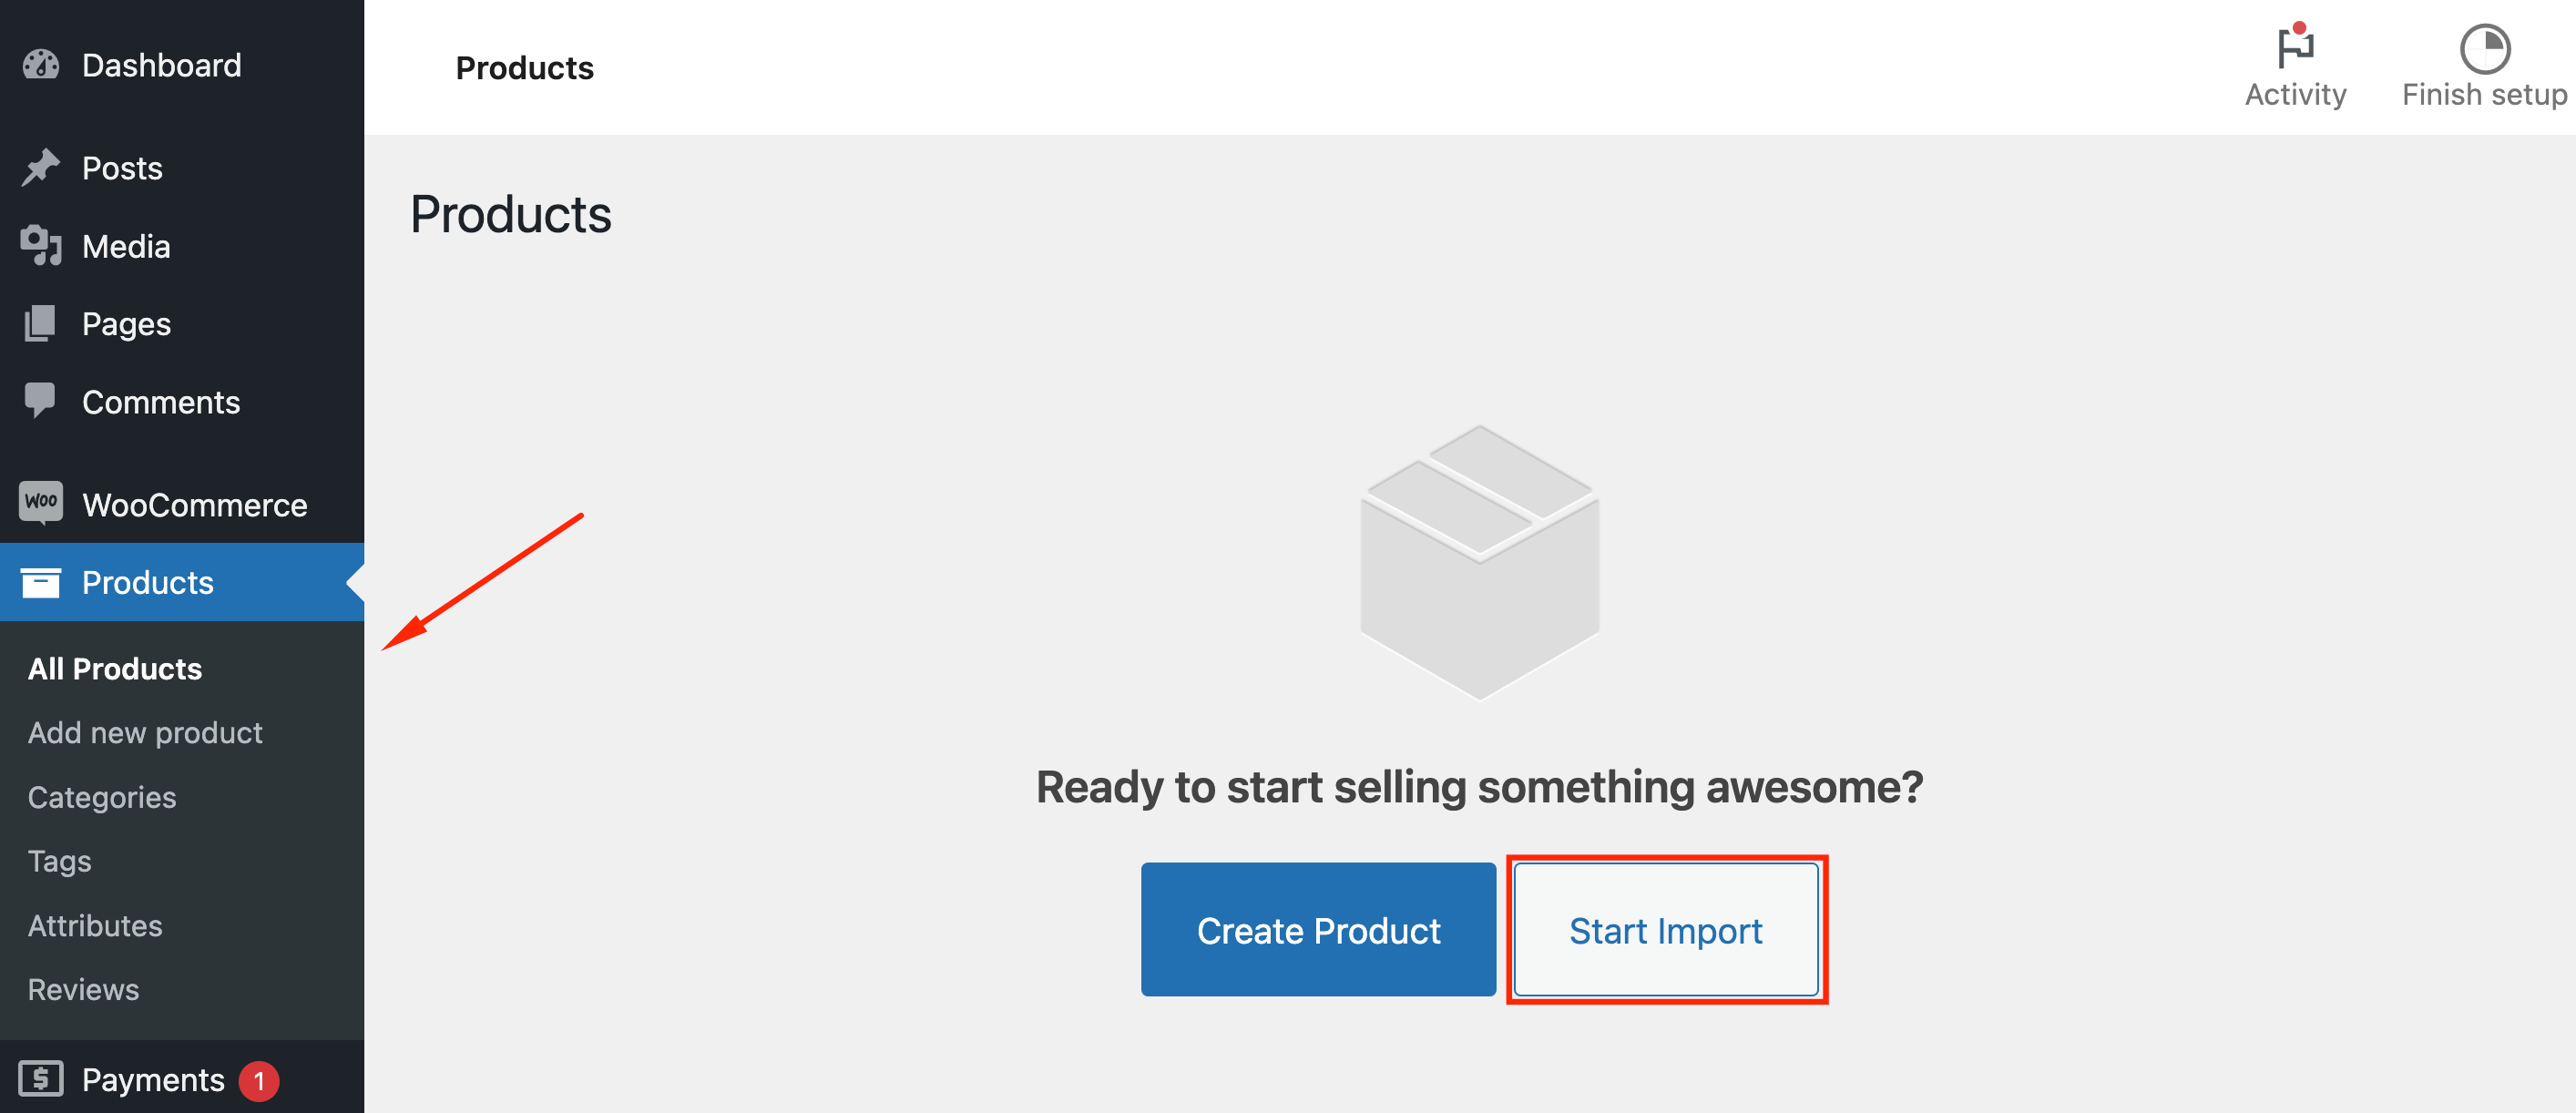
Click Choose File and select your CSV file.

You’ll also see the option to update existing products if they match by ID or SKU and skip products that don’t exist. Select this based on whether you’re adding new products or updating existing ones.
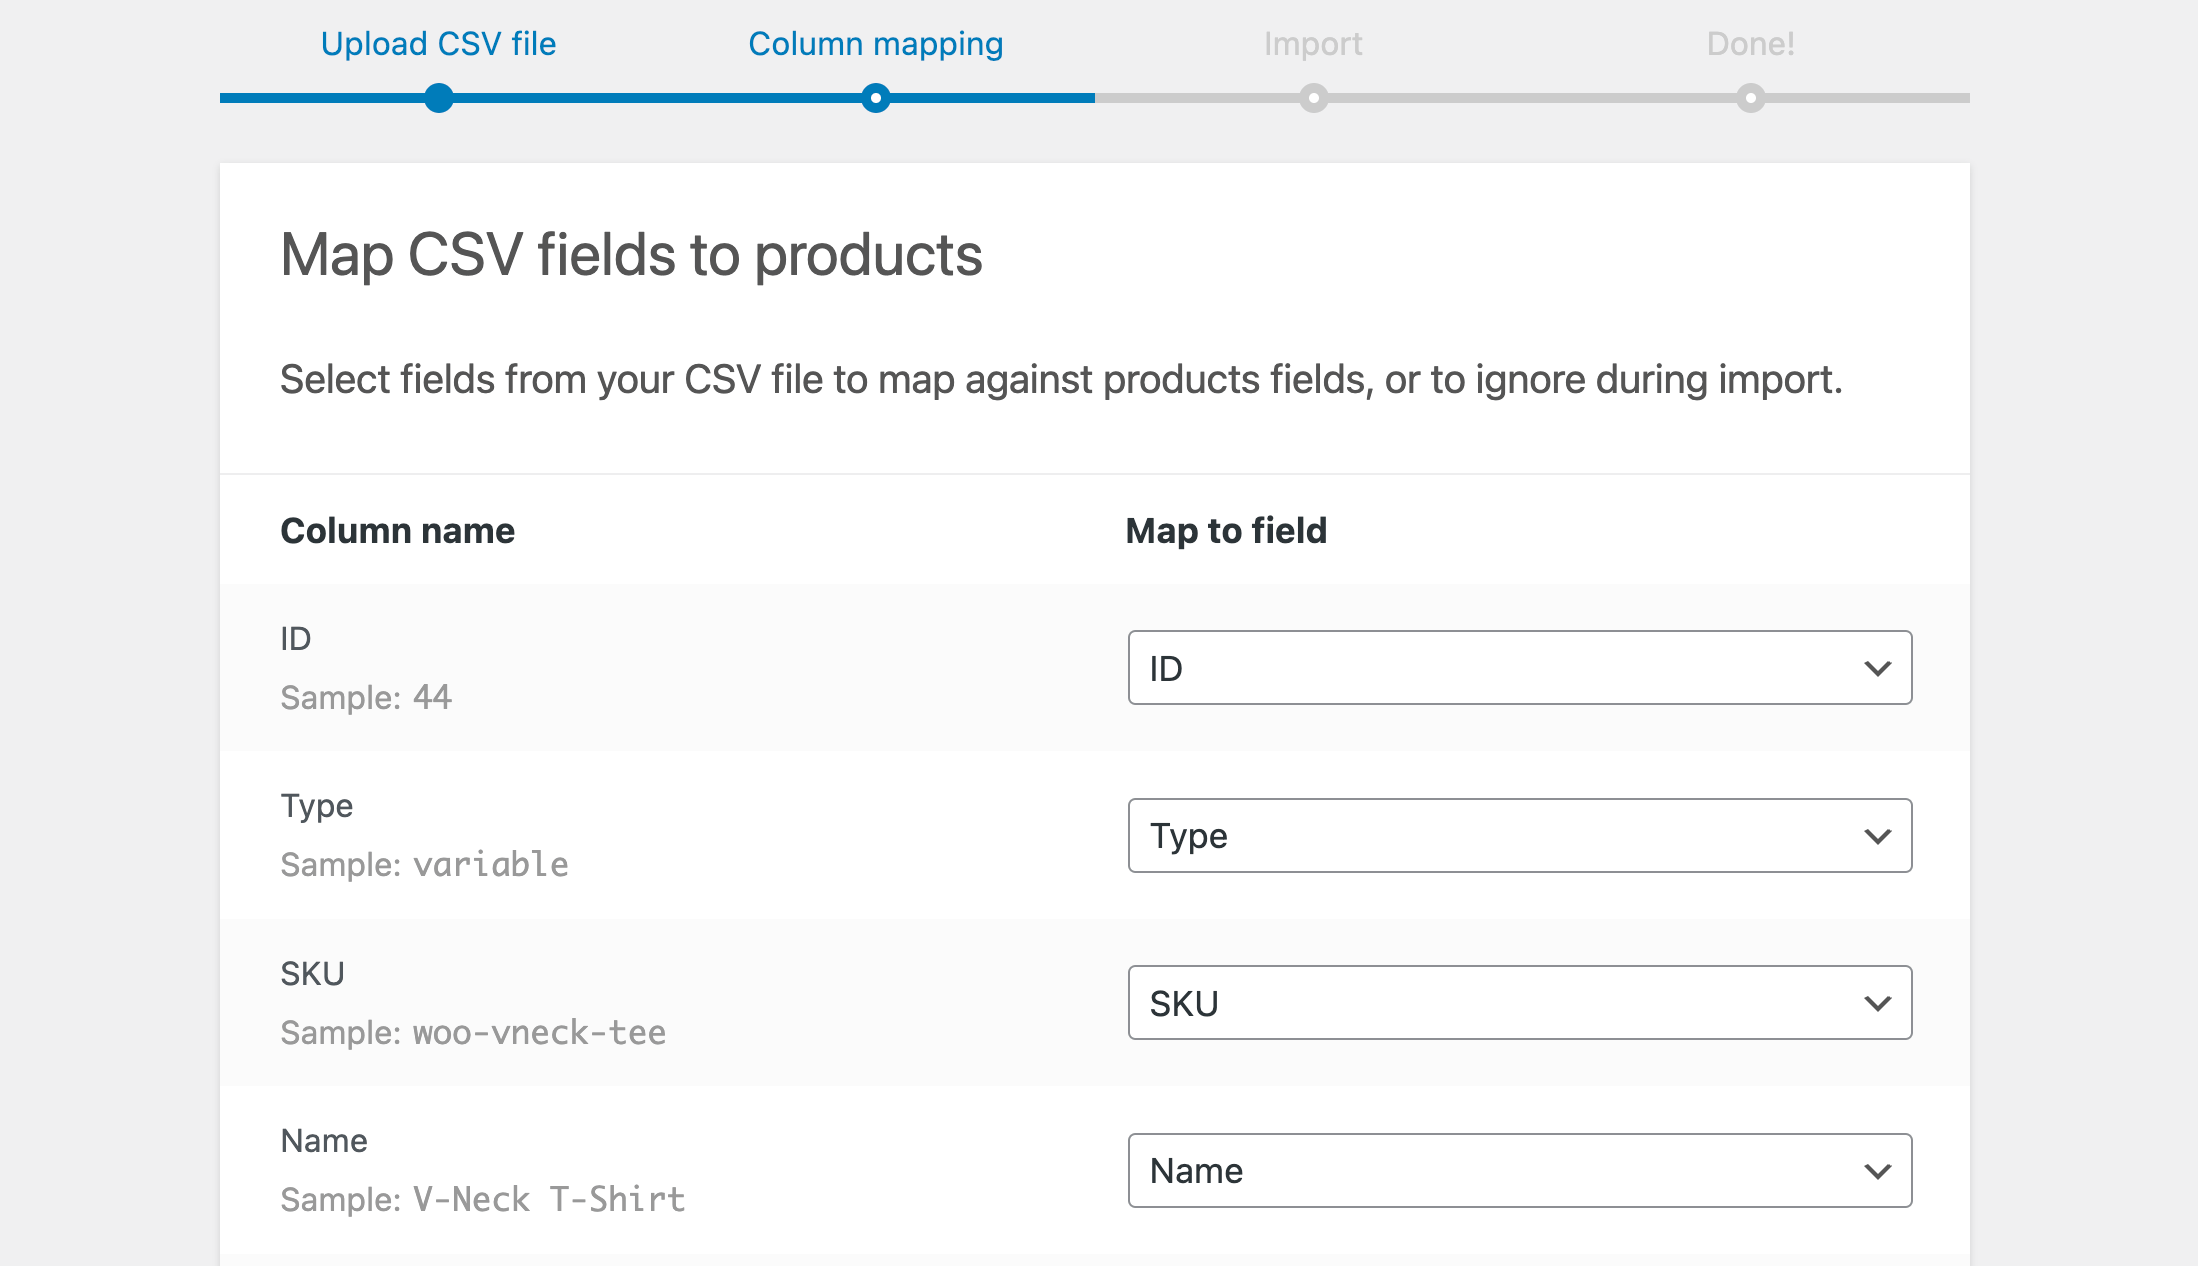
After that, you’ll have to check whether the columns match the information – this step is called Column mapping.
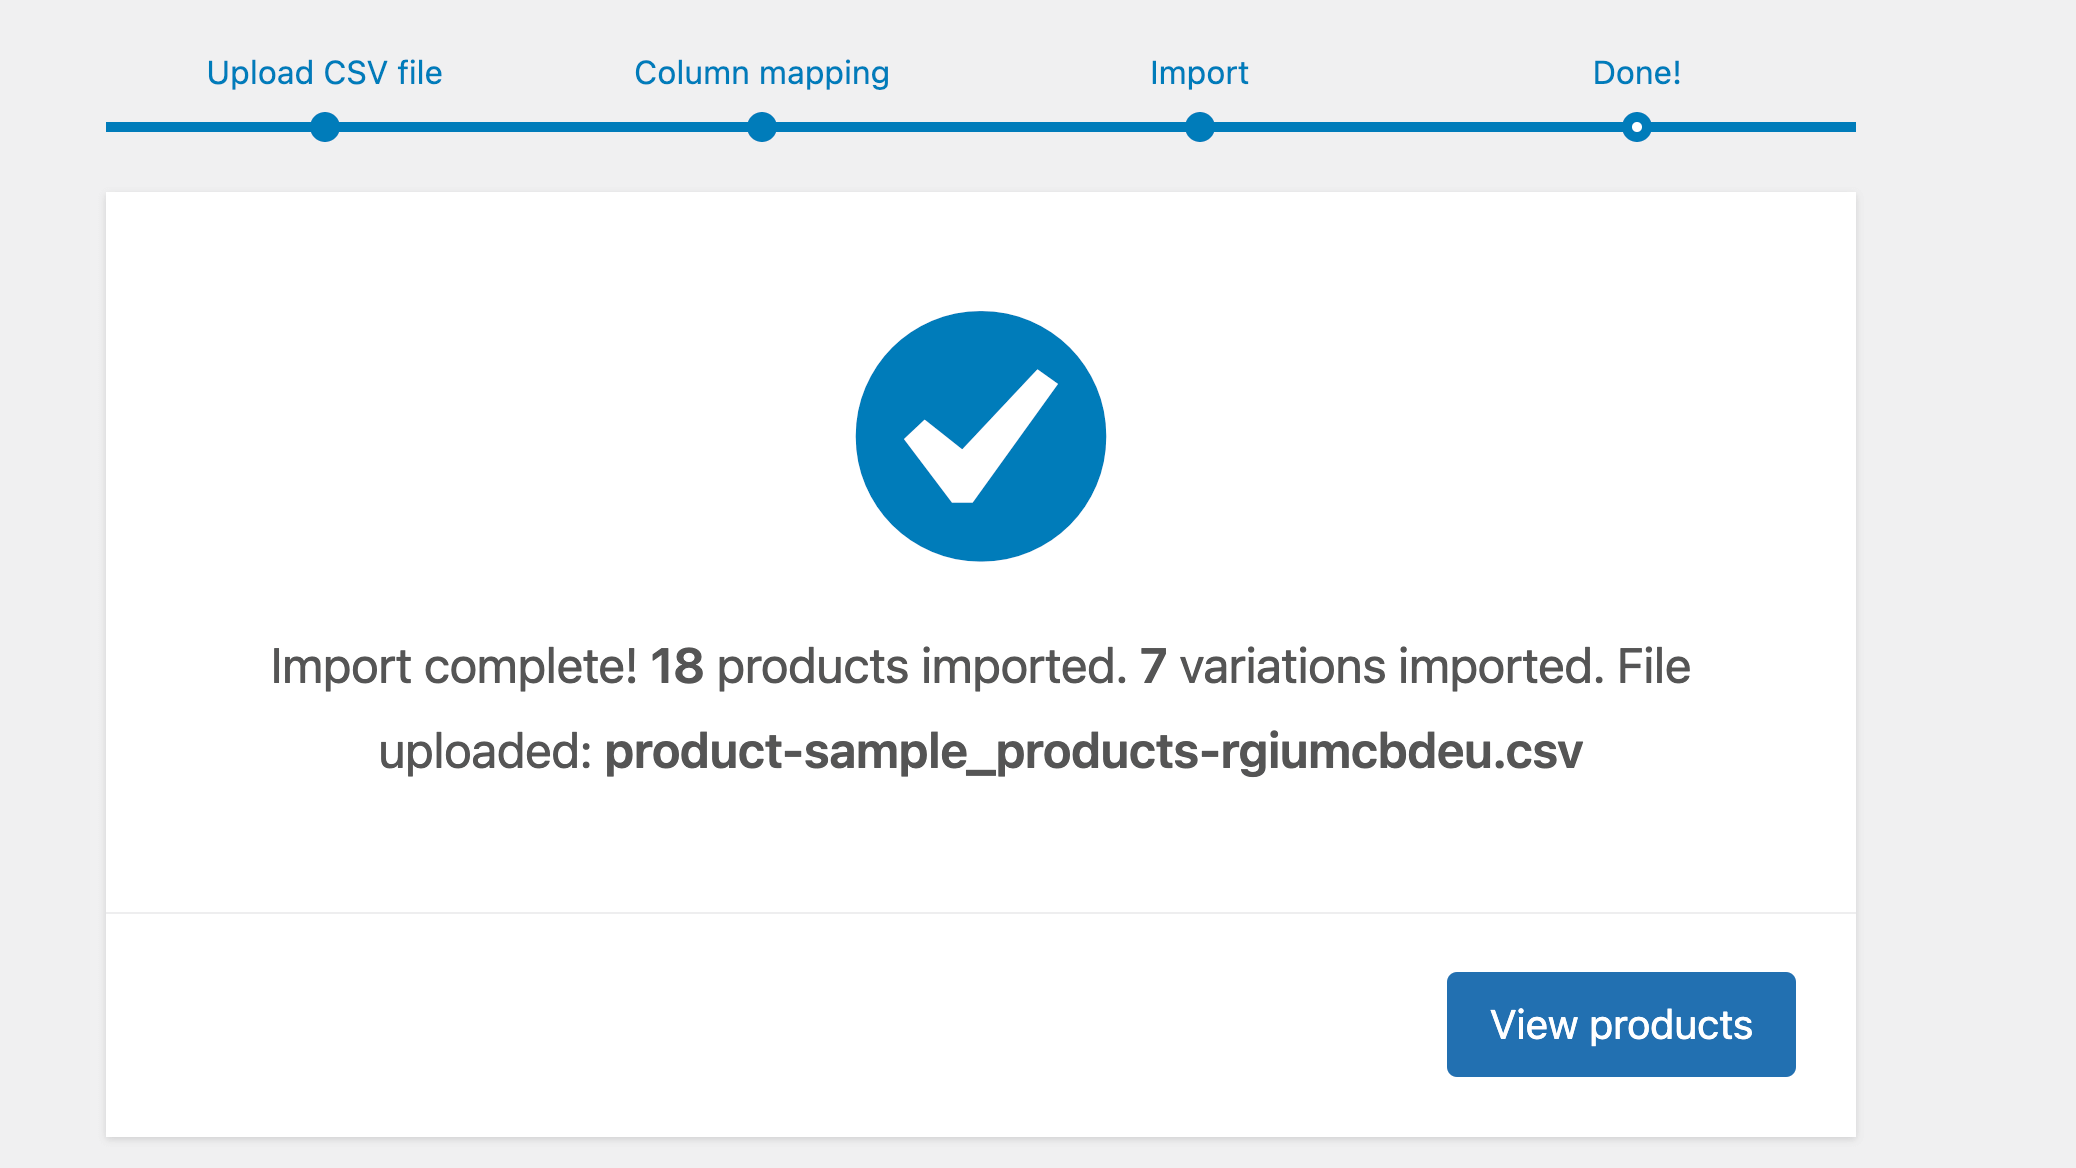
Once you’ve checked everything, click “Run the importer”
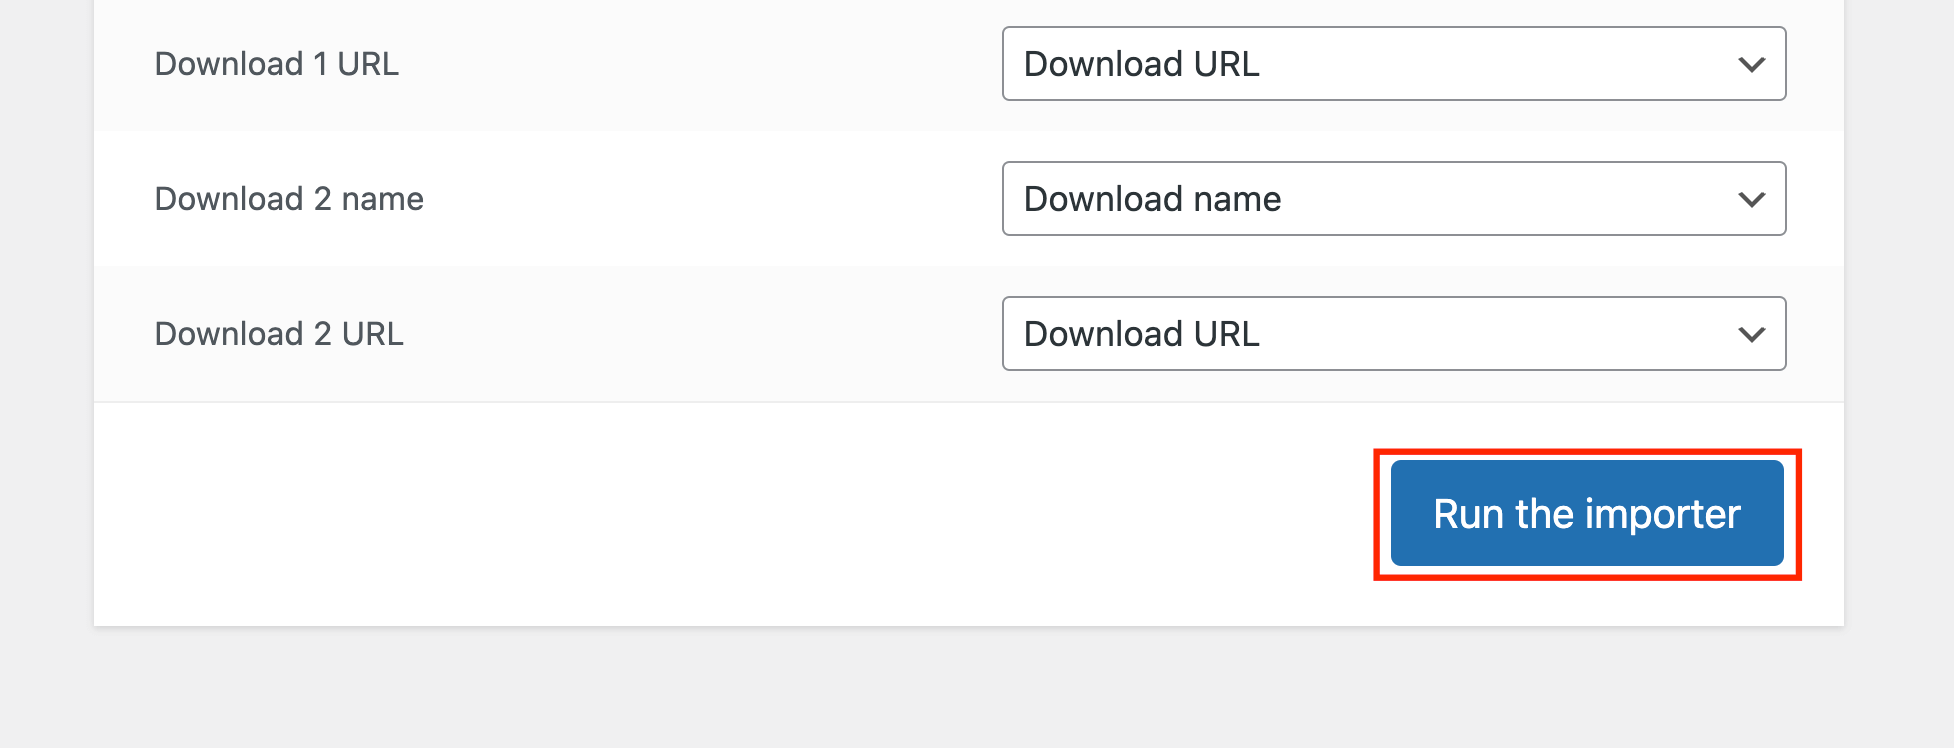
If everything was uploaded correctly, you should see a window that says, “Import complete!”
Step 4: Verify the upload
After the import completes:
- Check that the total number of imported products matches the entries in your CSV file
- Review several random products to ensure all fields have been imported correctly
- Verify whether product images appear properly
- Test that pricing and inventory numbers are accurate
- Confirm that categories and tags are assigned correctly
- Check whether product variations link properly to parent products
- Ensure custom fields are imported correctly
- Test product search and filtering functionality
If you find any issues, you can always delete the imported products and try again after fixing your CSV file. Common problems to watch out for include:
- Missing or duplicate SKUs
- Incorrect category hierarchies
- Broken image links
- Missing variation attributes
- Incorrect price formatting
Step-by-step bulk import process using a plugin
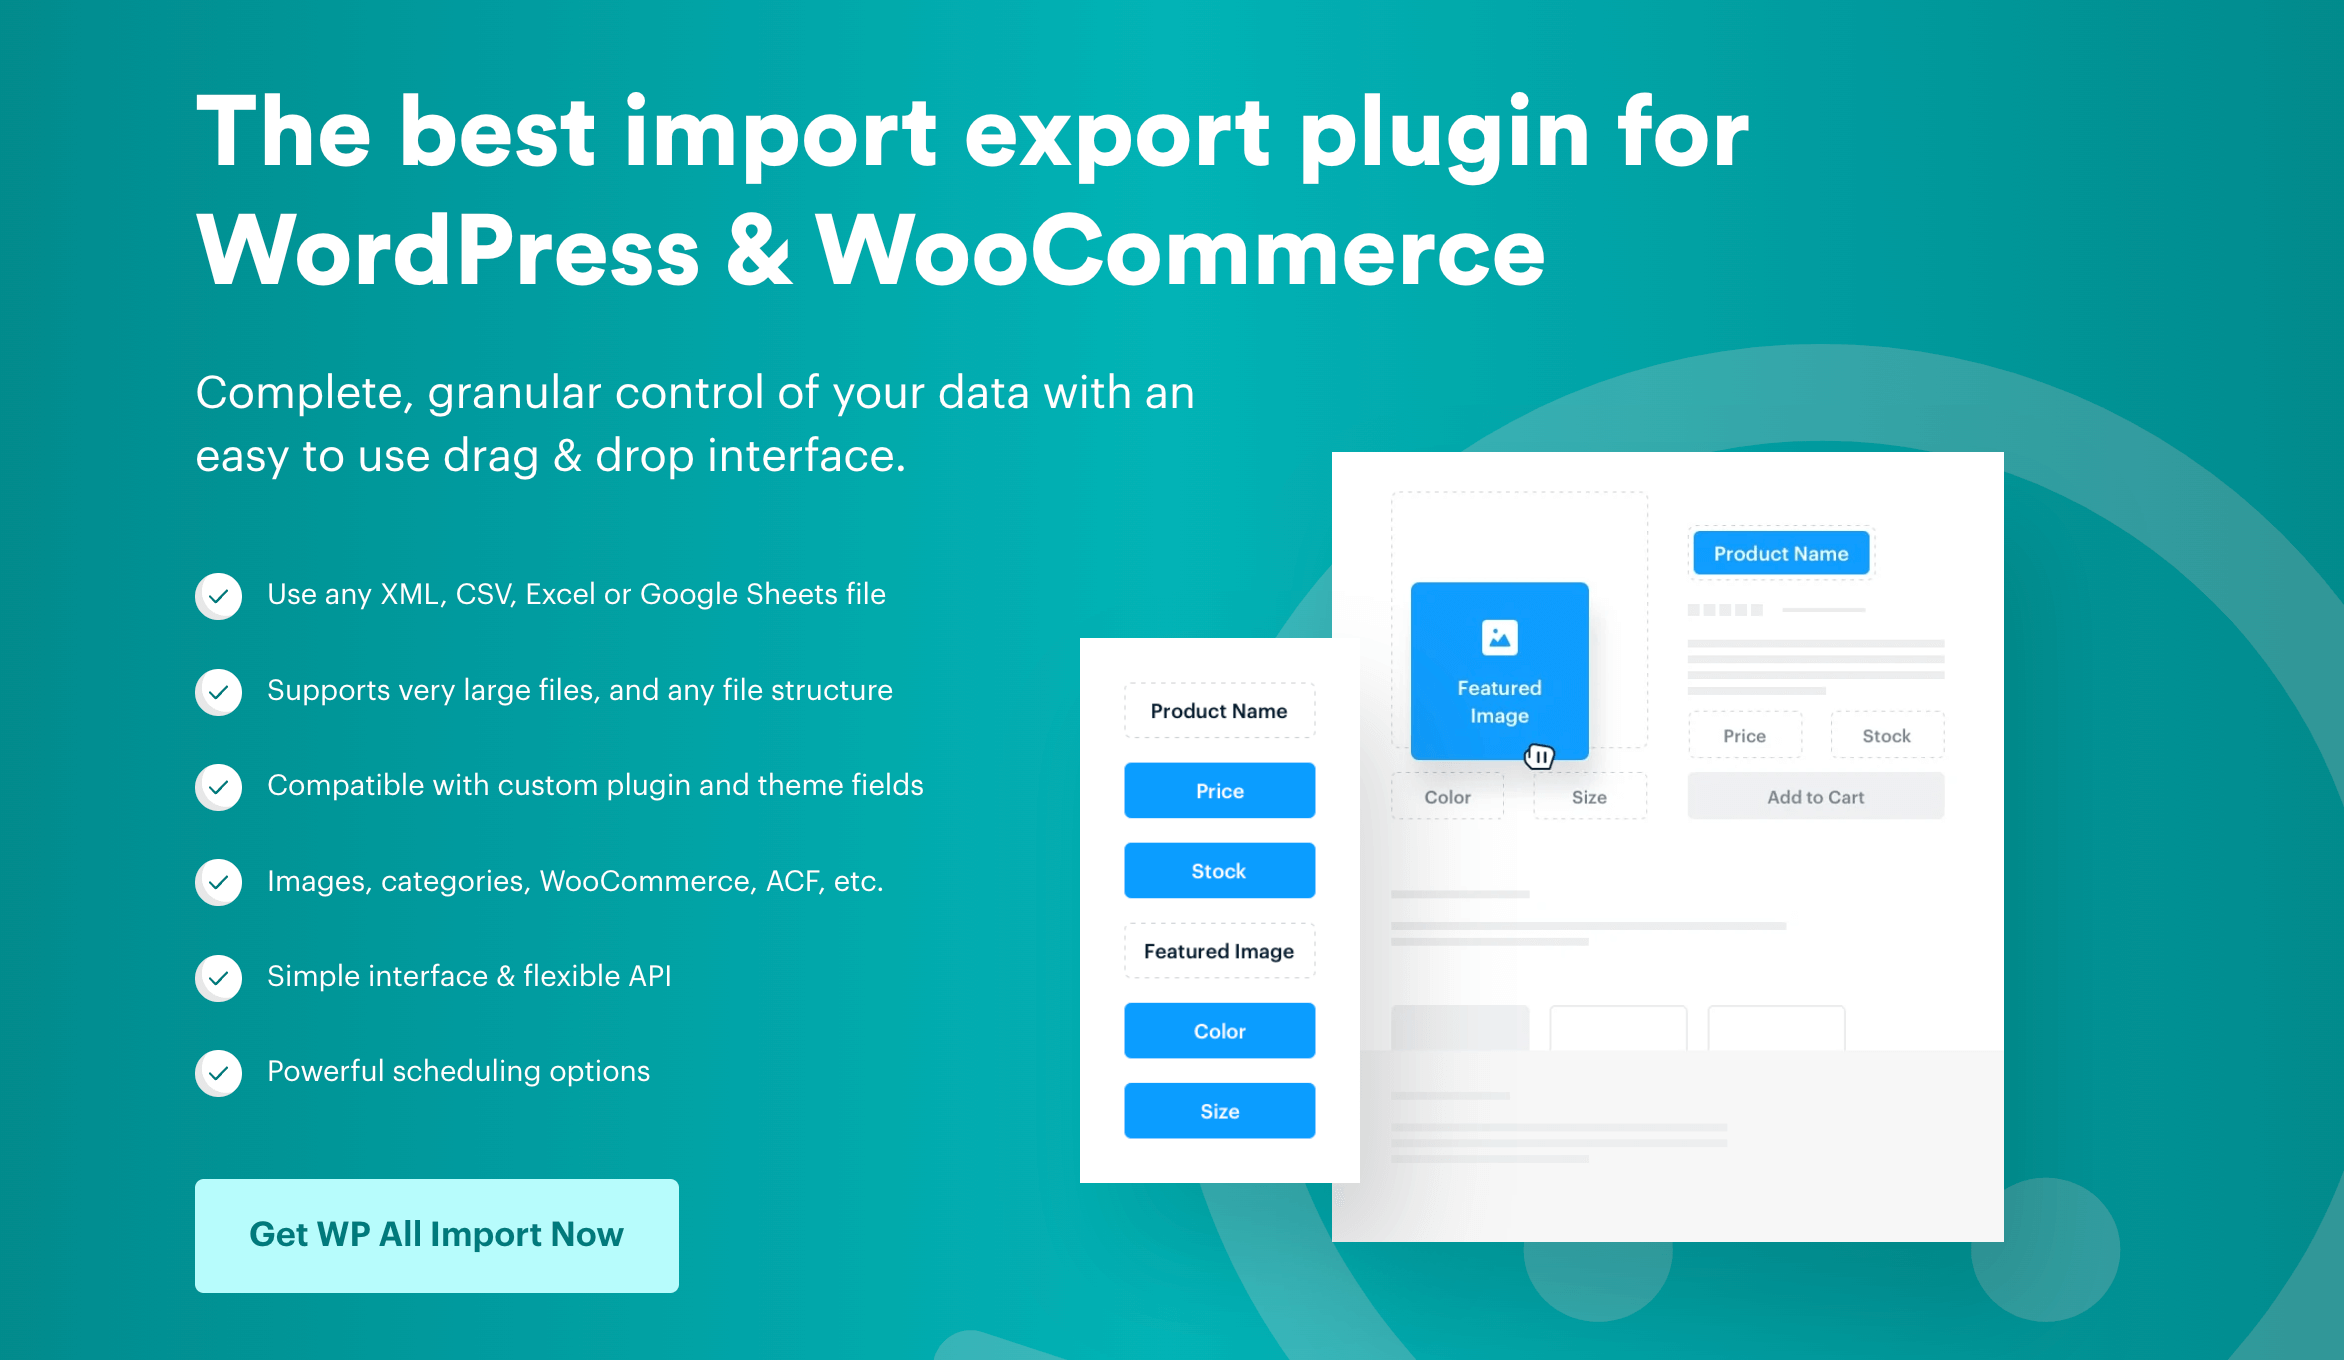
While WooCommerce’s built-in importer works well for basic needs, WP All Import has long been an industry standard for handling large product catalogs. The plugin integrates seamlessly with various WooCommerce extensions, including Advanced Product Fields for WooCommerce, making it possible to export and import custom field data alongside your products.
Let’s walk through the process of importing products using WP All Import:
1. Prepare your import file
Start by downloading the sample CSV template from GitHub to understand the correct format for your import file. The template includes common fields like:
- Product name and description
- SKU and pricing information
- Stock quantities
- Categories and tags
- Attribute data
- Image URLs
2. Set up the import
- Navigate to All Import → New Import in your WordPress dashboard.
- Upload your CSV file or provide a URL source.
- Select “WooCommerce Products” as your import type.
- Use the drag-and-drop interface to map your data fields.
3. Configure import settings
The plugin offers several critical settings to customize:
| Update rules | – Choose how to handle existing products – Set matching criteria (SKU or ID) – Define update behavior for duplicate items |
| Stock management | – Import initial stock levels – Set backorder rules – Configure low stock thresholds – Enable stock management per product |
| Product variations | – Map parent-child relationships – Import variation-specific pricing – Set attribute combinations – Configure variation-level stock |
| Custom fields and taxonomies | – Import category hierarchies – Map custom product attributes – Set up custom taxonomies – Import product meta data |
4. Run the import process
- Preview your import to catch potential issues.
- Run a small test import first.
- Monitor the import progress.
- Check the import log for any errors.
5. Verify your import
After the import completes, verify the following:
| Product data | – Check sample products across different categories – Verify prices and stock levels – Confirm product relationships – Test variation combinations |
| Structure validation | – Review category hierarchies – Check attribute organization – Verify image imports – Test product search functionality |
6. Troubleshooting common issues
- Missing images: Ensure image URLs are accessible.
- Duplicate SKUs: Check for unique identifiers.
- Category mismatches: Verify hierarchy formatting.
- Stock discrepancies: Confirm quantity formats.
Remember to take a database backup before running large imports. For regular catalog updates, consider setting up scheduled imports to automate the process.
Import products into WooCommerce using WP-CLI
Note that WooCommerce does not currently have an “import” command (although this feature has been requested for a while). In order to import products using WP-CLI (the WordPress command center), readers would need to create their own scripts.
Before you begin, again, you’ll need a CSV file that contains all your product data. Each row should represent one product, and each column should represent a specific piece of product information (like title, description, SKU, regular_price, etc.). The first line of the CSV should always be the header line that names each column. The lines after that should be the actual product data.
Step 1: Preparation
- Make sure WP-CLI is installed and accessible from the command line. Run wp –info in your WordPress directory to confirm.
- SSH into your server or open your terminal.
- Navigate to your WordPress installation directory (or anywhere you can run WP-CLI, as long as you’re referencing the correct WordPress path): cd /path/to/your/wordpress
- Create the script file: nano import-woo-products.sh (You can use nano, vi, or any other text editor.)
Step 2: Add code
Paste the following code into import-woo-products.sh:
#!/usr/bin/env bash

CSV_FILE="products.csv"

# Ensure the CSV file exists
if [[ ! -f "$CSV_FILE" ]]; then
  echo "Error: $CSV_FILE not found!"
  exit 1
fi

IFS=","

# Skip the header and read the CSV
tail -n +2 "$CSV_FILE" | while read -r title sku regular_price description categories tags; do
  # Create the product using WP-CLI
  wp wc product create \
    --title="$title" \
    --sku="$sku" \
    --regular_price="$regular_price" \
    --description="$description" \
    --categories="$categories" \
    --tags="$tags"

  if [[ $? -eq 0 ]]; then
    echo "Imported: $title"
  else
    echo "Error importing: $title"
  fi
doneCode language: Bash (bash)
Code breakdown:
if [[ ! -f "$CSV_FILE" ]]; thenchecks if the products.csv file exists. If not, an error message will be printed and the script will stop with a non-zero status.IFS=","sets the delimiter for the read command to a comma. This allows the script to properly parse CSV files, where fields are separated by commas.tail -n +2 "$CSV_FILE"skips the first line of the CSV file (usually the header row) and reads the data starting from the second line.while read -rreads each line of the file, assigning values to the variables title, sku, regular_price, description, categories, and tags. The-roption prevents read from interpreting backslashes as escape characters.
⚠️ Remember! This is only a basic example script. If any field in the CSV file contains commas, quotes, or special characters, consider using a more robust CSV parser like awk or python to handle CSV files correctly.
Save this as import-products.sh and run: chmod +x import-products.sh
Then run: ./import-products.sh
Ensure your CSV contains columns for title, sku, regular_price, description, categories, and tags.
Tip: Before you start bulk importing, do a test run with a single product to ensure everything is correct.
Enhance imported products with Advanced Product Fields for WooCommerce
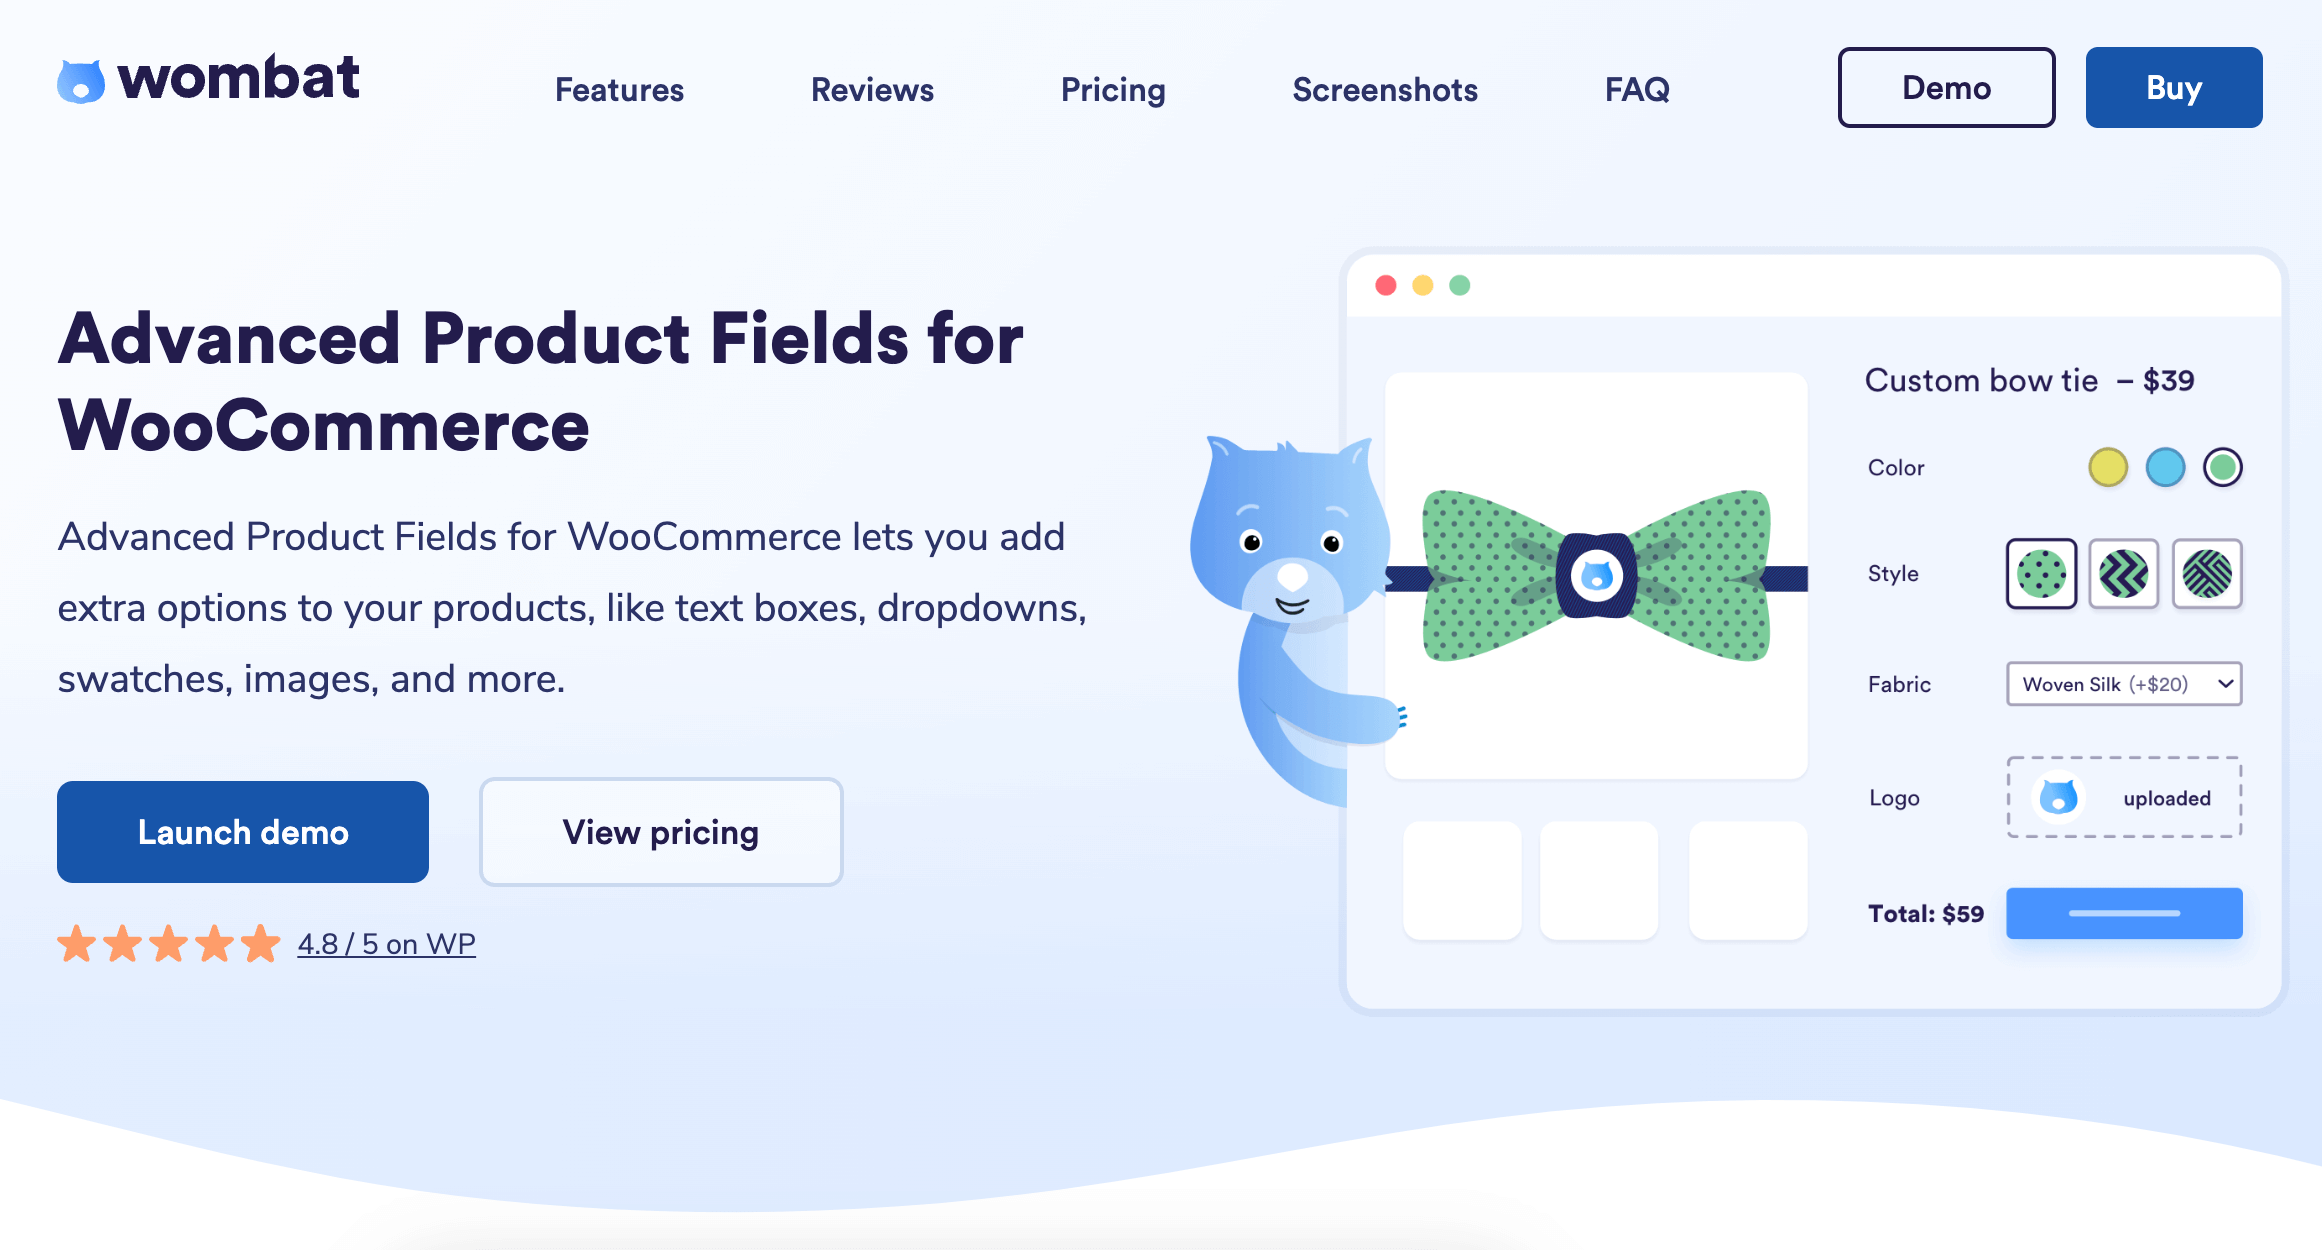
After importing your product catalog, you can enhance each item with custom options to match your customers’ needs. Advanced Product Fields for WooCommerce adds customization features that transform basic product listings into interactive shopping experiences.
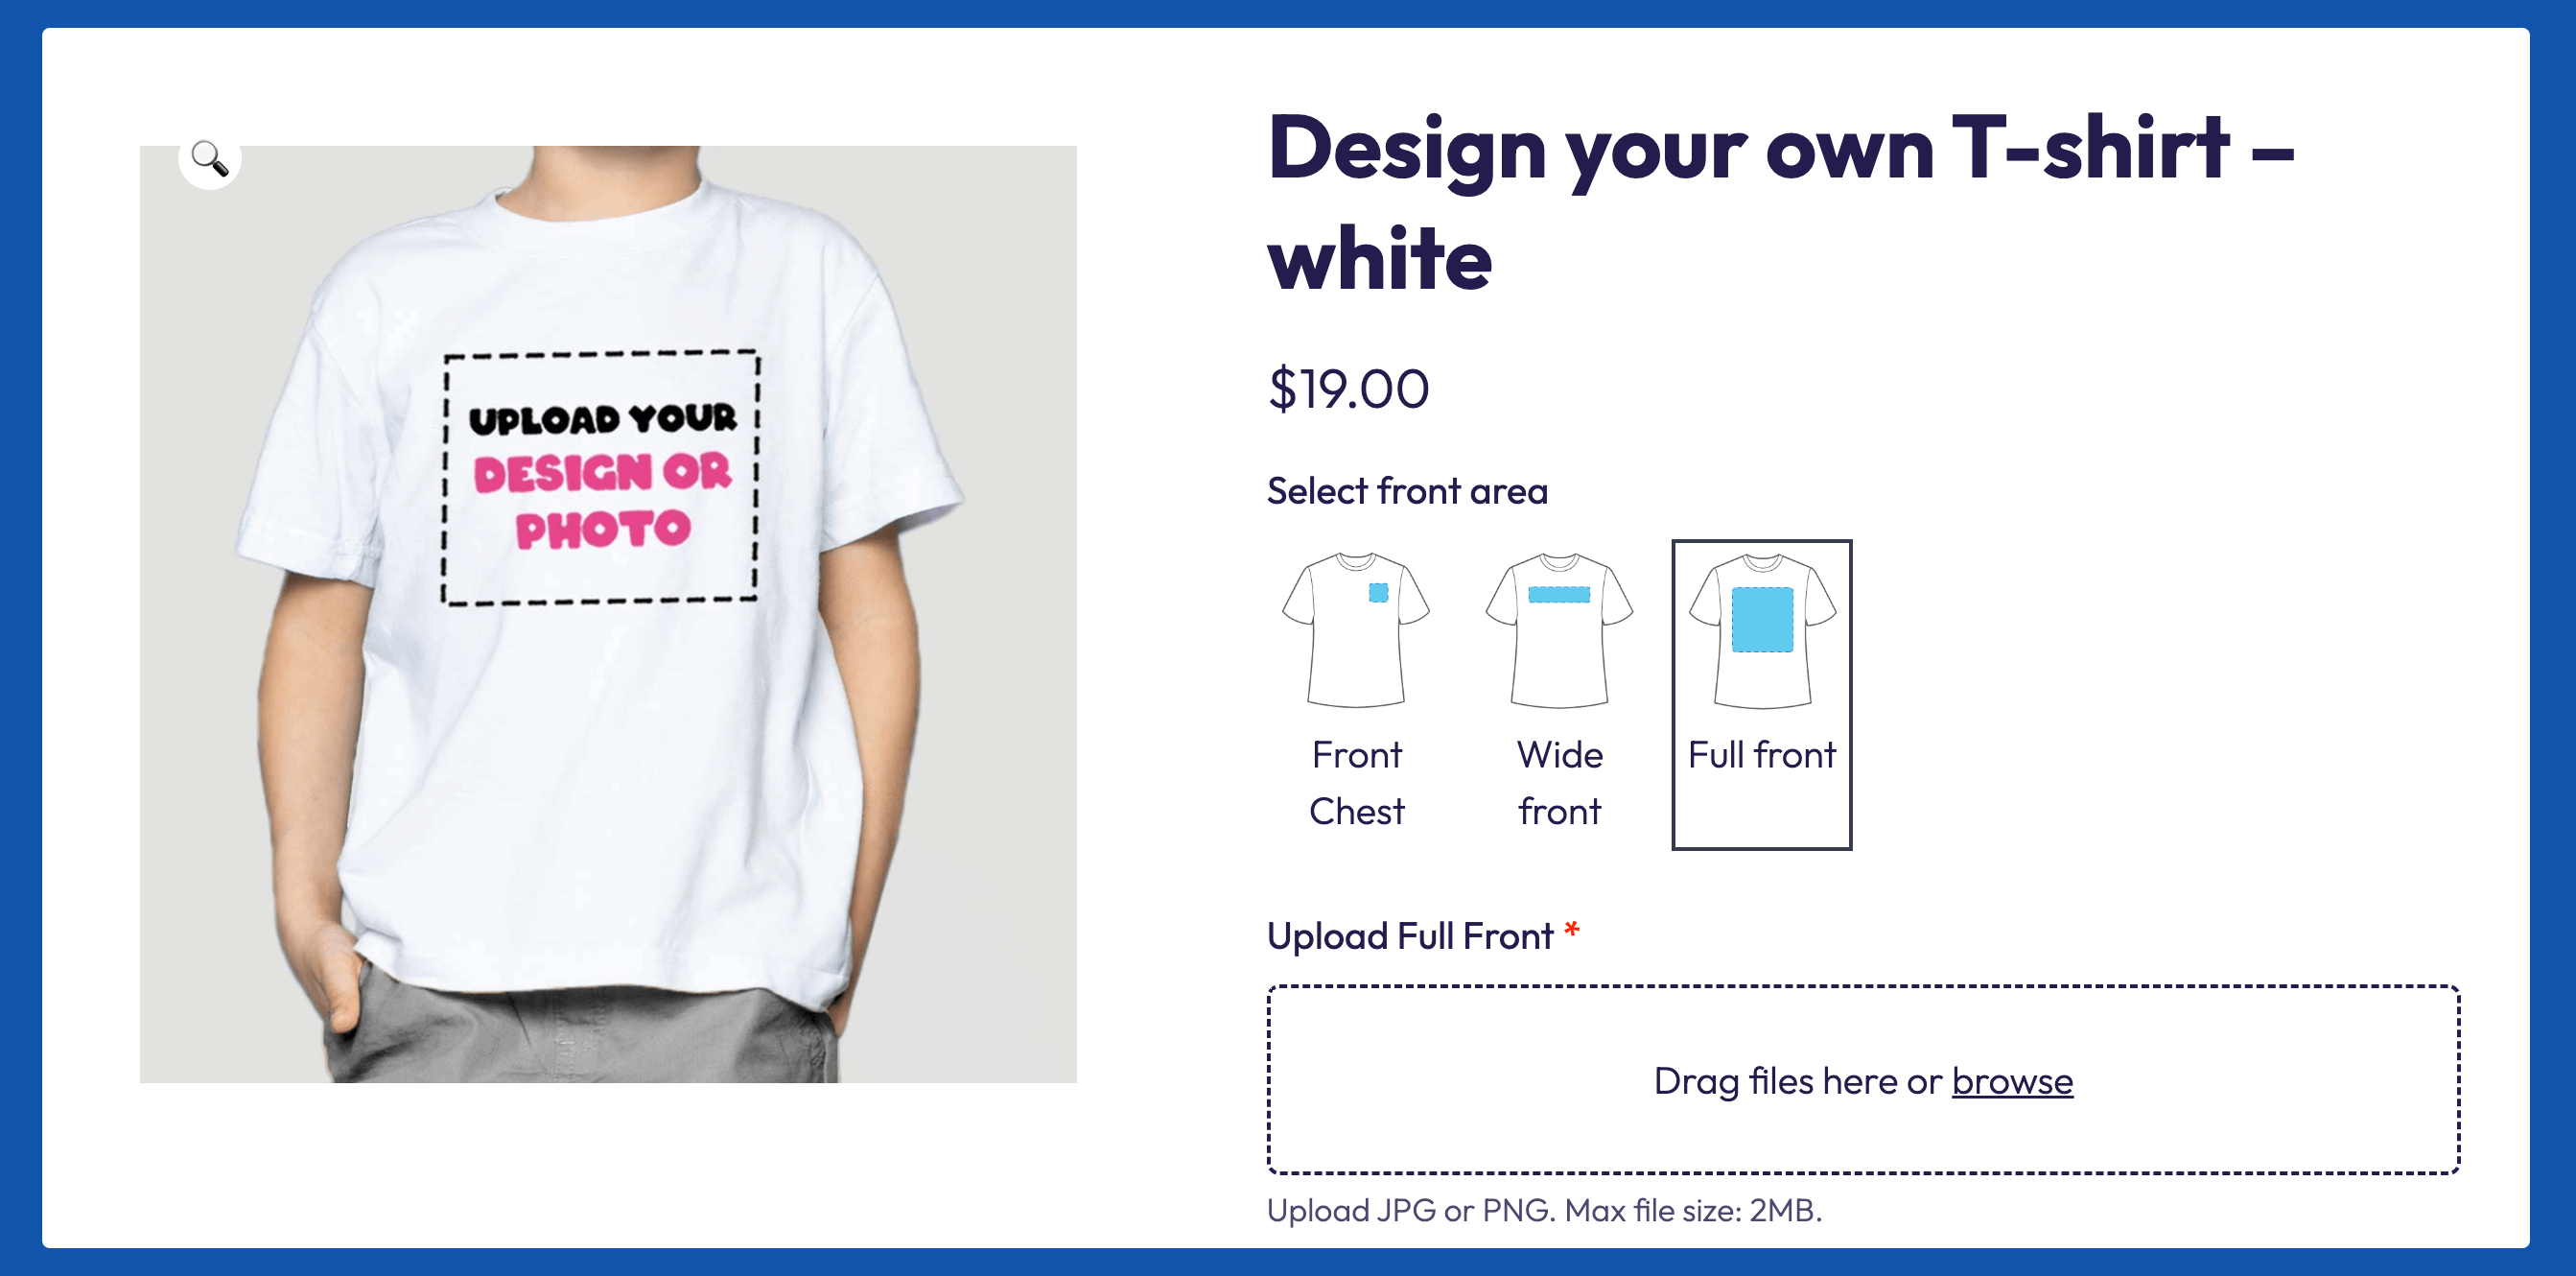
With Advanced Product Fields, you can add:
- Date fields for bookings and deliveries
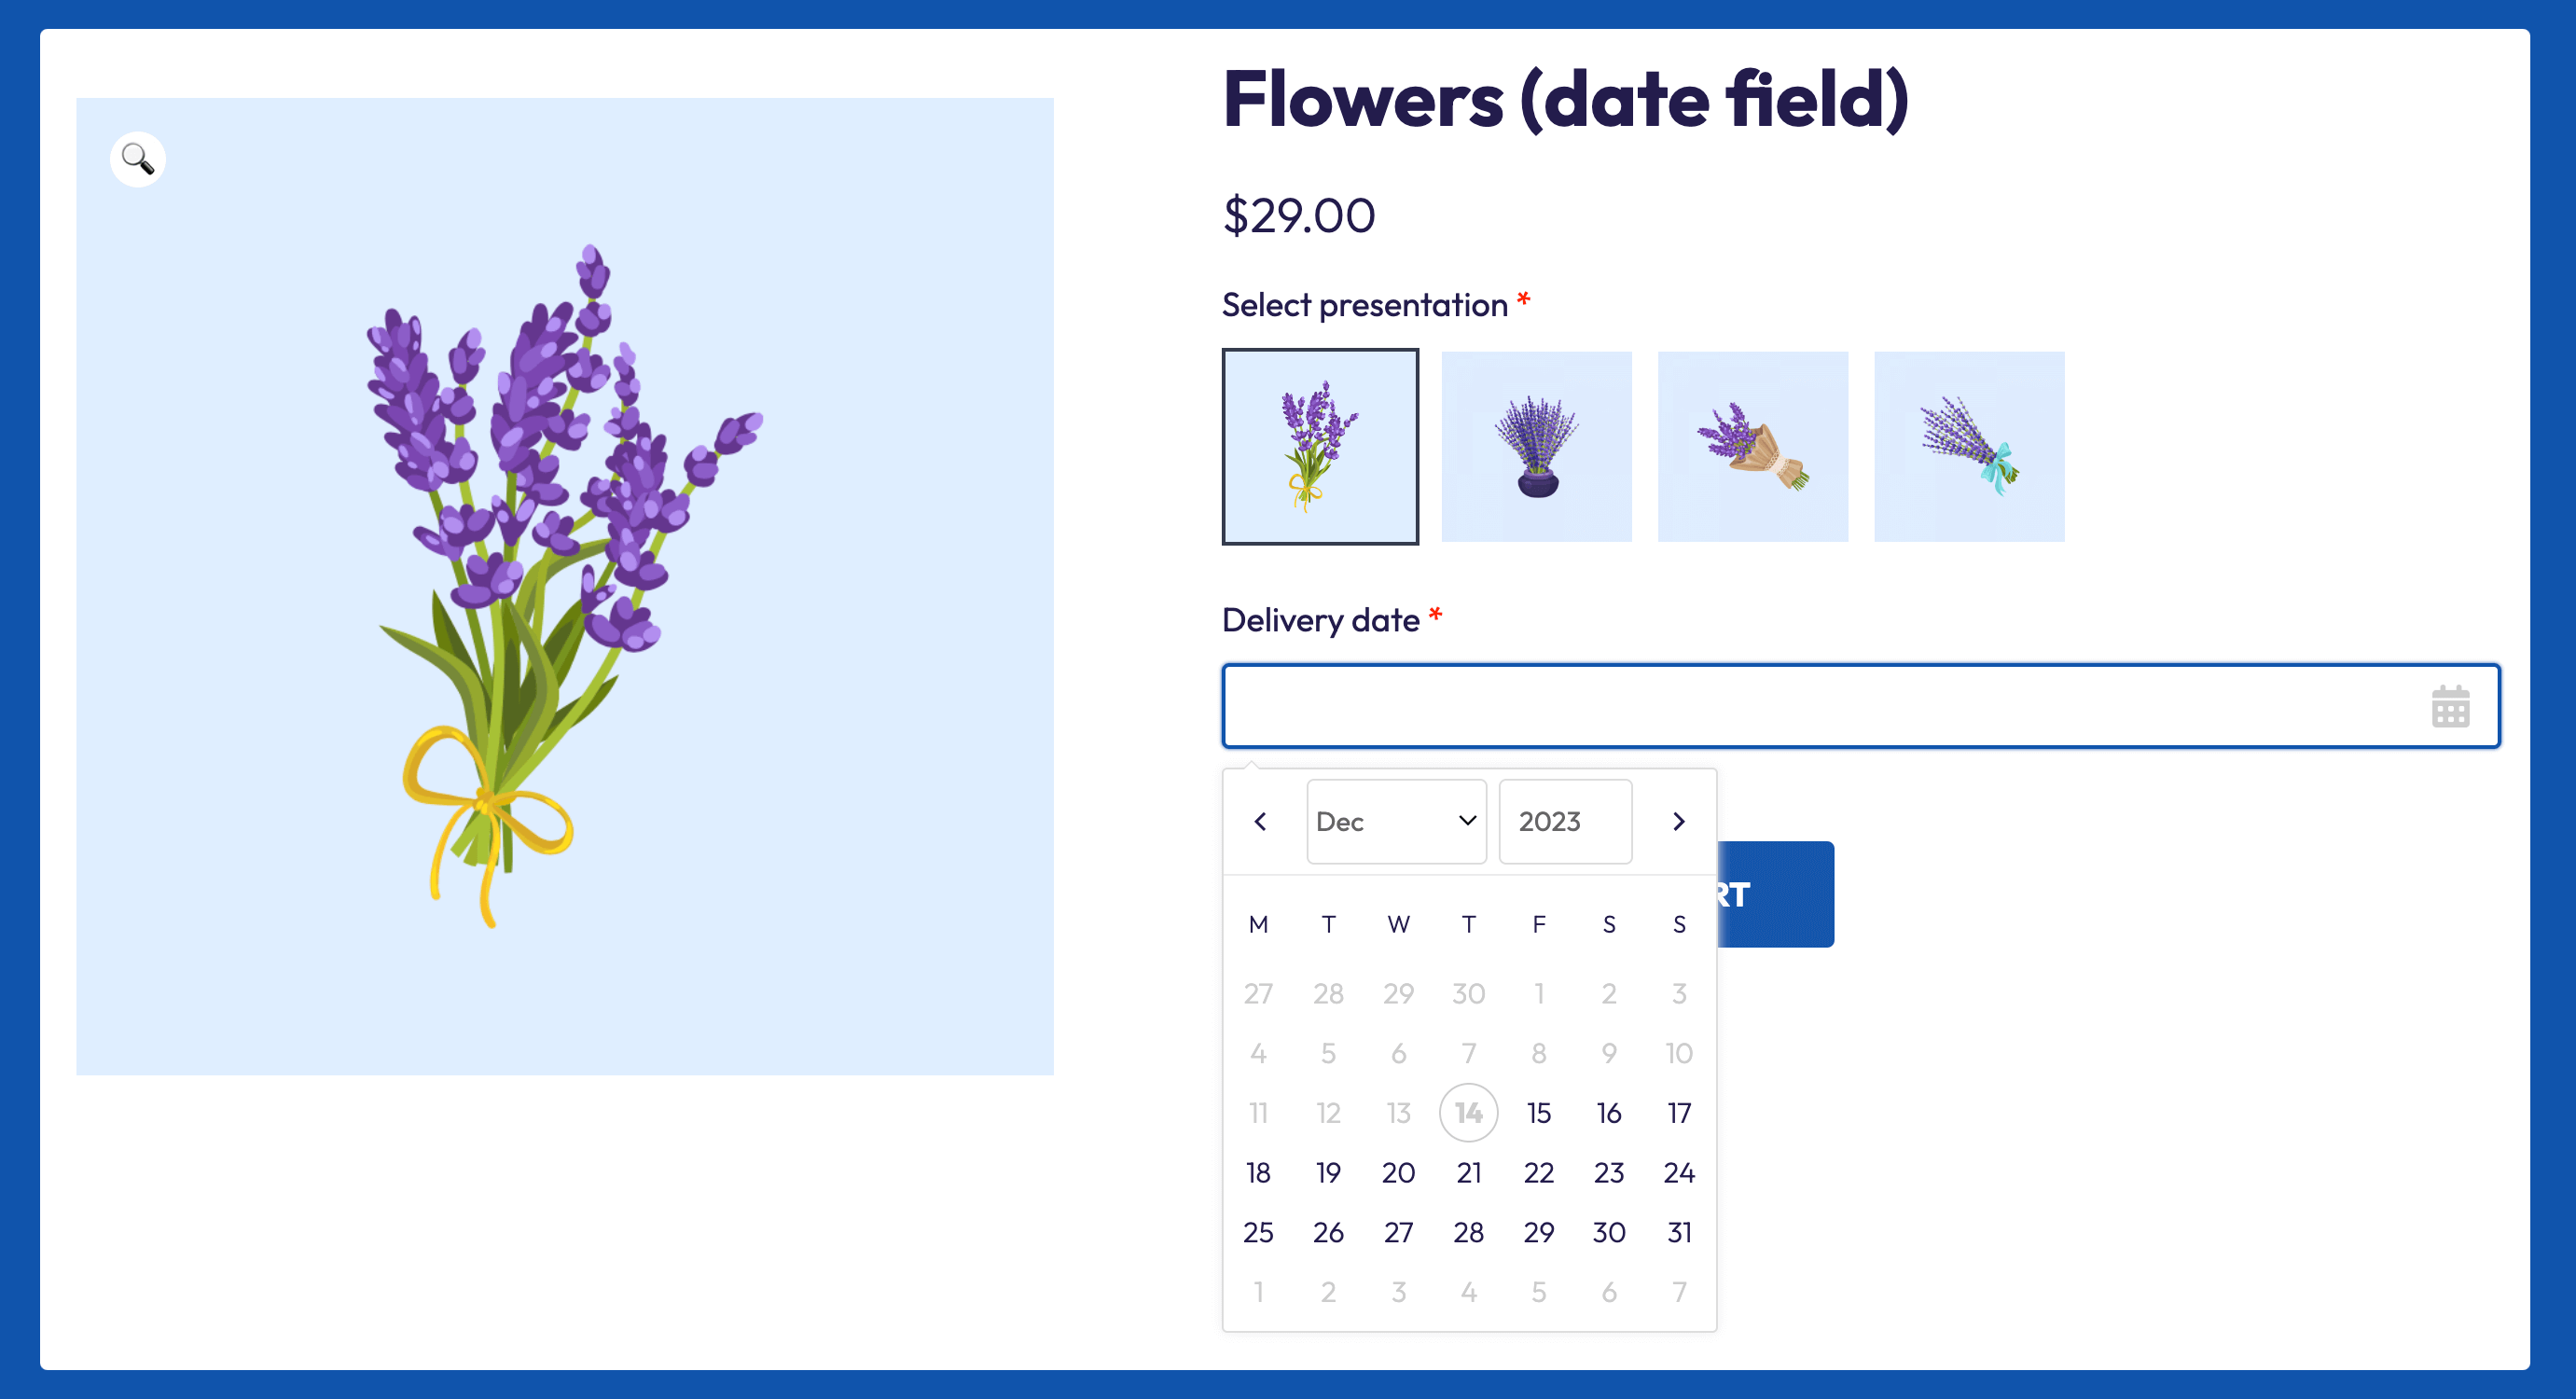
- Color swatches for visual choices
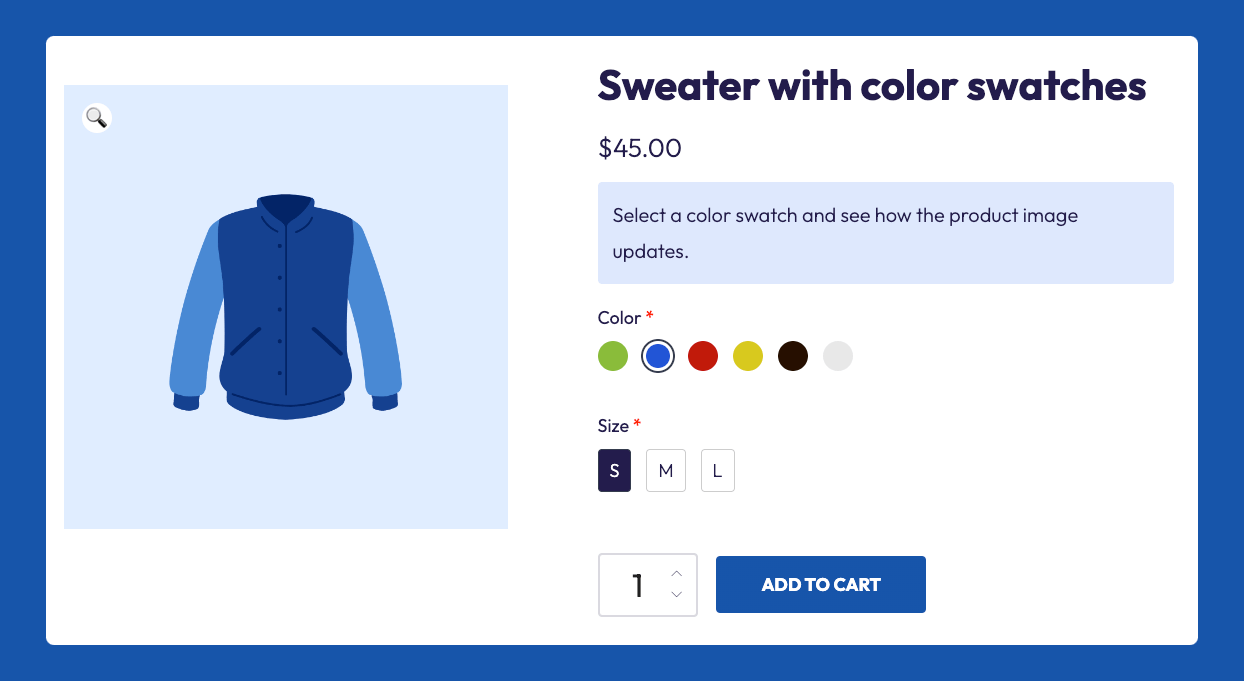
- Text input fields for custom printing
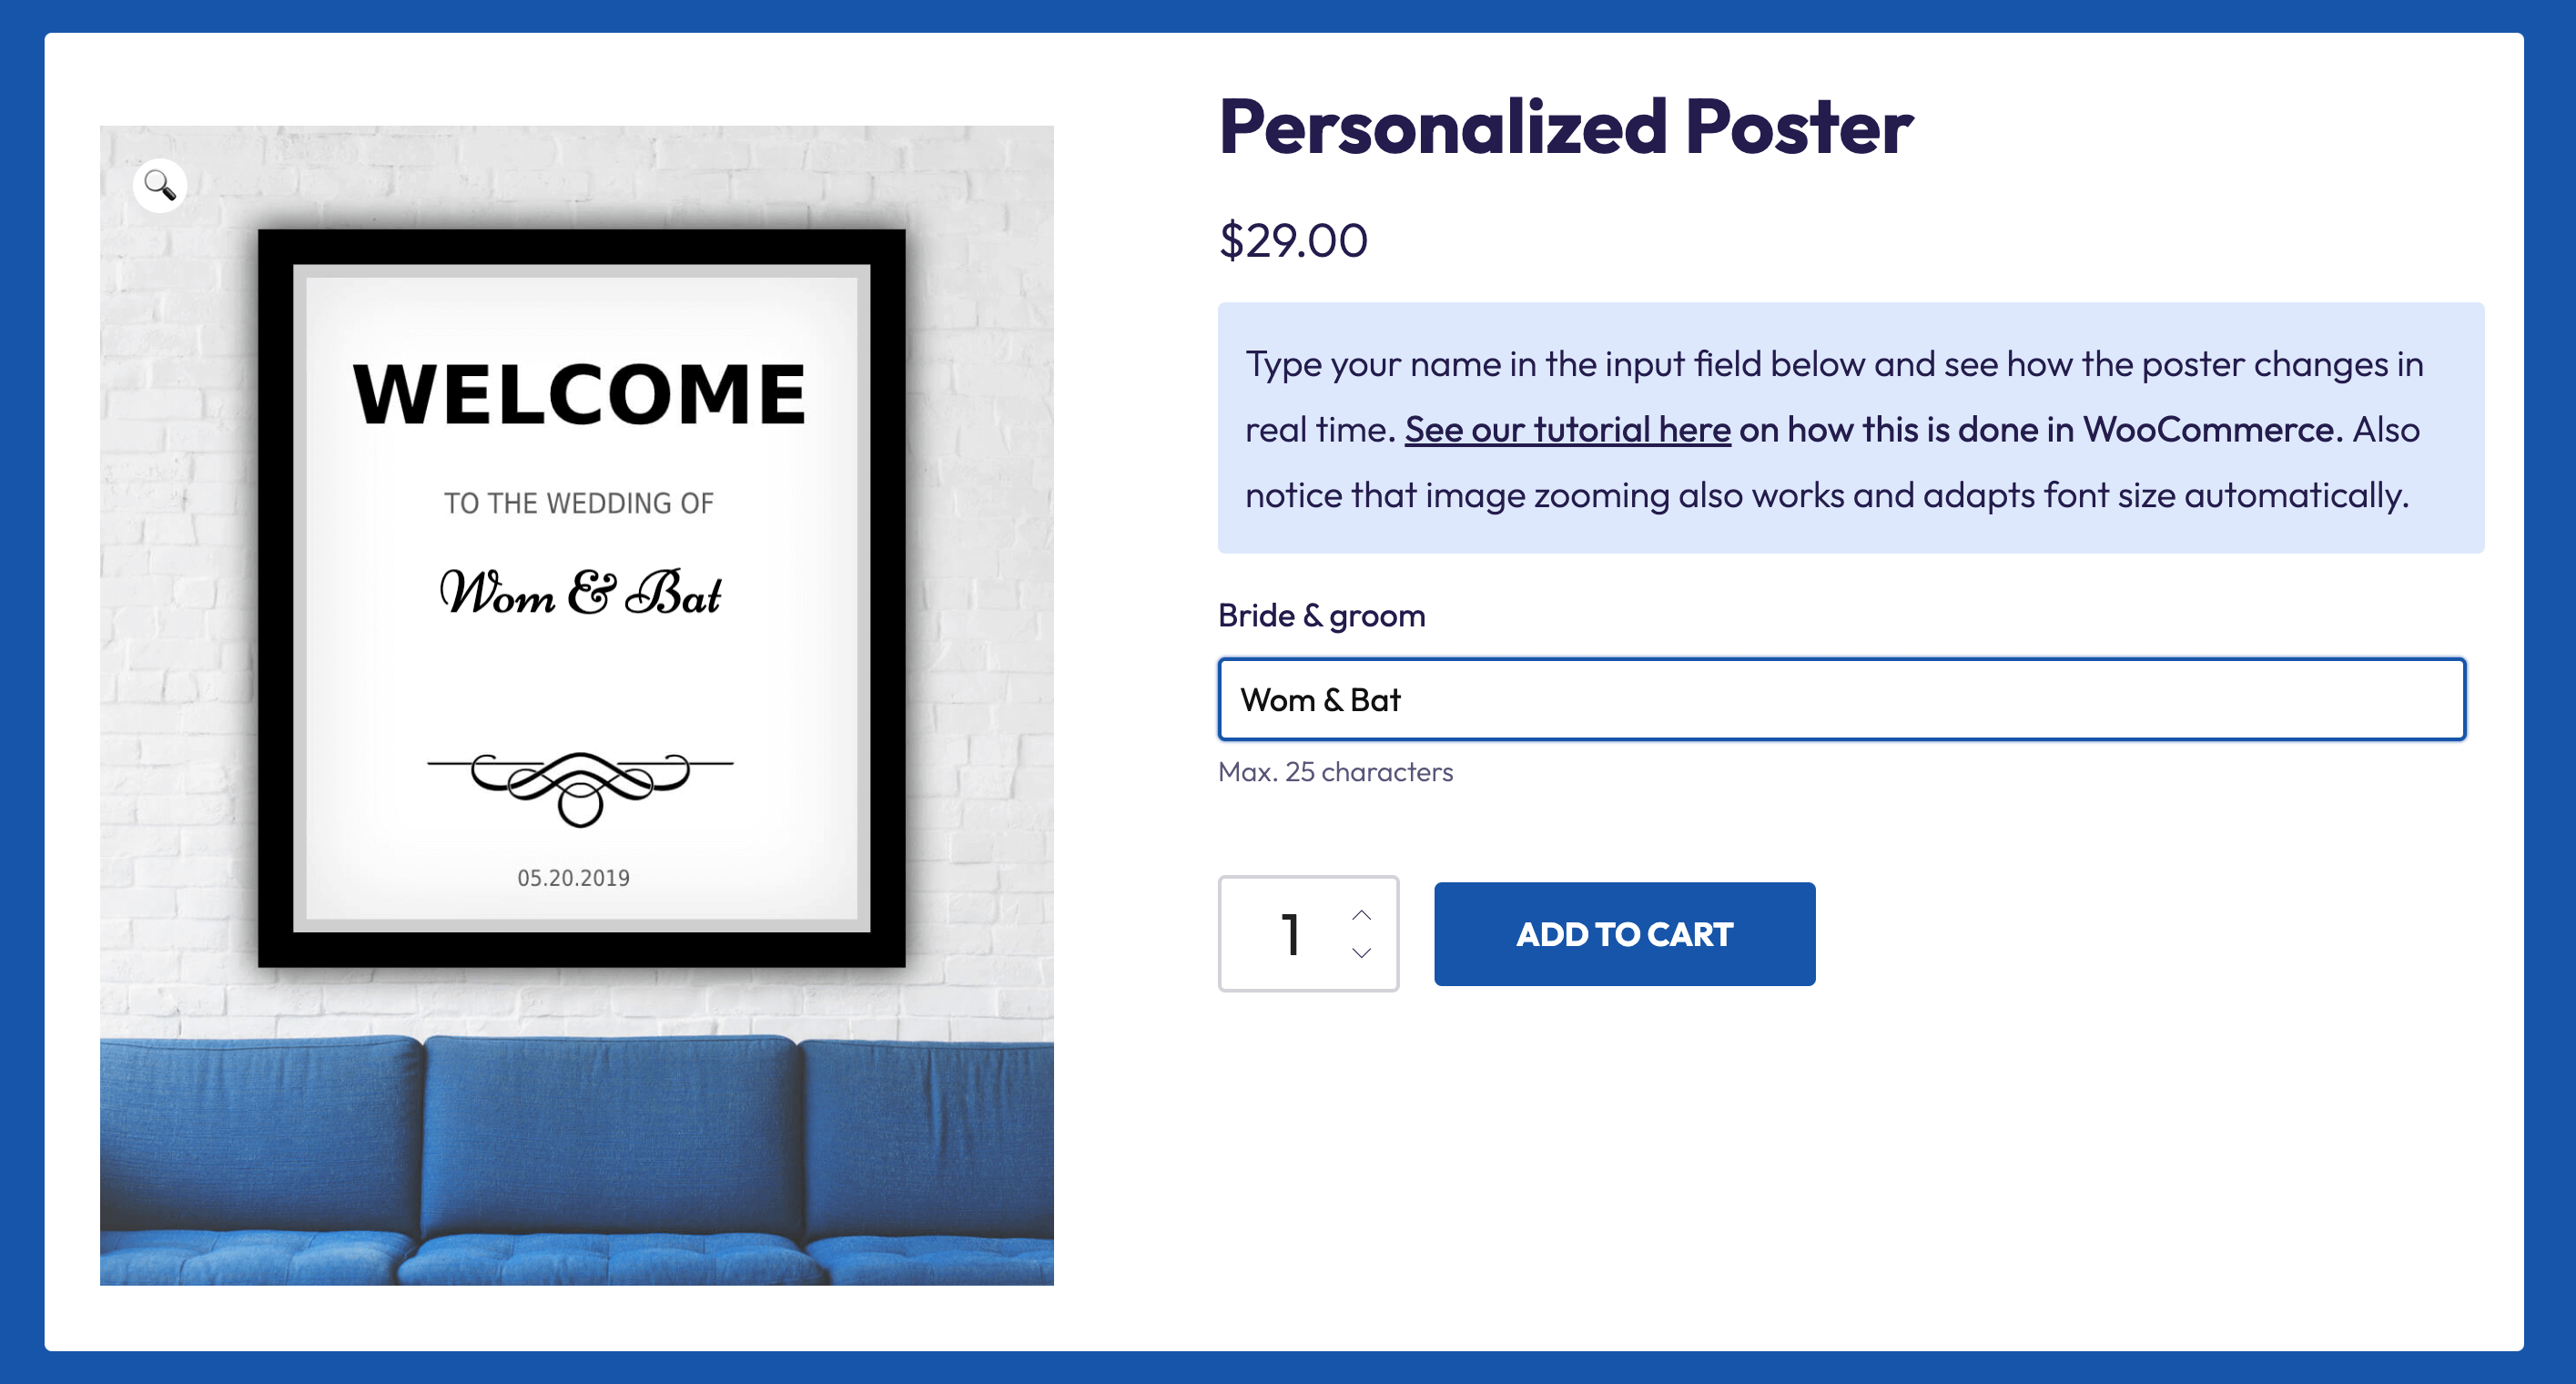
- File upload options for custom designs
The process is straightforward:
- Select your imported product and scroll down to the Product data area.
- Click on the Custom fields tab and add your first custom fields.
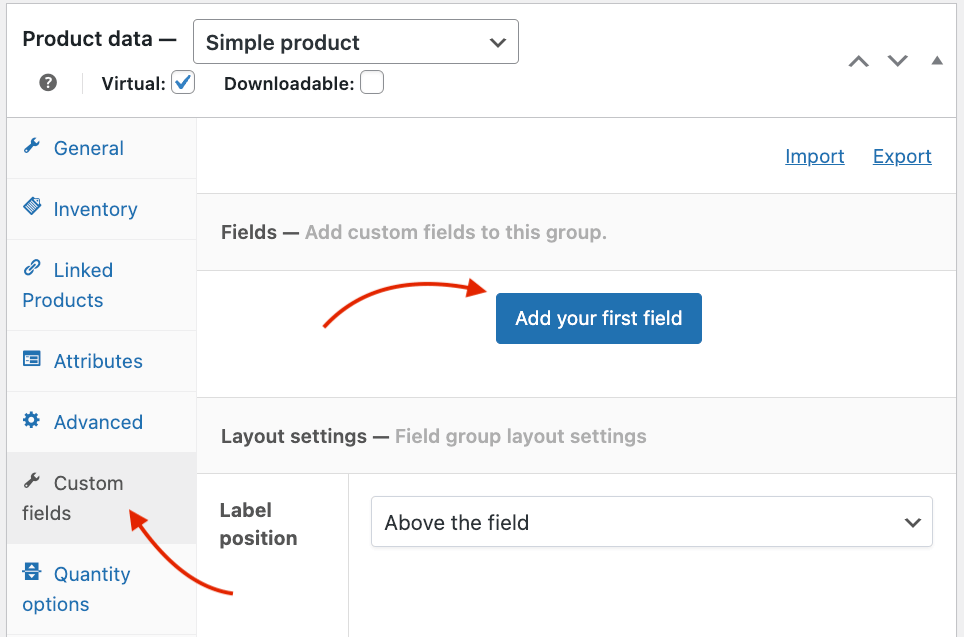
- Choose from 16 different custom field types.
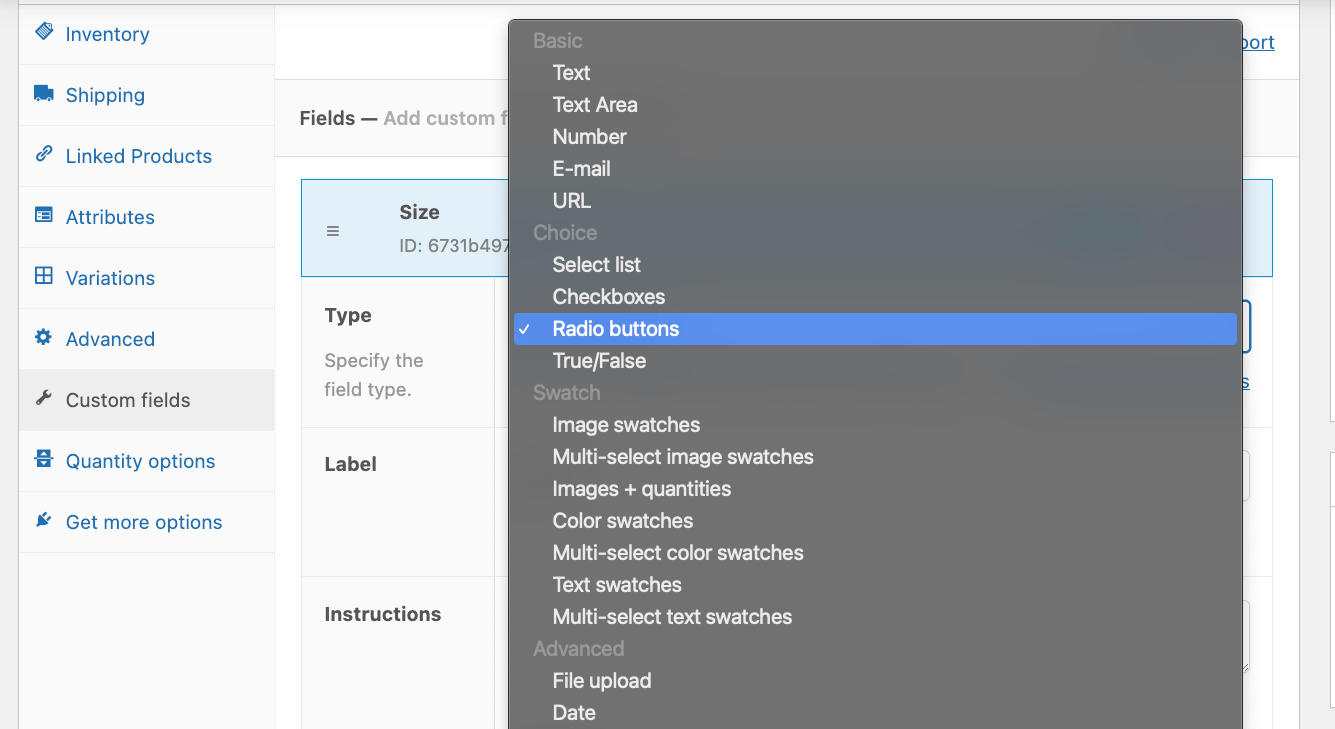
- Set conditional logic for field visibility if needed.

If you want, you can also create product field groups and apply them to multiple products, e.g. create a size selection field for all clothing items.
Using custom fields doesn’t only improve the user experience, but it also solves other common challenges:
- Instead of creating multiple variations, use a single product with customization options
- Reduce customer service questions by letting shoppers specify exactly what they want
- Collect necessary customization details during purchase
- Add cost modifiers based on customer selections
The result? A more professional store that gives customers the options they need while making product management easier for you.
Supercharge your product management today
Importing products efficiently is just the first step in creating a successful online store. By combining WooCommerce’s import capabilities with Advanced Product Fields, you can build a store that’s both easy to manage and simple for customers to use.
Start with a properly formatted CSV import to add your entire product catalog quickly. Then, enhance those products with custom fields, giving customers the ability to personalize their purchases. This combination of bulk importing and product customization creates a smoother shopping experience while reducing your day-to-day management tasks.
Ready to enhance your product catalog? Download Advanced Product Fields for WooCommerce and start adding custom options to your imported products.
