How to enable error logging on your WordPress website
Are you having WordPress issues, but you’re not sure what’s happening? Enabling error logging allows your WordPress site to capture and save all errors that happen behind the scenes.
If something odd is hapening, chances are the error log (a file listing all errors that occured between a time frame) can provide an answer.
Enable WordPress error logging with a plugin
Enabling error logging is easy with a WordPress plugin and doesn’t cause any overhead because when you’re done, you can simply remove the plugin.
- In your WordPress dashboard, navigate to Plugins → Add New
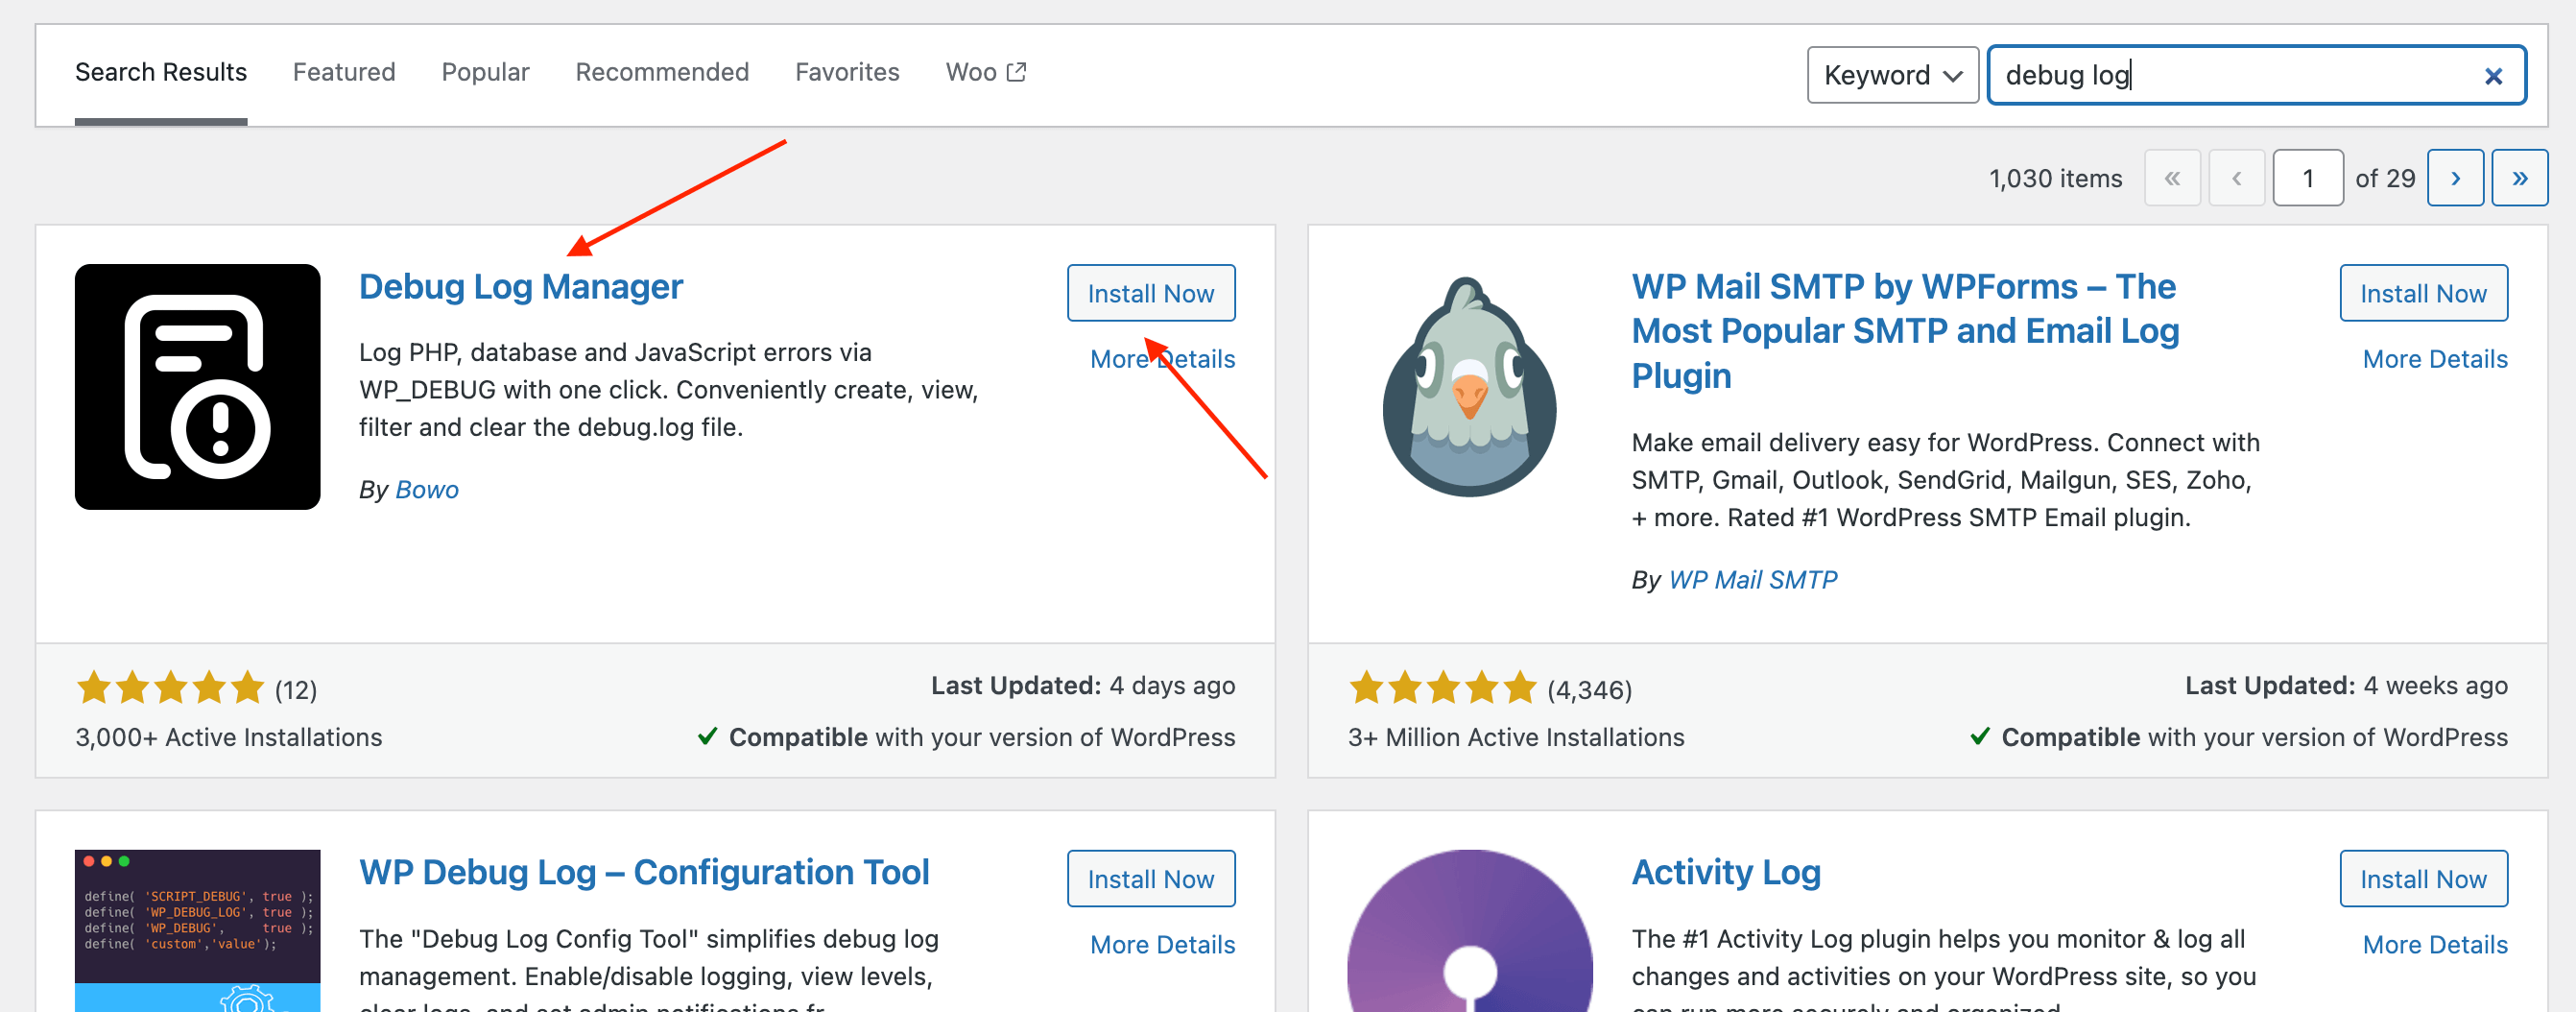
- Search for “debug log” plugin and install the “Debug Log Manager” plugin. It should be the first or 2nd result in the plugin list:
- Click Activate once it’s done installing.
- In your dashboard, navigate to Tools → Debug Log Manager and enable the Error Logging setting at the top of the page:

- If the list on this page already contains some entries, click the Clear Log button at the bottom of the page to empty the list.
Viewing errors in the log list
Now that WordPress is capturing errors that happen throughout your site, you want to be able to view these errors. Follow these steps:
- If you are looking into why a certain action is not working on your site, perform that action again. This way, WordPress can catch any background errors that occur during that process. It could be as simple as visiting the page that crashes your site, or visiting a blank page, or clicking the button that throws an error.
- Once the action is performed, go to your WordPress dashboard and navigate to Tools → Debug Log Manager. The list should now contain some entries.
- If the page contains an empty list, it means no errors were thrown.
If our support team is helping you with an issue, please take one or more screenshots of the log list so we can check it for errors regarding our plugins.
When you are done, you can safely uninstall the Debug Log Manager plugin from your site.