
Without a doubt, WooCommerce is the best plugin for turning your WordPress website into an e-commerce shop. It’s very versatile and has many features built-in to help you successfully launch your online store. But unfortunately, WooCommerce doesn’t offer much functionality for creating customizable products. Instead, you need to rely on a plugin to solve this problem.
This complete guide explains how you can create customizable products in WooCommerce with the use of a plugin. The article also contains plenty of other details, such as definitions and examples of personalized WooCommerce products.
It’s a long read, but you’ll learn a lot along the way!
Choosing your customization method
Before diving into implementation, you need to choose the right customization approach for your products. Not all customization needs are equal, and selecting the appropriate method can save you time, money, and technical headaches.
When it comes to creating customizable products in WooCommerce, you have three main approaches:
- Custom code development: The most flexible but also most complex option. This involves hiring developers to build custom functionality specific to your needs. While offering unlimited possibilities, it requires significant investment in both development and ongoing maintenance.
- WooCommerce variables (built-in): The native WooCommerce solution for product variations. This free, built-in feature allows you to create different versions of the same product (like a t-shirt in multiple sizes and colors). However, it’s limited to pre-defined dropdown selections only.
- Plugin solutions (e.g. Advanced Product Fields): Third-party plugins extend WooCommerce’s capabilities far beyond basic variations. Advanced Product Fields (APF) for WooCommerce is one such plugin that adds sophisticated customization options including text inputs, file uploads, conditional logic, and dynamic pricing. These plugins fill the gap between basic variations and full custom development.
Variables vs APF vs custom code
Here’s a simple framework to help you decide:
| Method | When you use |
|---|---|
| WooCommerce variables | – You have pre-defined options only (sizes, colors) – Each variation has a fixed price – You don’t need customer input (text, file upload) – Simple dropdown selection is sufficient |
| Advanced Product Fields | – Customers need to input custom text or upload files – Pricing varies based on selections or input – You need conditional logic (show/hide fields) – Visual customization is important (image swatches, color pickers, …) – You want to collect customer dataYou need complex pricing rules |
| Custom code | – You have highly specific requirements not met by any plugin – You have dedicated development resources – Long-term maintenance isn’t a concern – Budget allows for custom development |
Most businesses need APF when…
The majority of WooCommerce stores find they need Advanced Product Fields when they want to:
- Offer true personalization: Let customers add names, messages, or custom designs.
- Implement dynamic pricing: Charge based on character count, selections, or custom calculations.
- Create smart forms: Show relevant options based on previous choices.
- Enhance user experience: Provide visual feedback with image swatches and real-time previews.
- Scale efficiently: Apply customization options across multiple products without coding.
Cost/Complexity comparison
| Method | Initial cost | Setup complexity | Maintenance | Flexibility |
|---|---|---|---|---|
| WooCommerce variables | Free | Low | Low | Limited |
| Advanced Product Fields | $99-199 | Medium | Low | High |
| Custom development | $1000+ | High | High | Unlimited |
Want to understand the business case for personalization? Check out our guide on personalizing products in WooCommerce to learn about ROI, customer data strategies, and measuring success.
What are customizable products in WooCommerce?
A customizable – also referred to as a personalized – product is a product that includes a form with extra input fields on the product page. Your customer can fill out those custom fields to personalize your product to their wishes.
A classic example of a personalized product is a pizza, for which customers can choose the desired size and add extra toppings.

Customizable products can be simple, like adding a checkbox to offer gift wrapping. But they can also be complex, like selling business cards with various options, or a “build your own” product with a large form. Technically, you could build whole product configurators in WooCommerce! We’ll go over more examples later in this guide.
The important things to know are:
- Customized or personalized products allow customers to tweak various extra options in order to achieve the product they want to buy.
- You can create customizable products by adding extra options to your WooCommerce products.
Extra product options – terminology
Extra product options are basically form input fields you add to your WooCommerce products. Throughout this guide (and the internet), you’ll notice different terms that refer to the same thing:
- Extra product options
- Product add-ons
- Custom fields or product fields
- Product extras
- Input fields
These terms all refer to the same principle: Showing input fields on your product pages, which allow customers to personalize the product before adding it to their cart.
Types of custom product fields
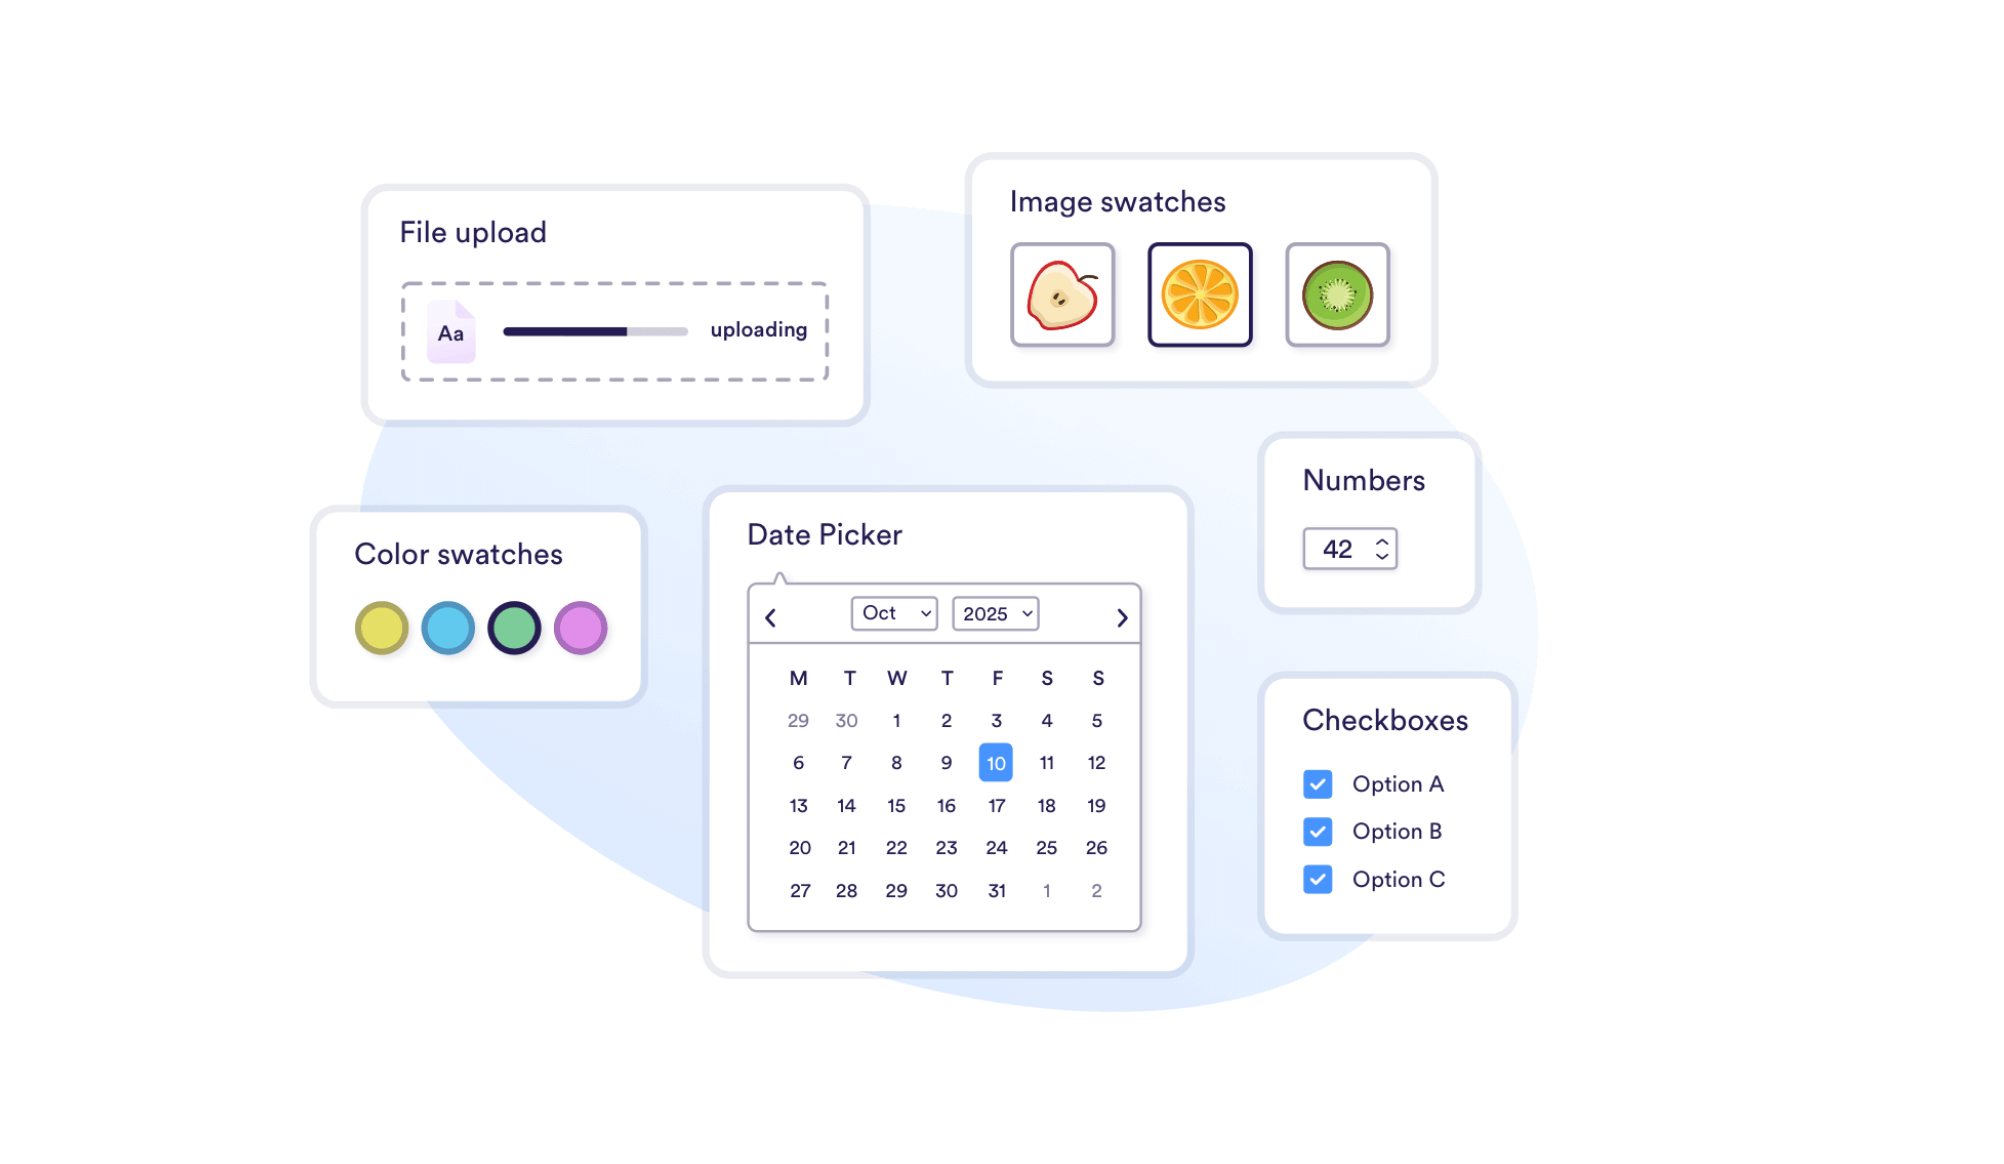
Typically, product options are built using normal form input fields like:
- Text and text area input fields
- Dropdown lists (select lists)
- Checkboxes (either a single checkbox or a group of multiple checkboxes)
- Radio buttons
- Number input fields
But you can also use more advanced fields like:
- File upload
- Date picker (a calendar field)
- Color picker / color swatches
- Image swatches (clickable images)
- Text swatches (clickable text buttons)
With these field types, you can build simple or complex forms on your WooCommerce product pages!
Examples of customizable products on the web
Some examples of popular brands jumping on the personalized products bandwagon:
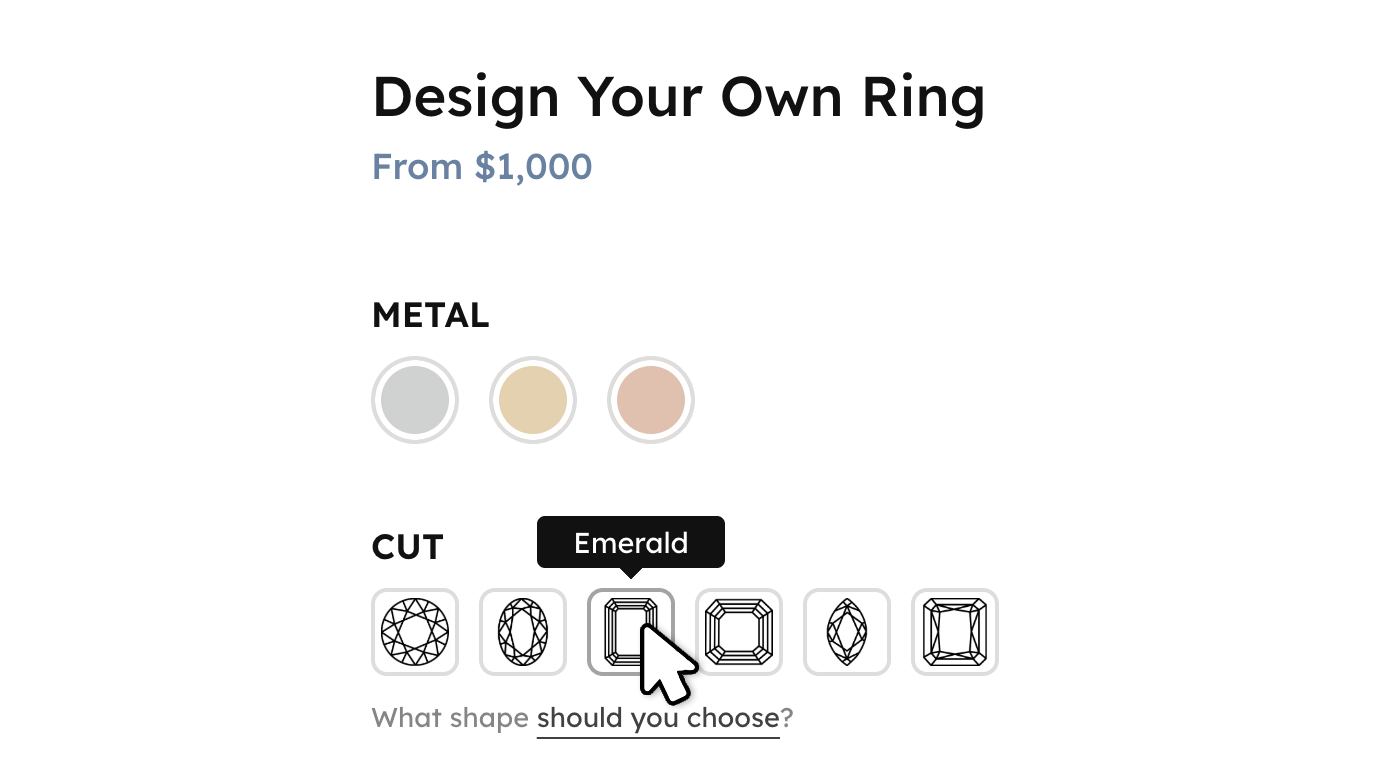
- Volkswagen lets you build your own car.
- Dell lets you build your own laptop.
- IKEA lets you plan and design your own rooms.
The concept of customization was designed just a few decades ago, but today prominent companies are using it to meet customer demand while growing their profit margins. Sure, these examples are very advanced product configurators, but they showcase the importance of offering customization.
Why you should sell personalized products
Here are some of the main reasons why offering personalized WooCommerce products is a good idea:
- You can increase the size of your target audience: By offering custom product options, you become a more inclusive store because you have options for everyone. There’s a good chance, you can even target a new audience.
- You increase average order value (AOV) because extra options generally change the final product price.
- Users stay on your site longer.
- It increases sales & profit margin.
- You offer a better user experience for your customers by breaking complex products down into easy steps.
Just be aware not to offer too many (complex) product options because you don’t want to overwhelm your users with extra choices!
What is the difference between custom product options and WooCommerce variations?
WooCommerce already has a built-in mechanism for adding extra options to your products. You can use this by changing the product type from Simple to Variable in WooCommerce. A classic example is selling shoes: You can offer visitors various colors (e.g. brown or black) and different shoe sizes. You can do this by creating a variable product in WooCommerce and adding variations for each combination of options you want to offer.
The problem is that WooCommerce variations are too limited in terms of features. Variations are meant to select a different version of the same product (for example a “large” size or a “small” size), but they are not meant to offer extensive features for personalized products.
Here are some of the key disadvantages of using WooCommerce variations:
Variations are always displayed as predefined options in a select list (dropdown field): This means you can’t add “free input” fields like text fields, and you can’t select multiple options from the same set.
Variations don’t have conditional logic: You can’t show or hide variations depending on the selection of previous fields.
The pricing structure for variations is very limited: You need to define a different product price for every combination of variations.

Read more about when to use variations versus custom product options
In order to have more control over the available product customizations, you’ll have to use a plugin that extends WooCommerce with those features.
How to add product options (custom fields) to WooCommerce
As mentioned before, WooCommerce doesn’t have many features for extra product options by default, so you’ll have to use a plugin to build customizable products. In this guide, we’ll be using the Advanced Product Fields for WooCommerce plugin.
Installing Advanced Product Fields for WooCommerce
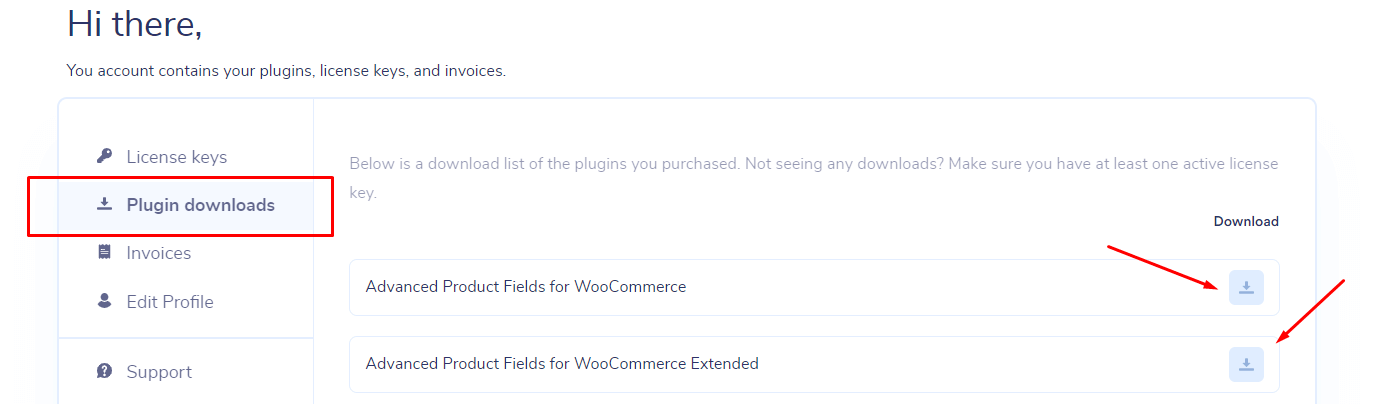
After purchasing the plugin, you will be redirected to your Studio Wombat account. Once you’re logged in, you can download the plugin. Head over to the Plugin Downloads section and click the download button on the right. This will automatically download the latest version.
To install the plugin, go to your WordPress admin dashboard → Plugins → Add new → Upload Plugin.
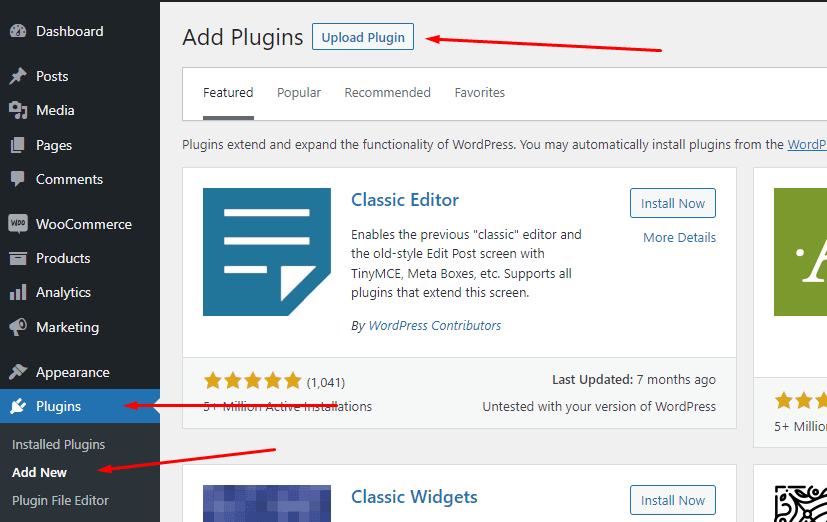
Next, choose the zip file you downloaded in the previous step and click Install Now.
How to add a text input field to a WooCommerce product

Now that you’ve installed the plugin, it’s time to use it! In this simple tutorial, we’ll add a text input field to a WooCommerce product. This is what we’re making:
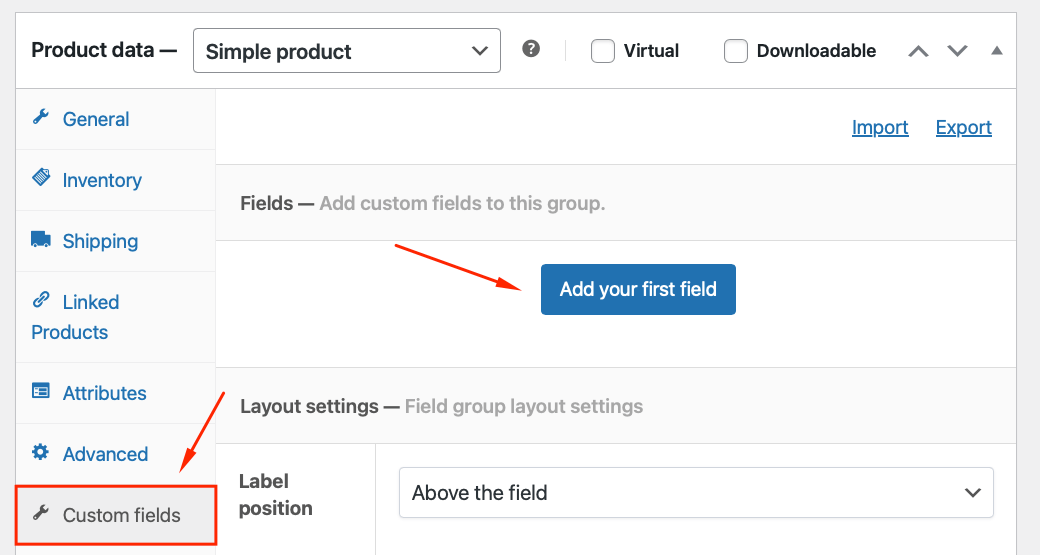
Before you can start using the plugin, you need to create a product in WooCommerce and assign a price in the General tab.
When that is done, navigate to the Custom fields tab and click Add your first field.
You’ll now see a section appear with all the options for your new text field:
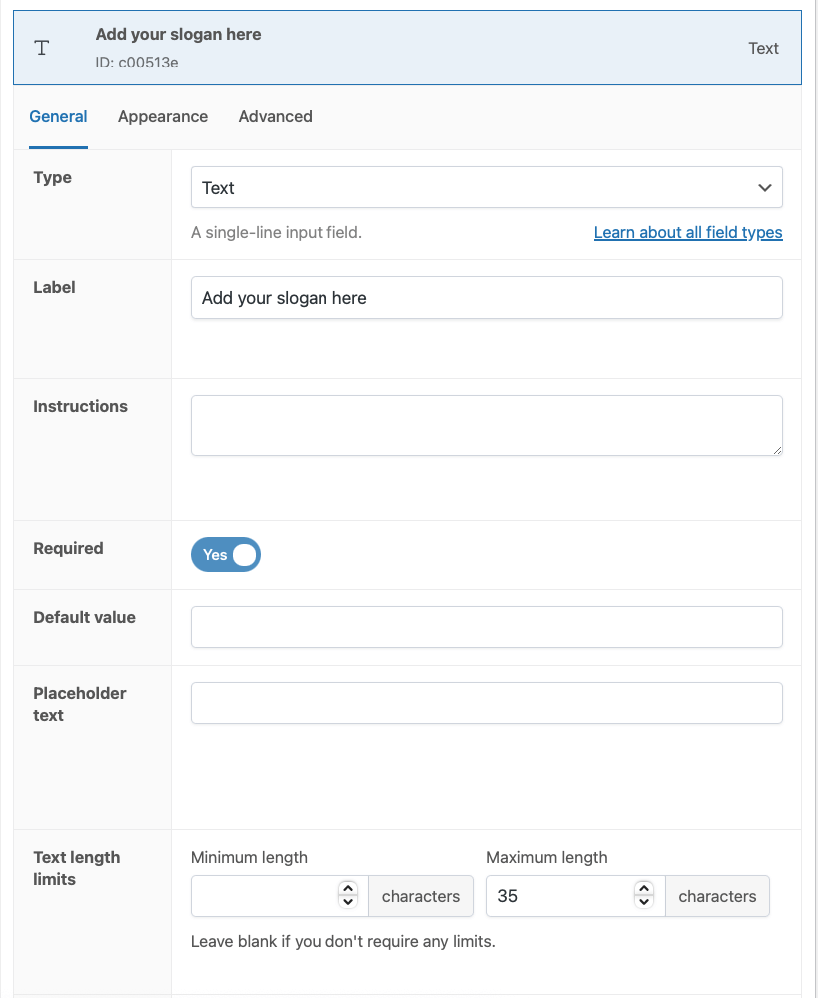
We’ll go through the most important settings for the field here:
- Type: This setting decides what type of custom field this should be. For now, leave it as Text.
- Label: This is the title of the field (which appears above it). Set it to “Add your slogan here.”
- Instructions: This setting adds a small paragraph of specific instructions below the input field. It’s used to give your customer extra information about that product option. We’ll add “Maximum 35 characters.’
There are various other settings to change the behavior of the text field, but we won’t set those now.
Once you’ve added all information, publish or update your product and you’re done!
How to add checkboxes to a WooCommerce product

Adding one checkbox or multiple checkboxes to your Woo product is very similar to adding a text field (which is explained above). Follow the steps above for adding a text field, but:
- If you want to add multiple checkboxes, choose Checkboxes from the Type dropdown.
- Want to add only 1 checkbox? Choose True/False as a type.
When adding multiple checkboxes, scroll down to the Options setting and click Add option. In this section, you can define each checkbox with a label and optional pricing changes.

How to add a number field to a WooCommerce product

By now, you probably get how it works. To add a number input field, repeat the steps above, but change the Type dropdown to Number.
Note that depending on the field type you select, additional settings will show up. For the numbers field, you can define whether or not you expect a decimal number, a minimum expected value, and a maximum allowed value.
How to add clickable images to a WooCommerce product
Most extra product options are basic form fields such as input fields or checkboxes. But Advanced Product Fields for WooCommerce also includes swatches. They are clickable buttons/elements such as color swatches, text swatches, and image swatches. They make your personalized products look better and are very easy to use. Below is an example of image swatches:
To add image swatches, repeat the usual steps and change the Type dropdown to Image Swatches. If you want to give customers the ability to select more than 1 image out of the group, then change the type to Multi-select image swatches.
Similar to adding checkboxes, scroll down until you find the Options setting. This is where you can define each image with an image, label, and additional pricing settings.
How to add a file upload field to a WooCommerce product
To add a file upload field to your product, change the Type to File Upload.
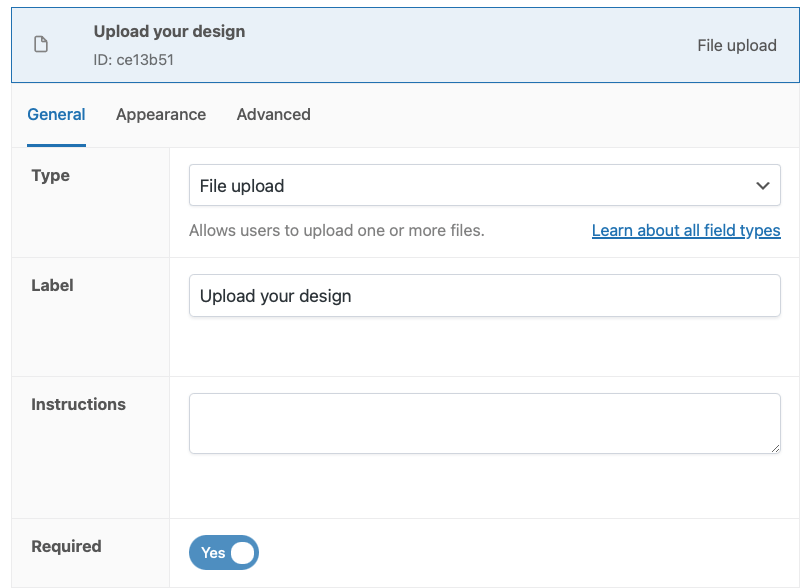
This will add a file upload field like this:
Advanced Product Fields (APF) for WooCommerce comes with many options to style and secure the file upload field. Make sure to check out the available options before saving your product.

Here is a more detailed tutorial on adding a modern file upload
Change the total product price depending on selected product options
A powerful product configurator or customizer needs the ability to change the final product price. Depending on which options the customer selects, the final product price can increase or decrease. This allows you to create customizable WooCommerce products with extra options that give discounts or add an extra price. Here are a few examples of extra product options that increase the total product price:
- Add a “gift wrapping” checkbox. When checked, the user is charged an extra $1 to cover the gift wrapping fee. And if you want this to be even more tailored, add image swatches for the user to choose their wrapping paper.
- If you sell computers, each option in the configurator is usually better than the previous one. Think about a 1TB hard drive versus a 2TB hard drive. The 2TB hard drive will be more expensive, so the total product price should increase.
- If you sell pizza with extra toppings, each additional topping increases the total product price with $1.50.
Advanced Product Fields for WooCommerce has a lot of features to help you create a similar experience. You can increase or decrease the final product price depending on the values the customer selects in your personalized product.
Pricing types
Advanced Product Fields allows you to use many different pricing types for your product add-ons. Here are the most popular ones:
- Quantity-based flat fee: Charges an extra fixed cost, which is automatically multiplied by the chosen product quantity.
- Flat fee: A fixed price, regardless of the product quantity.
- Percentage fee: The additional cost is a fixed fee based on a percentage of the product’s price.
- Amount × character count: Allows you to ask a fixed price per character. The price is automatically multiplied by the number of characters in the text field.
- Amount × field value: This pricing option is only applicable to number fields. It will multiply the field value with your given amount. This is useful to create a “pay-what-you-want” donation option.
- Table rate pricing: Finds the extra pricing from a predefined table.
- Formula pricing: If the above types don’t cover your needs, you can create your own formulas to cover more advanced pricing schemes.
These pricing features will take your customizable WooCommerce product to the next level! Below are quick tutorials on how to add pricing to your product addons.
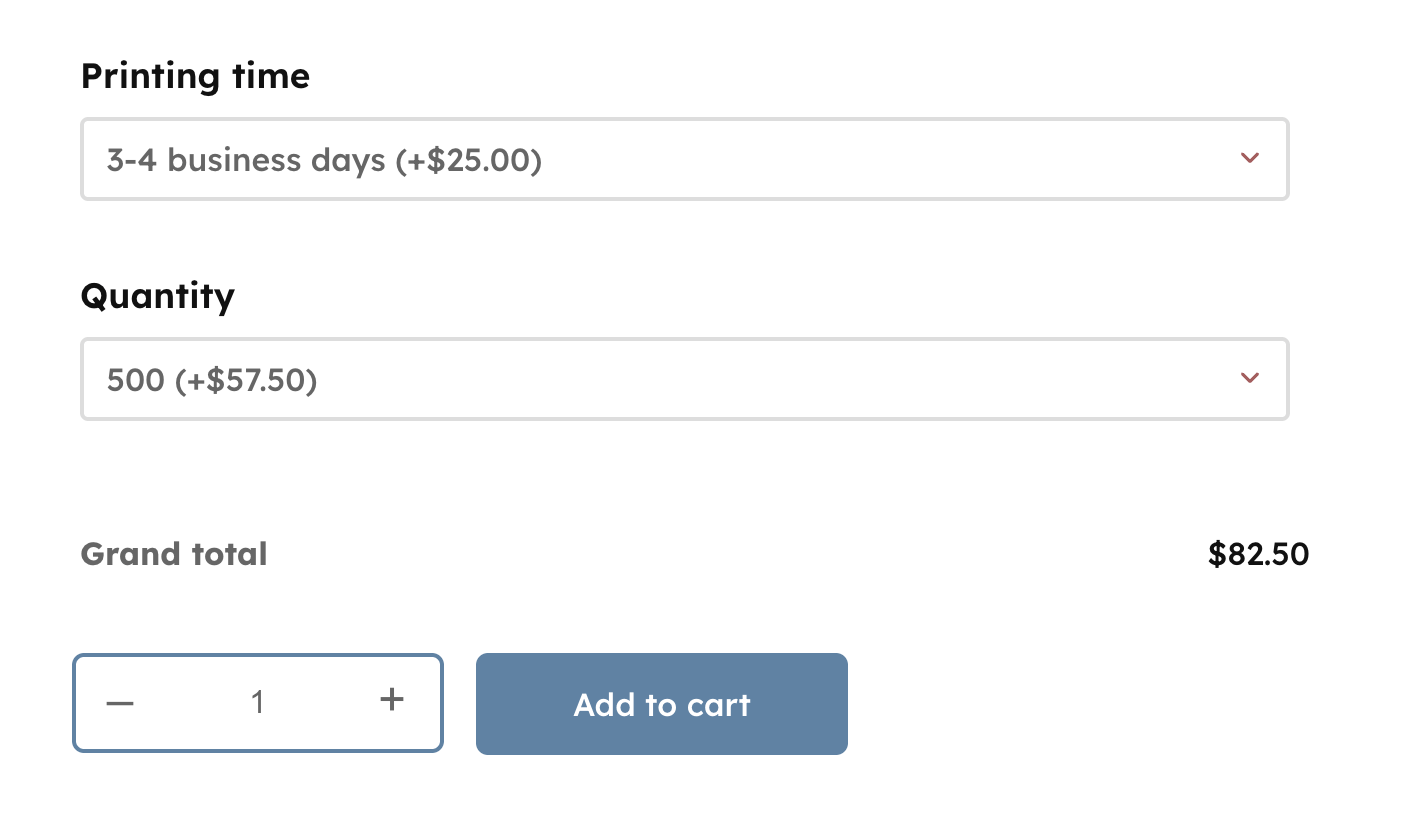
How to add a flat fee to a text field in WooCommerce
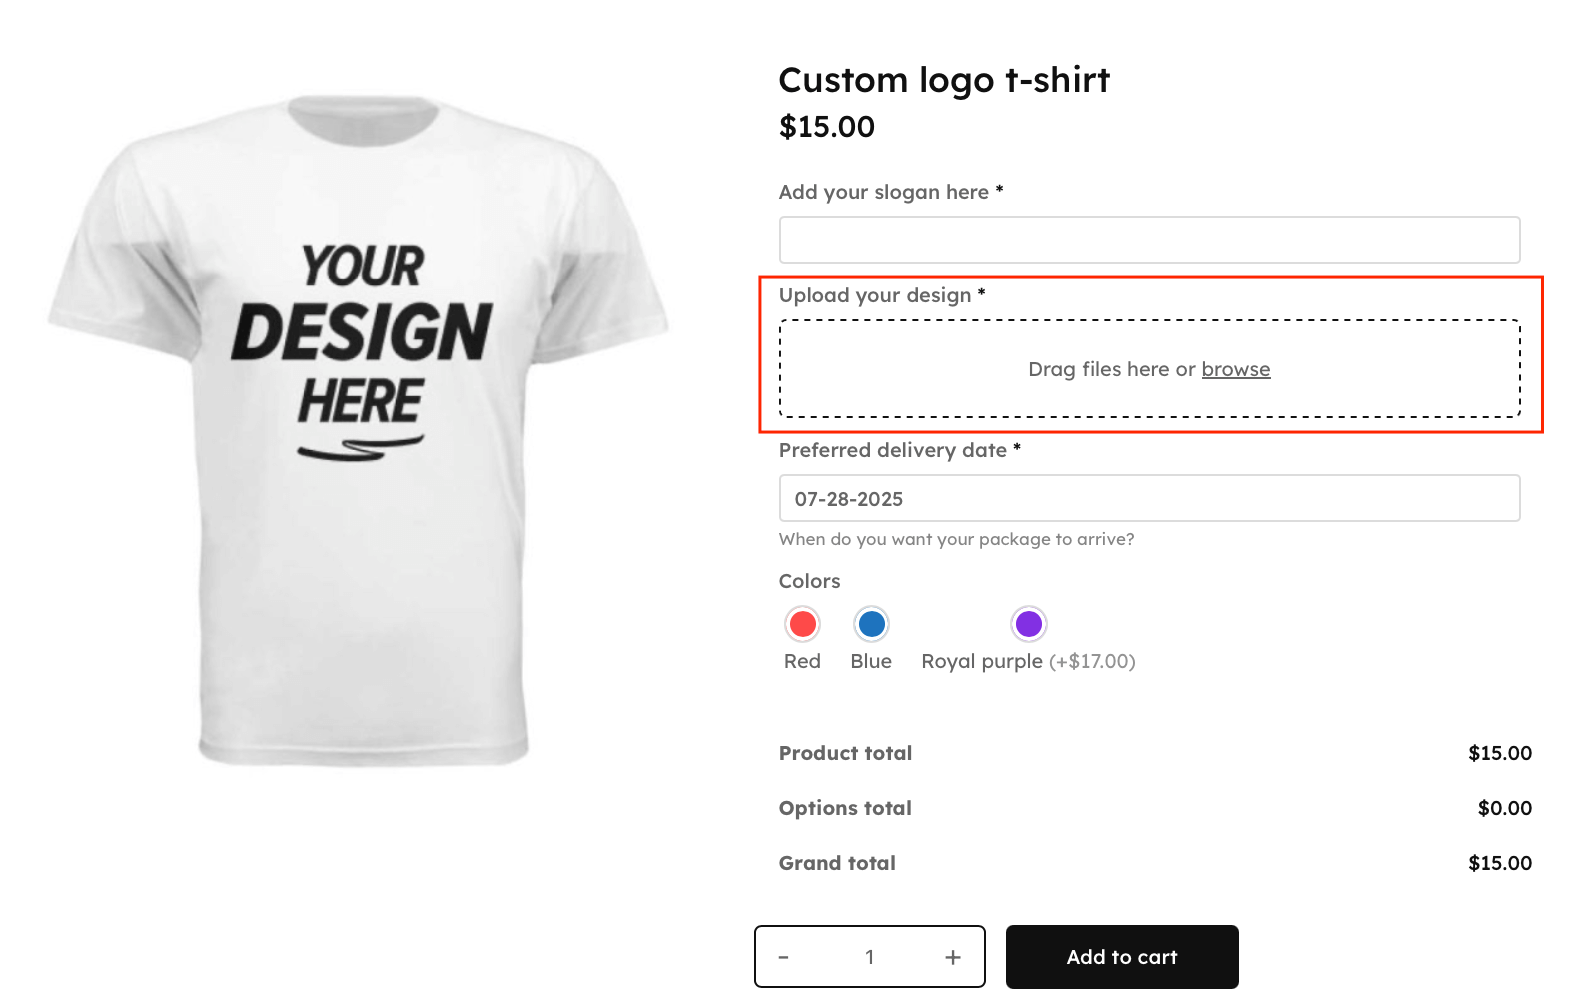
A basic example is to charge a flat fee when a text field is filled out. In our T-shirt example from earlier, we want to increase the final product price when the user adds the text that should appear on the T-shirt.
To do that, edit your product and find your text field in the Custom fields section. Scroll down to the Pricing setting. Turn it on and select Quantity based flat fee as the pricing type. Enter the desired additional cost in the field next to it. Your settings should look like this:

Now save your work by updating your product. Visit your product page and see how 2 extra sections appear on the product page: a pricing hint and a pricing summary.
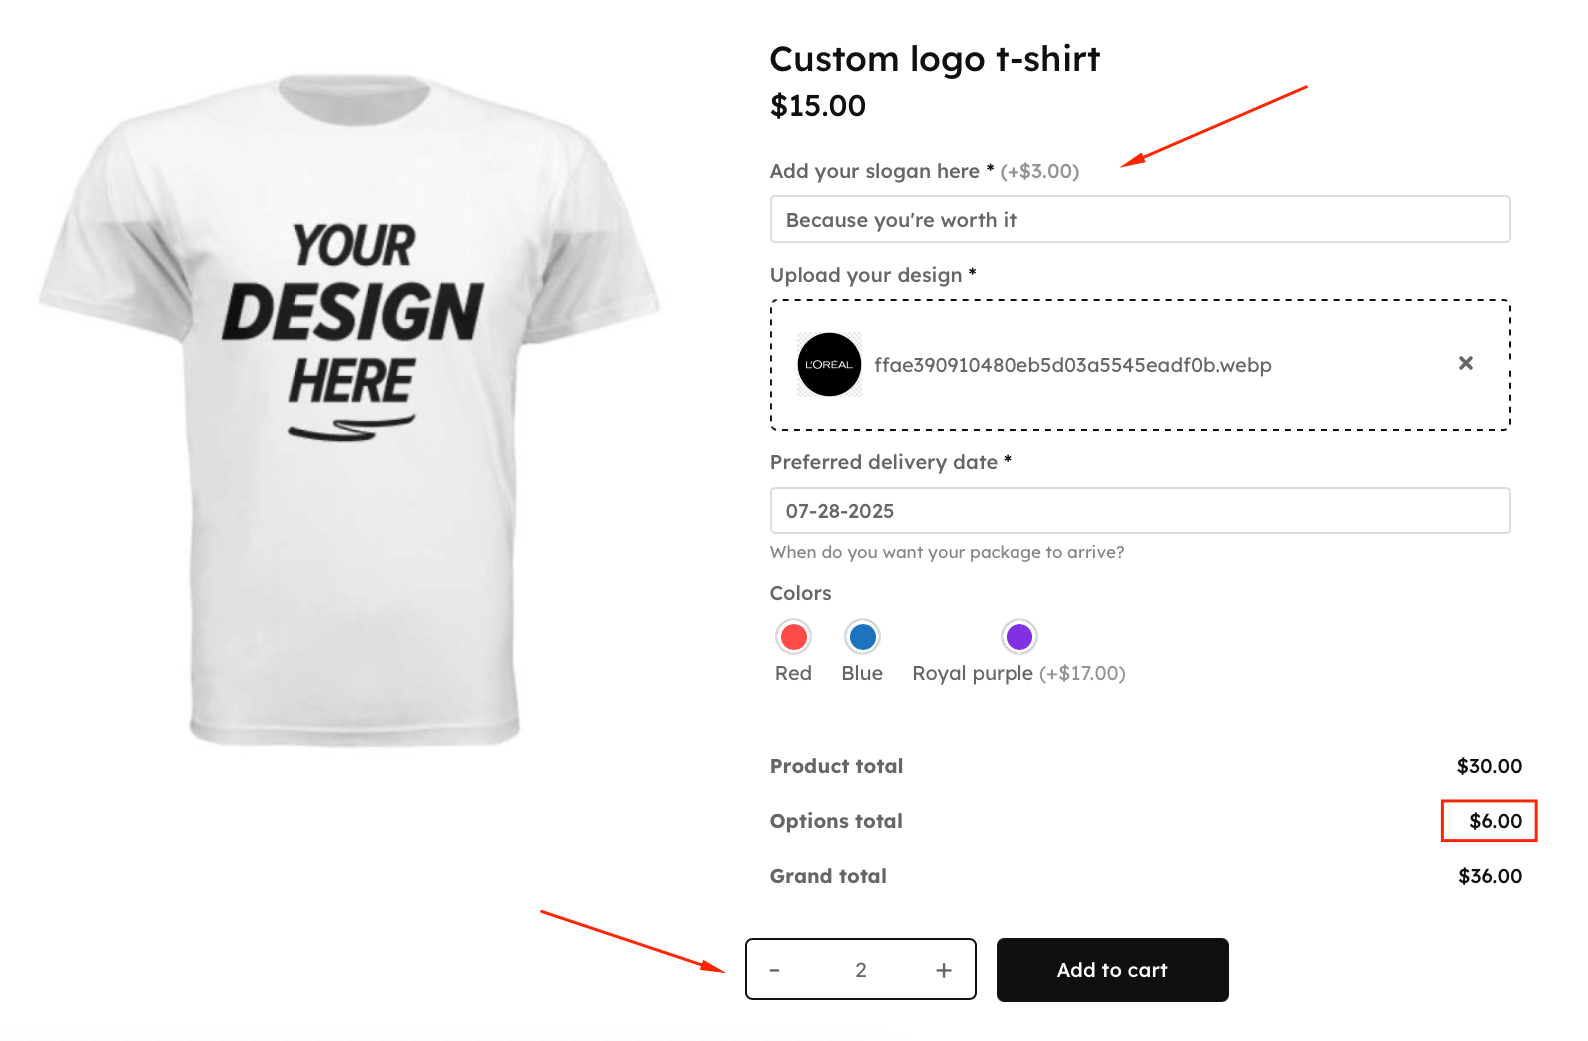
The pricing hint shows the customer what cost will be added when this field is filled out. The pricing summary at the bottom shows a breakdown of 3 prices: the product price, the total price of all options, and finally the grand total price.
How to add an extra fee to checkboxes in WooCommerce
Let’s say we’re building a “build your own pizza” customizer product in WooCommerce. Customers can add multiple extra toppings to their pizza. Each topping should increase the product price with $1 or $1.50.
We’ve discussed how to add checkboxes to a product, so we’ll skip that part here. Edit your product and find your checkboxes field in the Custom fields section. Scroll down to the Options setting. From there, set the desired pricing type and amount for each checkbox.

Save your product and check out the final result:
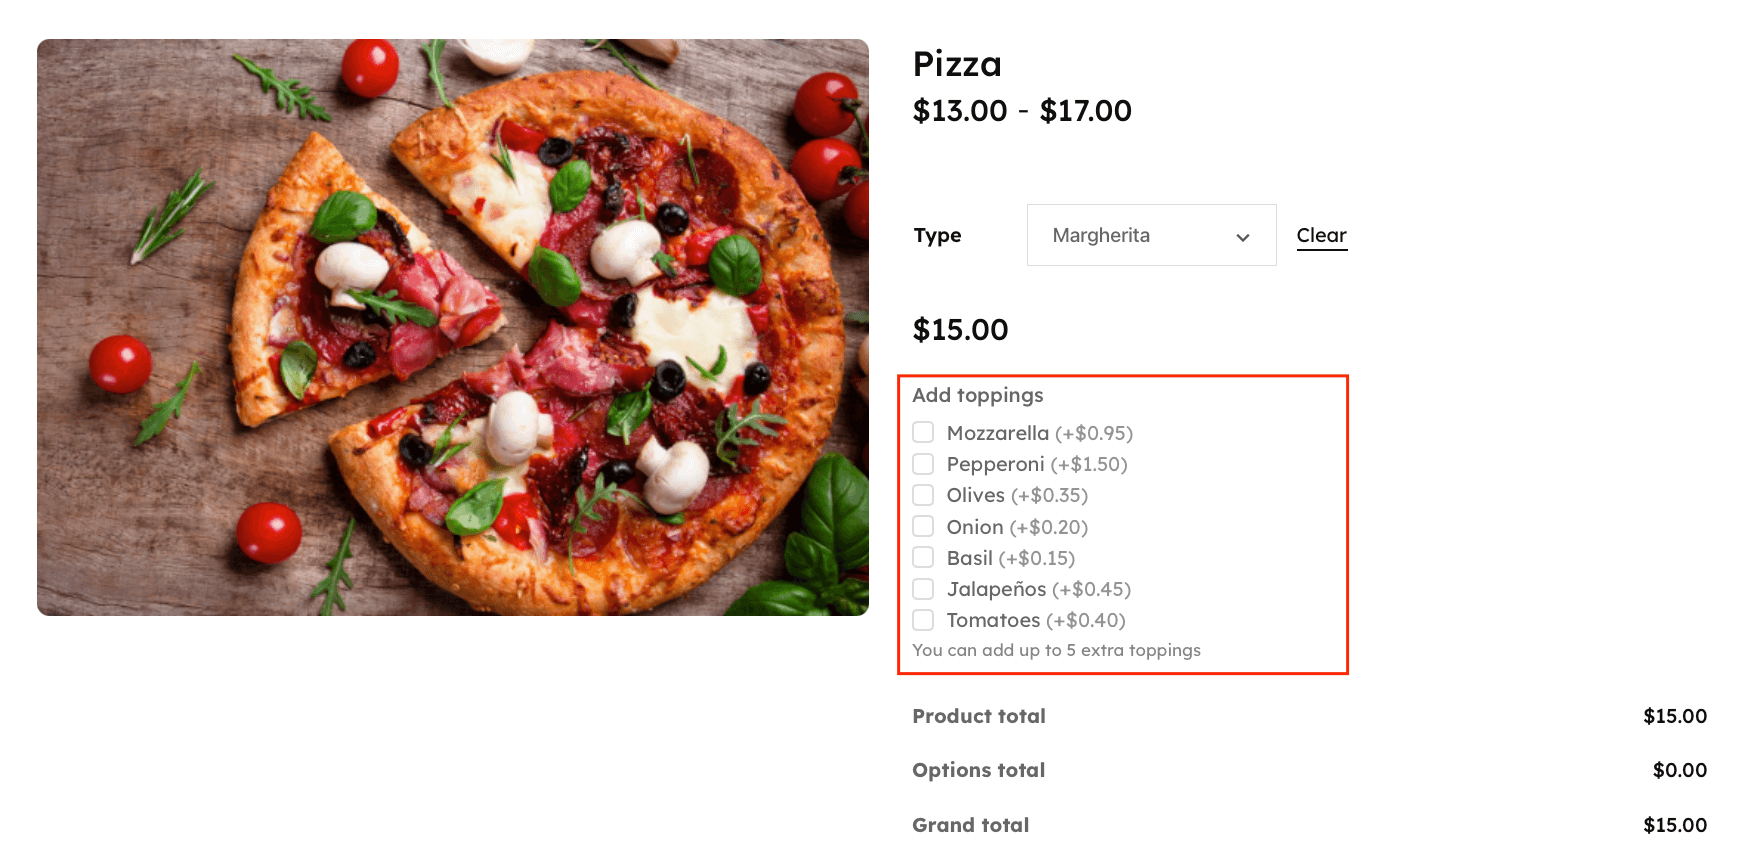
If you want to hide the pricing hint, go to WooCommerce → Settings → Product fields and disable the pricing hint there.
Live preview options
Modern customers expect to see exactly what they’re getting before they buy. Advanced Product Fields offers multiple ways to provide real-time visual feedback as customers personalize their products.
APF’s image switching feature
The most basic preview option is APF’s built-in image switching capability:
- Automatic image updates: Change the main product image based on customer selections.
- Multiple image support: Show different images for different color/style combinations.
- Smooth transitions: Images change instantly as customers make selections.
- Mobile optimized: Works seamlessly across all devices.
Image upload with move/resize capabilities
APF’s latest update introduces powerful image manipulation features perfect for custom product creation. Customers can now:
- Drag to reposition uploaded images on the product
- Resize images to fit perfectly
- Rotate images for optimal placement
- See real-time preview of their customization
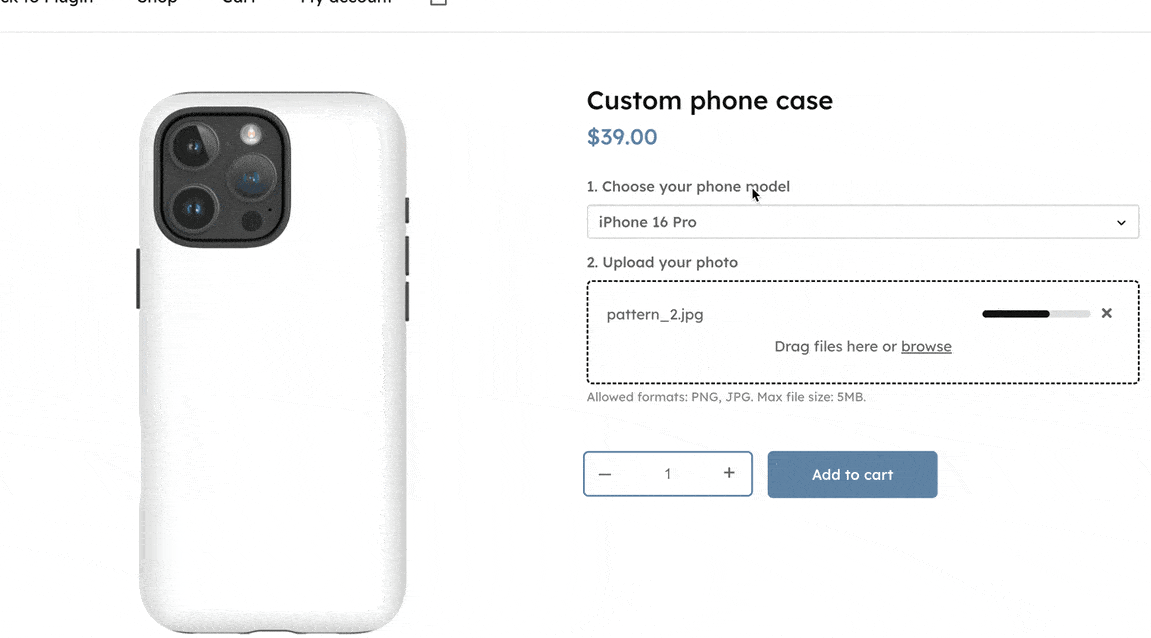
This feature is perfect for:
- Custom phone cases (see our detailed phone case customization guide)
- Personalized mugs with photo placement
- T-shirt designs with custom positioning
- Canvas prints with layout control
- Any product where image placement matters
Real-time price updates
Keep customers informed with dynamic pricing displays:
- Instant calculations: Prices update as options are selected
- Clear breakdown: Show base price + customization costs
- Running total: Display the final price prominently
- Mobile-friendly: Pricing stays visible on scroll
Customer experience benefits
Live previews dramatically improve the shopping experience:
- Reduced uncertainty: Customers know exactly what they’re buying
- Increased confidence: Visual confirmation reduces purchase hesitation
- Lower return rates: Accurate previews mean fewer disappointed customers
- Higher engagement: Interactive previews keep customers on-page longer
- Better conversions: Confident customers are more likely to complete purchases
Pro tip: Combine image switching with conditional logic to create sophisticated preview systems that respond to multiple customer choices simultaneously.
Conditional logic
Your configurable WooCommerce products are already powerful, but they’re about to get even more powerful!
Advanced Product Fields for WooCommerce allows you to show or hide product add-on fields based on the values of other fields or selected product variations. This powerful feature is called conditional logic and allows you to create more complex product configurators while maintaining a good user experience for your customers.
Here are some advantages of using conditional logic in your personalized products:
- Don’t overwhelm your users with many options, but gradually show them more.
- You can even create a multi-step product form to divide complex products in easy steps.
- Group logical parts together, increasing the user experience for the customer.
When your extra product options are complex, it’s a good idea to use conditional logic to help your customers understand your product.
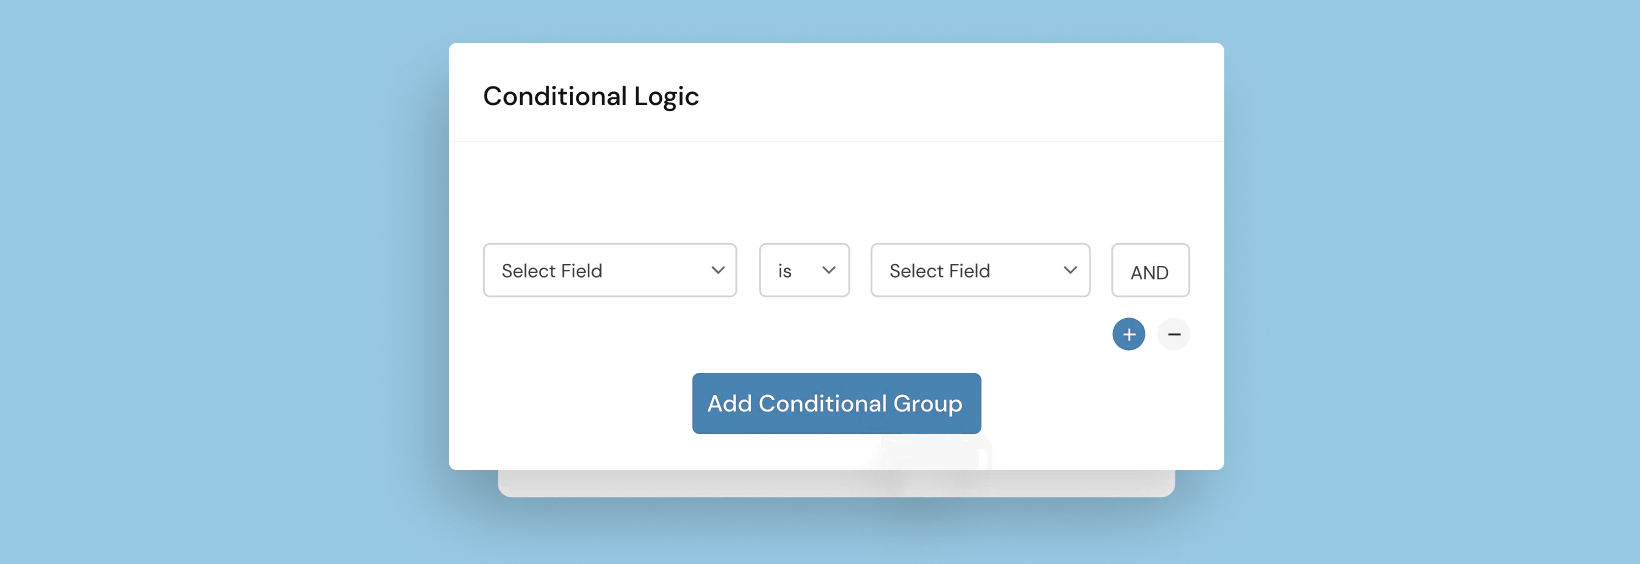
How to add conditional logic to your WooCommerce product options
Conditional logic is achieved by adding rules that let you decide when to show a specific product field. Using the Advanced Product Fields for WooCommerce plugin, you can create as many conditional rules as you like for the fields you create.
Edit your product and find your field in the Custom fields section. Scroll down to the Conditional section and click Add new rule group to start adding conditional rules.

Since you can add multiple rules, this system is capable of creating very complex logic to fit even the most advanced product setups.
By adding conditions to custom fields in WooCommerce, you can keep your product pages neat and concise. This helps you deliver a good user experience to customers.

Here is a detailed tutorial on adding conditional logic to product options.
How to add product add-ons in bulk
In this guide, we’ve only worked with local product fields. That means the custom fields only exist on a single product. But what if you have many products that require the same fields? No problem! Advanced Product Fields allows you to add product options in bulk too.
To do so, navigate to WooCommerce → Product Fields and create a new Field Group.
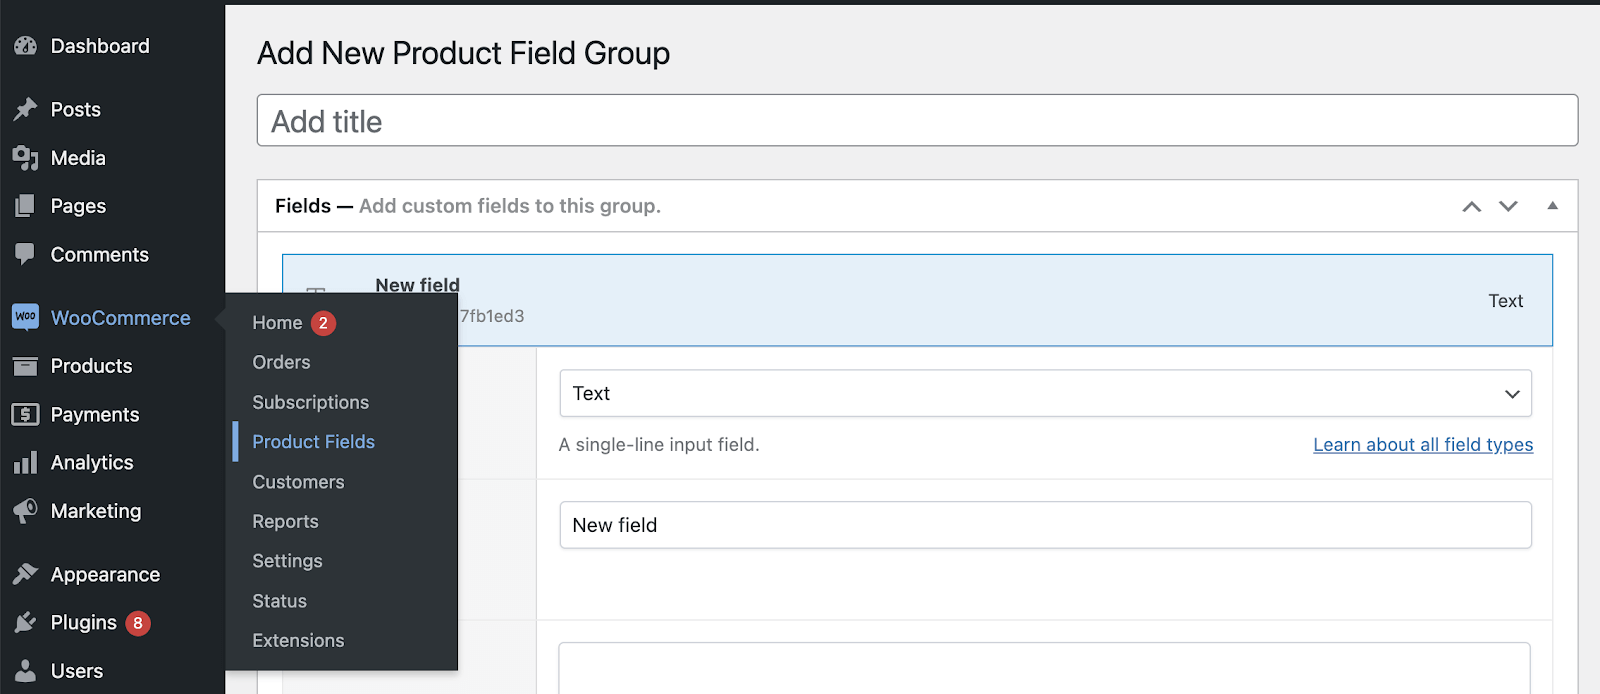
Add your fields and then navigate down to the Conditions section. In that section, you can add rules to display these fields on various products at once. You can add rules based on:
- Product categories
- Product tags
- Product variations or attributes
- User roles
- User logged in or logged out?
- Product names or IDs
- And finally, product types
If you add new products to your WooCommerce store in the feature, fields will automatically show if one (or more) of the above rules are true.
Wrapping up: Customizable products in WooCommerce
While WooCommerce itself doesn’t have many features to create customizable, personalized products, we’ve learned there are options to build out any type of use case. Specifically, we’ve looked at the Advanced Product Fields for WooCommerce plugin, including how to use it to create extra product options, to conditionally show or hide them, and to price the extra product add-ons accordingly.
Looking for the business perspective? This guide focused on technical implementation. To understand the business value, ROI, and customer data strategies for product personalization, read our complete guide to personalizing products in WooCommerce.
If you have any questions or remarks, please let us know in the comments!
Ready to offer customizable products? Add Advanced Product Fields to your WooCommerce store today!

The easiest way to set up extra product options for customizable products!
Find out more