
Spin-to-win opt-ins can be a great way to get more visitors to sign up for your email list. Let’s face it: Popups can be annoying, and the standard “sign up for my email newsletter” opt-in forms don’t inspire people to sign up.
A clever way to get users excited to join your email list is using spin-to-win opt-ins. A spin-to-win opt-in is a gamified popup or inline form that lets users win a prize or discount when they enter their email addresses.
Below, you’ll learn why spin-to-win opt-ins can be a valuable enhancement and how you can add one to your website or WooCommerce store.
What is a spin-to-win opt-in and why does it work so well?
A spin-to-win opt-in is a type of popup or sign-up form that offers your visitors a fun way to interact with your website.
Instead of showing a standard discount popup, many website and store owners use spin-to-win opt-ins to encourage more sign-ups and make their opt-ins more engaging and lucrative.

Here are some benefits of using a spin-to-win opt-in:
- It triggers curiosity and FOMO in your visitors while offering value.
- It creates a win-win scenario of creating a fun experience while delivering you a new subscriber.
- These opt-ins higher-converting and have 10 times the engagement rate of traditional popups.
How to add a spin-to-win opt-in to your site
There are many benefits of using spin-to-win opt-ins. So let’s look at how you can add one to your online store.
One of the easiest ways to add a spin-to-win opt-in to your WordPress or WooCommerce site is with the WP Optin Wheel plugin. With just a couple of clicks, you can have your very own high-converting spin-to-win opt-in running on your site.
Here are a few reasons to use WP Optin Wheel over other plugins. This plugin offers:
- Complete customization of the appearance of your spin-to-win opt-in
- Full control over spinner probability, prizes, and rules
- Multiple display options, including popup, inline, and widget mini-wheel
- Full integration with WooCommerce’s coupon feature for unique one-time-use coupons
- Automated anti-cheat validation to block fake or invalid email addresses
Note: We’ll be using the premium version of the plugin for the tutorial below. However, there is a free version you can use that provides basic spin-to-win functionality.
1. Download, install, and activate WP Optin Wheel
After you’ve purchased the plugin, you’ll need to download, install, and activate it. This process is the same as with any other WordPress plugin. If you need help, check out our step-by-step guide on installing WP Optin Wheel.
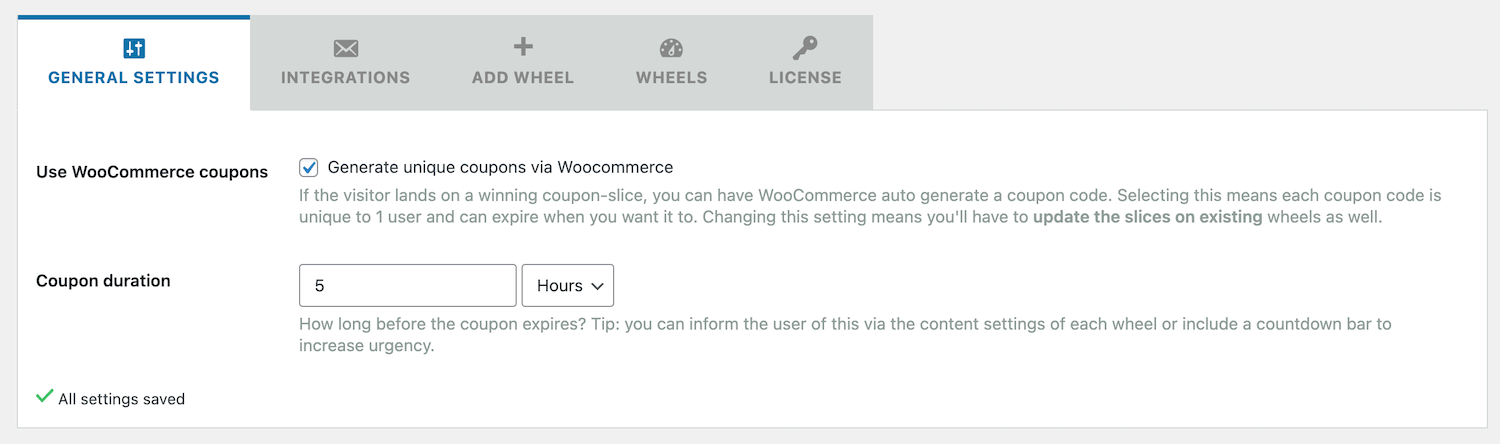
2. Enable unique WooCommerce coupon settings (optional)
If you run a WooCommerce store, you can enable the unique WooCommerce coupon in the General Settings section. This will create a coupon slice that generates a unique coupon code specifically for that user.
3. Connect your email marketing provider
If you plan to use spin-to-win opt-ins to grow your email list, you’ll need to connect your email provider of choice.
WP Optin Wheel works with the most popular email marketing tools, such as MailChimp, ActiveCampaign, GetResponse, MailerLite, Klaviyo, and more.
To connect your email marketing provider navigate to Settings → WP Optin Wheel Pro, then click the Integrations tab.

After that, click on the logo of your email marketing provider, and you’ll be prompted to enter your API key.
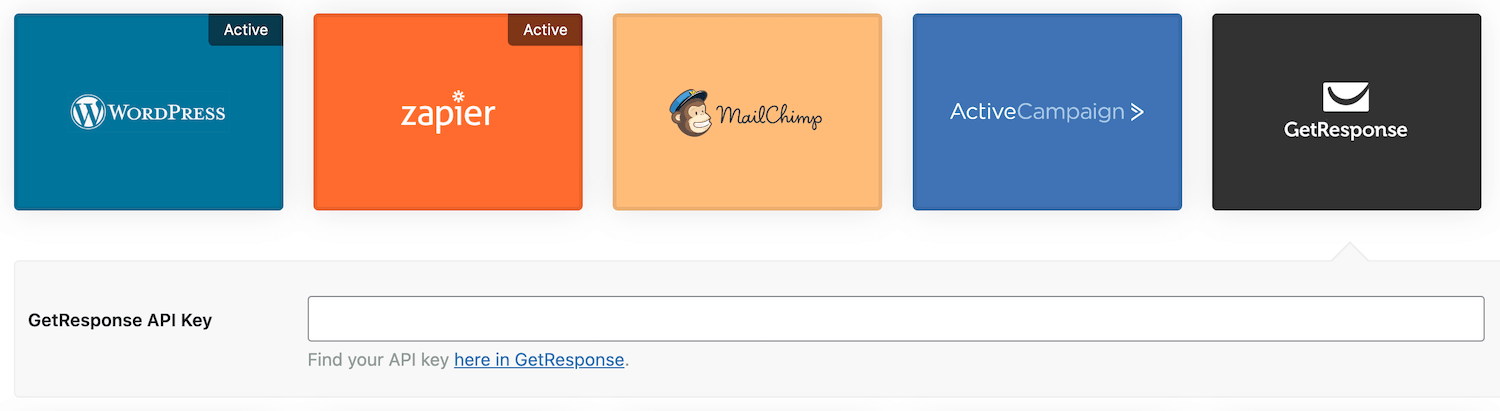
To find your API key, you’ll need to log into your email marketing provider’s account settings, which will differ slightly depending on your provider.
4. Create your first spin-to-win opt-in wheel
Once you’ve connected to your email provider, click the Add Wheel menu option to start creating your first wheel.
Here, you can give your wheel a name and choose whether you want to use it as a popup or embedded into a landing page on your site.
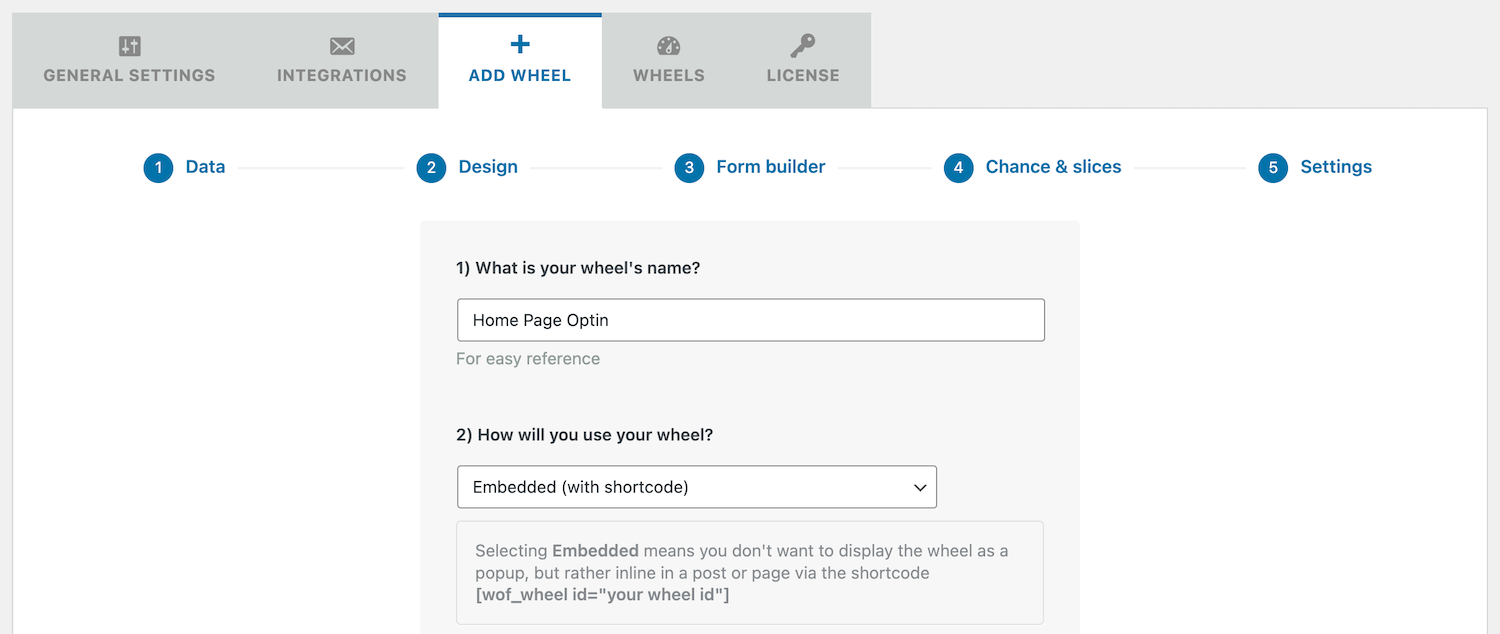
If you’re going to embed the spin-to-win opt-in wheel into your site, then you’ll need to add the shortcode wherever you’d like it to appear. The shortcode will look something like this [wof_wheel id= “your wheel id”]. You’ll need to substitute the ID with your wheel ID, which we will further explain below.
Once you’ve done this, you can choose how to collect data. You can choose not to store data, store data within your WordPress database, or select the Zapier option if you connected your email provider in the previous step.
5. Design your spin-to-win opt-in
Next, it’s time to design your spin-to-win opt-in. WP Optin Wheel offers 14 different themes, so you can choose one that best matches your site’s design. If none of the themes really match your color scheme, you can optimize the colors and background in the next steps. For now, select your preferred theme (or the one closest to your preference).
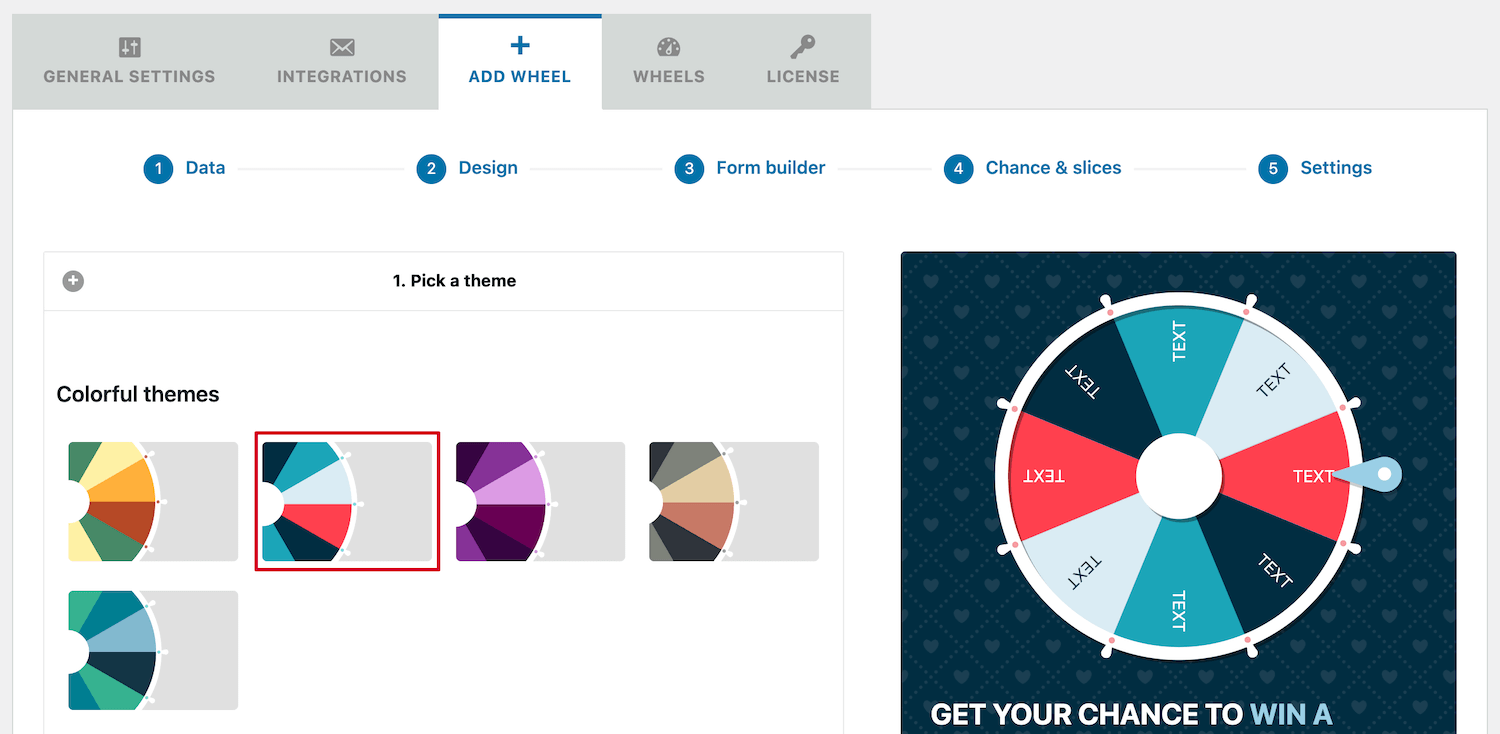
Then, you can choose the number of slices you want your spin wheel to have. You also have control over the color of each slice, so if none of the existing themes are perfect for your website, you can further customize a theme here. To change the color, click the Select Color button and enter the HEX code or choose a new color from the palette.
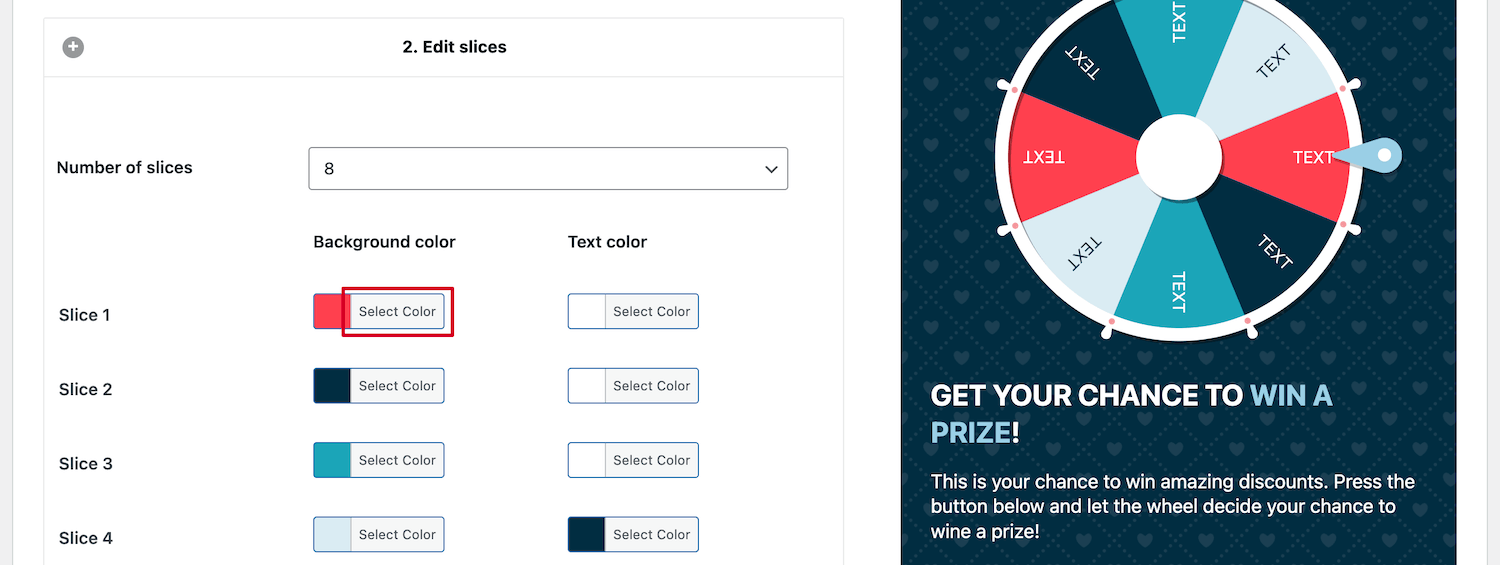
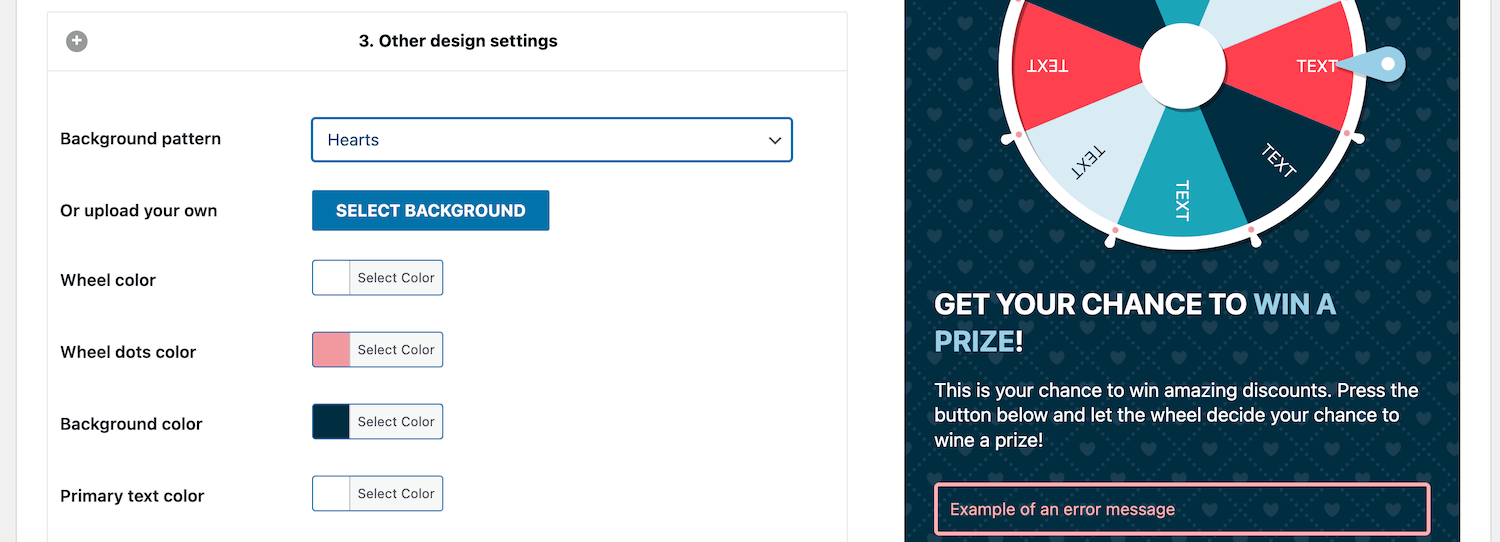
Below that, you can choose the background pattern or upload your own background, customize your text color, buttons, and more.
6. Build your spin-to-win opt-in form
Once you’re happy with how your spin-to-win opt-in wheel looks, it’s time to customize your form. The email field will be added by default, but you can add new fields by clicking the Add new field link.
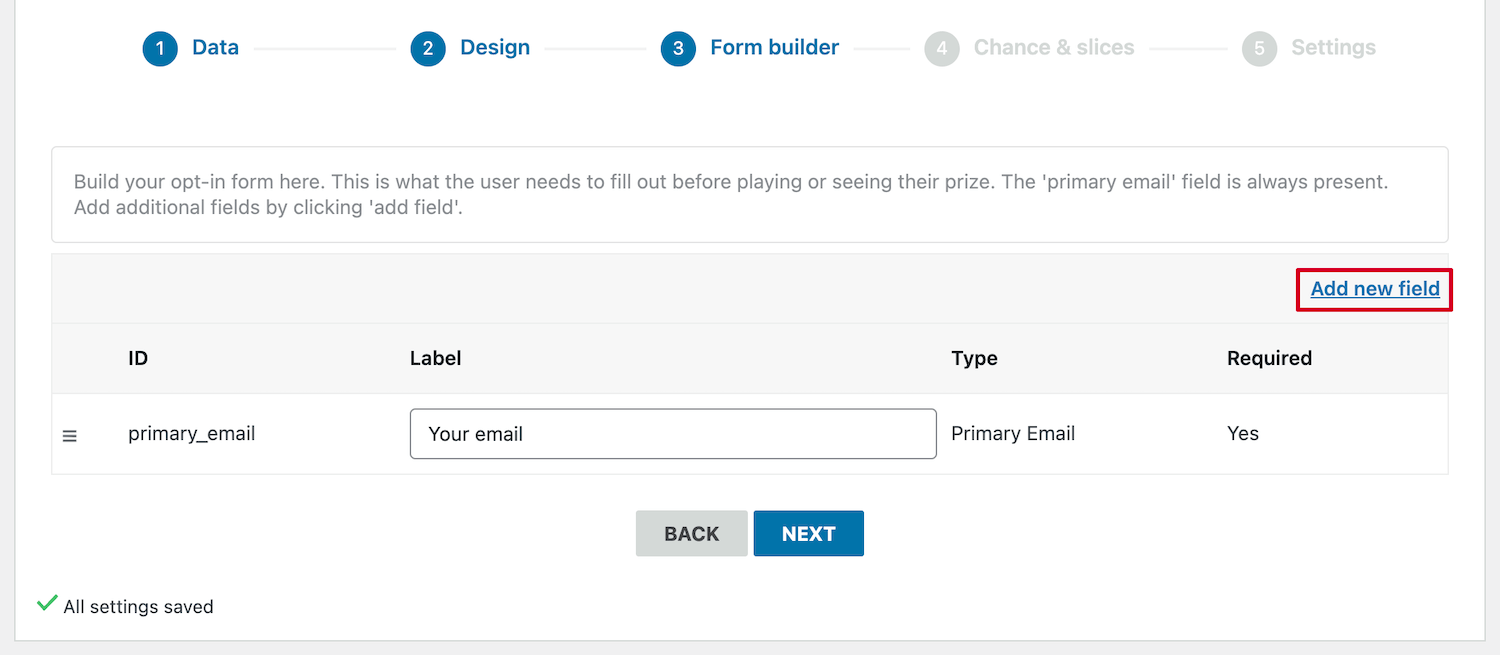
In the field popup, you can customize the input type and label, and specify whether that input is required or not. Once you’re satisfied, click the Next button to go to the Chance & slices screen.
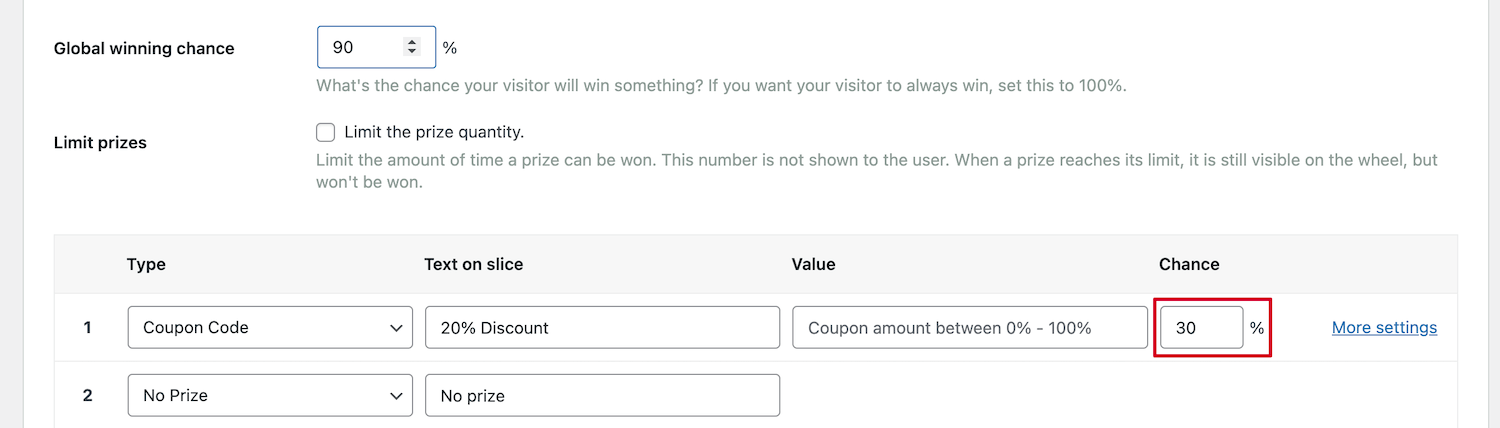
Now, it’s time to customize the available prizes. You have a lot of options available, including:
- Coupon code
- Free gift
- No prize
- Plain link/redirect
- Text/HTML
This gives you a lot of control over the prizes you offer. You can offer discounts, free ebooks, free shipping codes, and more.
One very powerful feature is the ability to adjust the percent chance your visitors will win a prize—you can be the master of your own little universe here! This allows you to control how often users will land on specific prizes, depending on factors like your stock of certain products, your preferred discount amount, etc. Adjust the percentage in the Chance box for each prize.
7. Adjust your global spin-to-win settings
The last step gives you complete control over your form messaging, behavior settings, gameplay, security, and more.
We’ll explore each of these below:
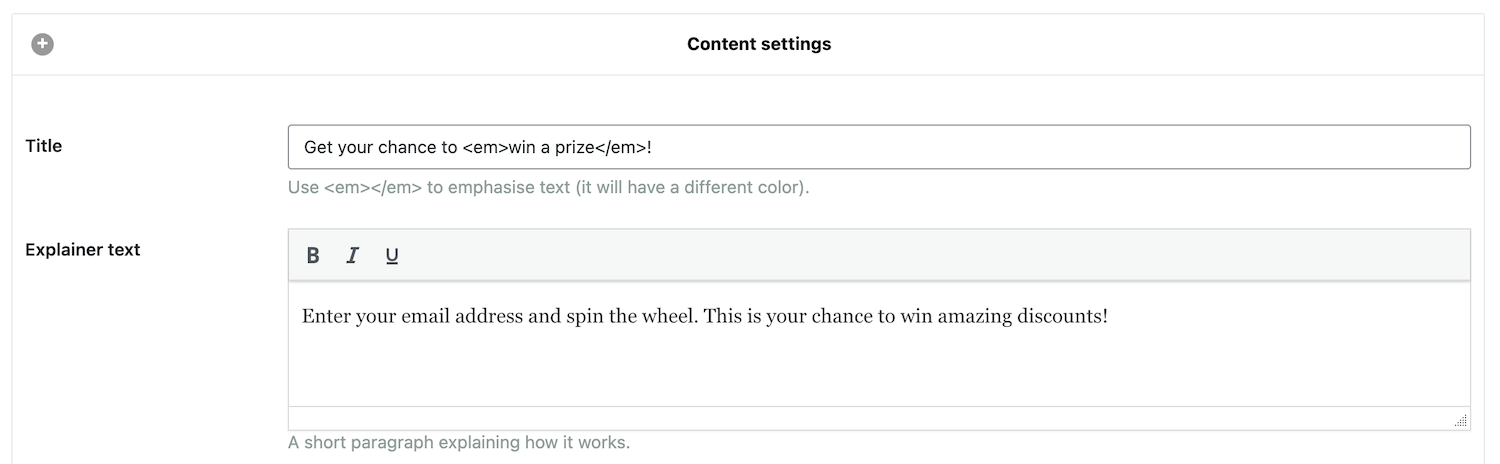
Content settings
Here, you can control all the messaging for your opt-in, including:
- The title of your form
- Your disclaimer text, including contest rules
- Button and closing popup text
- Text for losing a game
- Text for winning a game
- Every other text your wheel requires (e.g. button or “games left”)
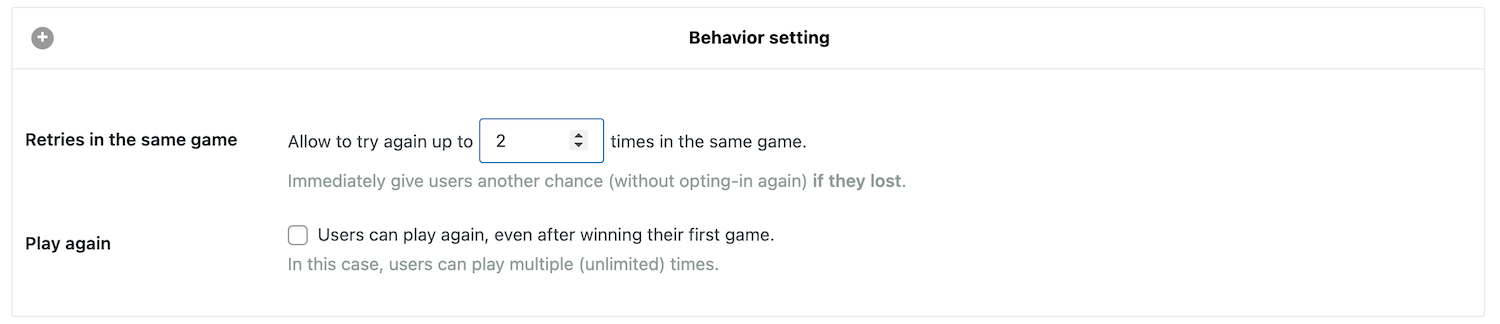
Behavior settings
The behavior settings control how many times your visitors can spin the wheel. You can also let users spin again even if they won a prize with their first spin .
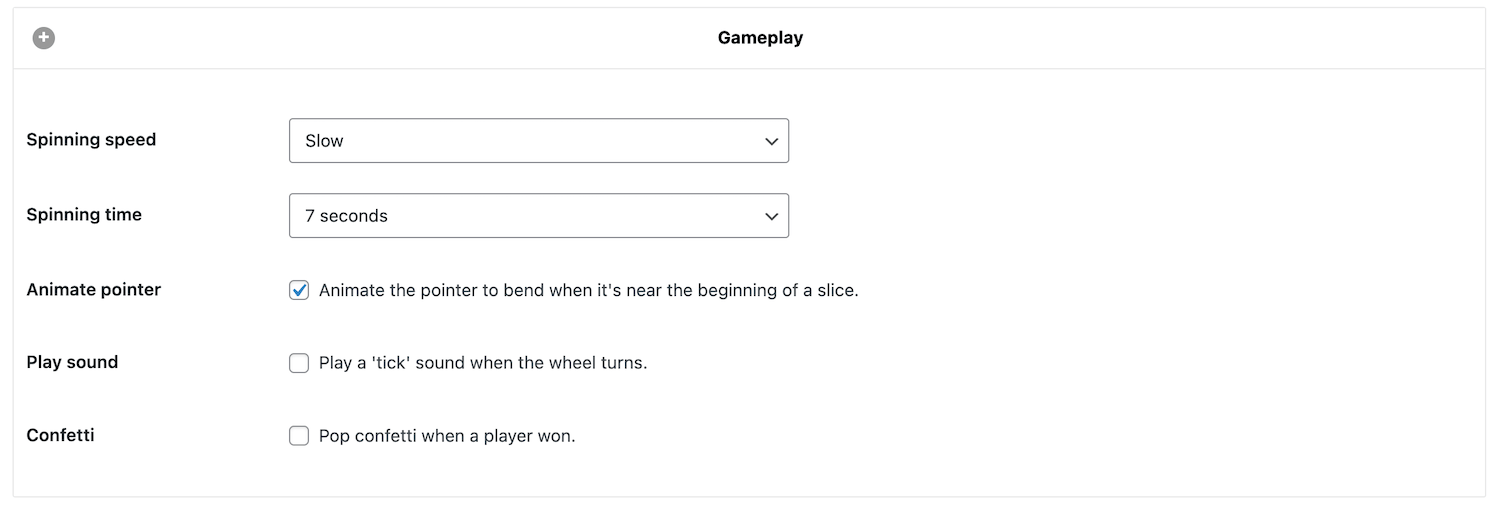
Gameplay
Gameplay settings help to make the opt-in more interactive. You can control the spin speed, time, animation, and sounds, and add confetti after a player wins.
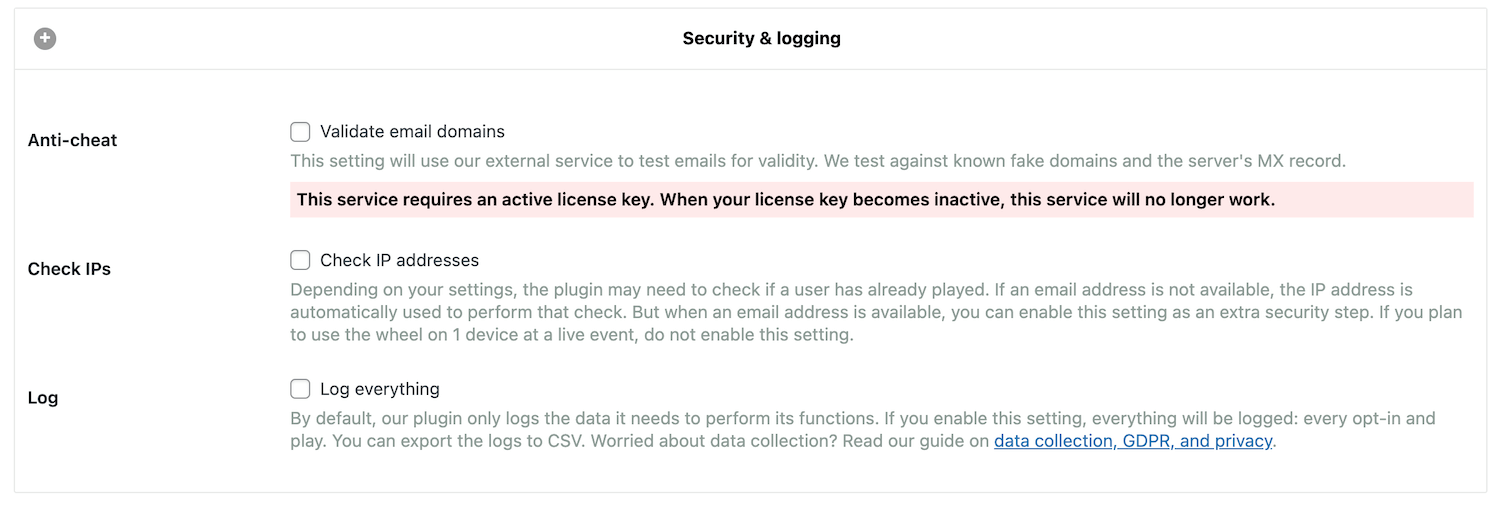
Security and logging
The security and logging section helps ensure that people use real email addresses and don’t try to game the system with multiple entries. If you’re using the Pro version, you can enable automated anti-cheat settings, which will validate email addresses to make sure they’re authentic.
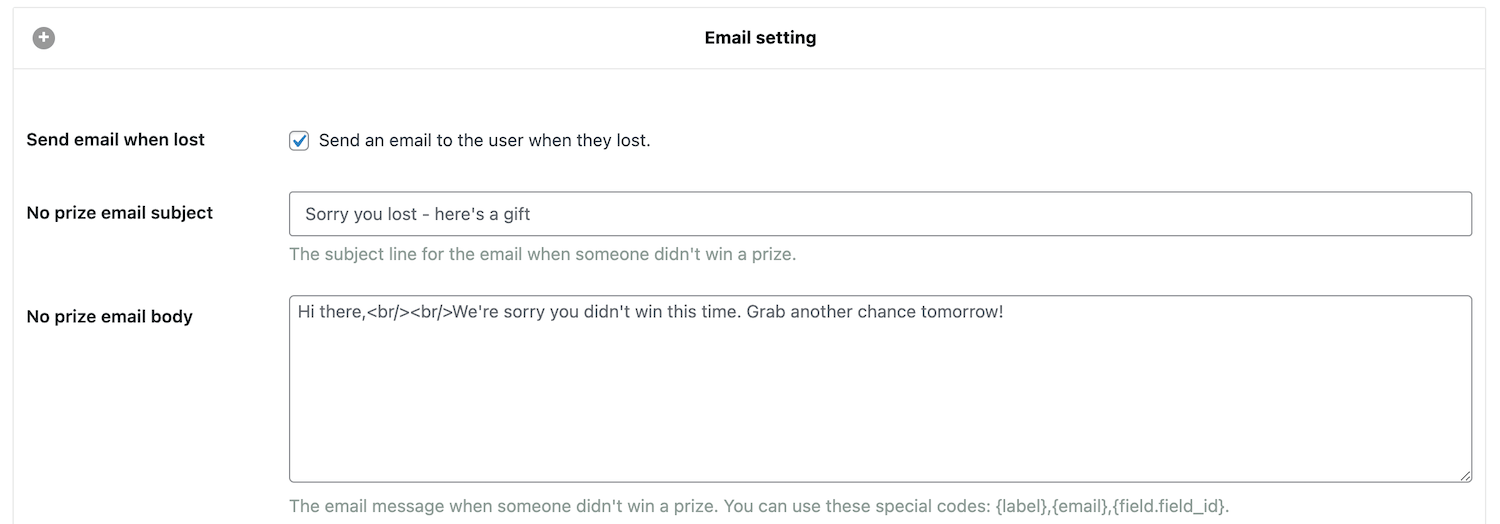
Email settings
The email settings section allows you to create and send automated emails based on whether users win or lose. This gives you the ability to quickly build a relationship or even offer a consolation prize if they don’t win.
Check the box and create the automated email that’ll be sent out.
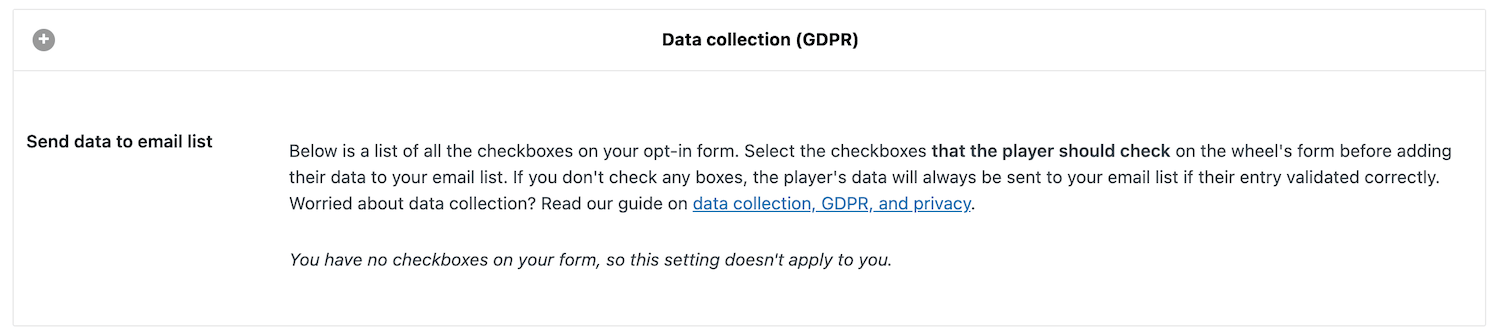
Data collection (GDPR)
Depending on how you collect data, you may need to remain GDPR compliant (especially if you’re in Europe or have European customers). If you’re unsure about GDPR compliance and your opt-in form, then check out our guide on data collection, GDPR, and privacy.
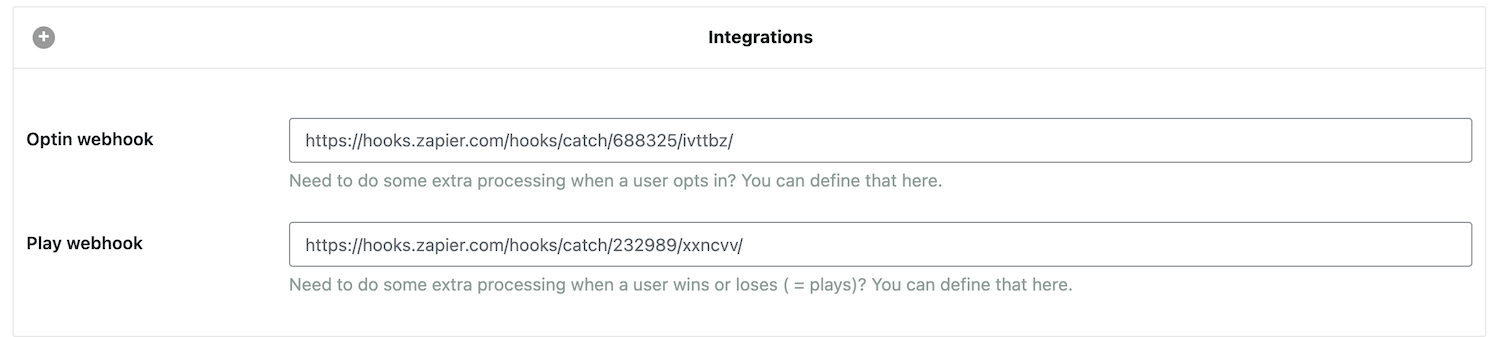
Integrations
Finally, if you need to connect additional applications for data processing, you can add opt-in or play webhooks in the Integration section.
8. Add your spin-to-win opt-in to your site
Once you’ve finished building your form, it’s time to add it to your site! If you’re creating a spin-to-win popup, it’ll automatically be live on your site and look like the one below.

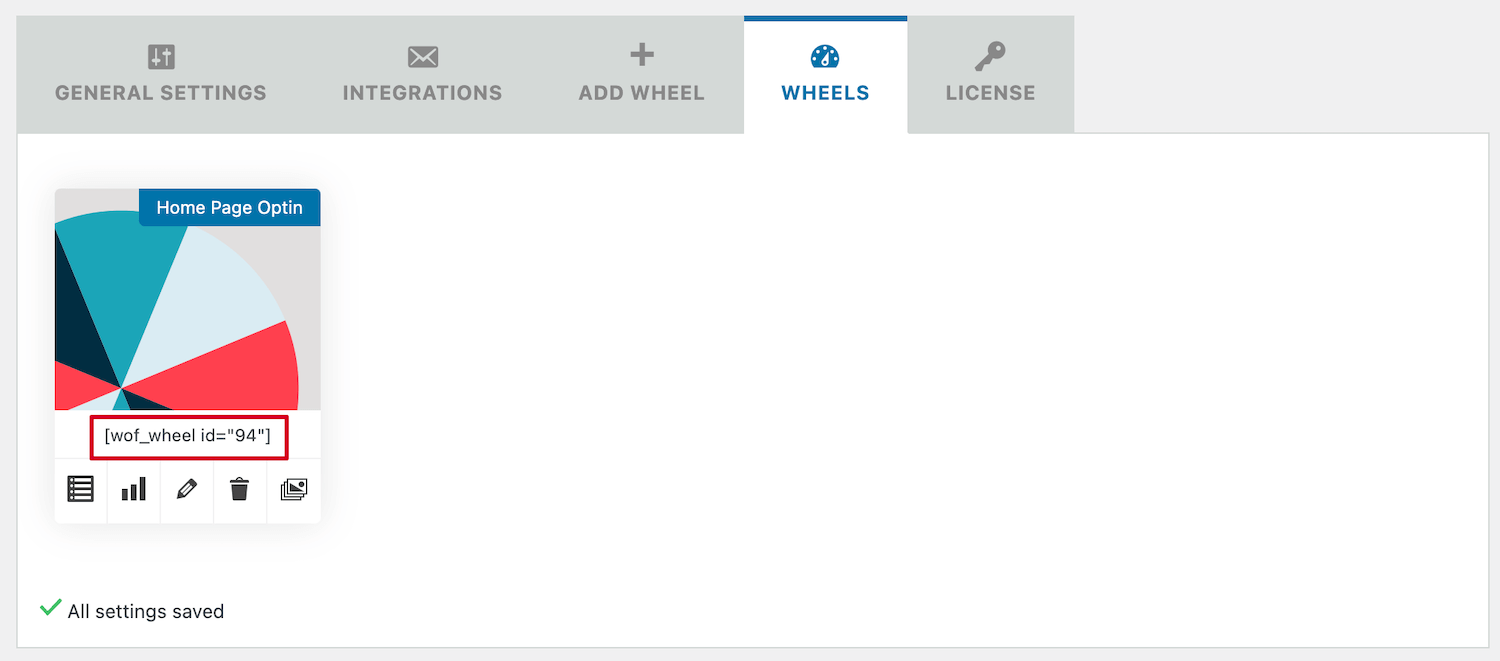
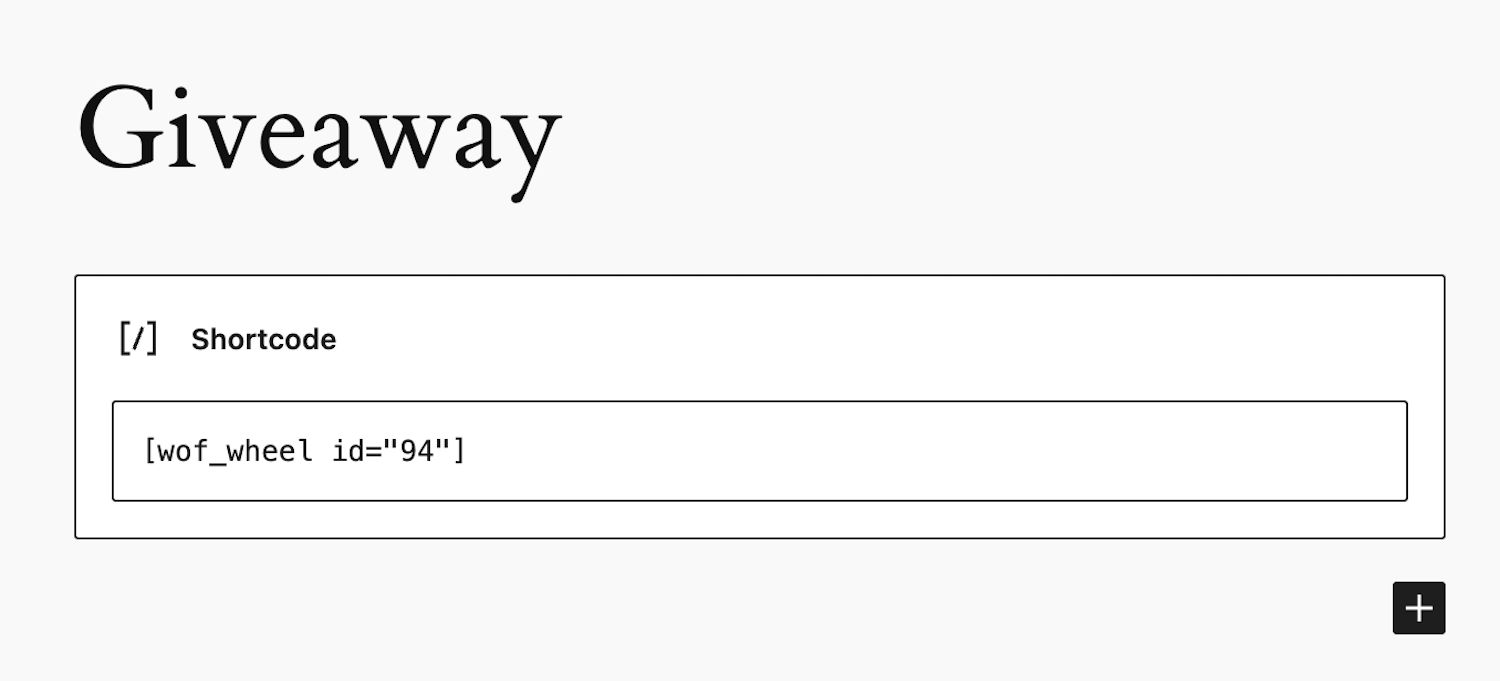
If you’ve created an embeddable opt-in, you’ll need to add it to your site using the generated shortcode. In this case, the shortcode we need to copy is [wof_wheel id= “94”]; however, yours will look slightly different.
Even if you’re not familiar with adding shortcodes, it’s pretty simple. All you need to do is go to the page or post where you want to add the spin-to-win opt-in, then search for the shortcode block.
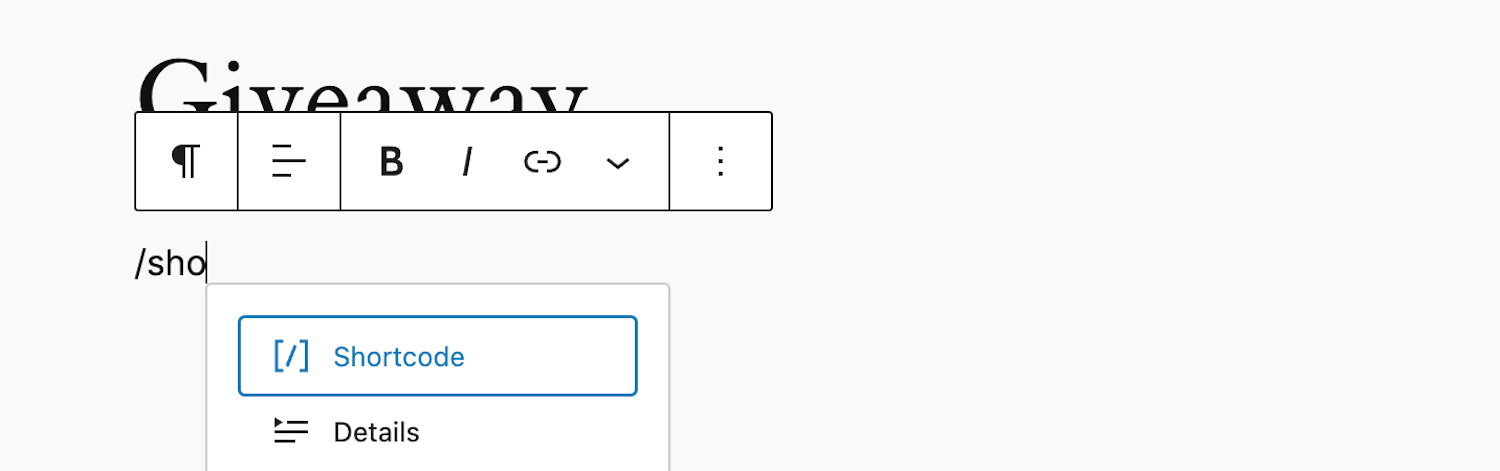
After that, paste the shortcode you copied earlier, and you’re all set! Now, you can direct visitors to your newly created spin-to-win opt-in page.
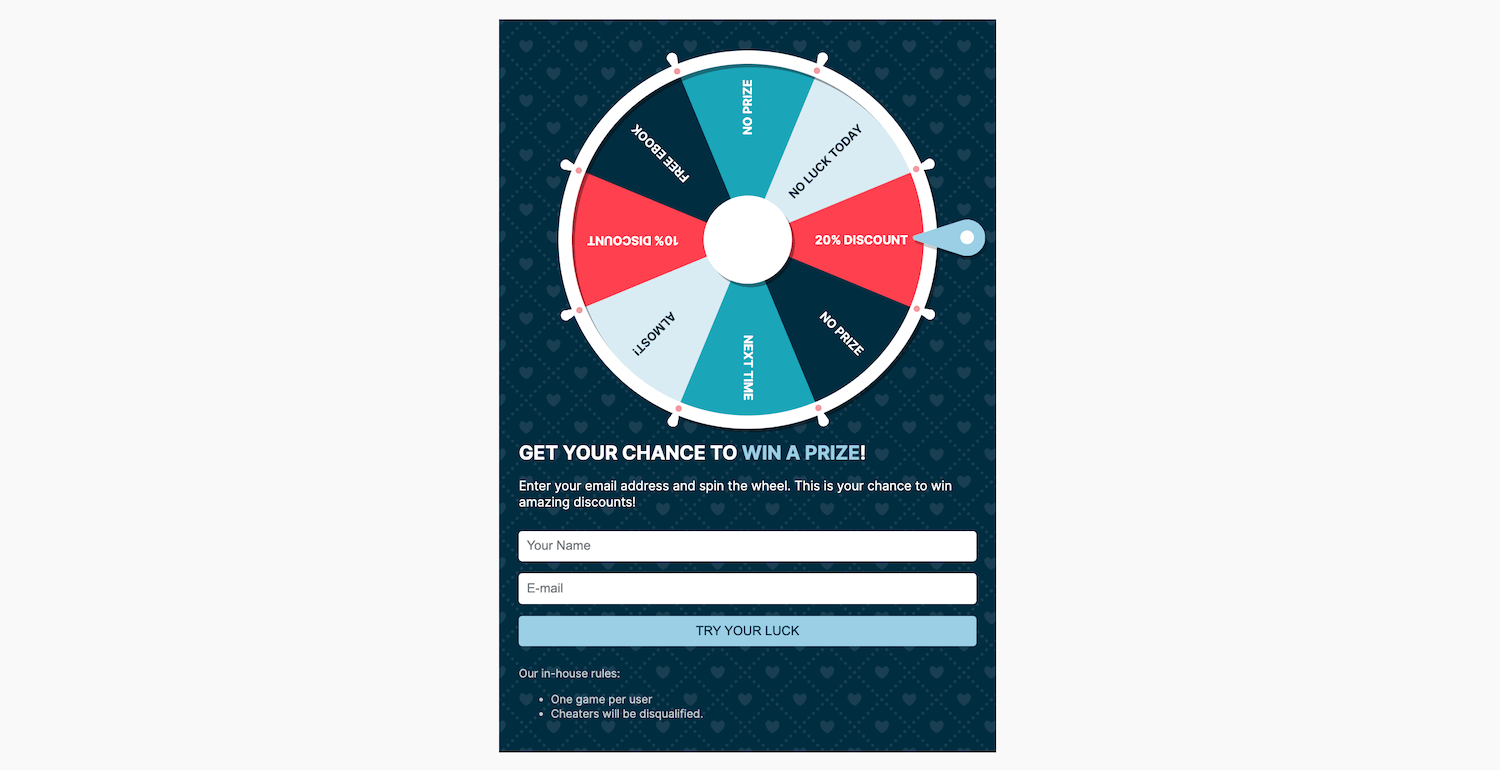
Here’s what our spin-to-win opt-in form will look like to our visitors:
That’s it!
Now that you know how to successfully add a spin-to-win opt-in to your WordPress site or WooCommerce store, it’s the perfect time to set this up and start reaping the benefits of gamification. Why not try out WP Optin Wheel today and see what it can do for you?
