
Customizing your WooCommerce store is the best way to improve its functionality and the customer experience. If you have the skills for it, you can do that by using hooks.
WooCommerce hooks allow developers to modify or extend the store’s functionality without changing its core files. This means you can ‘hook into’ various parts of the plugin to execute custom code, enabling a wide range of customizations.
Hooks can modify the checkout process, add custom fields, or alter product displays, among many other things. However, it’s crucial to understand and use hooks correctly. Misusing hooks can lead to website errors or unexpected behavior, while proper use can significantly improve your WooCommerce store’s performance and user experience.
In this article, we’ll explore the two types of WooCommerce hooks and demonstrate how to use them effectively. And if this all sounds too overwhelming or daunting, we’ll introduce an alternative method for store owners to customize their WooCommerce store without modifying the code directly.
Types of WooCommerce hooks: Actions and filters
WooCommerce hooks come in 2 main types: action hooks and filter hooks. Understanding the difference is crucial for effective customization.
- Action hooks: Execute functions at specific points in the WooCommerce workflow. For example, you might want to add a custom message after a product is added to the cart. Using an action hook, you can insert this functionality precisely where needed without altering the core WooCommerce code completely.
- Filter hooks: Modify data before it’s used by WooCommerce or stored in the database. For instance, you might want to change the text on the “Add to Cart” button. A filter hook can be used to manipulate this text before it’s displayed to the user.
Hooks can be implemented in two primary ways. First, add your custom code to your child theme’s functions.php file. This method is straightforward but requires careful management to avoid conflicts with theme updates. Alternatively, you can use a plugin like Code Snippets, which provides a user-friendly interface for adding and managing your custom code.
Using hooks ensures that your customizations remain compatible with updates to WordPress and WooCommerce, making ongoing maintenance much easier. For example, you don’t have to worry that you will lose your customizations when you upgrade, ensuring your e-commerce store remains up-to-date and functional.
How to use action hooks
Action hooks can be employed in various ways. For example, you can use them to:
- Add a custom field to the checkout page to collect additional information from customers.
- Insert a custom note or message on the order confirmation page.
- Execute a function after an order is completed, like sending a custom email to the customer.
To hook your custom function into WooCommerce, you use the add_action function:
add_action('action_name', 'your_custom_function');

function your_custom_function() {
    // Your custom code here
}Code language: PHP (php)
Step-by-step: Adding a new field to the checkout
Now, let’s add a new field to the WooCommerce checkout page using an action hook.
1. Hook into the checkout process
Use the woocommerce_after_order_notes action to add a new field after the order notes section.
add_action('woocommerce_after_order_notes', 'add_custom_checkout_field');

function add_custom_checkout_field($checkout) {
    echo '<div id="custom_checkout_field"><h2>' . __('Custom checkout field') . '</h2>';
    woocommerce_form_field('custom_field', array(
        'type' => 'text',
        'class' => array('form-row-wide'),
        'label' => __('Custom text field'),
        'placeholder' => __('Text input'),
    ), $checkout->get_value('custom_text_field'));
    echo '</div>';
}Code language: PHP (php)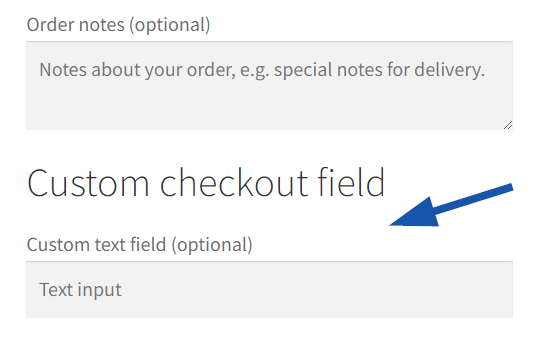
2. Validate the custom text field
add_action('woocommerce_checkout_process', 'validate_custom_checkout_field');

function validate_custom_checkout_field() {
    if (empty($_POST['custom_text_field'])) {
        wc_add_notice(__('Please fill in the custom text field.'), 'error');
    }
}Code language: PHP (php)
3. Save the custom field data
Hook into the woocommerce_checkout_create_order action to save the custom field data.
add_action('woocommerce_checkout_create_order', 'save_custom_checkout_field');

function save_custom_checkout_field($order) {
    if (!empty($_POST['custom_text_field'])) {
        $order->update_meta_data('custom_text_field', sanitize_text_field($_POST['custom_text_field']));
    }
}Code language: PHP (php)
4. Display the custom field data
Finally, use the woocommerce_admin_order_data_after_shipping_address action to display the custom field data in the admin order details.
add_action('woocommerce_admin_order_data_after_shipping_address', 'display_custom_checkout_field_in_admin_order_meta', 10, 1);

function display_custom_checkout_field_in_admin_order_meta($order){
    $custom_text_field = $order->get_meta('custom_text_field');
    if ($custom_text_field) {
        echo '<p><strong>'.__('Custom checkout text field').':</strong> ' . $custom_text_field . '</p>';
    }
}Code language: PHP (php)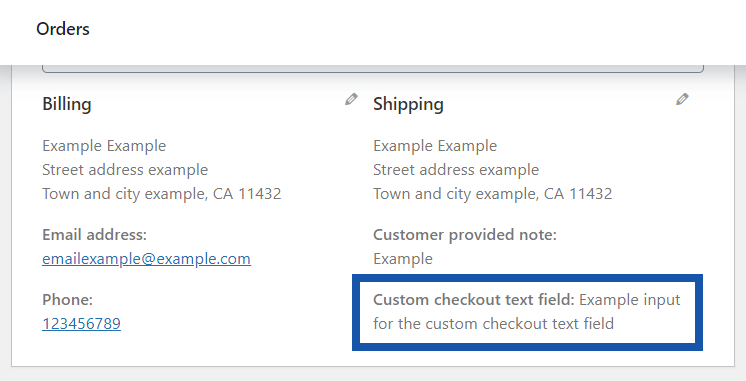
Selecting the correct hook is critical for ensuring your custom code executes at the desired point in the WooCommerce process. Each hook triggers at different stages, so understanding the sequence and context of each hook is essential.
How to use filter hooks
Filter hooks in WooCommerce are essential for modifying or customizing data before it is displayed or saved. They allow developers to alter various aspects of WooCommerce without changing core files. For example, you can use filter hooks to change the price of a product based on certain conditions or to modify how product information is displayed.
Identifying the data to modify
To use filter hooks effectively, developers must identify the specific data or functionality they want to modify. This could involve altering product prices, changing product descriptions, or customizing checkout processes. By understanding the context in which the data is used, you can choose the appropriate filter hook to achieve your desired outcome.
Example: Changing the price display format for products in the “Accessories” category
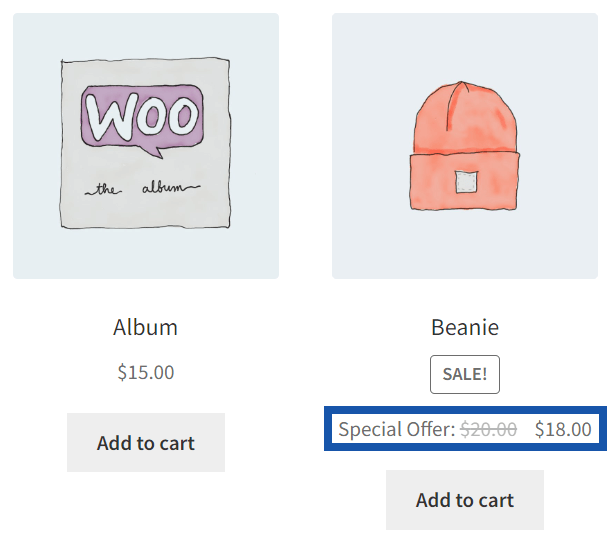
To do this, you need to add this code to your child theme’s functions.php file:
function custom_price_html($price, $product) {
   <em>// Define your custom text</em>
   $custom_text = 'Special Offer: ';

<em>   // Check if the product is in the "Accessories" category</em>
   if (has_term('accessories', 'product_cat', $product->get_id())) {
<em>      // Append custom text to the original price</em>
      $price = $custom_text . $price;
   }
   return $price;
}

<em>// Apply the filter</em>
add_filter('woocommerce_get_price_html', 'custom_price_html', 10, 2);Code language: PHP (php)
This code hooks into woocommerce_get_price_html and applies the custom_price_html function, which modifies the way product prices are displayed on the front end. The 10 is the priority of the filter, and the 2 indicates that the function accepts 2 arguments.
The custom_price_html function itself checks if the product belongs to the “Accessories” category (the slug of this is “accessories”, which is used in the code ). It uses has_term, which is a WordPress function that checks if a given product (identified by $product->get_id()) has a specific term (in this case, Accessories) in a specific taxonomy (product_cat for product categories).
Extending WooCommerce with Advanced Product Fields

Advanced Product Fields (APF) is a powerful tool for WooCommerce store owners, offering extensive customization options without the need for coding. This is particularly beneficial for those who aren’t comfortable modifying code and don’t want to hire a developer.
APF allows you to enhance your WooCommerce store by adding various types of fields to your products. With APF, you can include 16 different field types, such as text boxes, dropdowns, swatches, images, and more. These fields can be used to gather additional information from customers, offer product customizations like a custom product builder, or display additional product options, significantly improving the User Experience (UX).
One of the standout features of APF is its user-friendly interface. Store owners can effortlessly add and configure fields through the WordPress admin panel. This means you can create a highly customized shopping experience without writing a single line of code.

By using APF, you can tailor the shopping experience to better meet your customers’ needs. For example, you can offer dropdowns for size and color options, text fields for personalized messages, or image swatches for product variations. These customizations not only make the shopping process smoother but also more engaging, which can lead to increased sales.
Imagine a store selling custom T-shirts. With APF, customers can choose the size and color and add custom text or images.
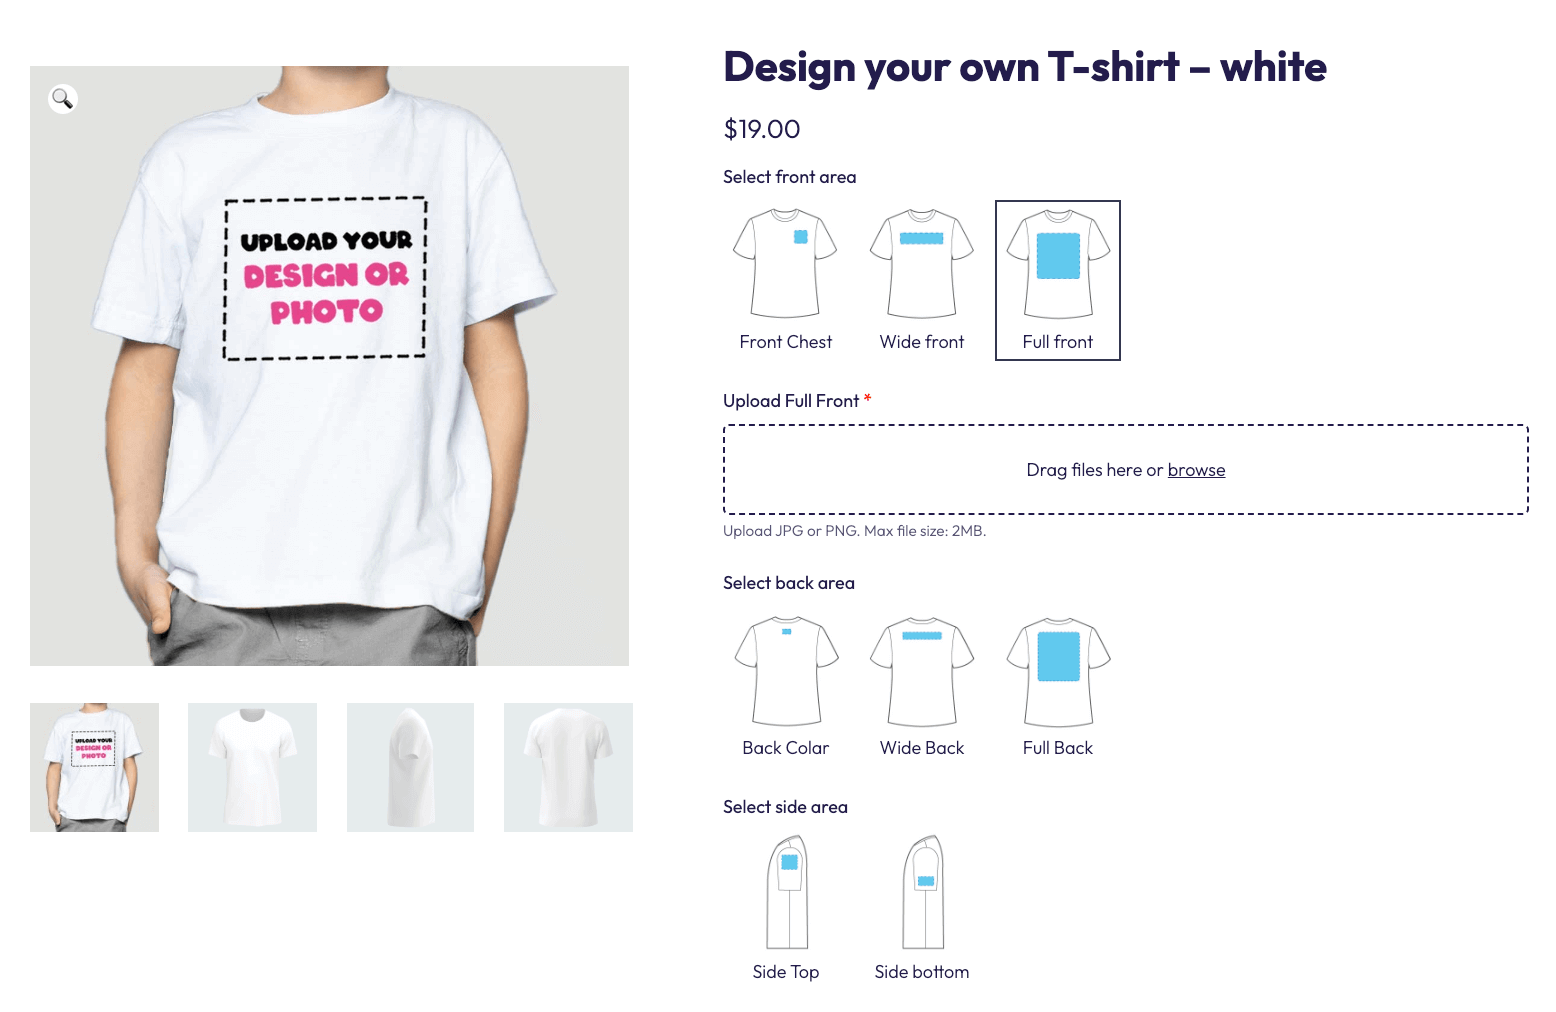
This level of customization can make your products more attractive and provide a personalized shopping experience that encourages customers to complete their purchases.
A step-by-step guide to adding custom fields with APF
Using APF to add custom fields to your WooCommerce products is straightforward and user-friendly.
Here’s a step-by-step guide to help you get started and show you how to change the product image based on selected options.
1. Installing and activating APF
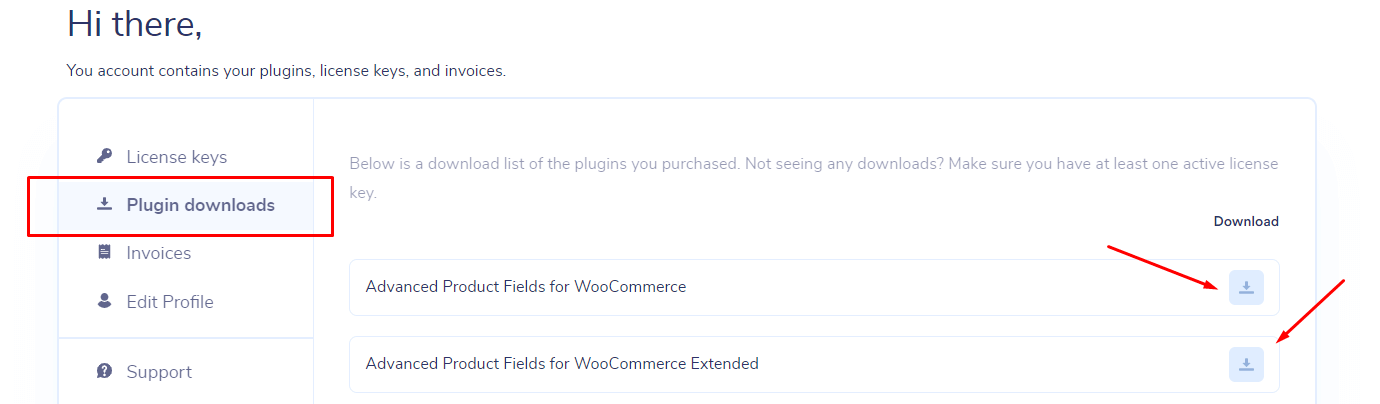
- Purchase Advanced Product Fields from the Studio Wombat website and download the plugin file.
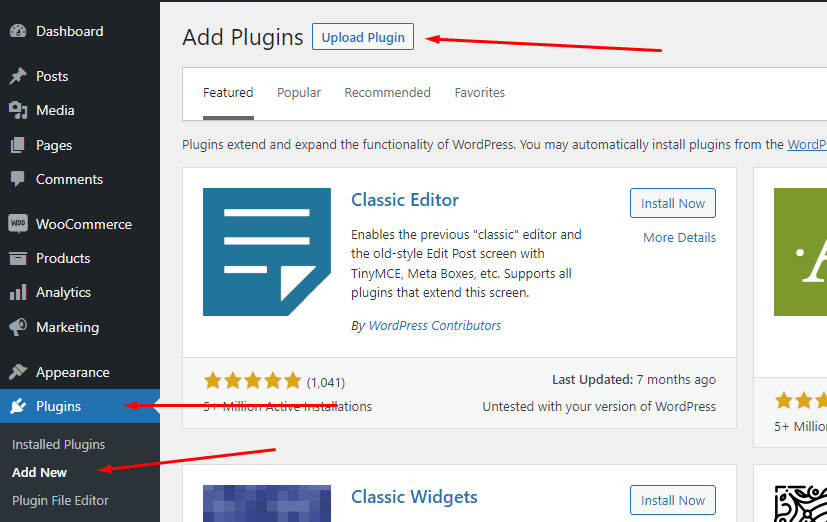
- Go to your WordPress admin dashboard, navigate to Plugins → Add New, and click on Upload Plugin.
- Choose the downloaded APF file and click Install Now.
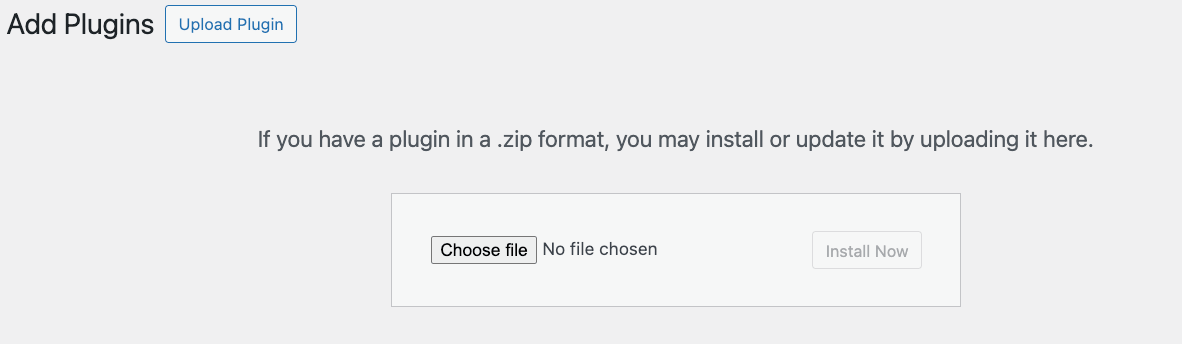
- Once the installation is complete, click Activate Plugin.
2. Adding custom fields with APF
- In your WordPress admin dashboard, go to WooCommerce → Product Fields.
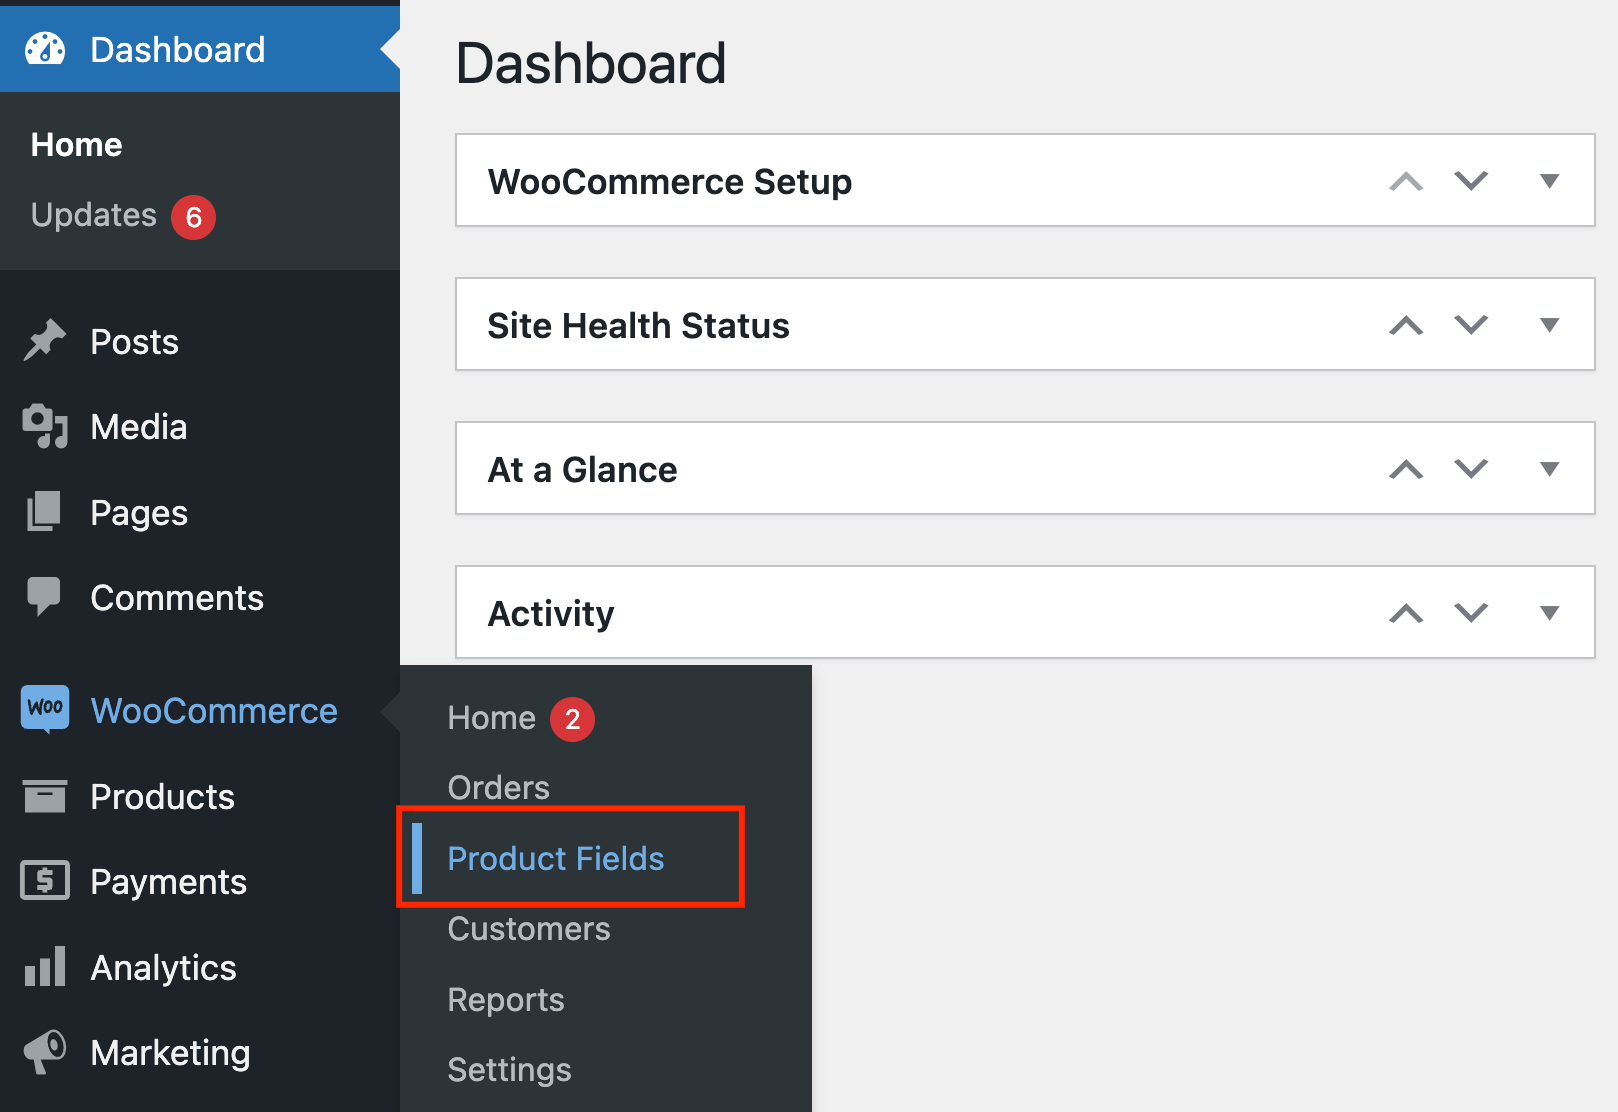
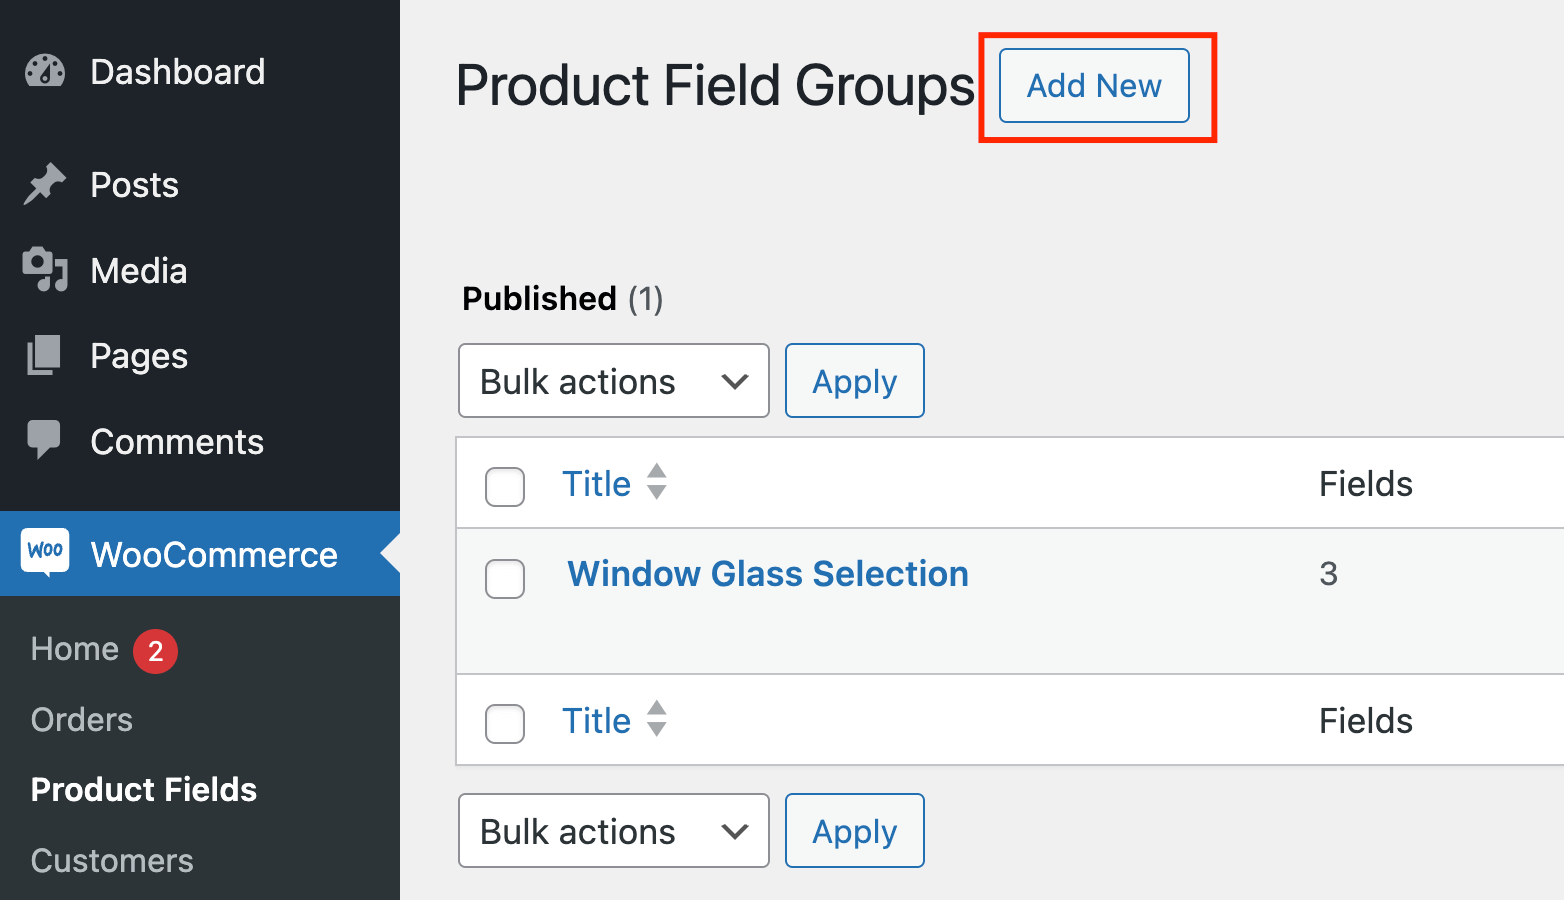
- Click on Add New to create a new field group. This group will contain the custom fields, which you can apply to all of your products or a specific category/group (e.g. only clothes or only the T-shirts from the clothes category).
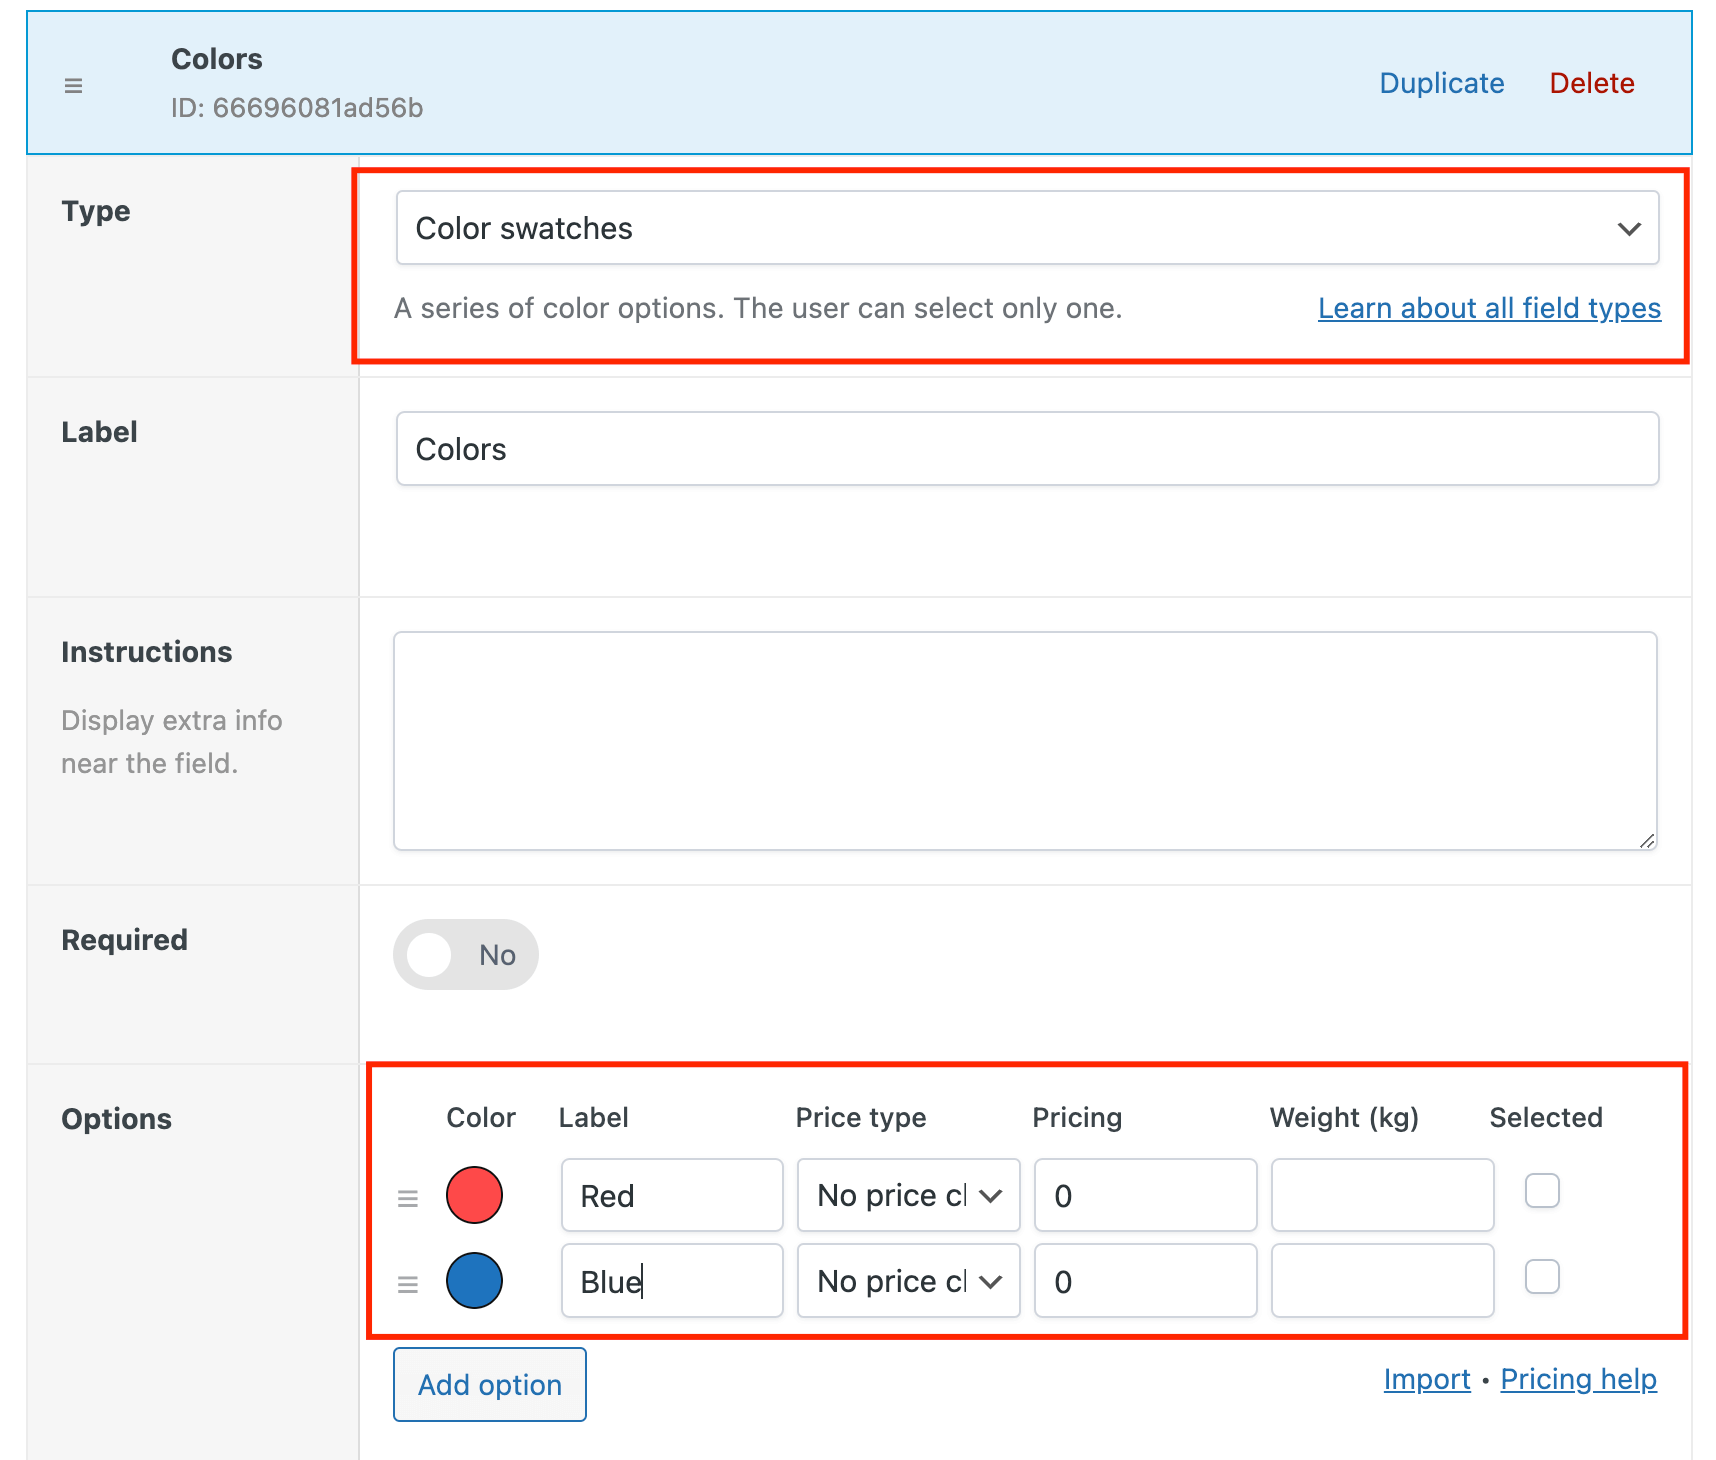
- Within the field group, click on Add Field. Choose the type of field you want to add (e.g. text box, dropdown, image swatch) and configure its settings. For instance, if you want to add a color swatch, select Color Swatches as the field type and add the relevant colors. You can add multiple different fields.
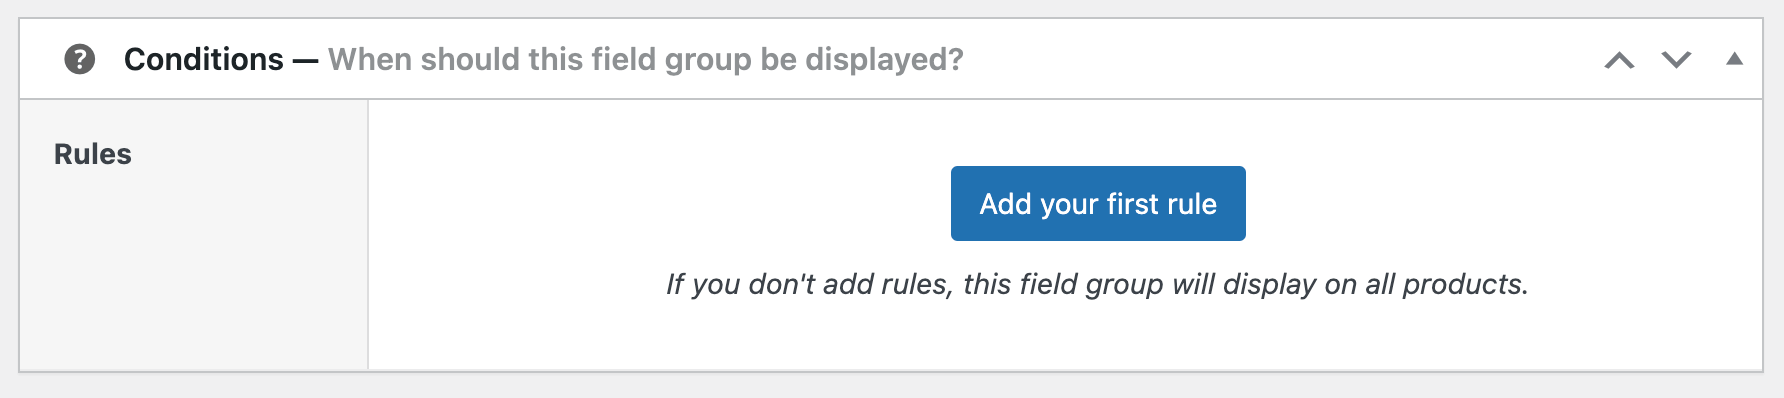
- Scroll down to the Conditions field and choose where you want this field group to appear. If you don’t add anything, it will be applied to all the products in your catalog.
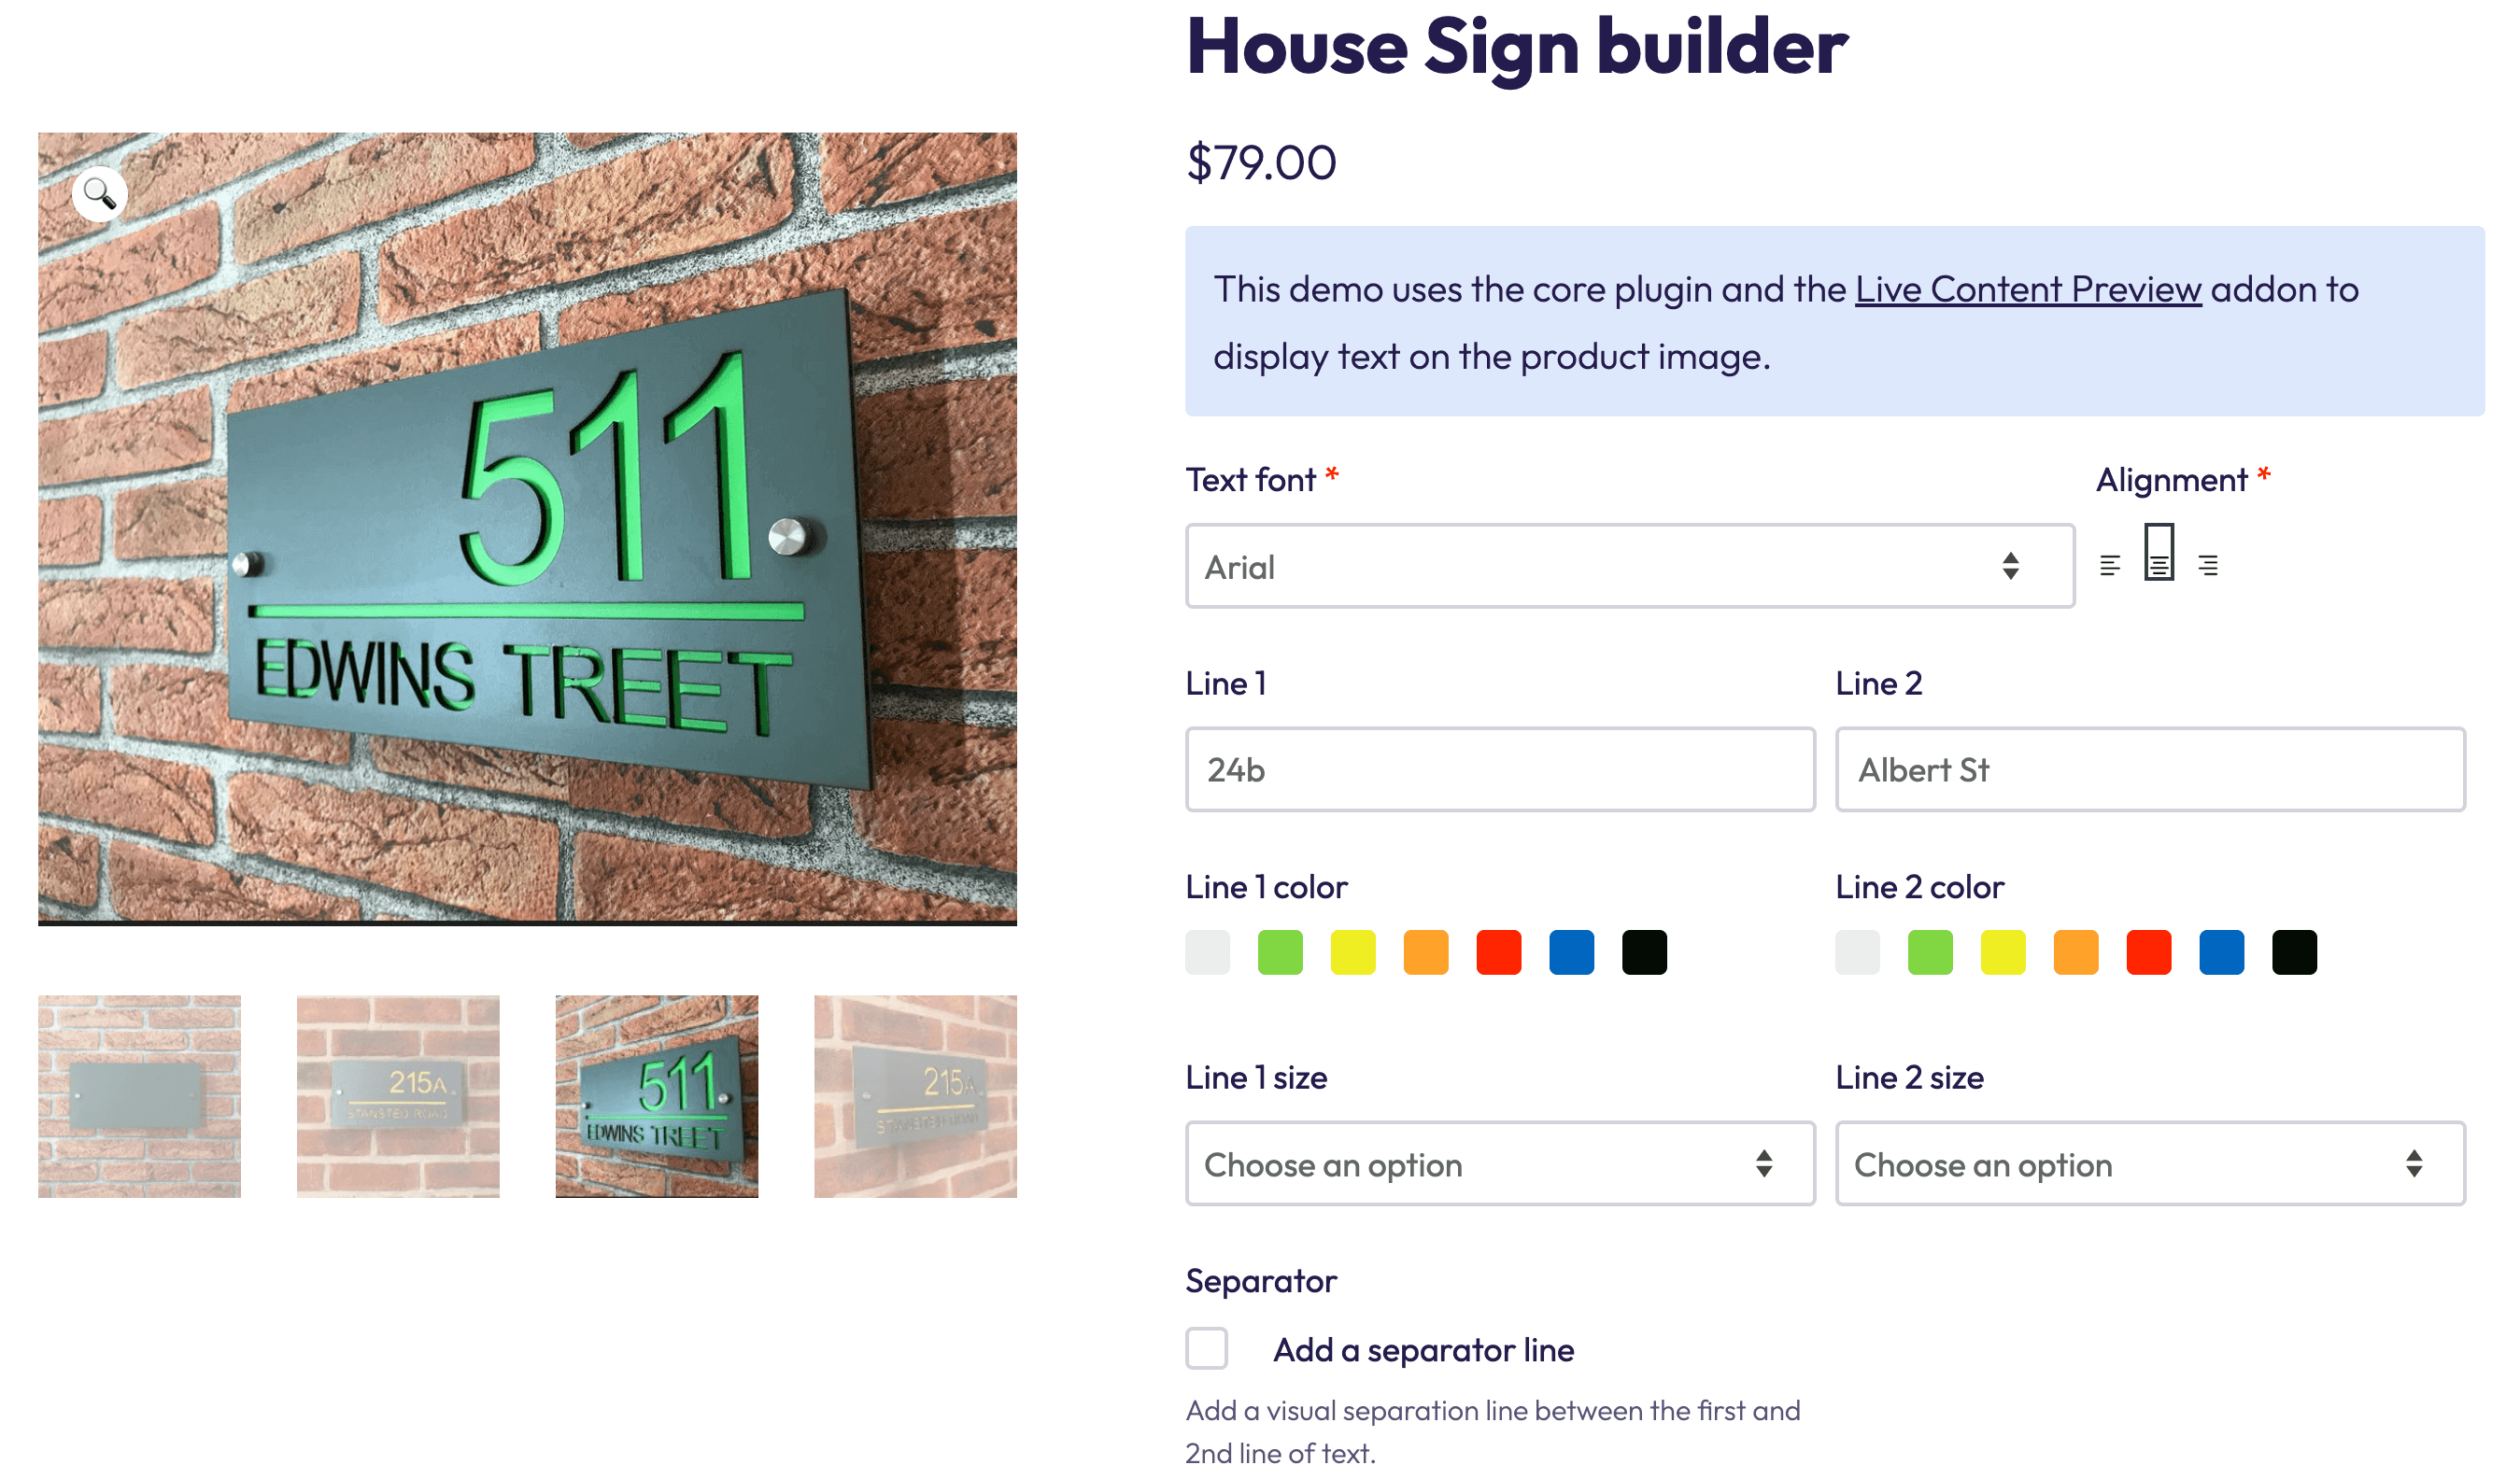
3. Changing the product image based on selected options
Earlier, we showed you how to change the price display depending on a current sale, but you can make many different additions.
One of the most common things to do is add a feature that changes the product image depending on the customer’s choice. You can do this with code, but it’s much easier to use APF:
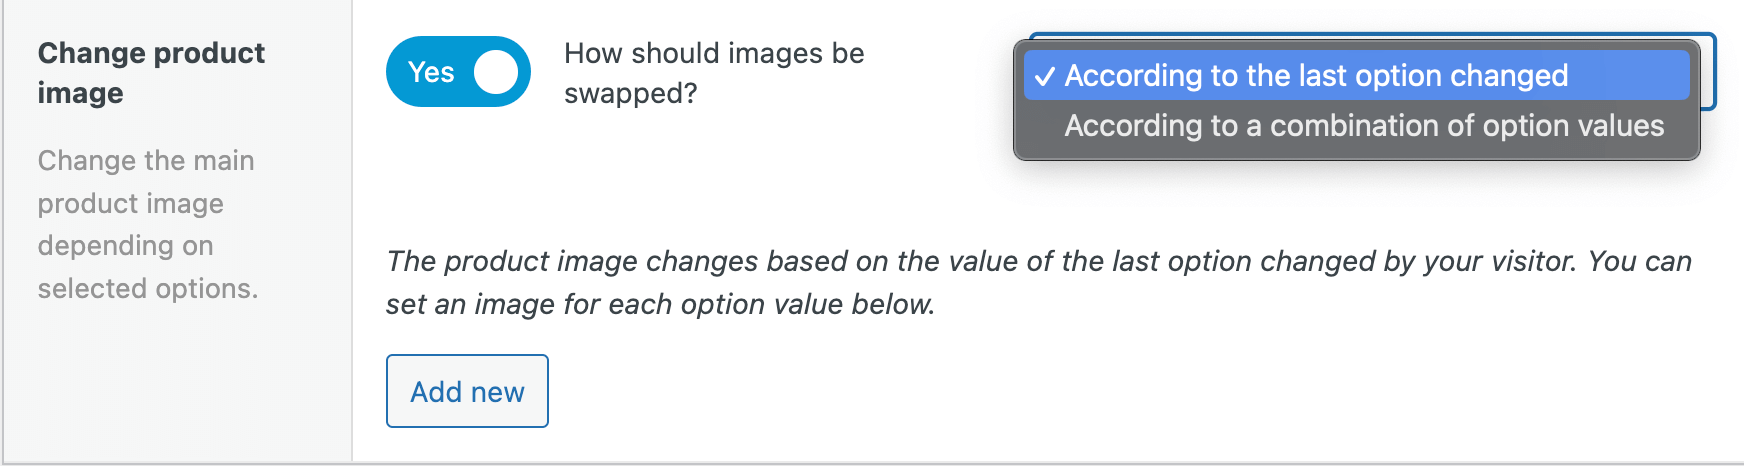
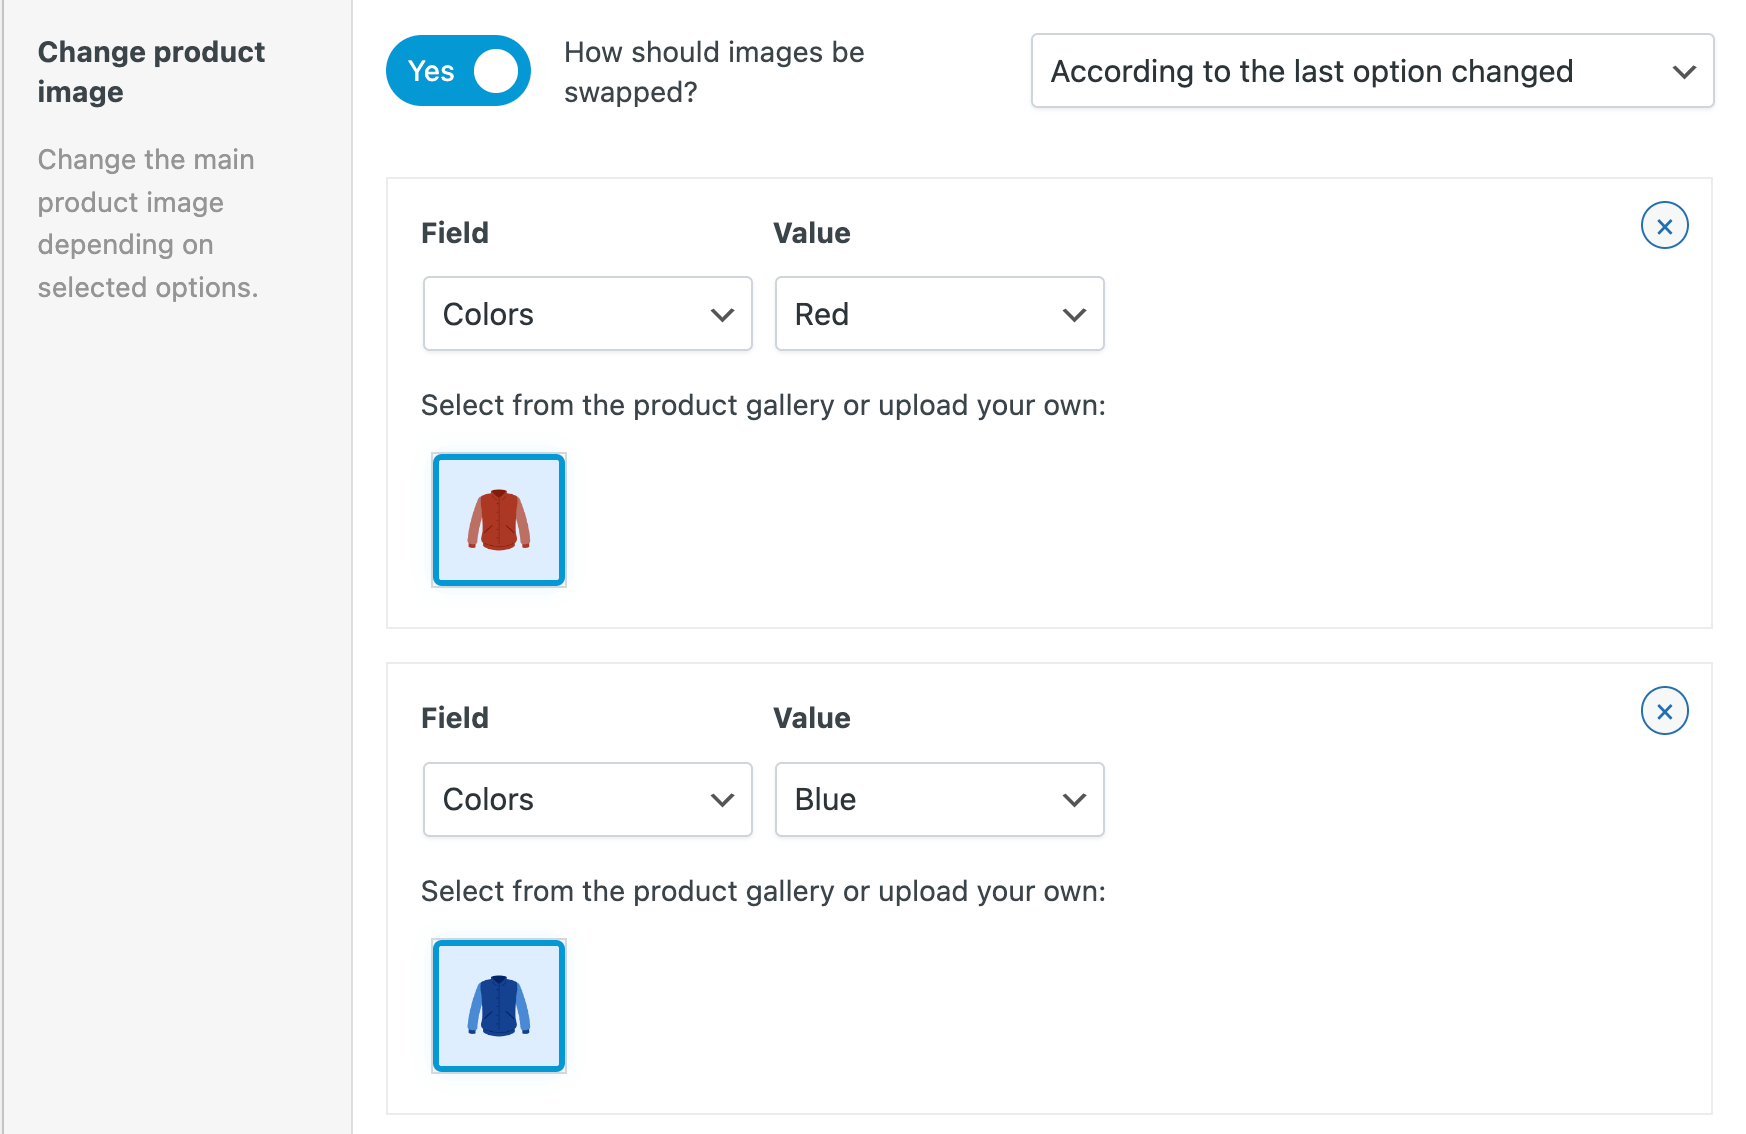
- Go to the color custom field we created and scroll down until you see the Layout settings. Enable Change product image.
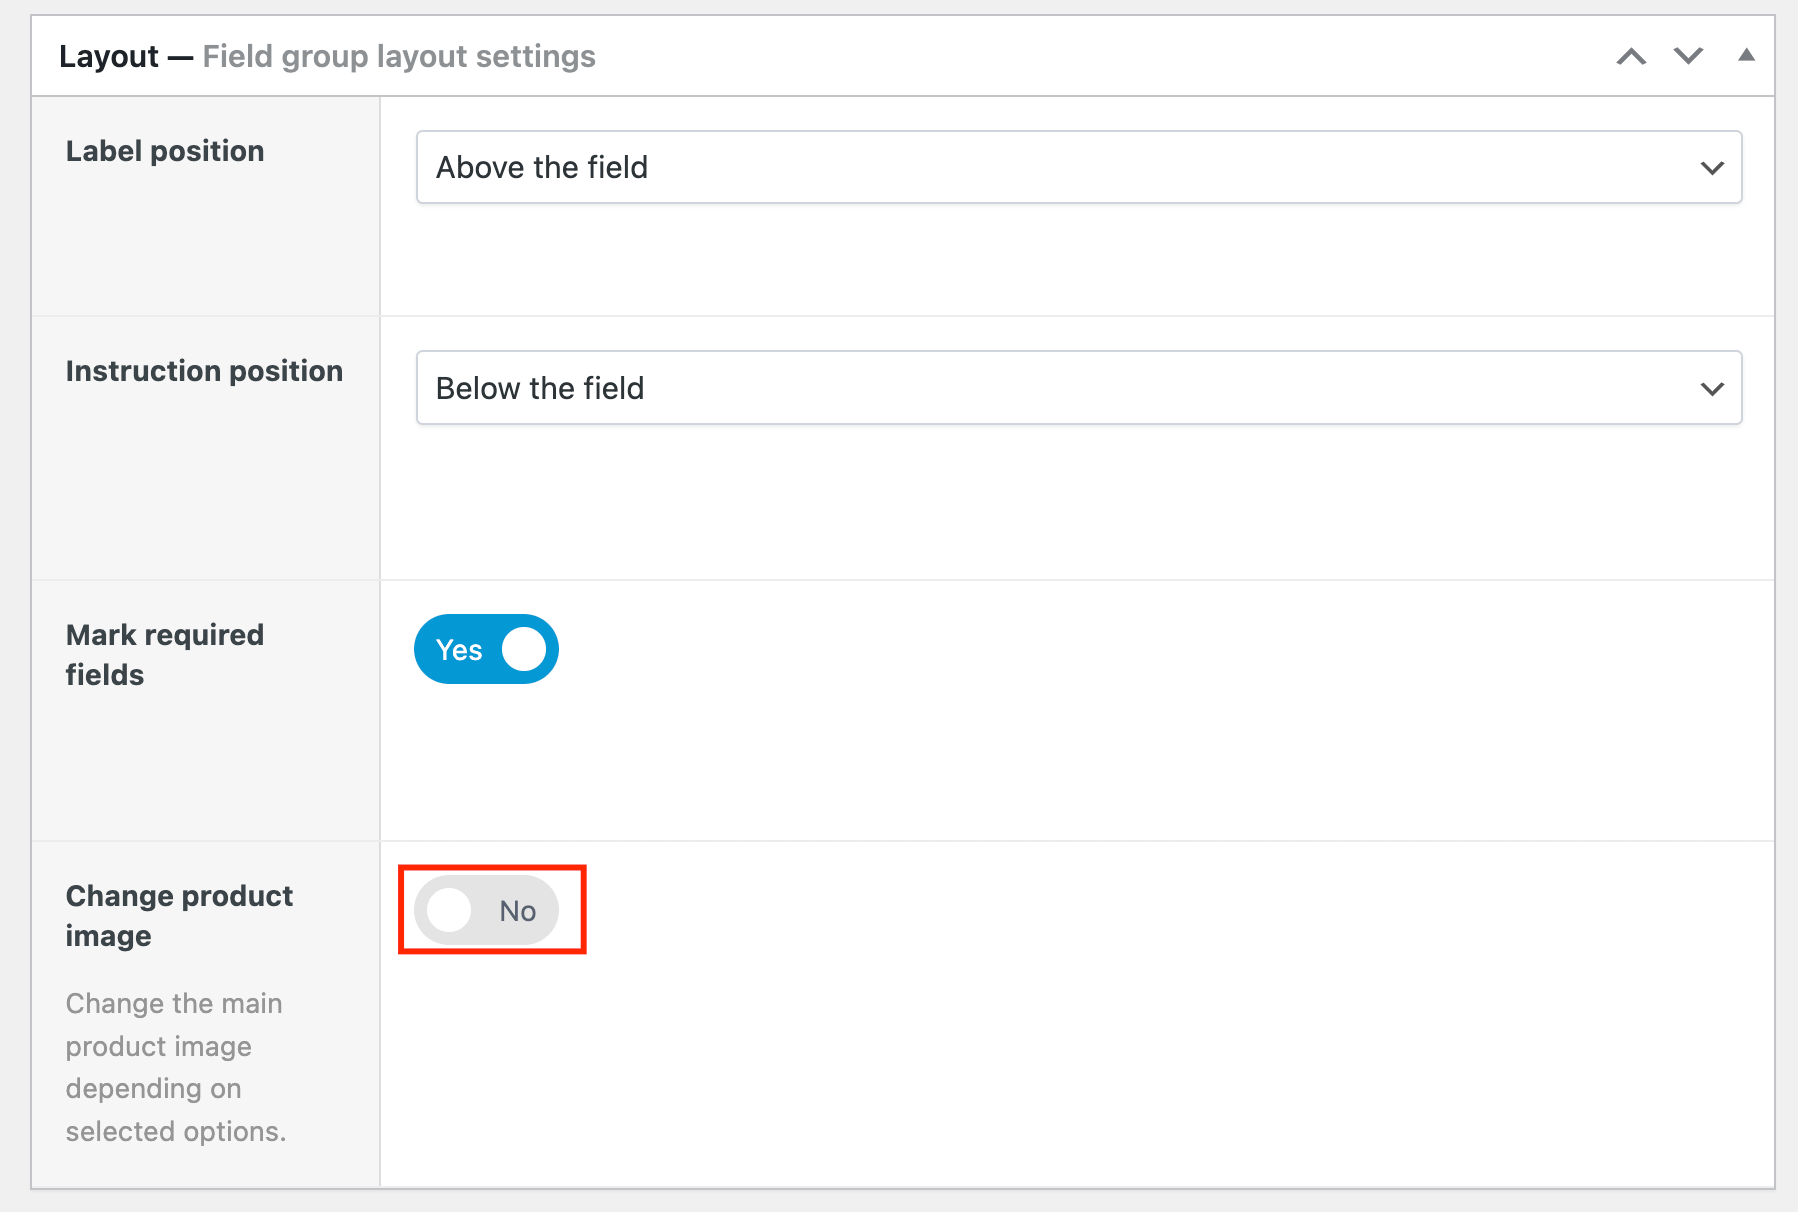
- Select the conditions of this change: Whether it should depend on the last chosen option or a combination of option values.
- Add the images for the different swatches.
- Click Update, and you’re done!
Make sure to check whether everything is functioning correctly on the front end.
Take your WooCommerce store to the next level with custom fields
WooCommerce hooks offer powerful ways to customize your store, but they require a good understanding of coding. While these hooks don’t alter the core code, you need to be comfortable working with PHP to use them effectively.
For a simpler, user-friendly alternative, plugins like Advanced Product Fields provide the same level of customization without needing coding skills. APF allows you to add a variety of custom fields easily, enhancing your store’s functionality and improving the customer experience.
Ready to enhance your WooCommerce store effortlessly? Download Advanced Product Fields today and start adding custom fields with ease!
