
Setting up quantity discounts in WooCommerce should be straightforward: offer bulk pricing, increase average order values, done.
Yet most store owners struggle with slow cart updates or complex variation configurations when testing different plugins. Cart pages that freeze during recalculations frustrate customers at the worst possible moment, right before they complete their purchase.
Bulk discounts (also called quantity discounts) offer reduced pricing when customers purchase larger quantities. These discounts increase average order values by incentivizing higher-volume purchases, but WooCommerce lacks native bulk pricing functionality and requires plugins for implementation.
So, how can you find the best option? Well, pay attention to where plugins calculate discounts: Product-level execution displays prices instantly without the performance hit of repeated cart recalculations.
This guide shows you why product-level calculations change everything, cutting load times while clearly displaying discounts. You’ll learn how WooCommerce Discounts adds easy-to-manage quantity discounts without slowing down your site, plus when to choose alternative solutions based on your specific needs.
How quantity discounts drive higher order values
Tiered pricing creates psychological breakpoints that push customers toward larger purchases. When shoppers see they’re just one unit away from unlocking a better price, they naturally gravitate toward the next tier.
Each tier is clearly described: Buy 1-5 at $10, 6-10 at $8, and 11+ at $7. This structure makes the savings immediately obvious without requiring your users to do mental math. Additionally, the discount is applied to all units, maximizing perceived savings. A customer buying 6 units pays $48 instead of $60, saving $12 instantly. This “all units” approach feels more generous than discounting only the additional items. It also works great for wholesalers where bulk buying is the standard.
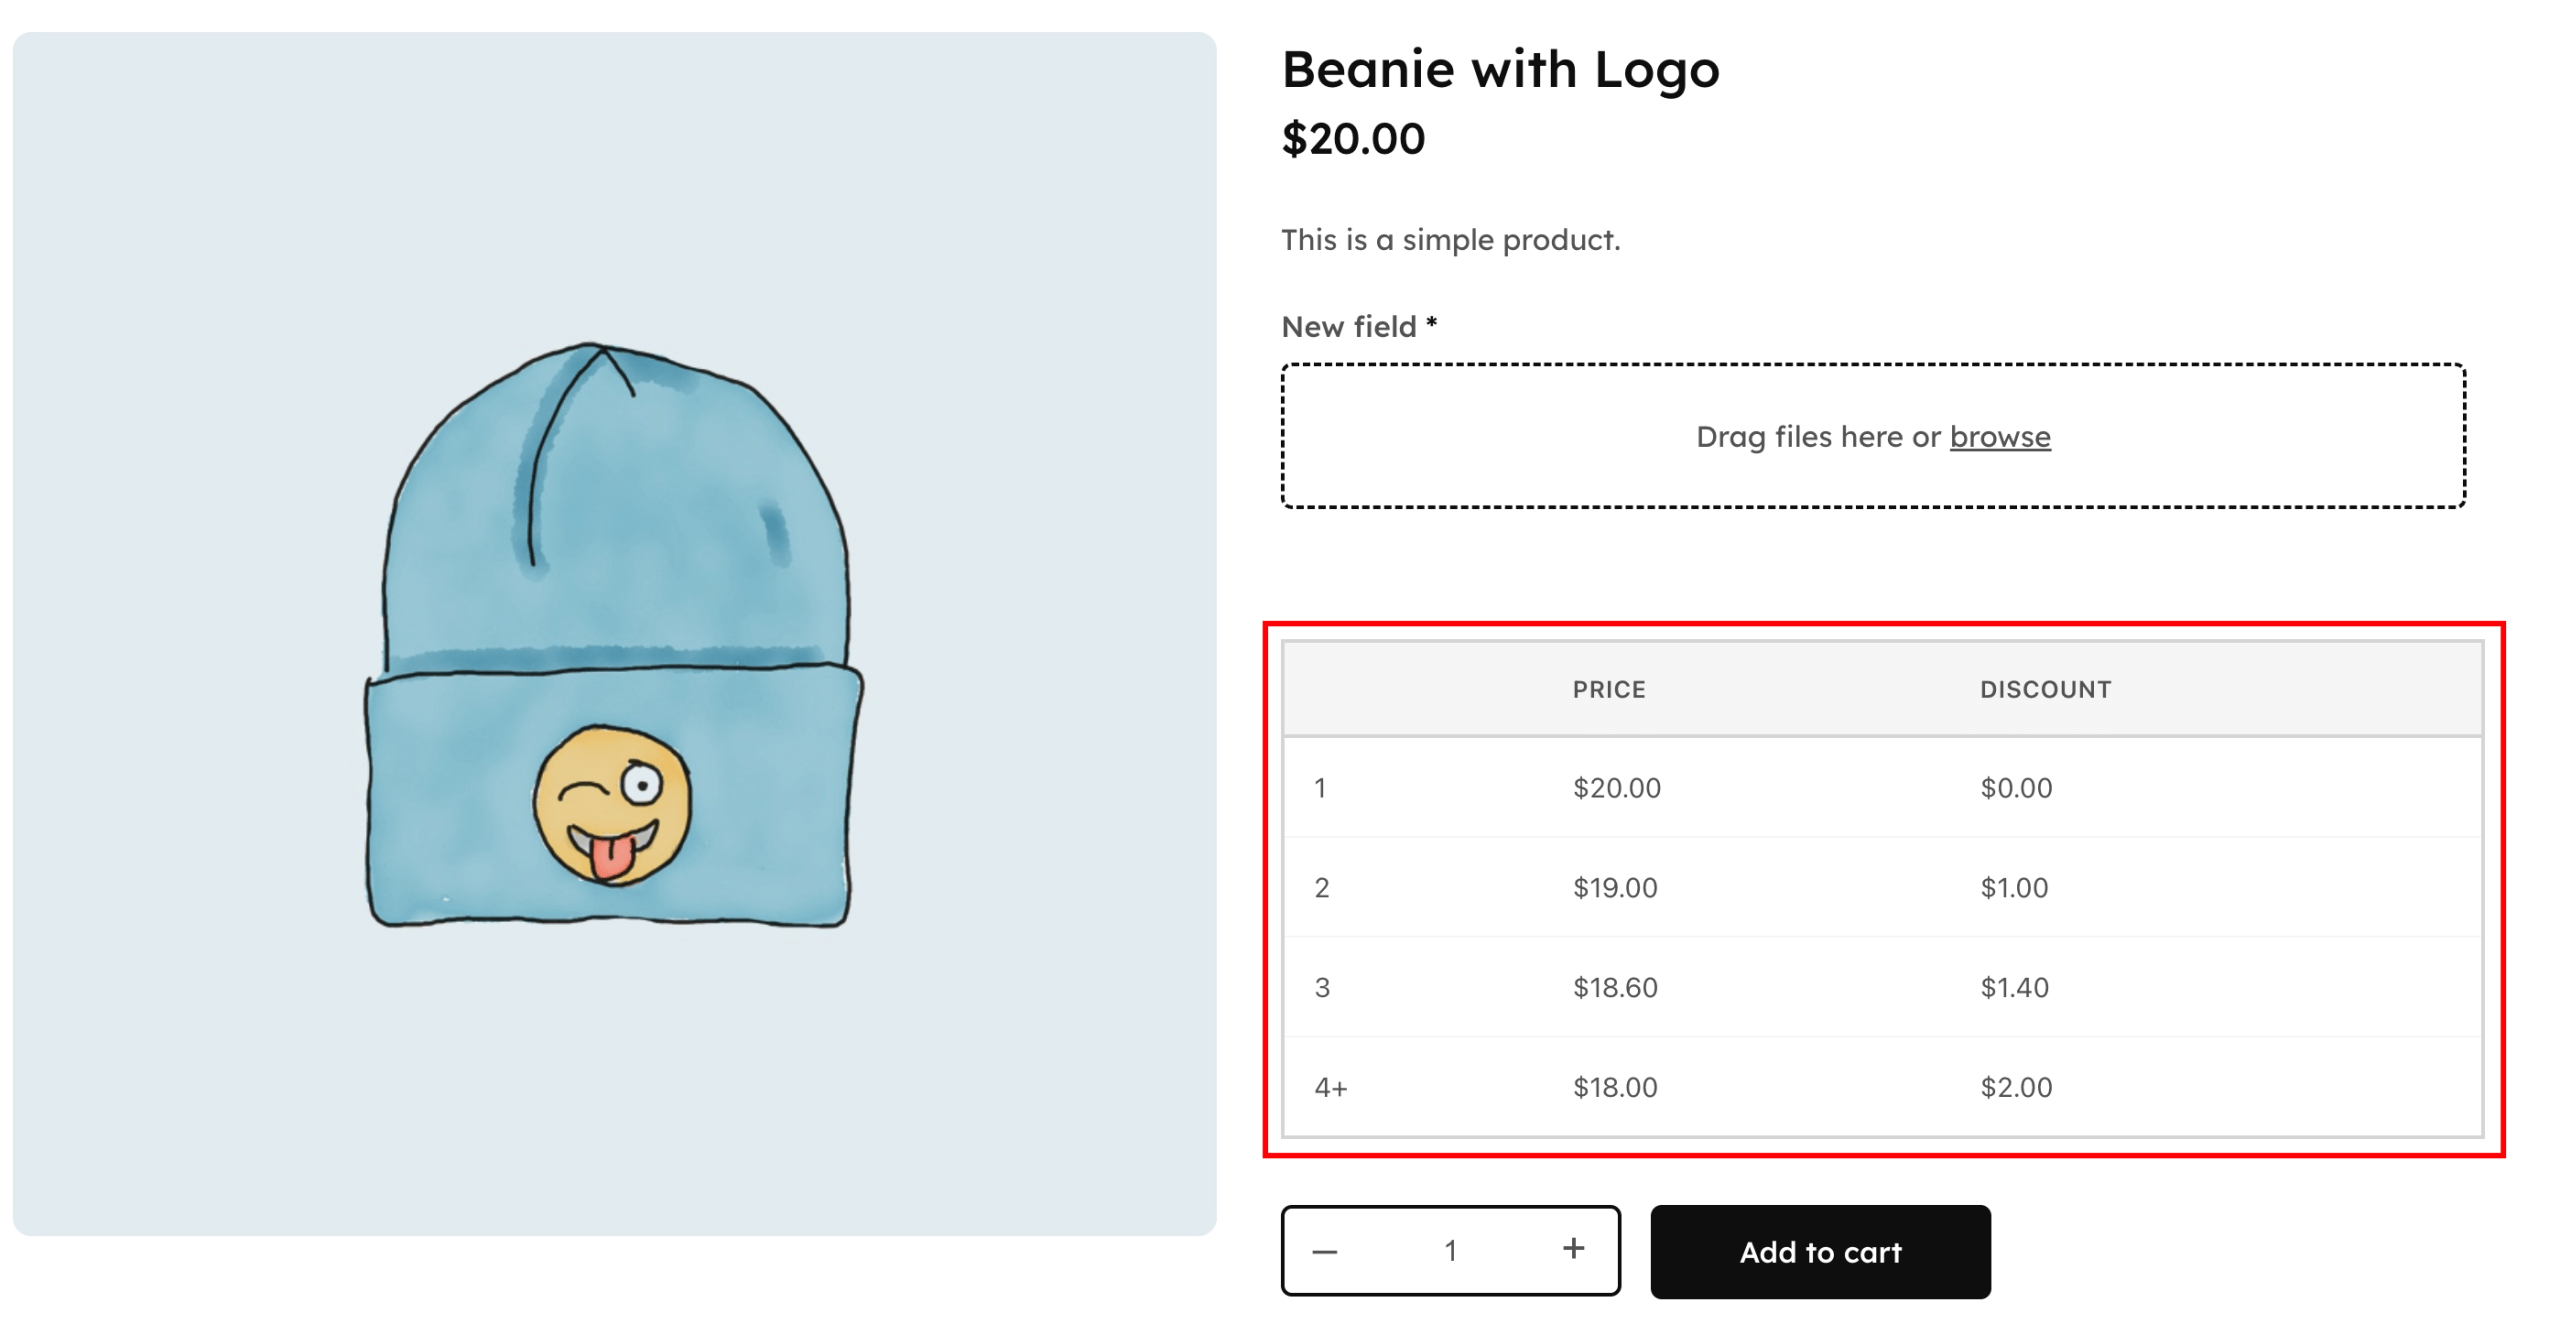
And when you have it as a visual pricing table, you help customers make a confident purchasing decision. Instead of having to wonder, “How much will I save,” they see exact numbers before adding items to their cart.
This increased average order value directly impacts your profits without requiring aggressive and complicated marketing campaigns.
Why automatic quantity discounts outperform manual coupon codes
Plugin discounts apply automatically when customers hit quantity thresholds – zero friction. The moment someone adds 6 items instead of 5, the new price appears automatically.
However, that’s not what happens in WooCommerce. The platform’s native coupon system lacks tiered pricing capabilities and forces customers to manually enter codes, making it unsuitable for sophisticated bulk discount strategies.
The logical alternative is getting a discount plugin. These tools display savings directly on product pages where the majority of buying decisions happen. Customers see the tiered pricing before they commit, which makes the value proposition part of their initial consideration rather than a surprise at checkout.
However, not seeing the discount isn’t the only disadvantage of native WooCommerce coupons – they also can’t handle tiered pricing at all.
Besides being a nightmare for user experience, cart-based systems like coupons can really impact performance because they recalculate with every change. Automatic and product page-level discounts, however, calculate once and cache, making everything load much faster.
And this is exactly how WooCommerce Discounts by Studio Wombat works. But before we get into that, let’s see…
The 3 types of quantity discounts
- Fixed amount discounts subtract a specific dollar amount ($10 off orders over $75), making savings crystal clear for customers who prefer exact numbers over percentages. This approach works best when you want to communicate value in concrete terms that don’t require calculation.
- Percentage discounts scale naturally across different price points (15% off when buying 5+), working perfectly for varied catalogs where fixed amounts would create unfair advantages. A 15% discount feels equally valuable whether applied to a $10 item or a $100 item, maintaining fairness across your product range.
- Fixed price per unit sets an exact price regardless of original ($5 per unit for 20+), simplifying bulk wholesale orders and clearance events where you need predictable margins. This method eliminates calculation complexity entirely – customers know exactly what they’ll pay per item once they reach the threshold, making it ideal for B2B scenarios or inventory liquidation.
Bulk discount strategies
Beyond pricing structures, bulk discounts can be implemented through different strategic approaches depending on your business model.
- Volume pricing discounts: Volume pricing offers the same discount percentage based on total quantity purchased.
- Example: Buy 10 or more items and receive 10% off your entire order.
- This approach works well for stores with consistent pricing across products.
- Tiered bulk pricing discounts: Tiered pricing provides different discount levels at specific quantity breakpoints.
- Example: Buy 1-5 items at regular price, 6-10 items at $5 discount per item, 11+ items at $10 discount per item.
- Each tier offers increasingly better value, encouraging customers to reach the next threshold.
- Bundle pricing discounts: Bulk pricing discounts for product combinations purchased together.
- Example: Buy a laptop and printer together and receive 15% off the printer.
- The bundle price remains lower than purchasing each item separately, creating clear savings.
- Mix-and-match bulk pricing discounts: Mix-and-match discounts apply when customers purchase a specified total quantity from a predefined selection.
- Example: Buy any 3 items from the Electronics category and receive 10% off.
- This strategy works particularly well for clearing inventory across multiple SKUs.
- BOGO (Buy One Get One) strategy:BOGO deals offer free or discounted products when customers purchase a specified quantity.
- Example: Buy 3 pairs of socks, get 1 free.
- This approach drives higher unit sales while maintaining perceived value through the “free” item.
Comparing WooCommerce bulk discount plugins
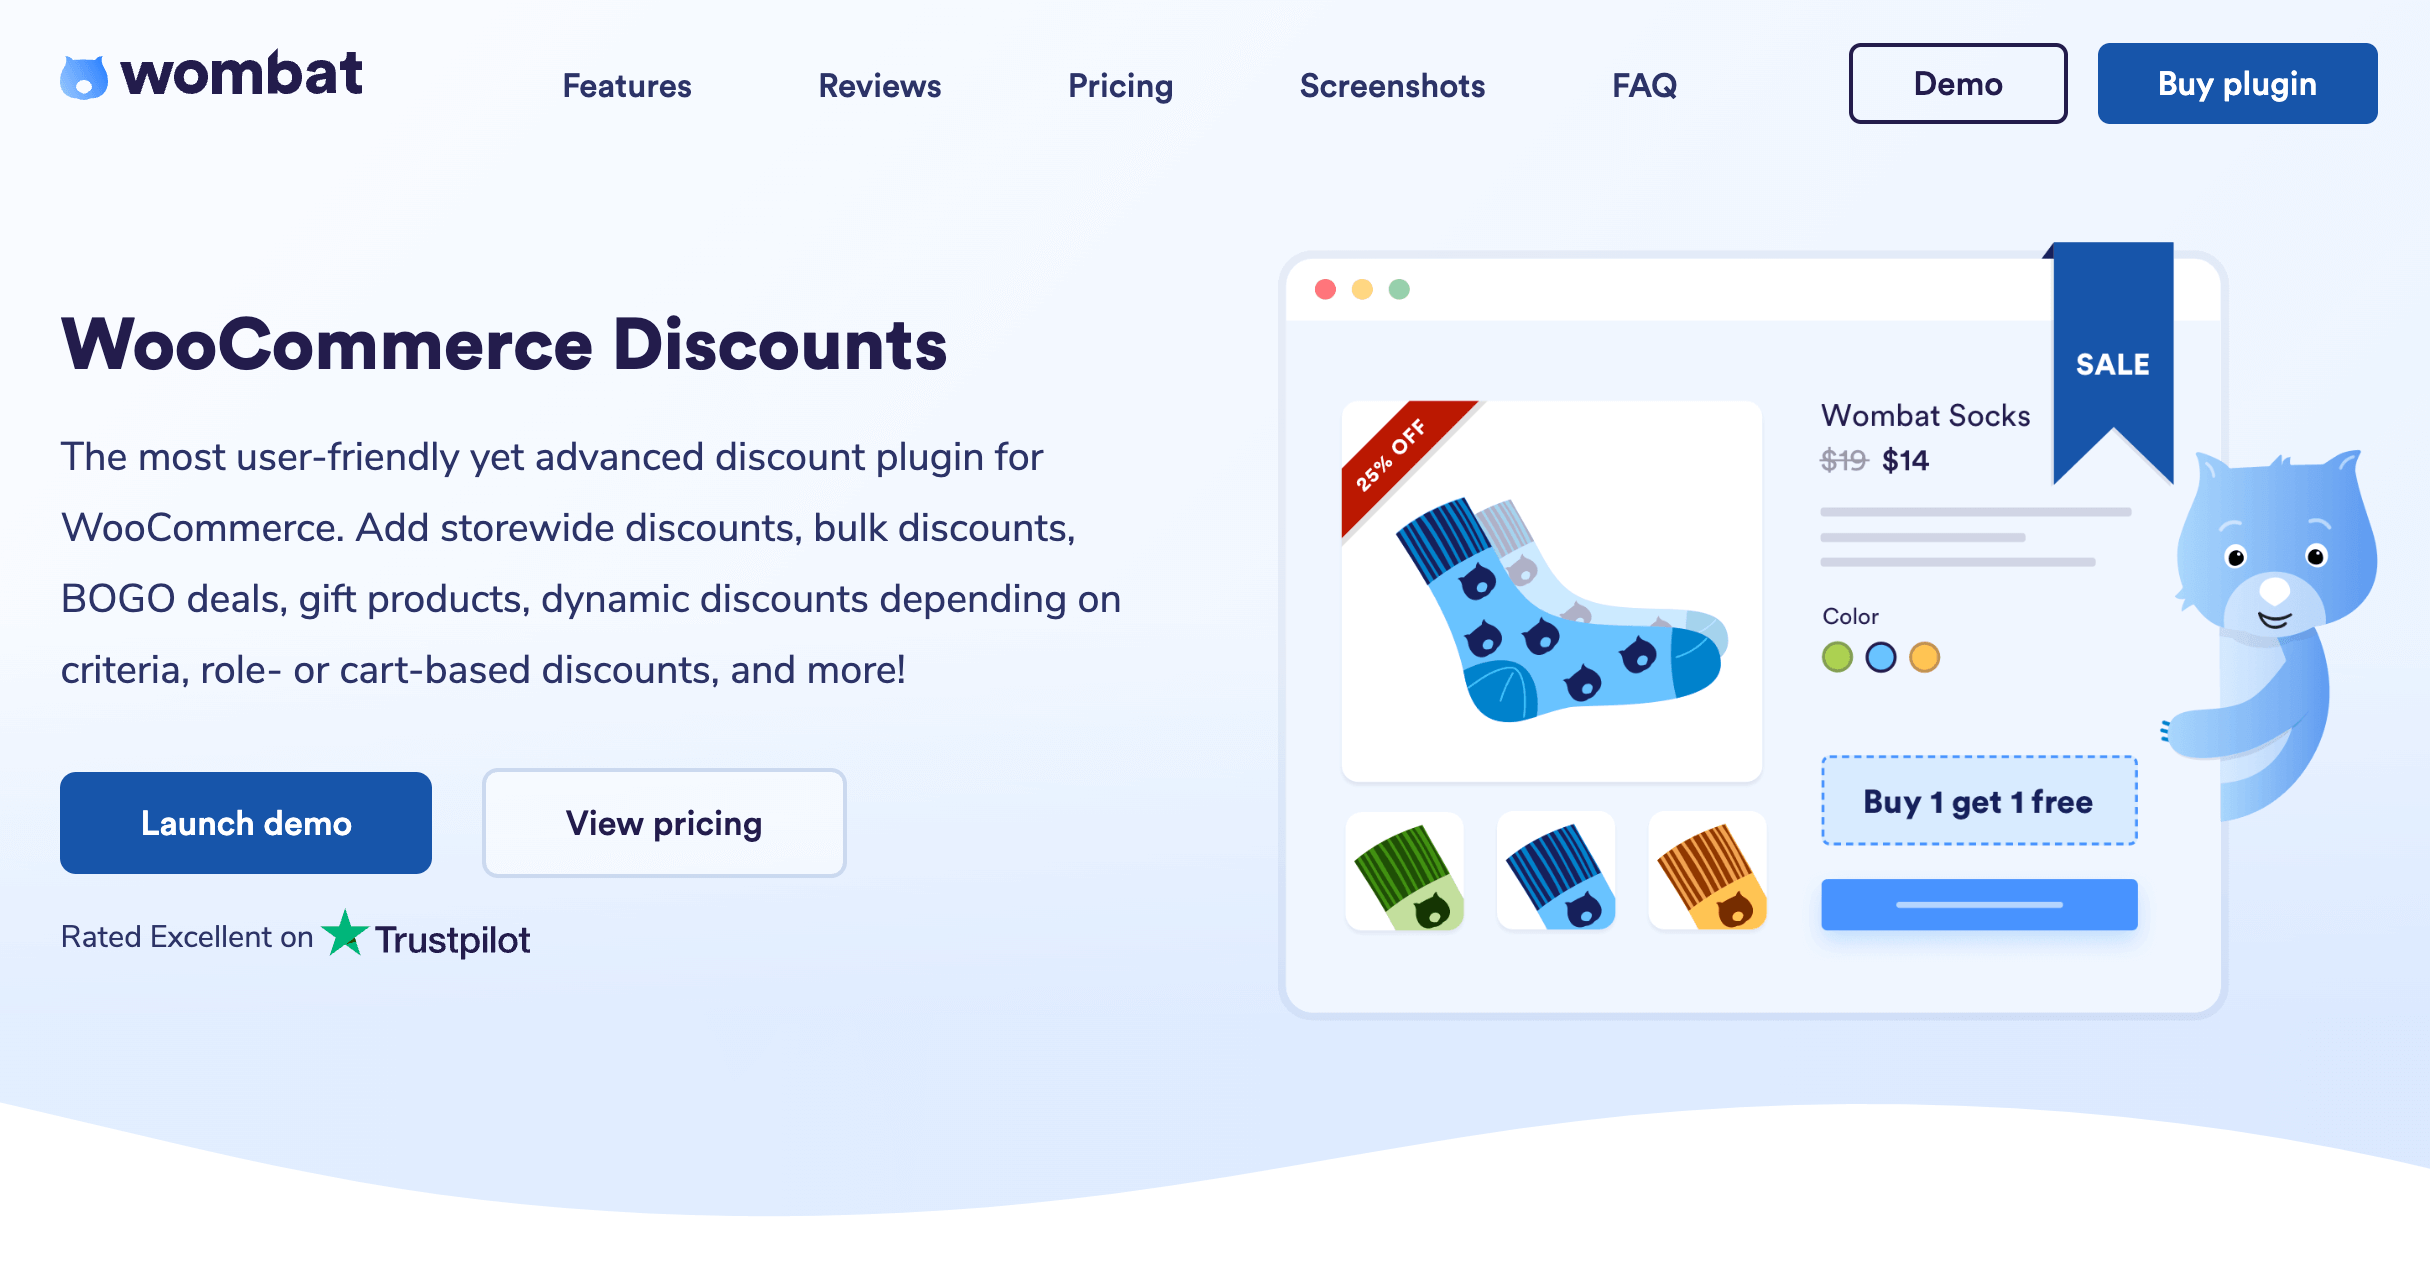
Several plugins add bulk discount capabilities to WooCommerce, each with different feature sets and pricing models. WooCommerce Discounts by Studio Wombat provides the most comprehensive discount toolkit with built-in pricing tables, recursive discounts, and modern performance architecture.
| Feature | WooCommerce Discounts by Studio Wombat | Bulk Discounts for WooCommerce by Plugify | YITH WooCommerce Dynamic Pricing & Discounts |
|---|---|---|---|
| Tiered Pricing | ✅ | ✅ | ✅ |
| BOGO Deals | ✅ Native | ✅ | ✅ |
| Role-Based Pricing | ✅ | ✅ | ✅ |
| Pricing Tables | ✅ Built-in | ✅ | ✅ |
| Performance | Product-level, modern code | Standard | Cart-level |
| Scheduling | ✅ Date & time | Limited | ✅ Date range |
| Cart Conditions | ✅ Advanced | ✅ Basic | ✅ |
| Price | $49/year | $59/year | $144.99/year |
For stores needing basic quantity discounts on a tight budget, the free Coupon Generator for WooCommerce plugin creates bulk coupon codes but requires manual distribution and lacks automatic tiered pricing.
Advanced discount conditions for targeted pricing
Discount conditions determine which customers qualify for bulk pricing and when those discounts activate during the shopping experience.
- User role-based pricing: Create separate pricing tiers for wholesale buyers, VIP members, and regular customers within the same store.
- Category-specific discounts: Target seasonal inventory or specific product lines without manually selecting individual items.
- Product variation discounts: Offer different bulk rates for T-shirt sizes or color options within a single product listing.
- Cart condition-based discounts: Activate volume pricing only when customers meet minimum purchase requirements or exclude certain items.
- Time-limited offers with scheduling: Launch Black Friday bulk deals at midnight and end them automatically without manual intervention.
WooCommerce Discounts supports these condition types without requiring additional plugins or custom code. Stores selling to both retail and wholesale markets benefit most from this flexibility, as do subscription box businesses and multi-tier membership programs.
Setting up quantity discounts with WooCommerce Discounts
Studio Wombat handles automatic WooCommerce discounts that eliminate this friction entirely and positively impact the overall performance. The plugin uses a multi-step wizard that guides you through creating bulk discounts for products, categories, variations, or attributes, with conditional logic to control exactly when and for whom discounts apply, plus scheduling options to automatically activate promotions for flash sales and seasonal events.
Creating tiered pricing with WooCommerce Discounts takes just a few minutes.
Let’s walk through setting up quantity discounts for socks: $10 per pair normally, $8/pair when buying 3+, and $5/pair for 10 or more pairs.
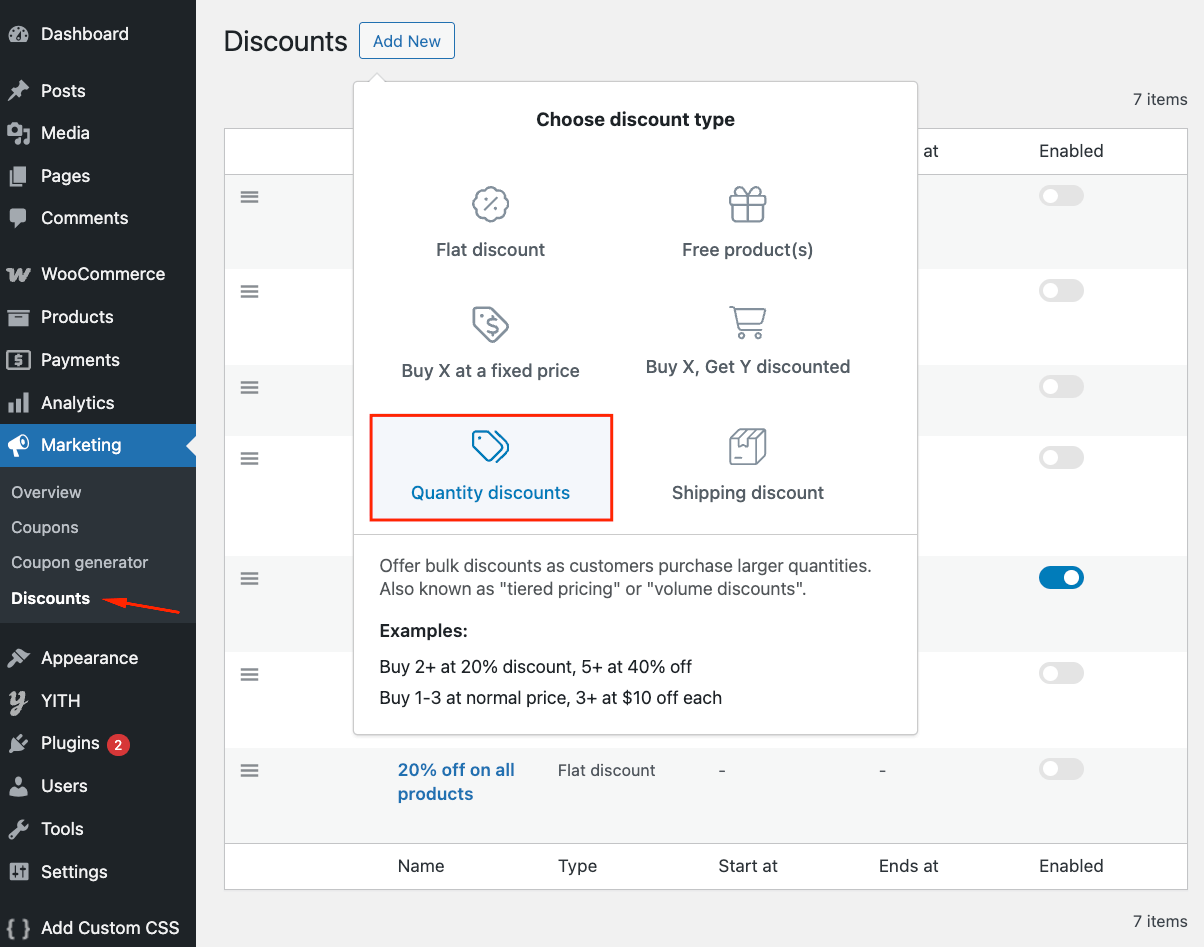
- First, navigate to Marketing → Discounts in your WordPress dashboard, click Add New, and choose Quantity discounts from the discount type options.
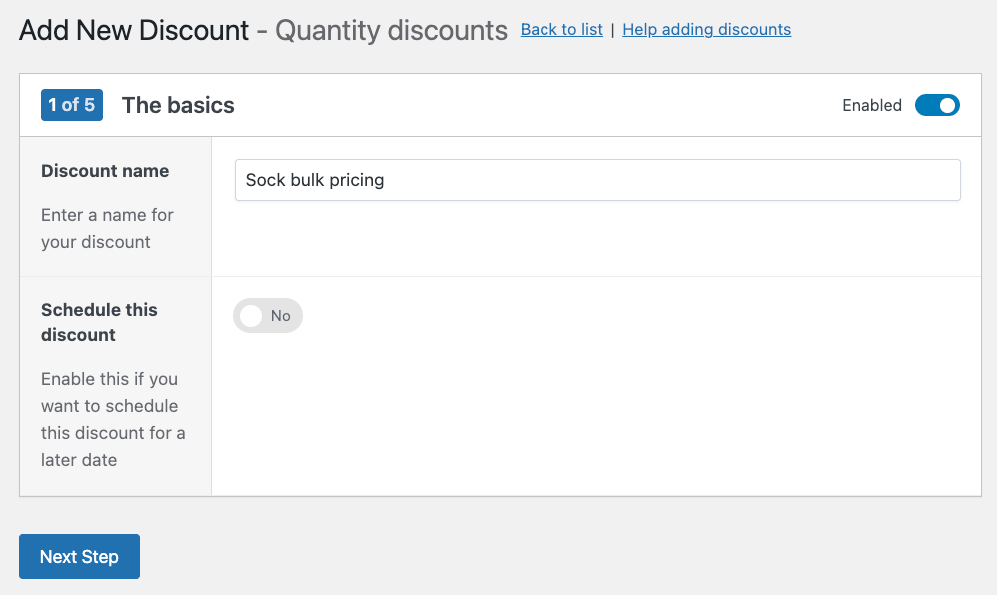
- Name your discount something descriptive, like “Sock Bulk Pricing,” and set your start and end dates if needed.
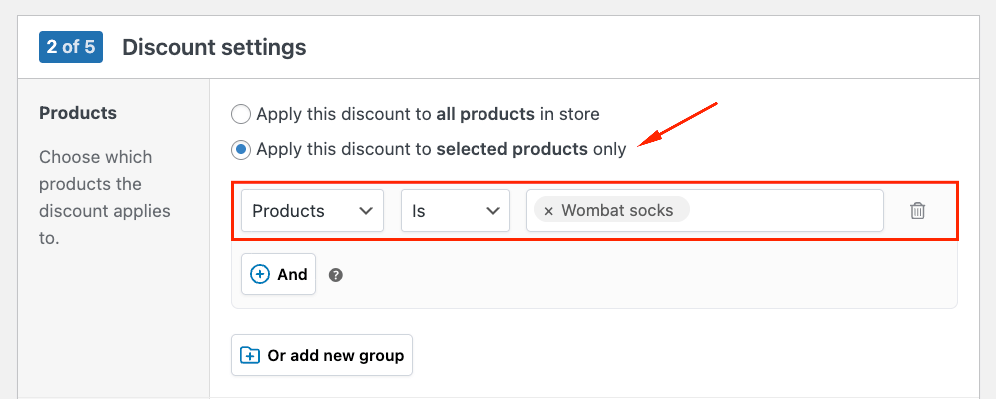
- Click on “Apply this discount to selected products only”, and select the sock products you want to apply this discount to. You can choose specific products, categories, or tags.
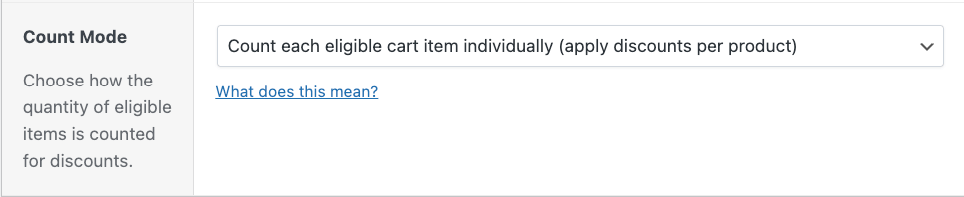
- Choose the count mode: Count each eligible cart item individually (apply discounts per product).
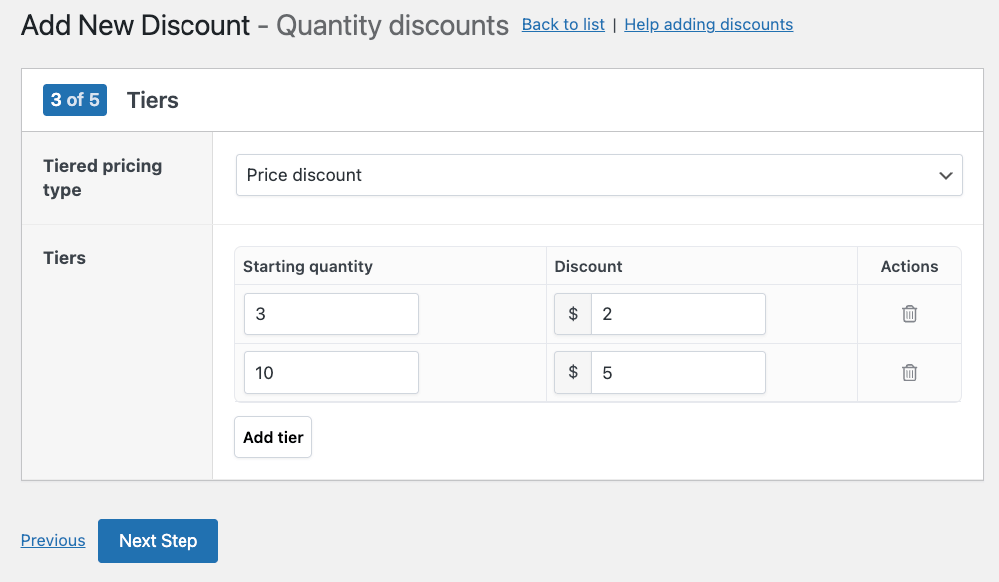
- Now configure your quantity tiers with a “Price discount” tiered pricing typer. Click Add tier and set up your first breakpoint: quantities 3-9 with a fixed price of $8 per unit ($2 discount). Add another tier for quantities 10+ at $5 per unit.
- Save your discount, and it activates immediately.
Now, every time users add products above the thresholds, they will enjoy the discounts. However, with the current settings, they won’t see the discount before they actually add the product.
So, how do we fix that?
How to display tiered pricing tables on product pages
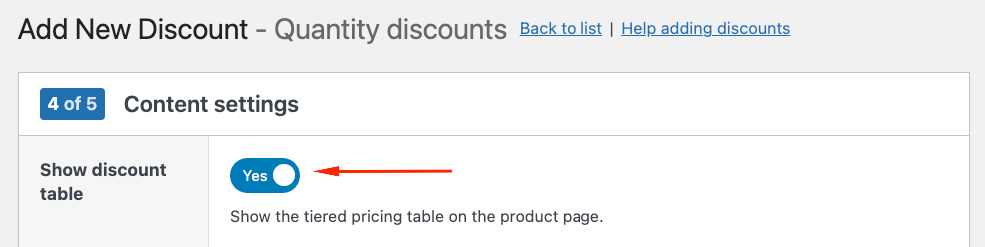
During the discount setup process, the Content settings section controls exactly how your pricing table appears to customers. You can customize which information displays to match your store’s needs, starting with toggling the “Show discount table.”
Available columns include: range (quantity thresholds), price (discounted price per unit), total_price (total cost for that tier), discount (amount saved per unit), total_discount (total savings), and discount_percent (percentage saved). Choose the columns that communicate value most clearly to your specific audience.

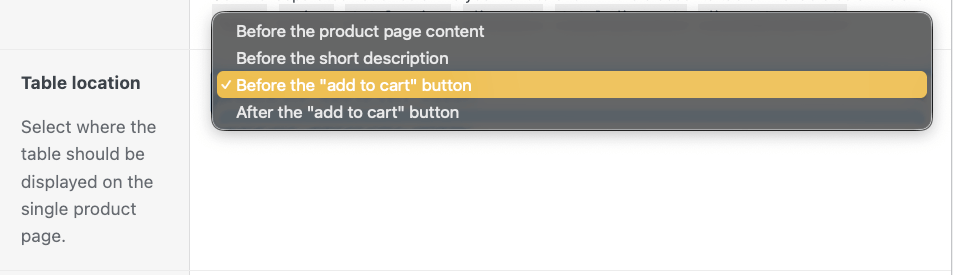
Next, choose the table’s position. Display it after or before the “add to cart” button for maximum visibility at the decision point, before the short description to catch attention early, or before product page content to ensure every visitor sees the tiered pricing.
The cart total updates automatically as customers change quantities, reflecting savings in real time without requiring page refreshes or cart updates.

How to create a “buy 3, get 1 free” discount
“Buy 3, get 1 free” is another way to promote bulk purchases, although the quantities usually don’t get that high. Still, it’s a very effective way to increase the average order value through free products.
Here’s how you can do that:
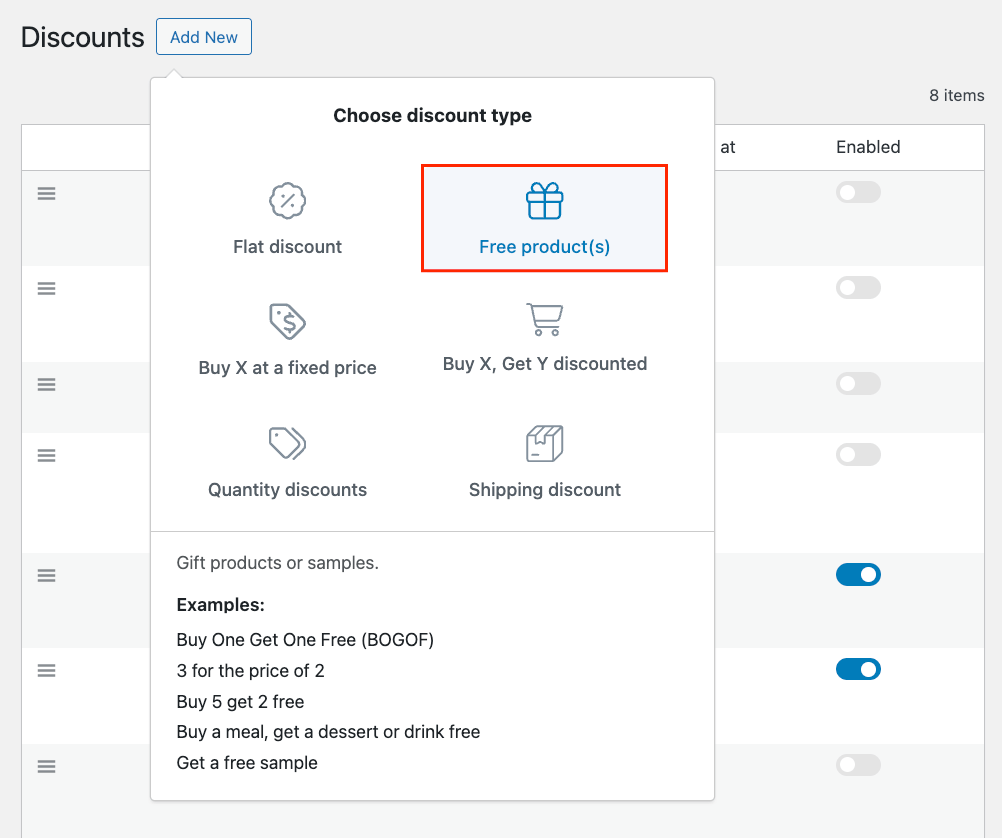
- Choose Free product(s) as your discount type.
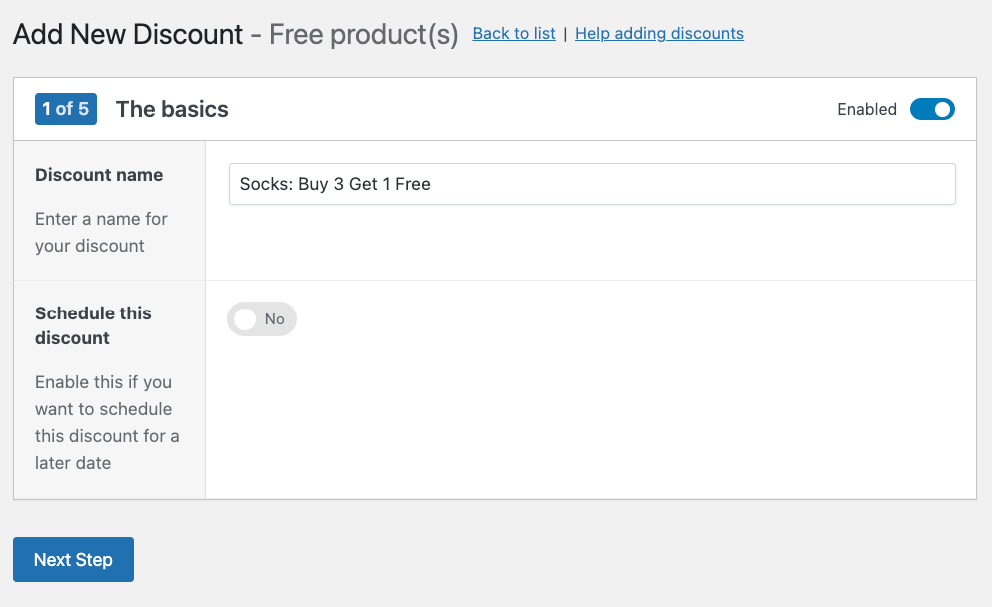
- Name your promotion something clear, like “Socks: Buy 3 Get 1 Free,” and configure your scheduling if needed.
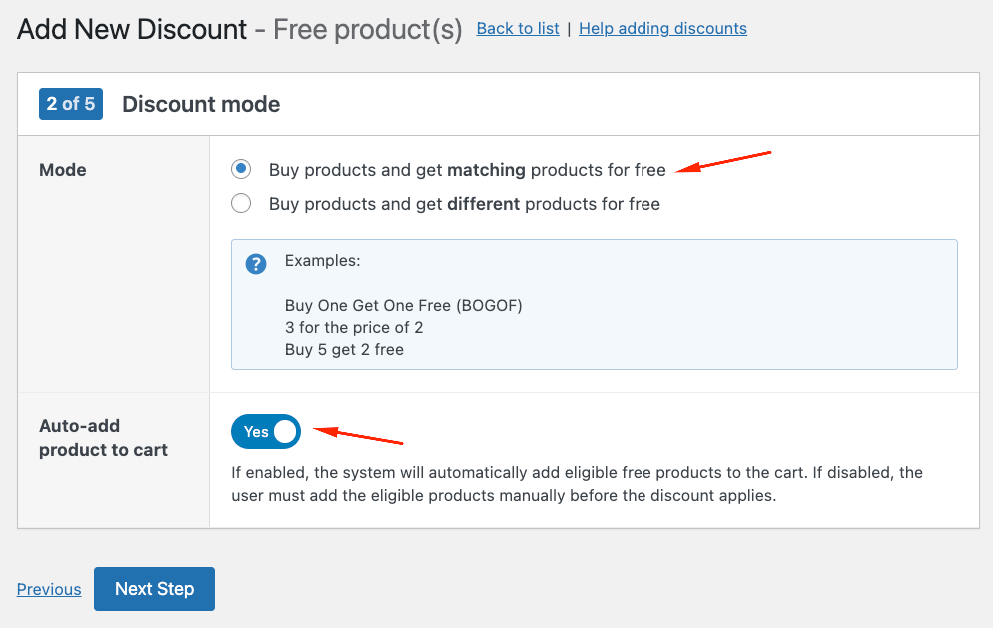
- Choose the discount mode: Buy products and get matching products for free. Then, toggle Auto-add product to cart.
- Under Products, choose the qualifying product. This determines which items customers must purchase to unlock the free product. Then, add the “Buy” and “Get” quantities: how many products customers need to purchase to unlock a certain number of free products.
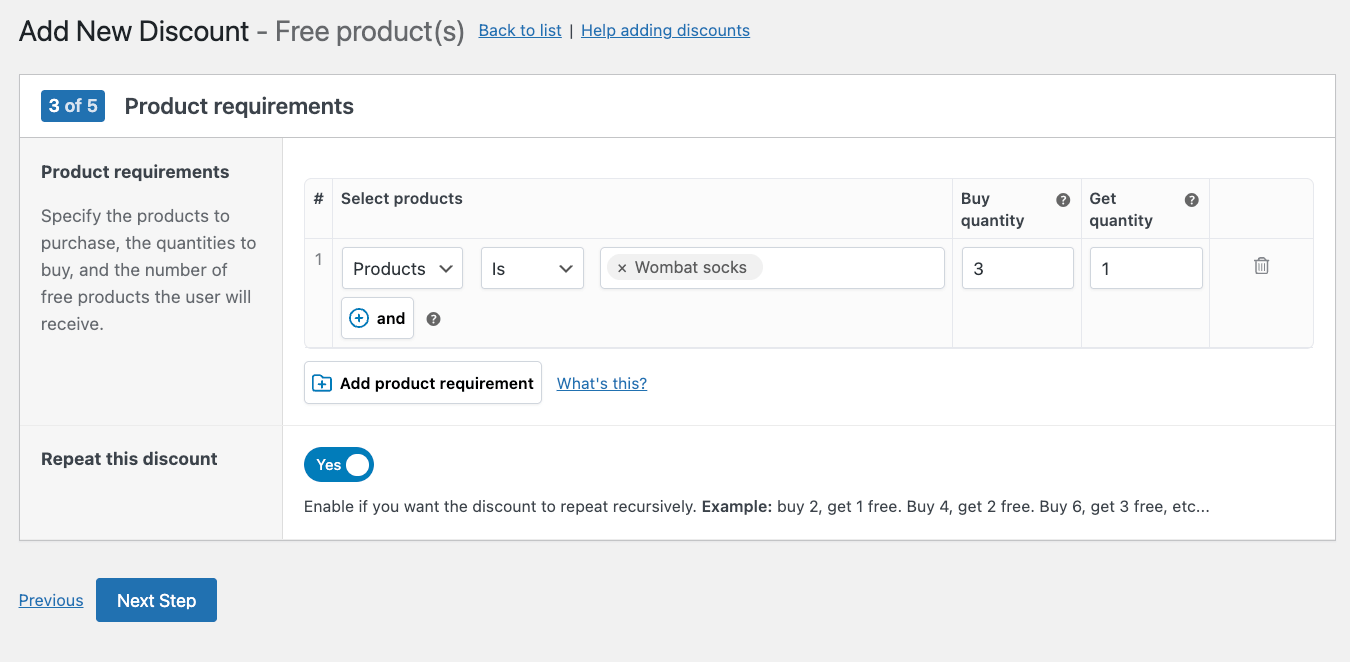
- Toggle Repeat this discount if you want the deal to repeat: customers buying 6 pairs get 2 free, 9 pairs get 3 free, and so on.
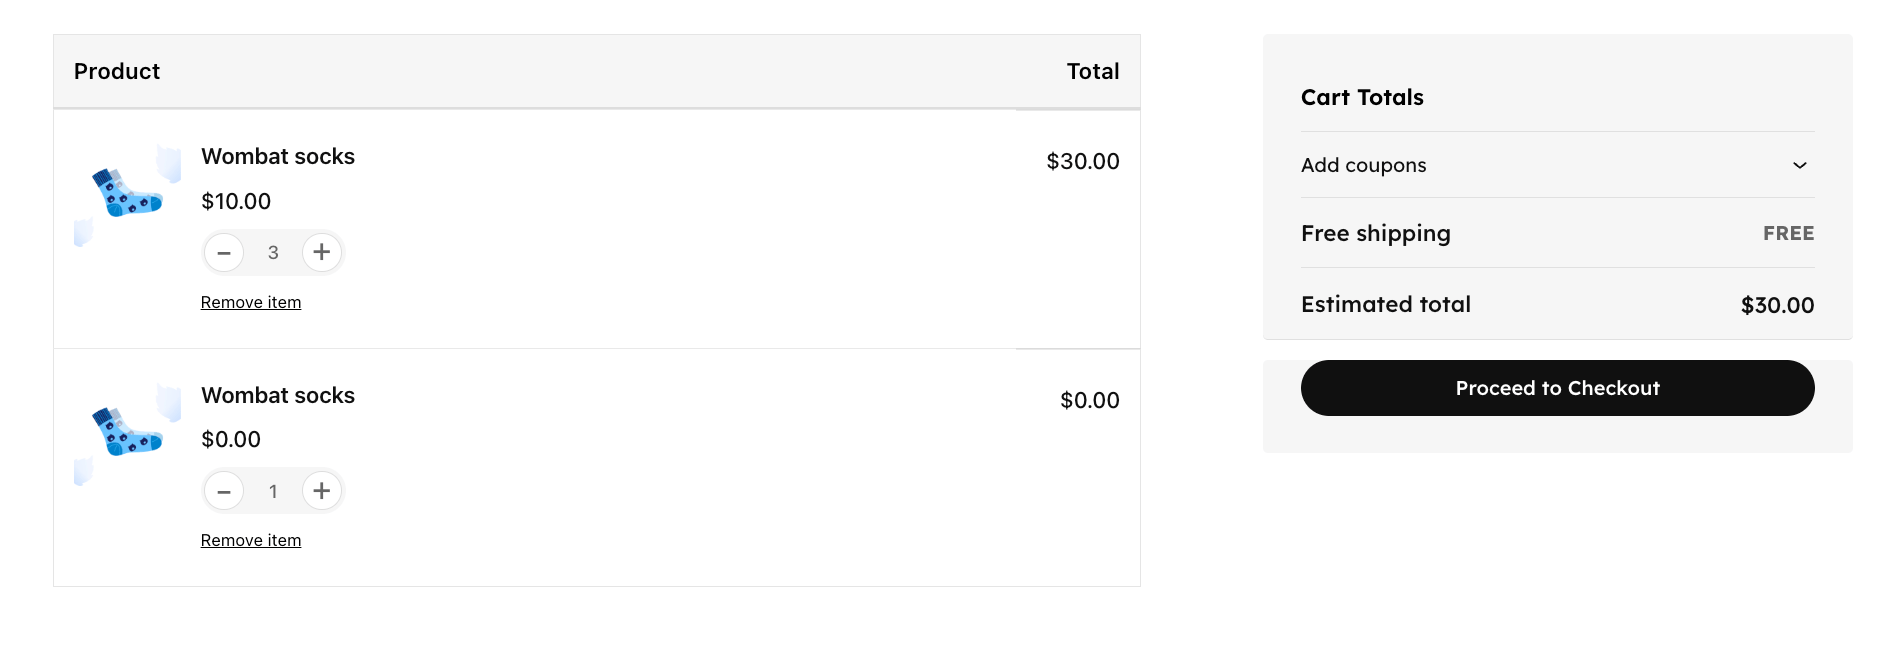
- Save your discount and test it on the frontend. Add 3 pairs to your cart and watch the 4th pair automatically appear at $0.
Building tier structures that maximize order value
Follow these best practices to design tier structures that drive larger purchases:
- Create a minimum of 3 tiers: Small (convenience), medium (value), large (bulk). This gives customers multiple psychological anchors and increases the likelihood they’ll choose a higher quantity tier.
- Set your first breakpoint just above your average order quantity. If customers typically buy 2 items, make your first tier start at 3 to nudge them toward spending slightly more.
- Make each tier’s savings meaningful – at least 10% more than the previous tier. Incremental improvements feel rewarding and justify the jump in quantity.
- Leave the maximum blank on your highest tier to capture unlimited quantities. This accommodates bulk buyers without capping their potential order size.
- Preview the pricing table directly in the editor before publishing to ensure the tiers display correctly and communicate value clearly.
- Test live calculations by selecting different quantities on your actual product page to verify the discount applies correctly at each threshold.
- Enable pricing tables to display automatically on all discounted products to maintain consistency across your catalog.
- Add custom messages like “Buy 5+ and save 20%” above the product price to reinforce the savings opportunity.
- Use sale badges on product thumbnails in category pages to attract attention and drive traffic to discounted products.
Check out our guide on how to set up discounts for categories to learn more about applying bulk pricing across entire product groups.
Managing discount priorities
Studio Wombat’s priority system ensures the right discount always applies, preventing confusion when multiple rules could affect the same product.
- Lower priority numbers always beat higher ones: Priority 1 wins over priority 10. Use this hierarchy to control which promotions take precedence during overlapping sales periods.
- Product rules override category rules regardless of priority settings. This means a product-specific discount will always apply instead of a broader category discount.
- Role-based discounts can layer on top of or replace standard pricing depending on your configuration, letting you offer special wholesale rates to specific customer groups.
- Only one discount applies per product to maintain pricing clarity and prevent stacking that could erode your margins unexpectedly.
Document your priority strategy for team members managing promotions to avoid conflicts during busy seasonal periods.
Maintaining load speed while adding discount features
Every additional second of load time increases cart abandonment, hurts Google rankings, and compounds the strain on stores already running a lot of plugins.
As we mentioned, product-page calculations execute once when customers customize and cache results, while cart-based systems recalculate with every change – creating the performance difference that makes Studio Wombat faster. This architectural choice means your discount logic runs efficiently without creating bottlenecks during the critical checkout process.
Cache configuration for optimal performance
- Static discount rules work perfectly with full-page caching since the pricing remains consistent for all visitors viewing the same product.
- Only exclude product pages if using role-based or user-specific pricing that needs to display different prices for different customer groups.
- Add /product/* to exclusions in WP Rocket or W3 Total Cache if needed to ensure dynamic pricing displays correctly.
- CDN caching for CSS, JavaScript, and images remains fully compatible, letting you maintain fast global delivery without sacrificing discount functionality.
- Object caching actually improves performance by storing calculations in memory rather than querying the database repeatedly.
- Clear cache after updating rules to show new pricing immediately to customers browsing your store.
Make quantity discounts work for your store today
Before implementing any quantity discount solution, evaluate it against 3 essential criteria.
- Will it maintain your site’s speed? Performance degradation costs more through abandoned carts than you’ll recover from increased order sizes.
- Do savings appear at the decision point? Discounts buried in the cart don’t drive purchasing behavior. Customers need immediate visibility on product pages while they’re actively considering quantities.
- Does it support your business model? Consider whether you need tiered breaks, product-specific rules, or variation-level pricing before committing to a plugin.
WooCommerce Discounts addresses these requirements through its guided setup process and flexible conditional logic.
Remember: Customers won’t buy more if they don’t instantly see the value of doing so.
Get started with WooCommerce Discounts and watch your average order value increase as customers instantly see the savings from buying more, all without the performance hit of cart-based calculations.
