If you make an online sale in the woods but no one is around to see it, did it even happen? Impossible metaphors aside, it’s essential to know that just because you created a sale, it doesn’t mean that people will pay attention to it.
An excellent solution for this is to add sales badges; however, the default WooCommerce badges are very limited. With their basic appearance, generic badge text (Sale), and no customization options, these badges often do more harm than good to your well-planned promotions.
Customizable badges, on the other hand, come with a lot of benefits:
- They let you communicate clearly specific information about the sale.
- They can be designed to match your store’s exact branding, providing a consistent experience throughout the website and enhancing click-through rates and conversions.
- They allow you to change the messaging depending on the type of sale (clearance, flash sale, holiday special).
If you want to use sales badges to improve product visibility and customer engagement, you have two main options: code-based customization (PHP and CSS) and plugin solutions. In this article, we’ll take a look at both so that no matter what your skill level is, you can learn to transform basic WooCommerce sale badges into eye-catching promotional tools.
Don’t care about code? Skip to the plugin section!
How to customize the WooCommerce sale badge with PHP snippets
The default badge for an item on sale looks like this:
As you can see, it’s not very appealing, but thankfully, the platform has made it easy for developers to customize it without editing the core files. This happens with hooks and filters, and now we’ll show you how you can use the woocommerce_sale_flash filter to replace the default text with custom text, e.g. “Limited offer!”
In a custom plugin or your child theme’s functions.php, add the following code:
<code>function custom_sale_badge_text( $html ) {
    // Replacing the default "Sale!" text with "Limited offer!" in the badge.
    $html = str_replace( 'Sale!', 'Limited offer!', $html );
    return $html; // Return the modified HTML
}

// Hooking the function into WooCommerce's 'woocommerce_sale_flash' filter
add_filter( 'woocommerce_sale_flash', 'custom_sale_badge_text' );</code>Code language: PHP (php)
And this is how that would look on your shop page:
Adding dynamic content to the badge
Although it’s nice to change the text, this is a static message that will appear regardless of the offer. To further customize the listing, you can add a dynamic badge that updates accordingly, such as the discount percentage.
Like in the previous example, add the following snippet in a custom plugin or your child theme’s functions.php:
// Add dynamic discount percentage to sale badge in WooCommerce
function custom_woocommerce_sale_percentage() {
    global $product;

    if ( $product->is_on_sale() ) {
        $regular_price = $product->get_regular_price();
        $sale_price = $product->get_sale_price();

        // Calculating the discount percentage
        if ( $regular_price > 0 ) {
            $percentage = round( ( ( $regular_price - $sale_price ) / $regular_price ) * 100 );

            // Displaying the discount percentage
            echo '<span class="onsale">-' . $percentage . '%</span>';
        }
    }
}

// Hooking the function to display the sale badge
add_action( 'woocommerce_before_shop_loop_item_title', 'custom_woocommerce_sale_percentage', 10 );Code language: PHP (php)
Now, you have an additional piece of content that will appear on your products:
Adding a conditional badge text
As the name suggests, conditional badge text changes depending on predetermined conditions – for example, based on the product category or discount amount.
In this example, we’ll add a snippet that does the following actions:
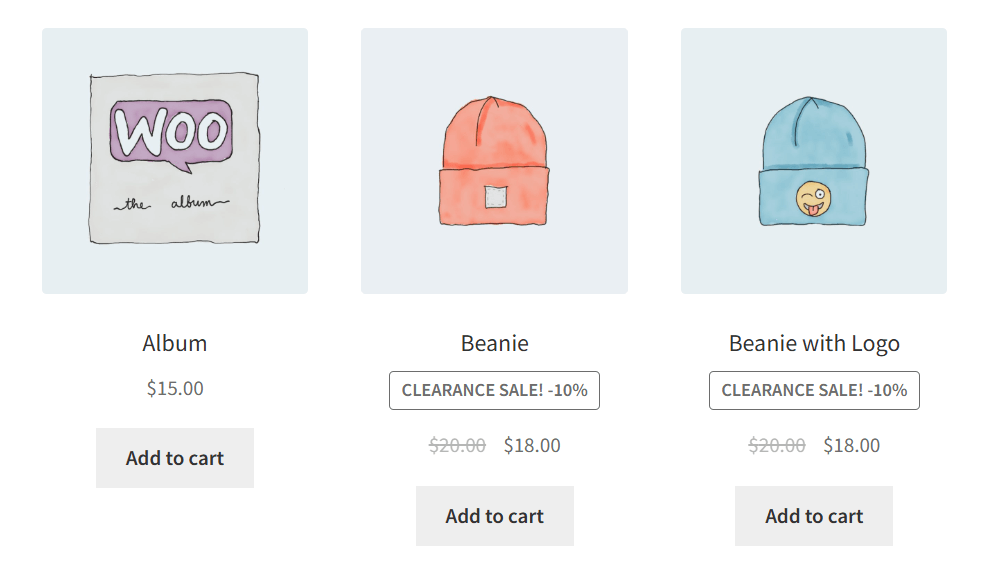
- Changes the sale badge text to “Clearance Sale! + discount %” if the product is in the “clearance category”.
- Changes the sale badge text to “Wow Sale!! + discount %” if the product’s discount is greater than 50%.
And here is the snippet:
function custom_woocommerce_sale_flash_text_only( $html, $post ) {
    $product = wc_get_product( $post->ID );

    // Checking if the product is on sale
    if ( $product->is_on_sale() ) {
        $regular_price = $product->get_regular_price();
        $sale_price = $product->get_sale_price();

        // Calculating the discount percentage
        if ( $regular_price > 0 ) {
            $percentage = round( ( ( $regular_price - $sale_price ) / $regular_price ) * 100 );

            // Checking for the "clearance" category
            if ( has_term( 'clearance', 'product_cat', $product->get_id() ) ) {
                // Replacing 'Sale!' with 'Clearance Sale!' and add the discount percentage
                $html = str_replace( 'Sale!', 'Clearance Sale! ' . '-' . $percentage . '%', $html );
            }
            // Checking if the discount is greater than 50%
            elseif ( $percentage > 50 ) {
                // Replacing 'Sale!' with 'WOW Sale!!' and add the discount percentage
                $html = str_replace( 'Sale!', 'WOW Sale!! ' . '-' . $percentage . '%', $html );
            }
            else {
                // Replacing 'Sale!' with just the discount percentage
                $html = str_replace( 'Sale!', '-' . $percentage . '%', $html );
            }
        }
    }

    // Returning the modified HTML with new badge text
    return $html;
}

// Hooking into the sale flash to modify the sale badge text only
add_filter( 'woocommerce_sale_flash', 'custom_woocommerce_sale_flash_text_only', 10, 2 );Code language: PHP (php)
And this is how it looks to customers:
Testing your customizations safely
Before deploying badge changes:
- Use a staging site or local development environment first.
- Test across different product types (simple, variable, grouped).
- Check mobile and desktop views.
- Clear your cache after making changes.
Compatibility considerations
Some themes override WooCommerce templates, which might conflict with your customizations. Page builders like Elementor or Divi may also handle product displays differently. This is why you always have to verify that your badges appear correctly across your entire store.
Create attention-grabbing sale badges with CSS styling
While PHP controls what your badge says, CSS determines how it looks. Let’s transform that plain sales badge into something that truly catches the eye.
Targeting the WooCommerce sale badge
Every WooCommerce sale badge uses the .onsale CSS class. This consistent selector makes styling straightforward across your entire store.
Simply add your CSS to your theme’s customizer or a custom CSS plugin.
Basic visual customizations
Start by adjusting fundamental properties to match your brand:
.woocommerce span.onsale {
  background-color: #AA5500; /* red background */
  color: #ffffff; /* white text */
  font-family: "Courier New", Courier, monospace;
  font-size: 13px;
  font-weight: bold;
  padding: 10px;
  border-radius: 80px; /* Adjust the value for more or less rounding */
}Code language: CSS (css)
These tweaks instantly elevate your badges from generic to branded. The border-radius property creates smooth, modern corners – increase the value for circular badges or decrease it for sharper edges.
Repositioning your badges
Default badge placement isn’t always ideal. Take control with absolute positioning:
.woocommerce ul.products li.product .onsale {
    position: absolute;
    top: 5px;       /* distance from top */
    right: 1px;     /* distance from right */
    left: auto;
    bottom: auto;
    z-index: 10;     /* ensure it's above the image */
}Code language: CSS (css)
Pro tip: Adjust the top and right values to find your sweet spot. Some stores prefer top-left placement, while others find bottom-right more effective.
Advanced design options
Ready to make your badges truly stand out? Consider these eye-catching options:
- Circular badges: Set border-radius to 50% for perfect circles.
- 3D effects: Add box-shadow: 0 4px 6px rgba(0,0,0,0.3) for depth.
- Ribbon style: Combine negative margins with pseudo-elements.
- Gradient backgrounds: Use background: linear-gradient() for modern appeal.
- Adding subtle animations
Movement catches attention without being obnoxious. This gentle pulse effect works wonders:
@keyframes pulse {
    0% { transform: scale(1); opacity: 1; }
    50% { transform: scale(1.1); opacity: 0.9; }
    100% { transform: scale(1); opacity: 1; }
}

.woocommerce span.onsale {
    animation: pulse 2s infinite ease-in-out;
}Code language: CSS (css)
The animation runs continuously, creating a heartbeat effect that draws eyes naturally to your discounted products.
Remember: Less is often more with animations. Subtle effects enhance user experience, while excessive movement can distract and annoy shoppers.
How to change the sale badge using plugins
For store owners who prefer a no-code approach, several plugins offer comprehensive solutions for customizing WooCommerce sale badges. These tools provide intuitive interfaces that make badge customization accessible to everyone, regardless of technical expertise.
Why choose a plugin solution?
Plugins eliminate the technical barriers of manual coding. With visual editors and drag-and-drop functionality, you can create professional badges in minutes rather than hours. Plus, they handle compatibility issues automatically – no more worrying about theme conflicts or WooCommerce updates breaking your customizations.
Several excellent plugins exist for badge customization, including:
- Product Badges for WooCommerce
- Badge and Product Label for WooCommerce
- YITH WooCommerce Badge Management
We’ll focus on YITH for this tutorial, as it offers the most comprehensive feature set.
Every business is different, though, so we recommend trying out different options and finding what works best for your website.
Start by looking for these universally important features:
- Multiple badge types: Text badges, uploaded images, or dynamic percentage displays
- Flexible positioning: Drag-and-drop placement or precise pixel control
- Smart scheduling: Automatically activate badges for Black Friday or flash sales
- Conditional rules: Show different badges based on categories, tags, or stock levels
- Mobile optimization: Badges that scale properly on smartphones
Setting up YITH WooCommerce Badge Management
Installation takes just minutes:
- Purchase and download YITH WooCommerce Badge Management.
- Navigate to WordPress dashboard → Plugins → Add New → Upload Plugin.
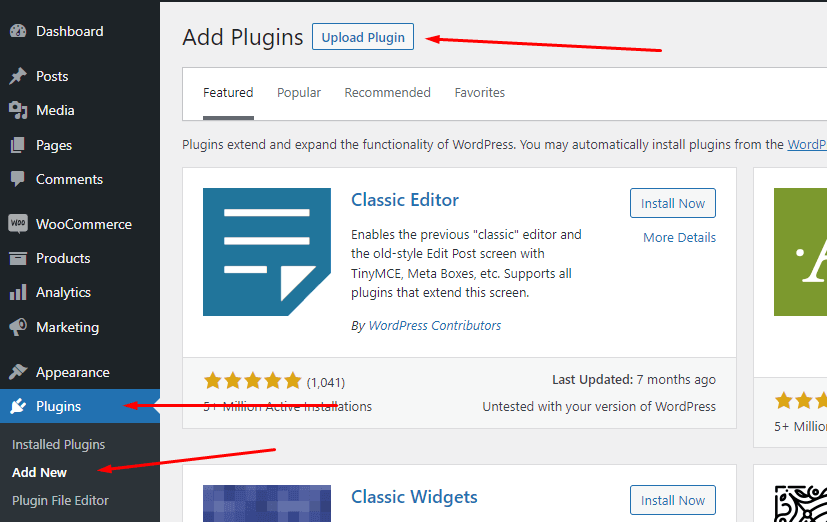
- Upload the plugin ZIP file and activate.
Creating your first custom badge:
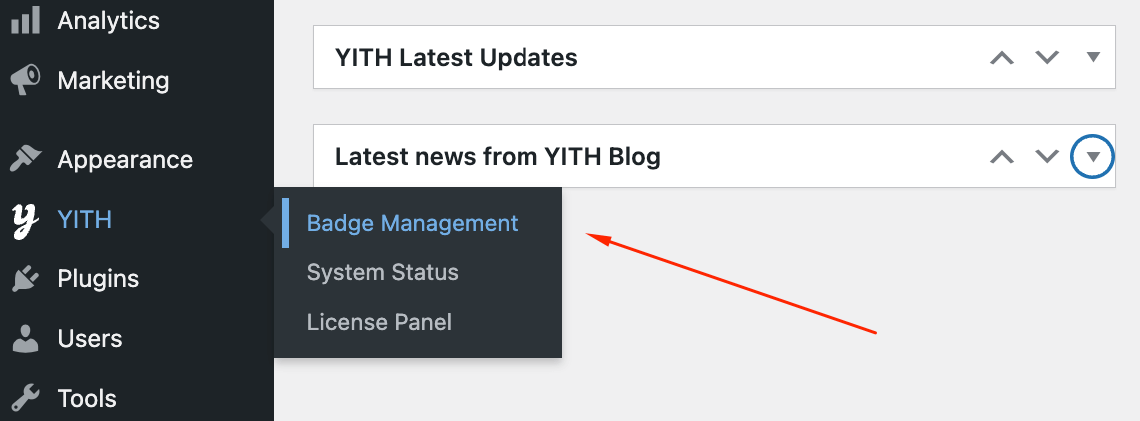
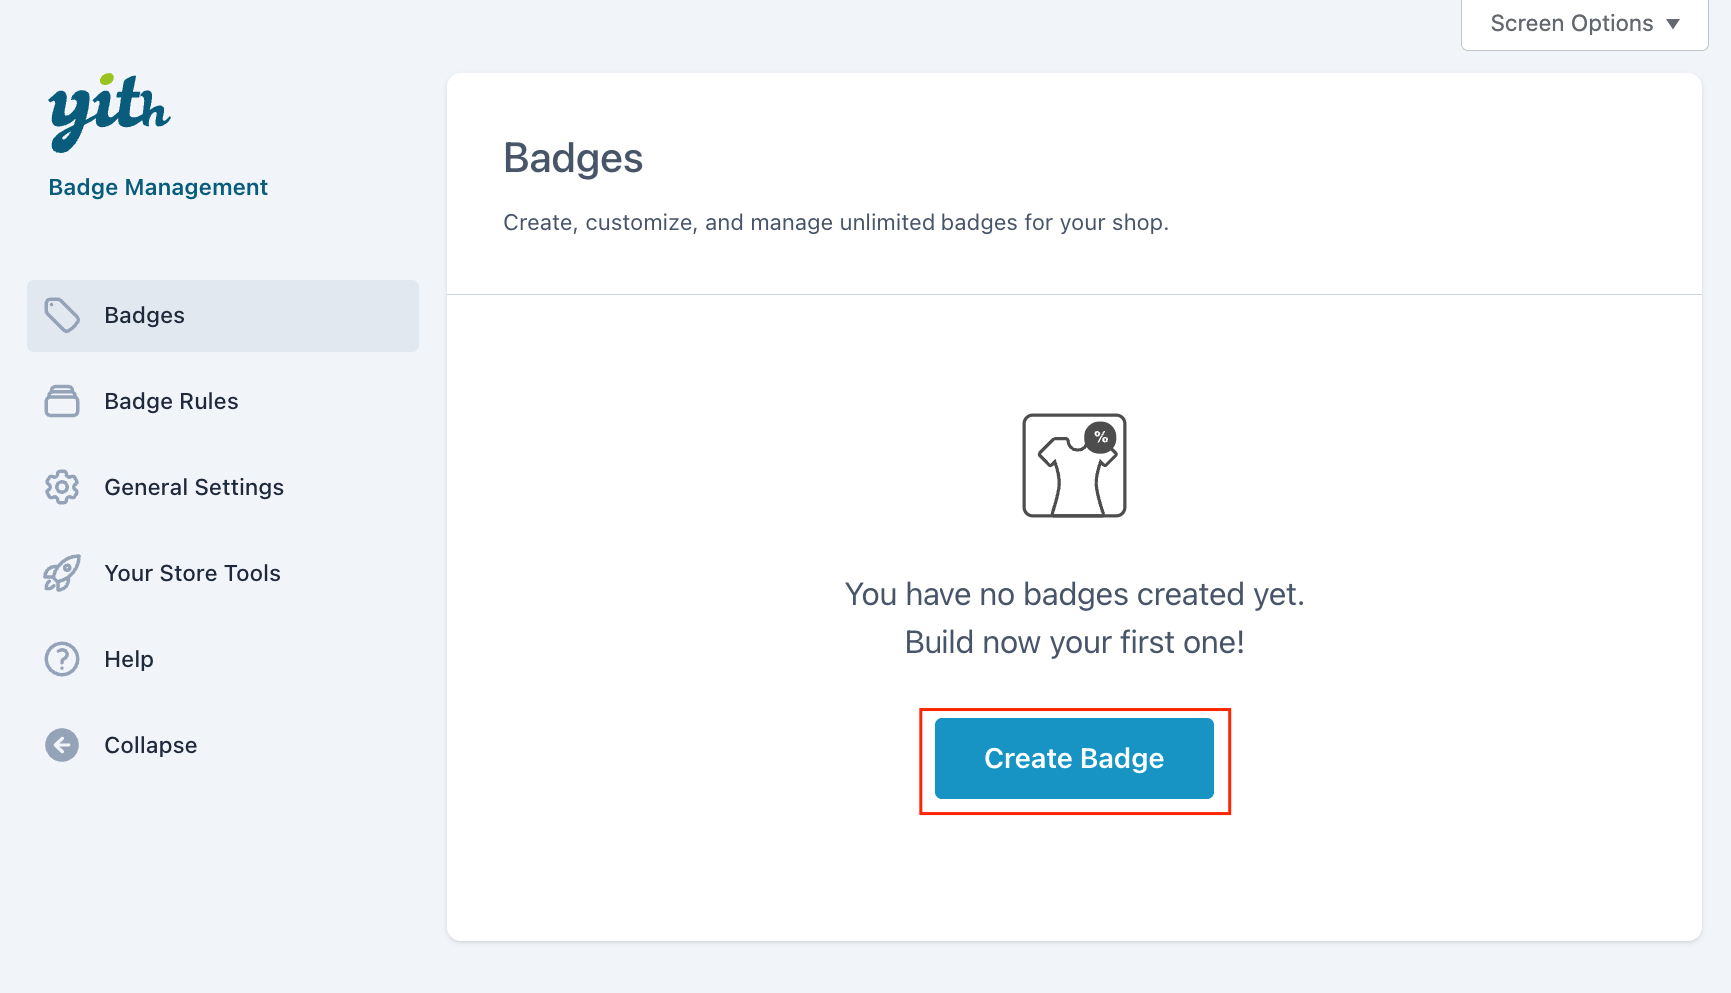
- Access the badge builder through YITH → Badge Management.
- Click Create Badge.
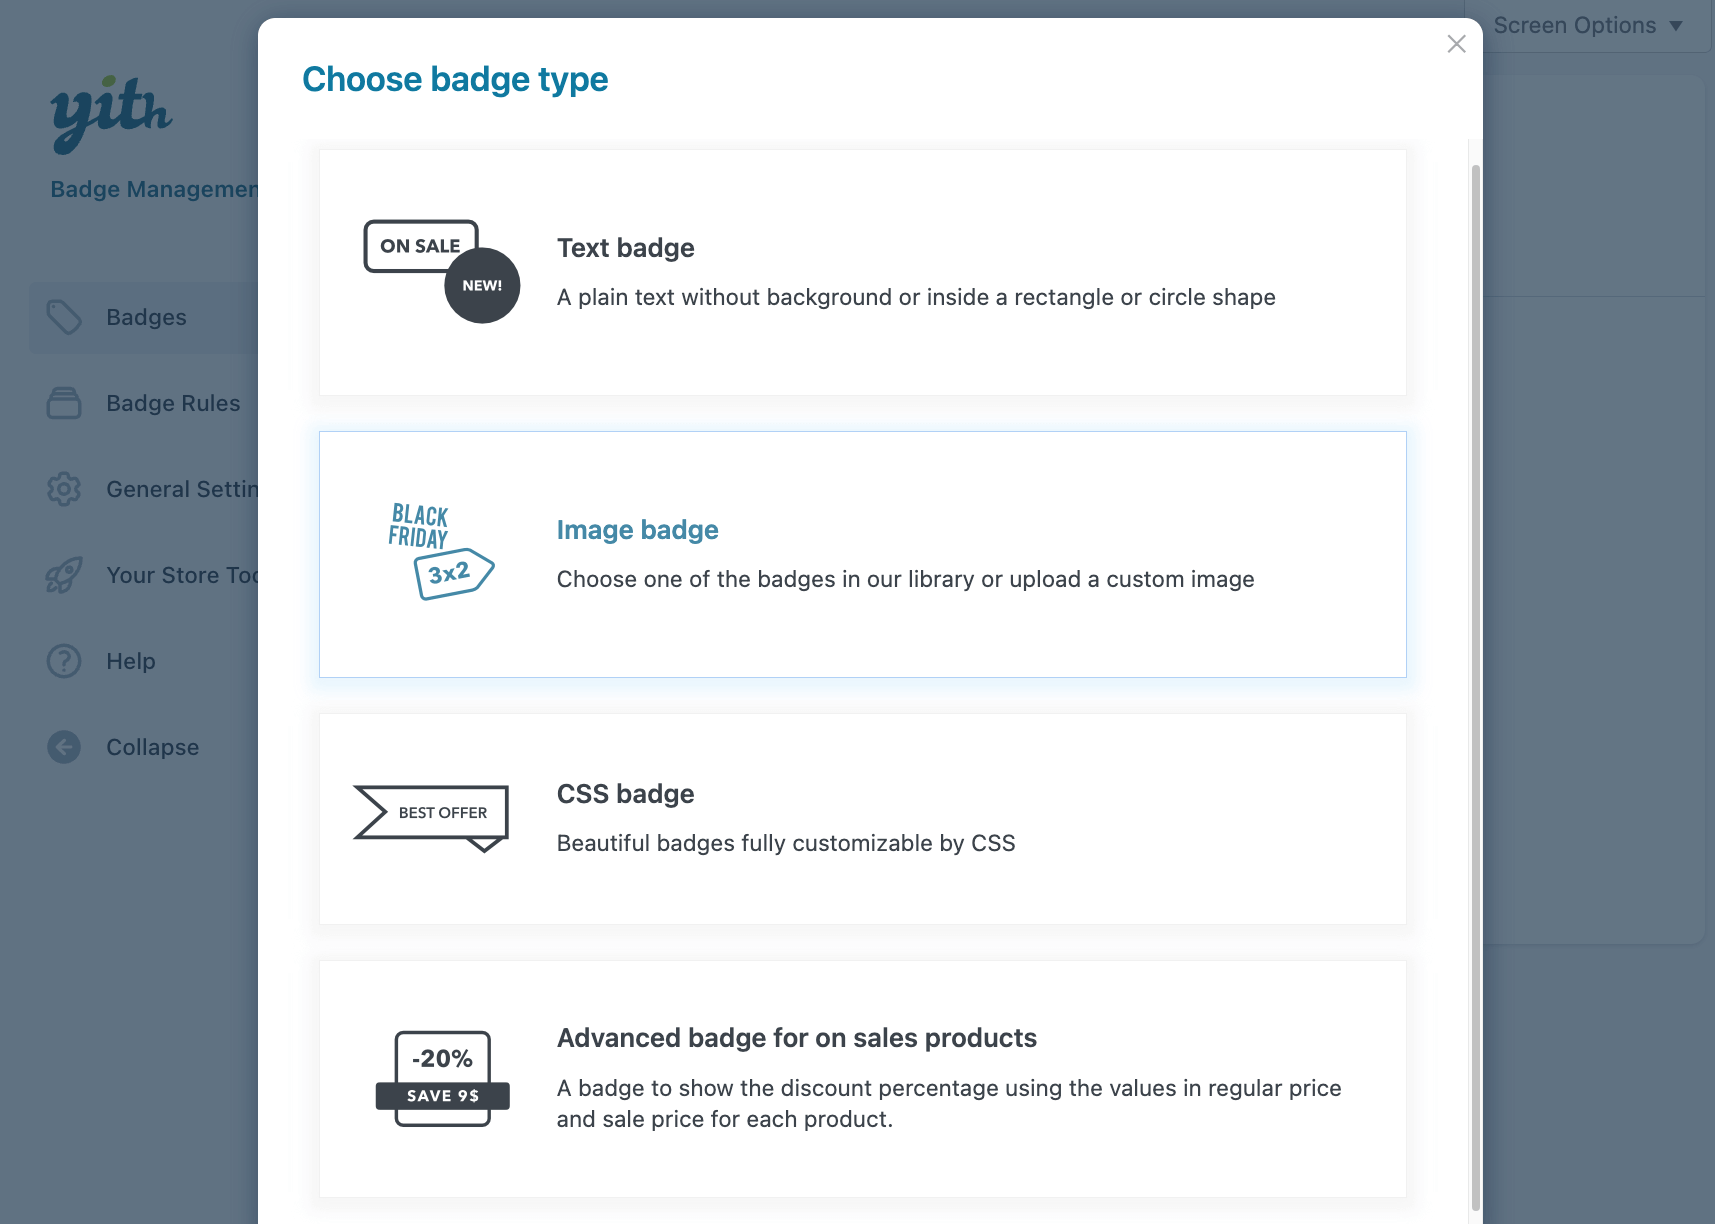
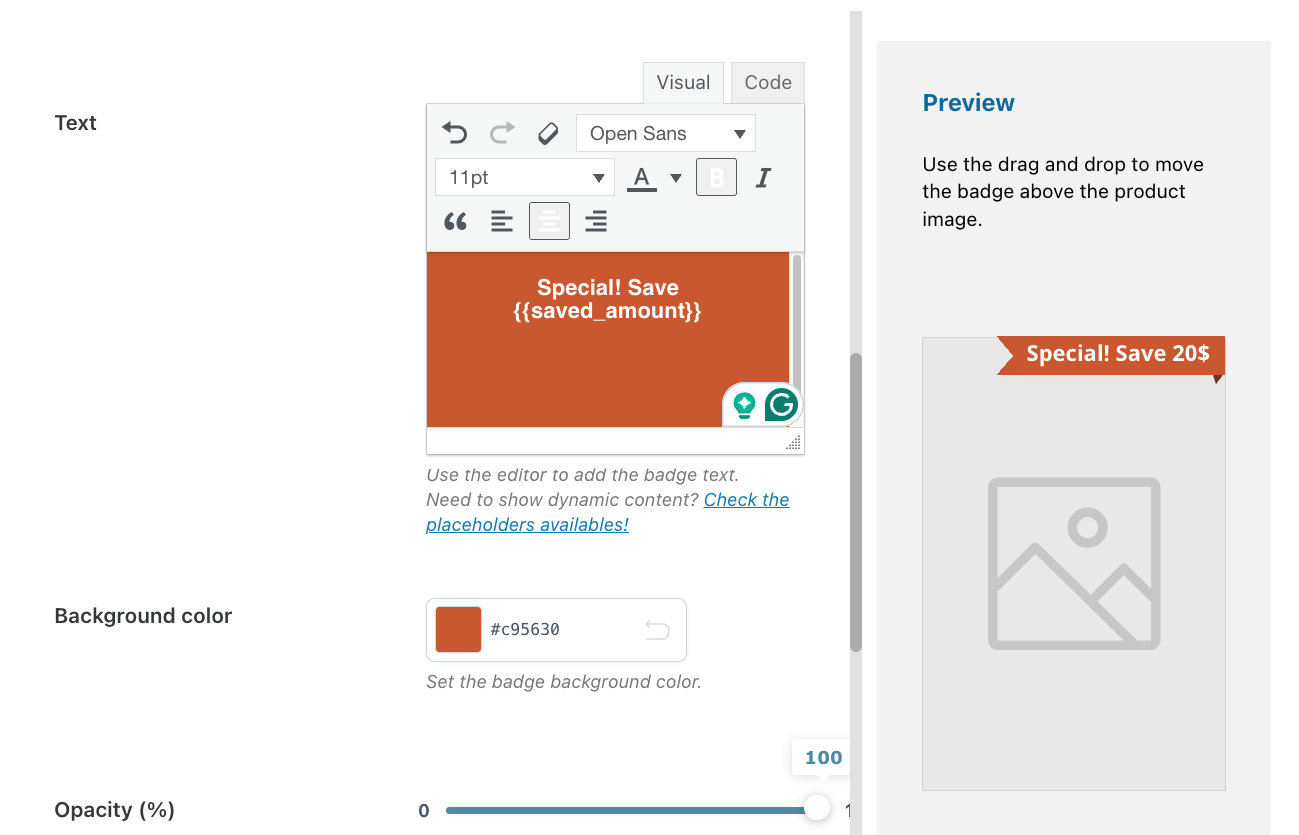
- Choose your badge type (text, image, CSS, or advanced) and you’ll access the visual editor, which lets you design badges with a real-time preview.
- Select a badge template from the library and name it (this won’t be visible to customers; it’s only for the back end). You can also move it around the product image through the drag-and-drop editor on the right.
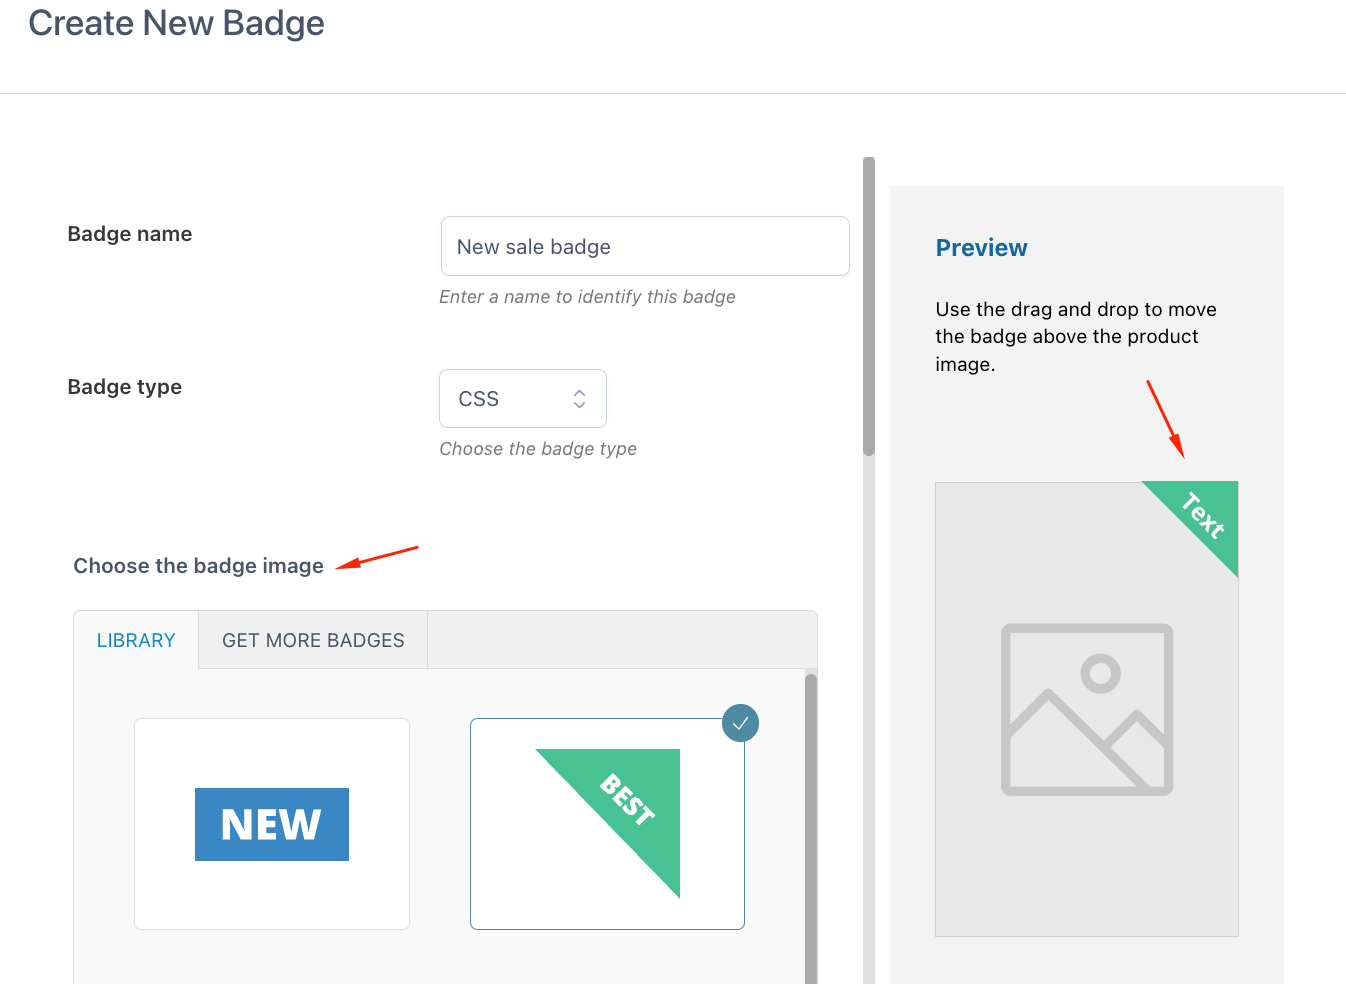
- After that, you can change the text to suit your sale, as well as the formatting, colors, and positioning.
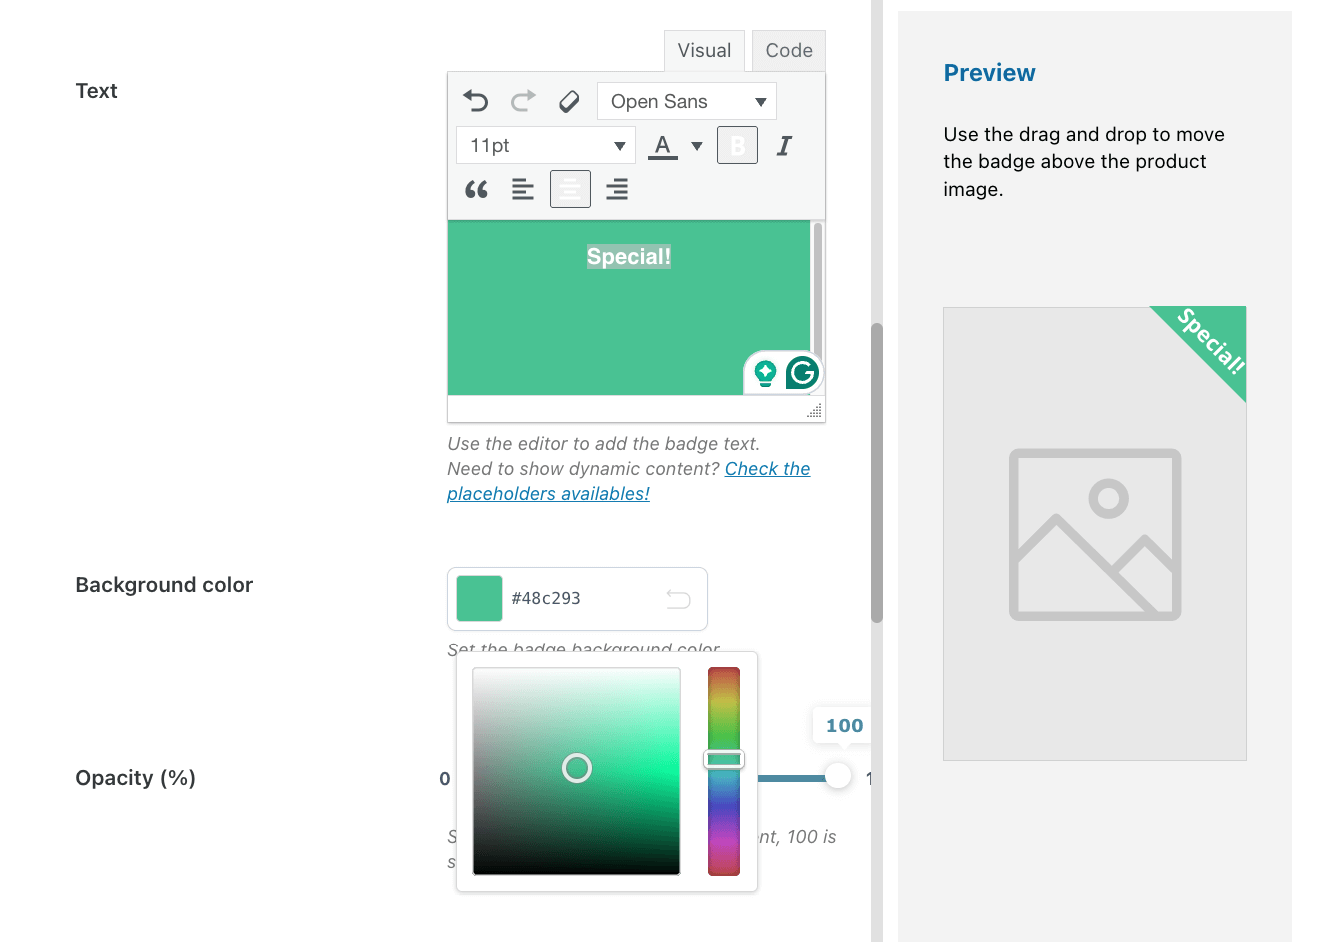
- Below the text editor, you’ll find a link that opens a pop-up with useful placeholders, allowing you to create dynamic content.
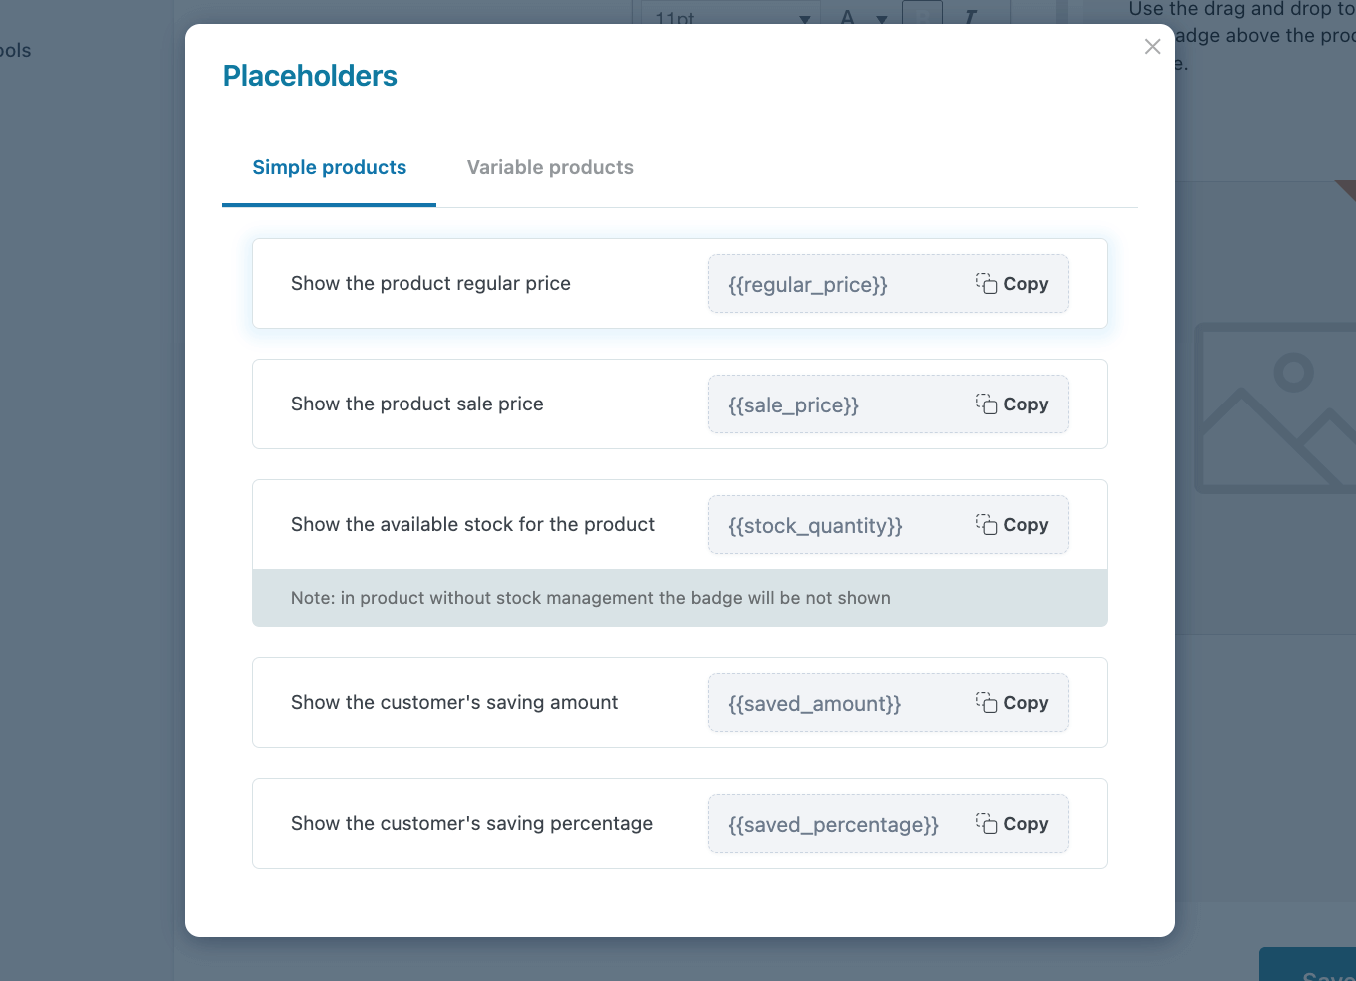
- Use this to create a badge that shows how much people will save on this product.
- When you’re done, just click on Save badge.
Applying badges to products
However, just creating a badge won’t apply it to any product – you need to assign correctly.
To do that, follow these steps:
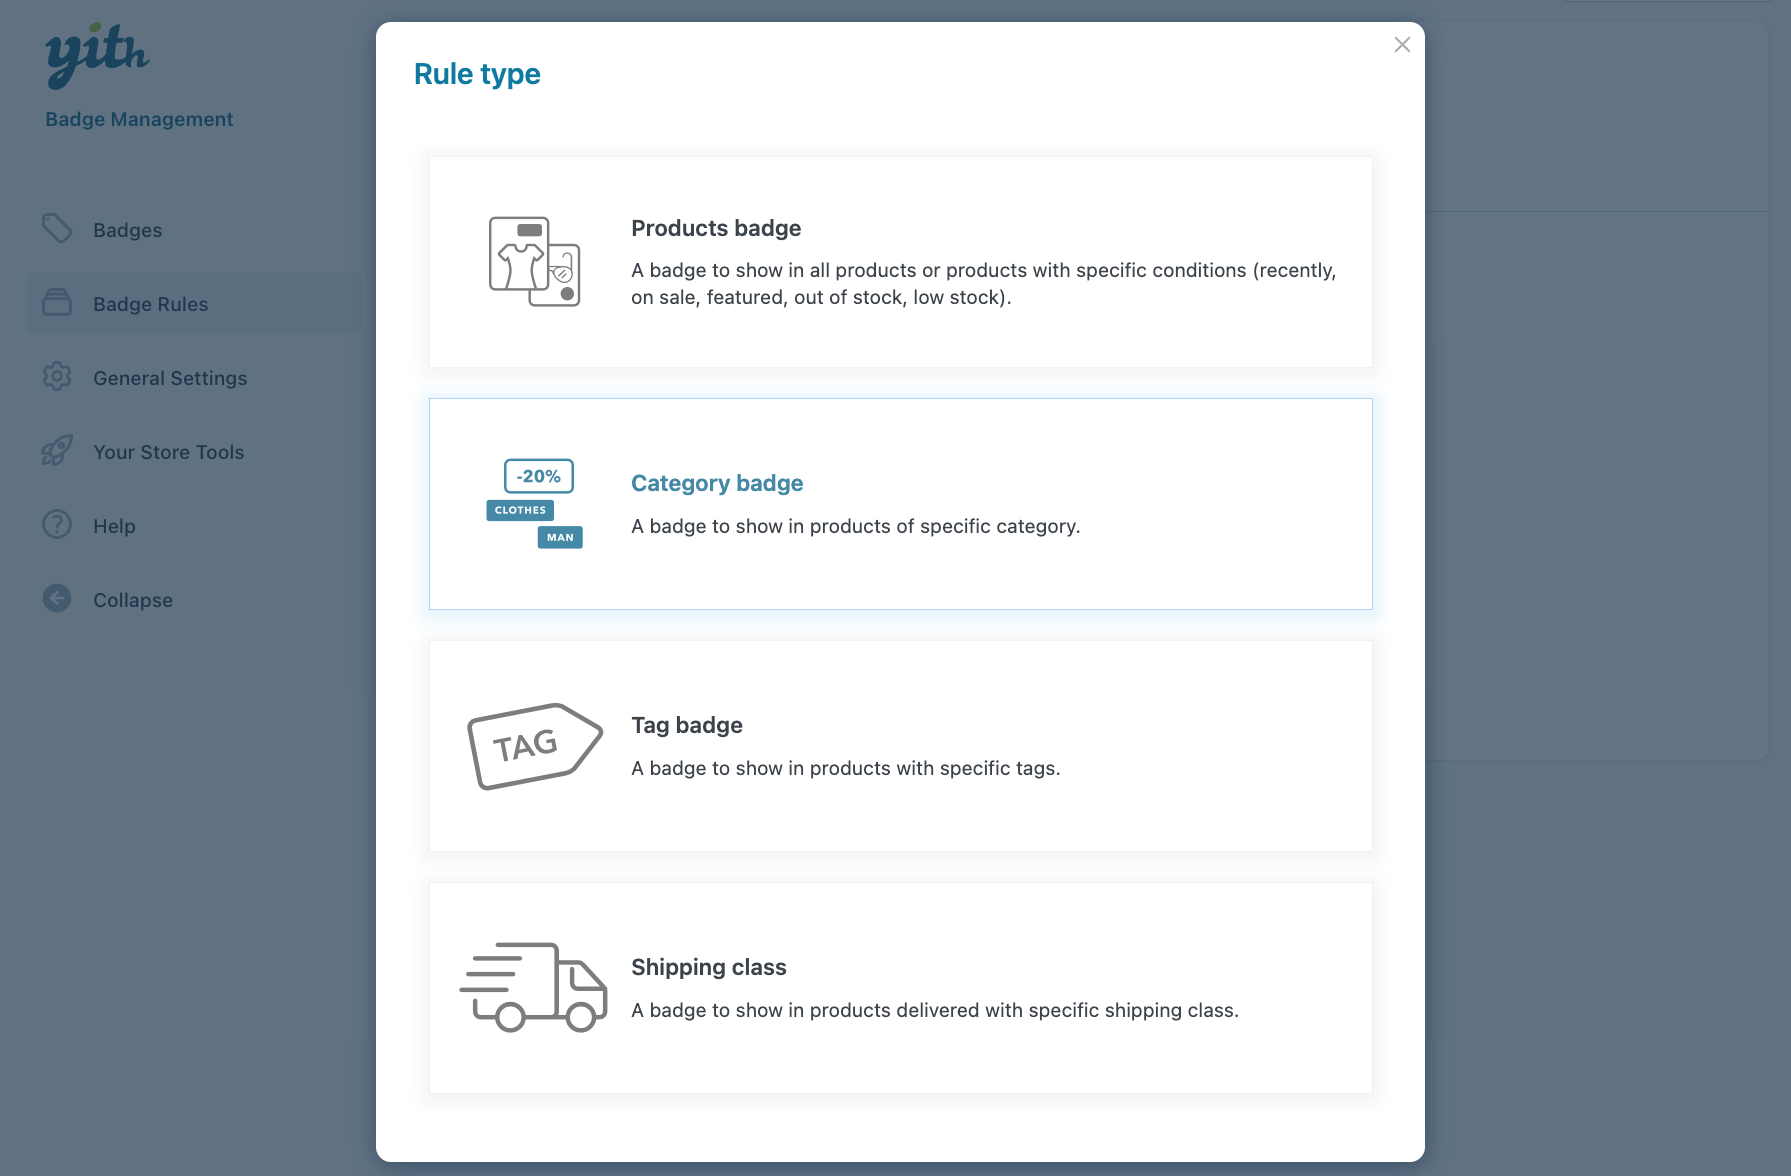
- Head to the Badge Rules tab.
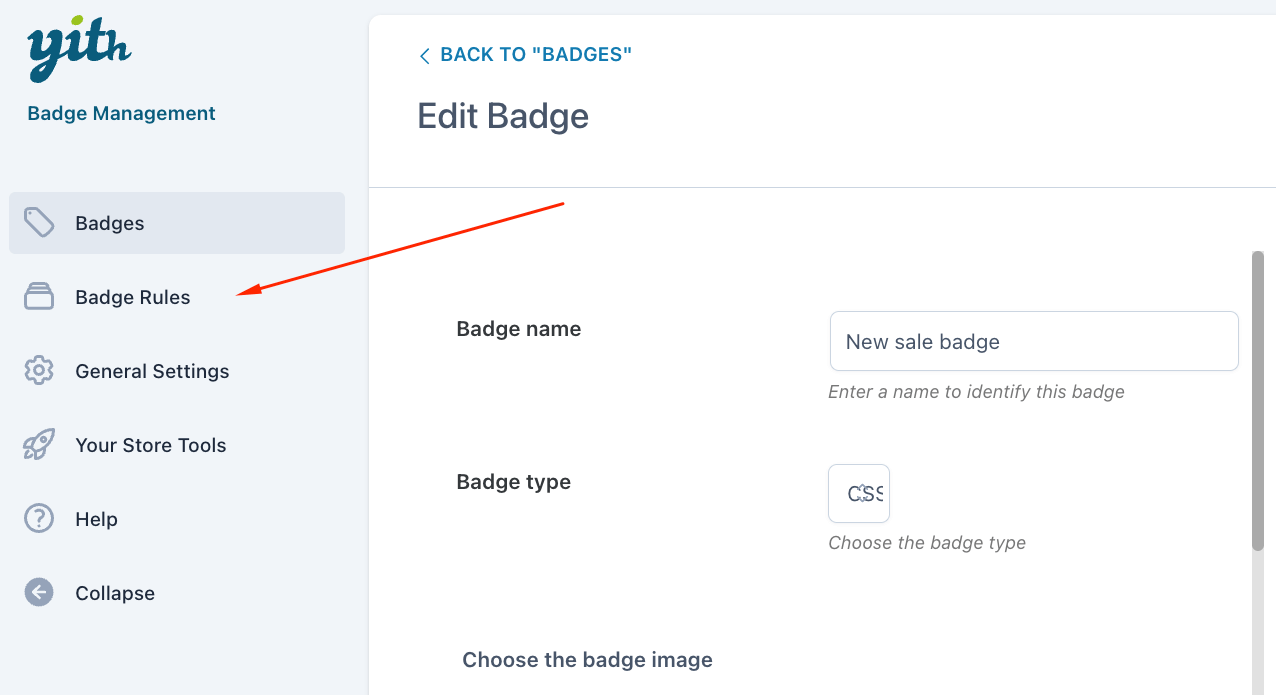
- Click on Set Rule.
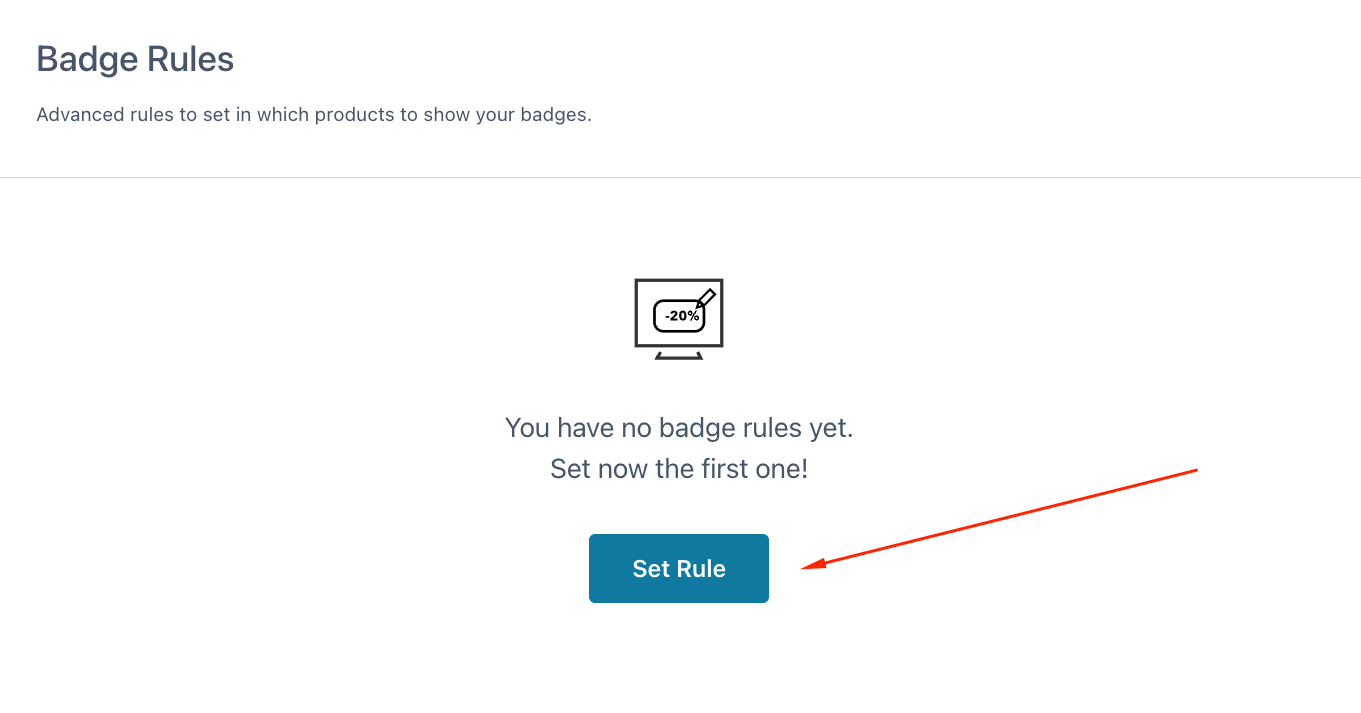
- Choose the type of rule you want to add. You can target:
- All products or ones with specific conditions
- Specific categories
- Tags
- Shipping classes
- Select a name for the rule, choose the category, and the badge you want to associate with this rule.
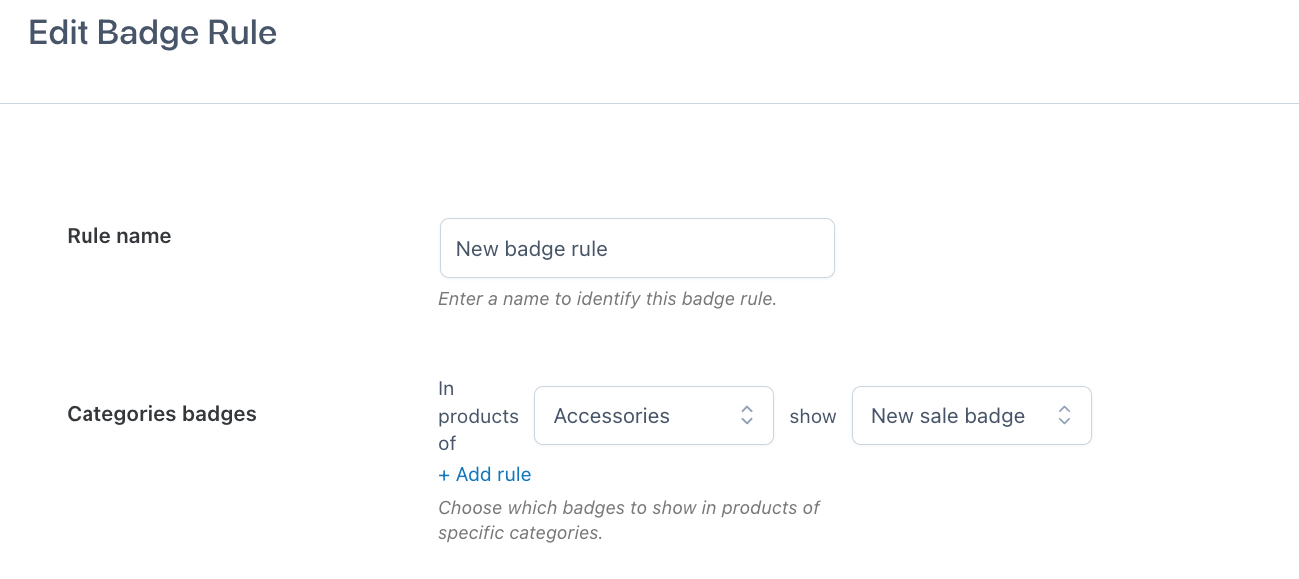
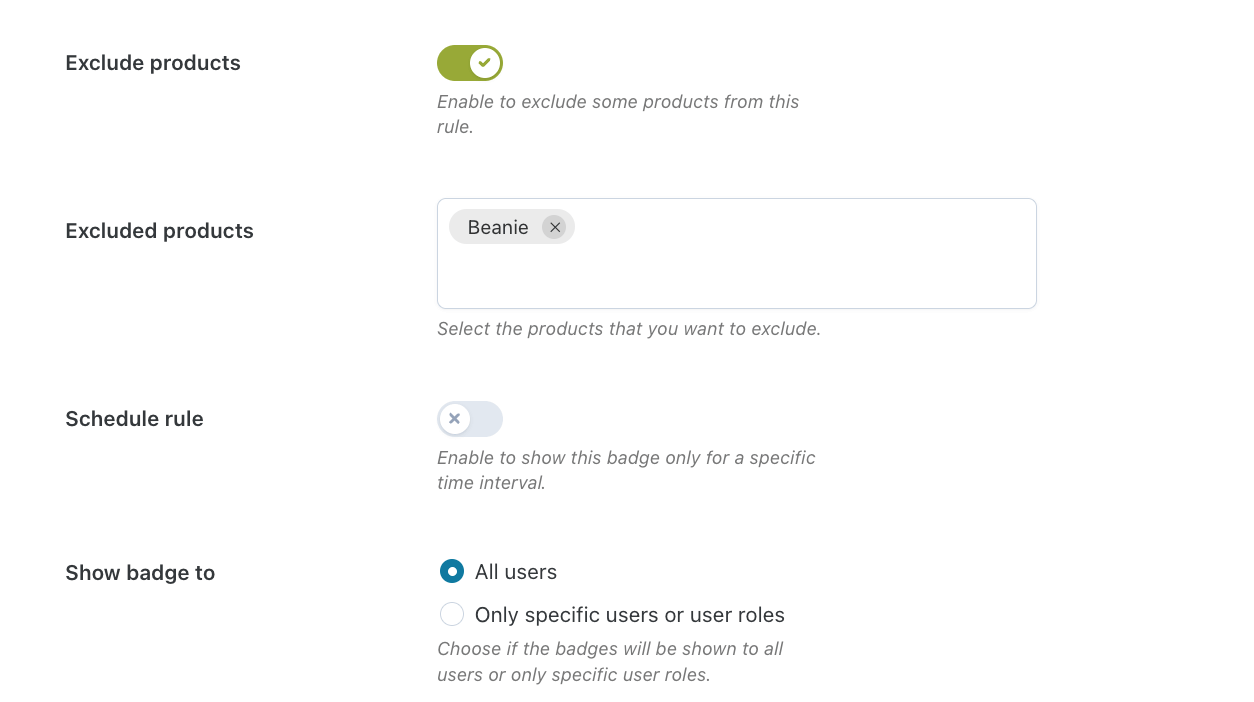
- Adjust any extra settings, such as excluding certain products, scheduling the rule for a set time frame, and restricting the badge to a specific user or user role.
- Click save.
The plugin automatically handles responsive display. Your badges scale appropriately on mobile devices, maintaining visibility without overwhelming smaller screens.
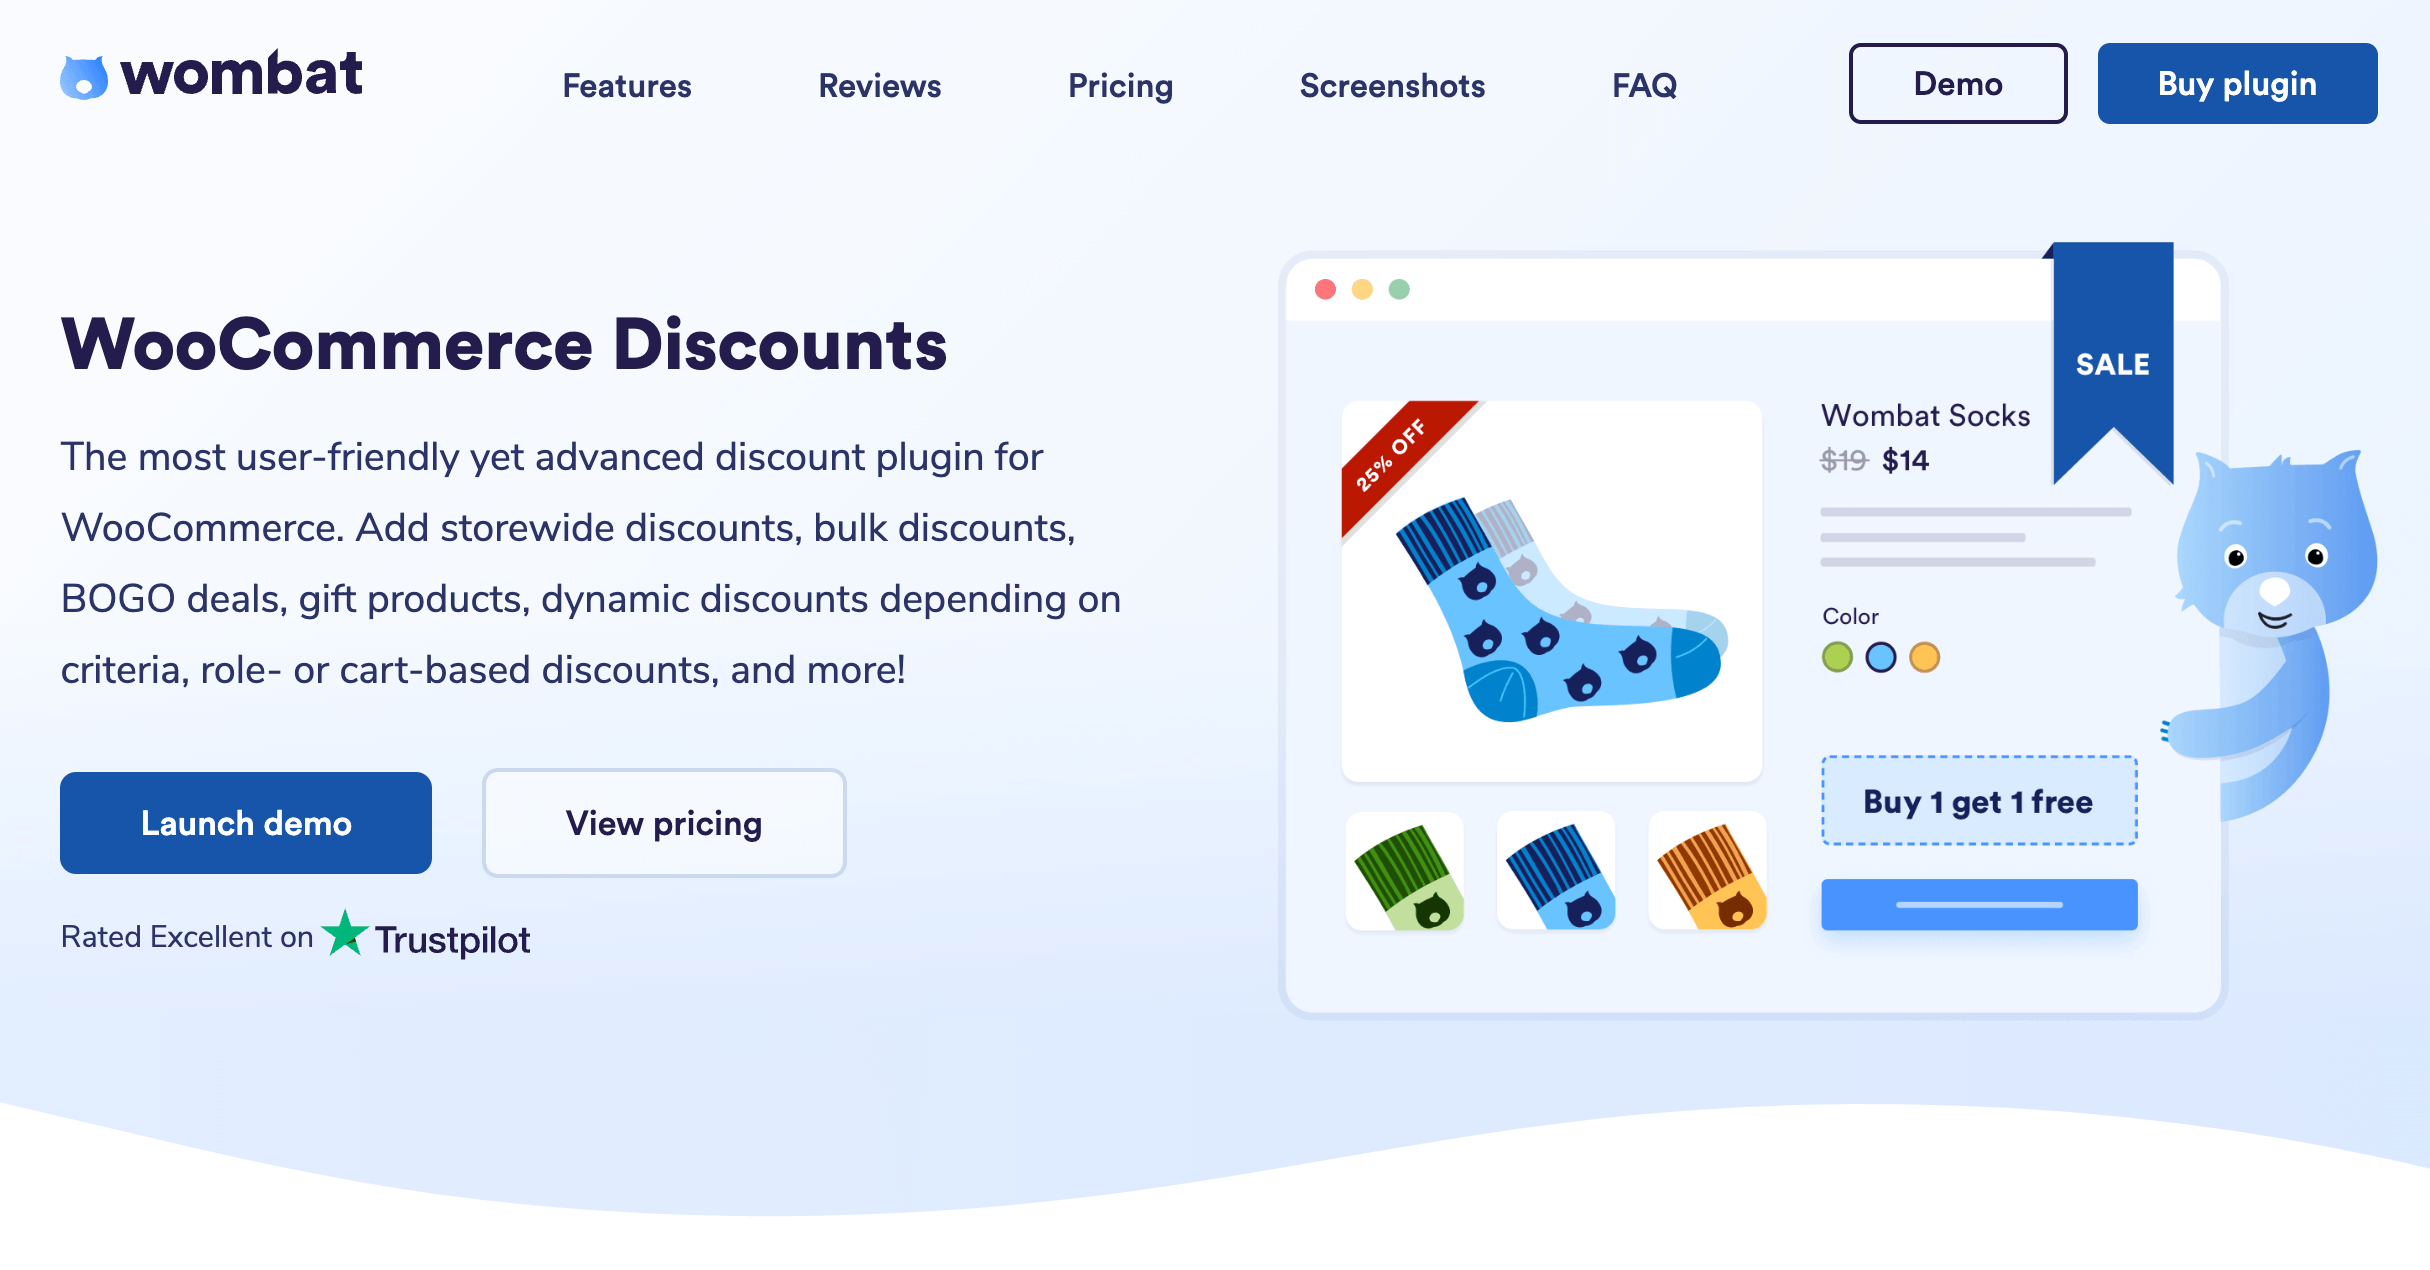
Optimize your sales with WooCommerce Discounts!
Custom sale badges catch the eye, but they’re only half the equation. The actual discount strategy behind those badges determines whether browsers become buyers.
Your beautifully designed badges need equally compelling offers to back them up. That’s where Studio Wombat’s WooCommerce Discounts plugin becomes invaluable.
With this tool, you can create sophisticated pricing rules that make your custom badges meaningful:
- Automatic discounts – No coupon codes needed. Prices adjust instantly when customers add items to the cart.
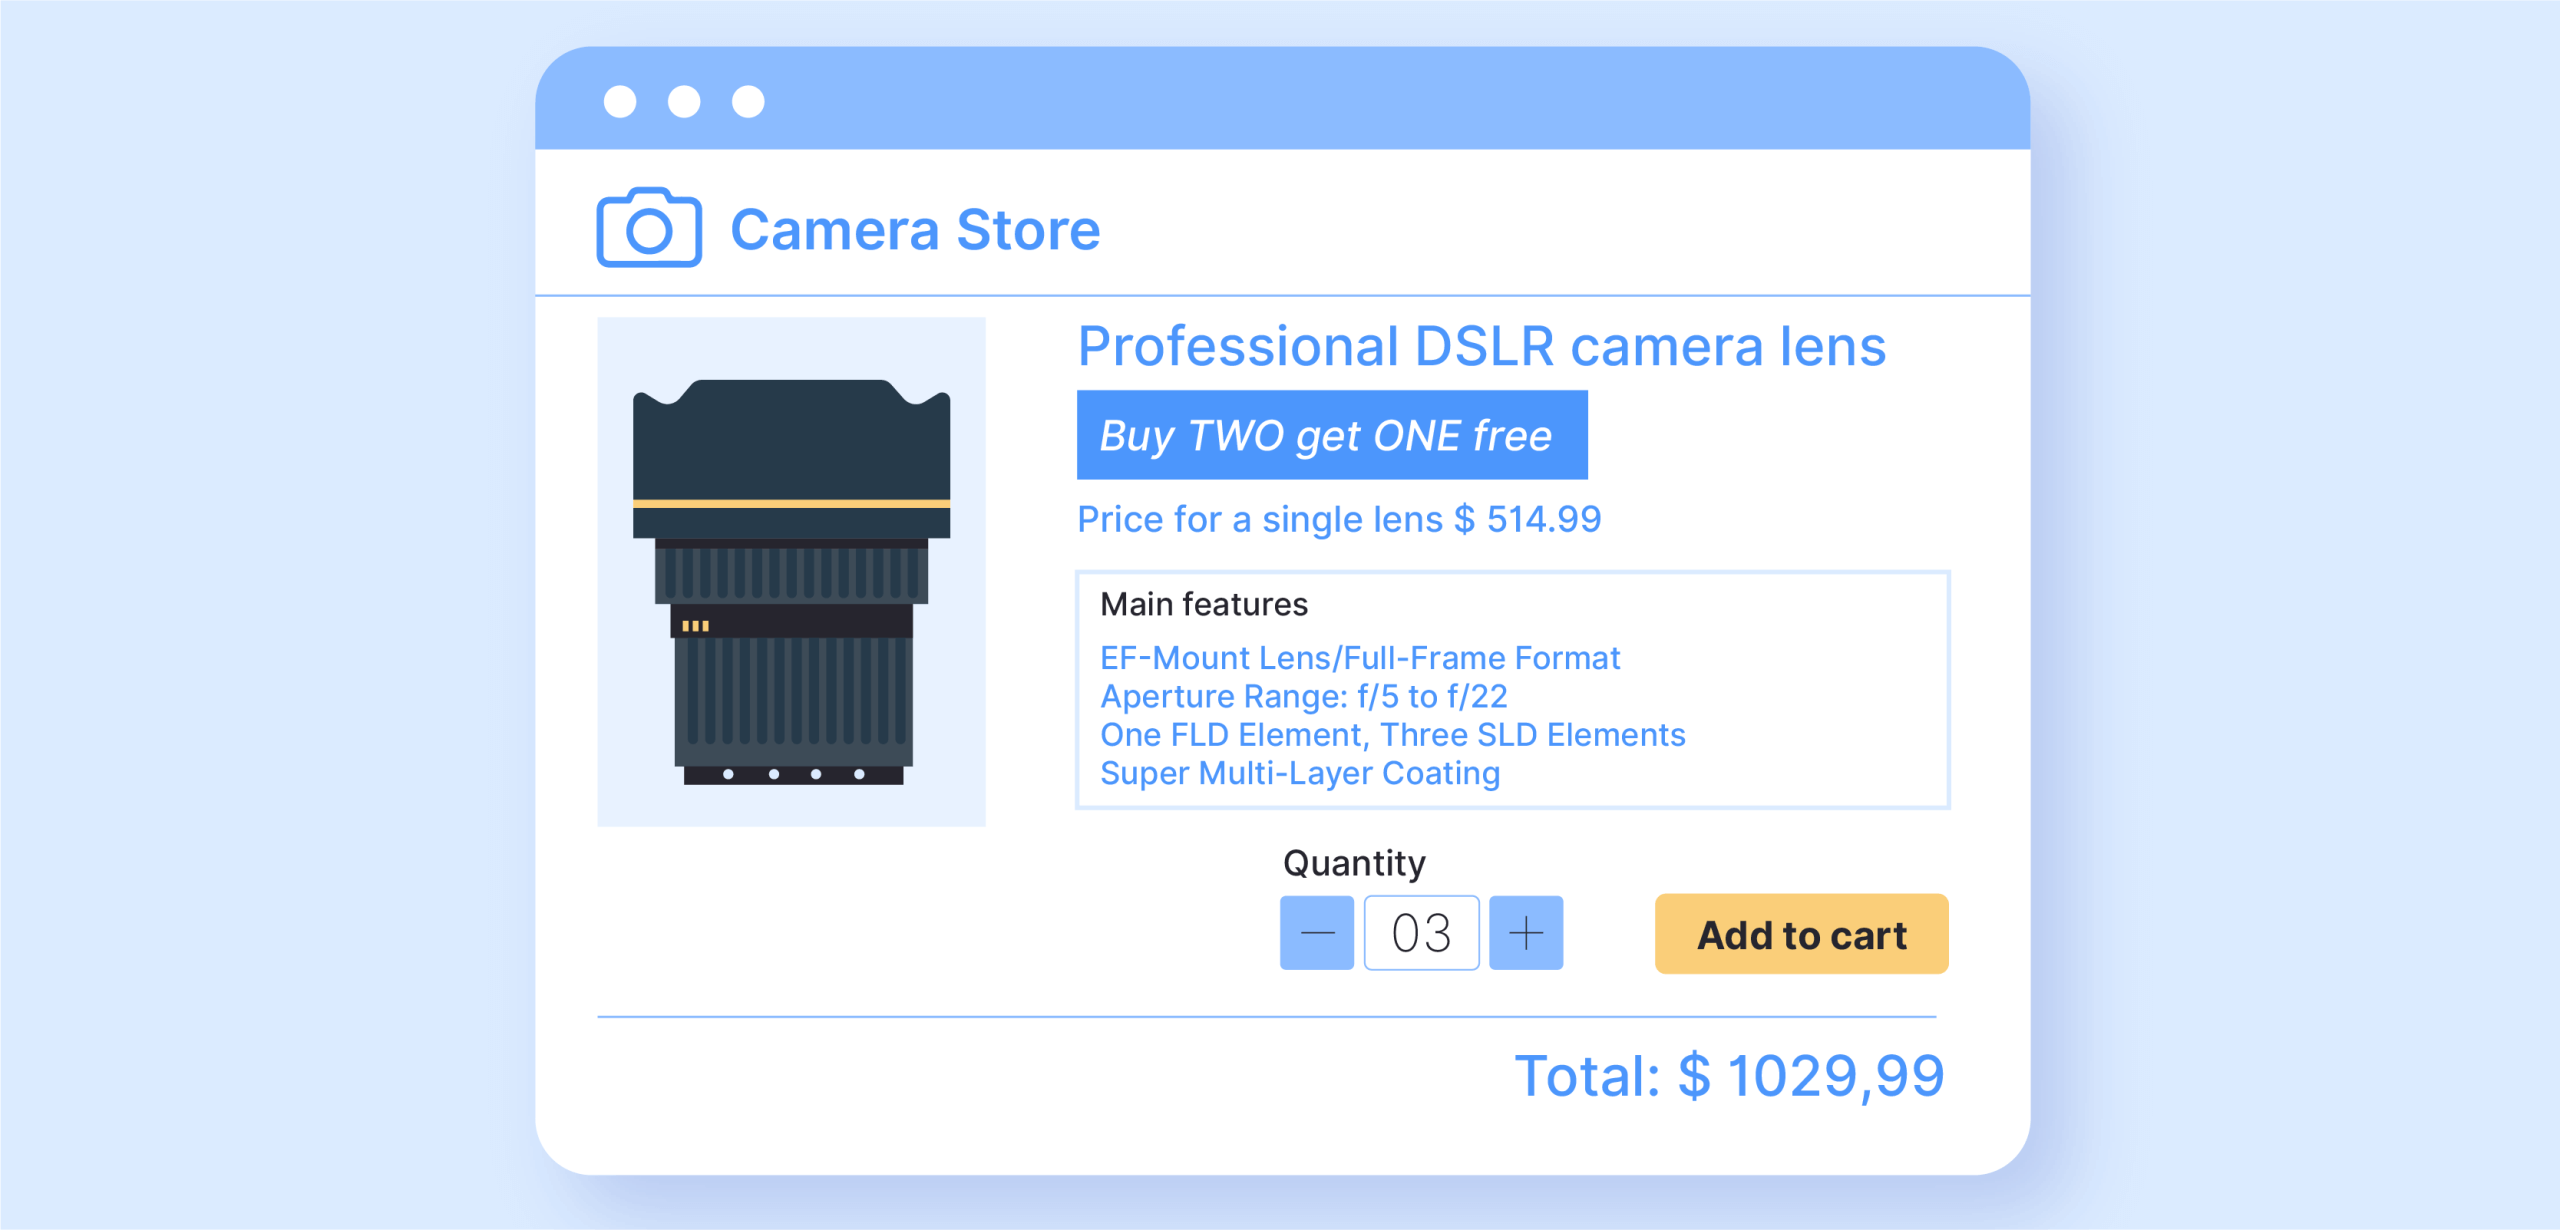
- Volume pricing – “Buy 4, Save 20%” badges backed by real bulk discounts.
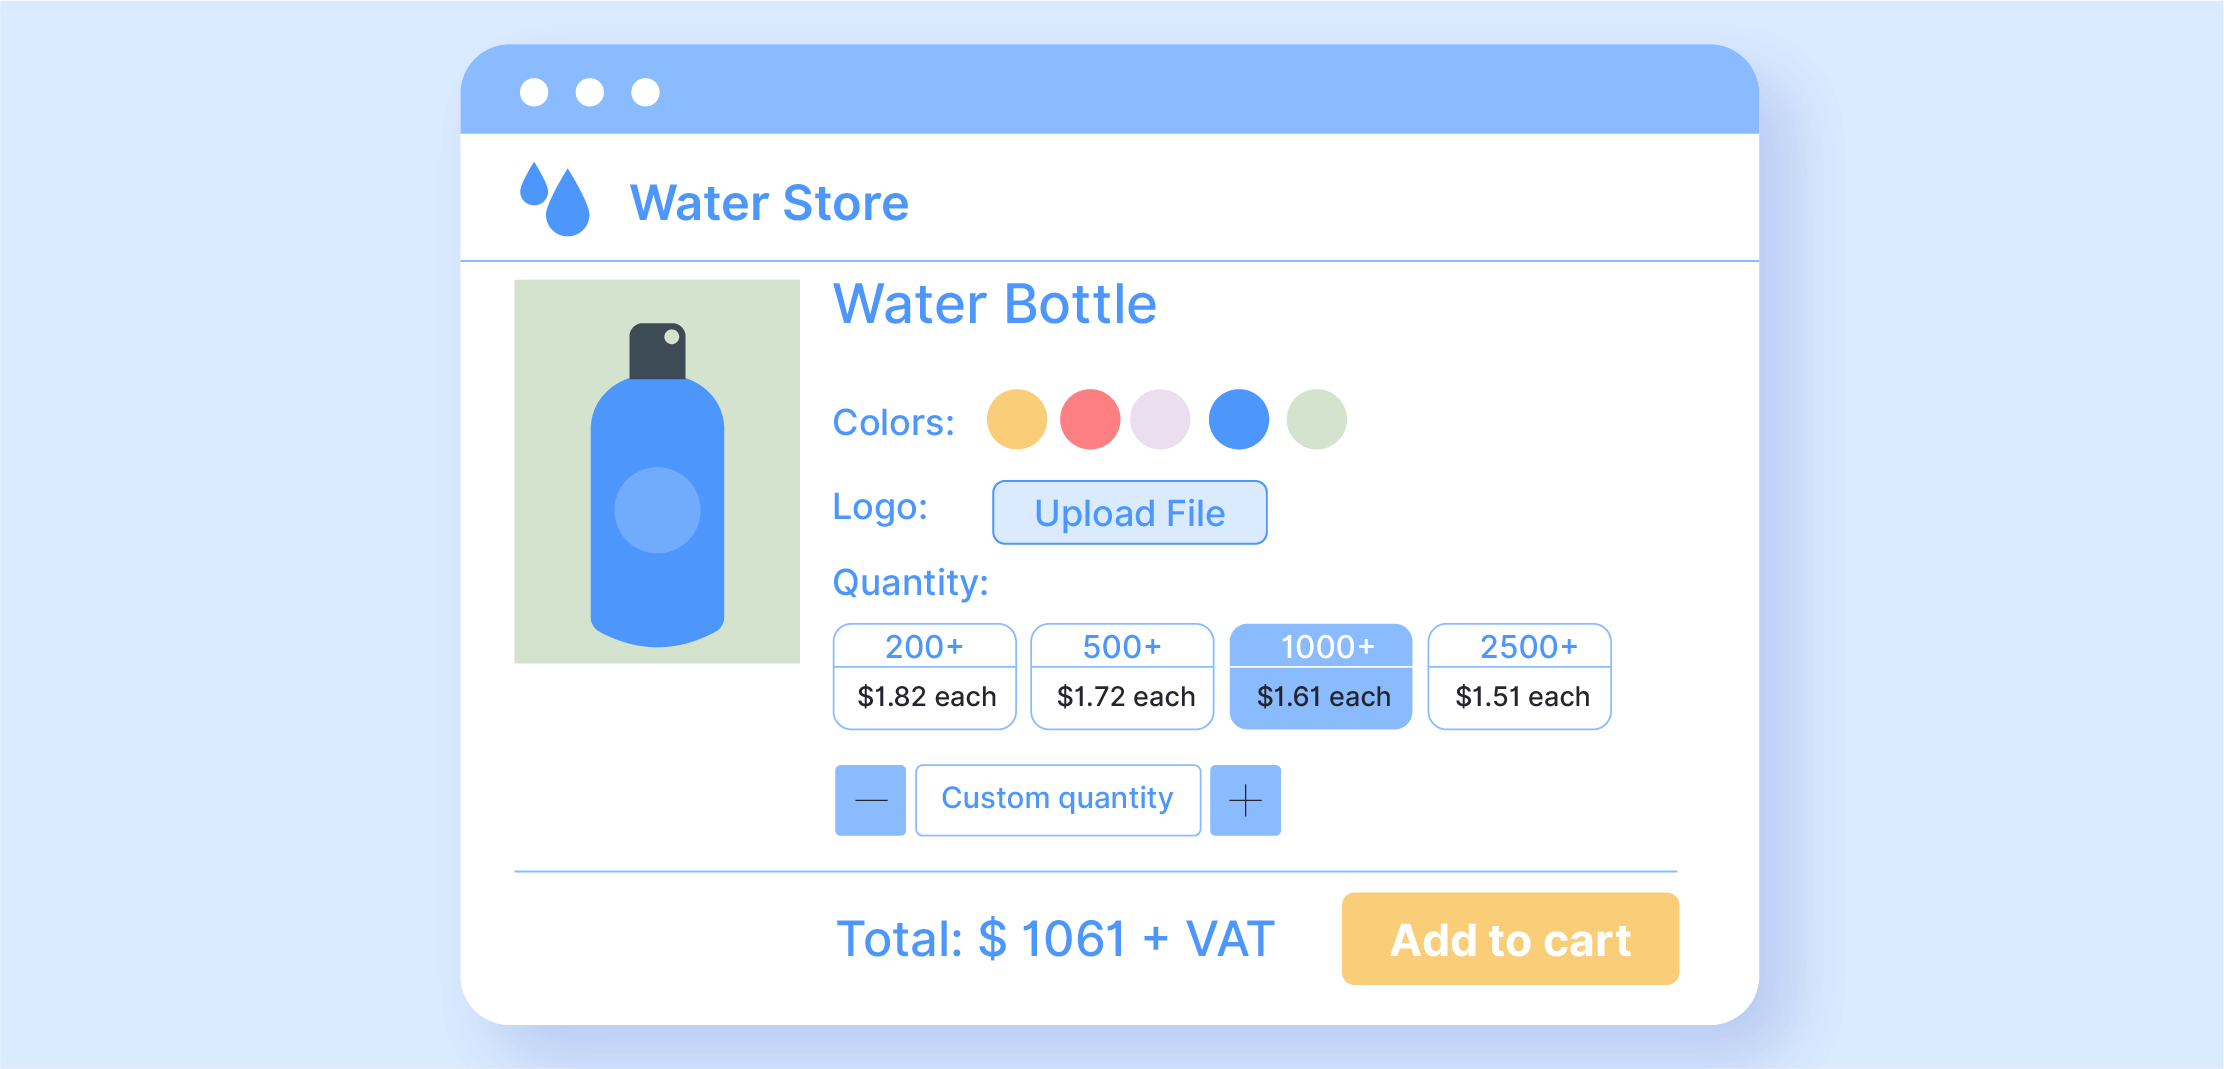
- BOGO deals – Perfect for those eye-catching “2 for 1” badges.
- Category-wide sales – Apply discounts across entire product lines.
The plugin handles complex scenarios effortlessly. Set different discount tiers, schedule flash sales, or create VIP pricing for specific customer groups.
When professional badges showcase genuine value through smart discount strategies, conversion rates naturally improve. Your store transforms from simply displaying sales to actively driving them through coordinated visual and pricing tactics.
Start enhancing your store with custom sale badges today
Custom sale badges transform how customers perceive your promotions, directly impacting conversion rates and the shopping experience.
Whether you’ve chosen PHP customization or a plugin solution, implementing these visual improvements pays dividends quickly. Even subtle changes – updated colors, dynamic percentages, or gentle animations – can dramatically increase click-through rates.
Custom badges shine brightest within a cohesive store design. Pair them with strategic discounts using WooCommerce Discounts to create compelling offers that convert.
Don’t let another sale season pass with generic badges – your competitors are already customizing theirs. Start today – pick one method from this guide and transform your first badge. Your conversion rates will thank you.
