
Are you using WooCommerce to sell customizable products? Do you need customers to upload files on the product page before they add products to their cart? You can’t do that without a little help from a plugin.
After reading this no-nonsense tutorial, you’ll know exactly how to add a file upload field to a product in WooCommerce. You’ll be able to do it in just a few steps using the product options plugin, Advanced Product Fields for WooCommerce.

The easiest way to add file uploads to your WooCommerce products.
Find out moreHow the file upload process works in your store
While browsing through your online store, a customer will come across your products as usual. Normally, they would see an “add to cart” button underneath every product. As customers are required to upload one or multiple files before purchase, they will see a “Select options” button instead:

When they click on it, the customer will be taken to the product page, which will show a file upload field:

When you mark the file upload as required, customers can’t add the product to their cart unless a file is uploaded.
The order admin screen displays the resulting file(s), allowing you (the store owner) to view and download the uploaded files easily:

Now that we know how the process works on your store, let’s dive into how to use WooCommerce to add a file upload to a product page!
How to add a WooCommerce file upload to a product page
Here is the bite-sized version on how to add a file upload field to a WooCommerce product page:
- Install Advanced Product Fields for WooCommerce.
- Edit your WooCommerce product via Products → All products.
- Scroll down to the Custom fields tab.
- Click Add Your First Field.
- Set the Field Type to File Upload.
- Update your product.
Now let’s jump into the details!
Step 1: install Advanced Product Fields for WooCommerce
To get started, purchase the Advanced Product Fields for WooCommerce plugin: studiowombat.com/advanced-product-fields-for-woocommerce
This plugin is a life-saver when you want to add form input fields to your product pages, including file uploads!
To install the plugin, follow these steps:
- Go to Plugins → Add New → Upload Plugin.
- Choose the zip file you downloaded from your Studio Wombat account, upload it, and then click Activate.
Now that you have Advanced Product Fields installed, you can move onto adding a file upload field to a product in your WooCommerce store.
Step 2: create the file upload input field
In this step, we’re going to add a file upload field to our WooCommerce product. To do that, follow these steps:
- Go to Products → All Products and edit the product you’d like to add a file upload option to.
- Scroll down to the Product Data section and click on the Custom fields tab.

- Click on the Add Your First Field button to create your first input field.
- A new section appears where you can define your upload field.

- Here is the data you should change to configure your upload field:
- Type: this is the type of field you want to create. By default, the field type is set to Text, but you can pick anything from text input fields to image swatches. In this case, we’re going to select File Upload.
- Label: this is the title you want to show above the upload field. It tells the customer what you expect. It could be something like “Upload your logo” or “Upload your design files”.
- Instructions: additionally, you can give extra instructions that will appear below the upload field. It could be used to inform your customers what file types are allowed or what the maximum allowed file size is.
- Accepted file types: you can restrict allowed file types here. This is a good idea to harden the security of the file upload field and your WooCommerce store. You can choose between image file types like PNG or JPG, or document files like PDF, XLS or DOCX. You can select various types of audio (MP3) or video file formats too. You can even define custom file types like .ai or .psd.
- The next few options allow you to further refine the text field. You can choose between a number of things, from the expected file size, to if you’ll charge your customers extra for it or not.
Once you have configured the WooCommerce file upload field, update your product to save your work.
Step 3: set the file upload layout
If you visit your WooCommerce product page, you’ll see the file upload field looks quite basic. That’s how the browser renders a file upload input field by default:

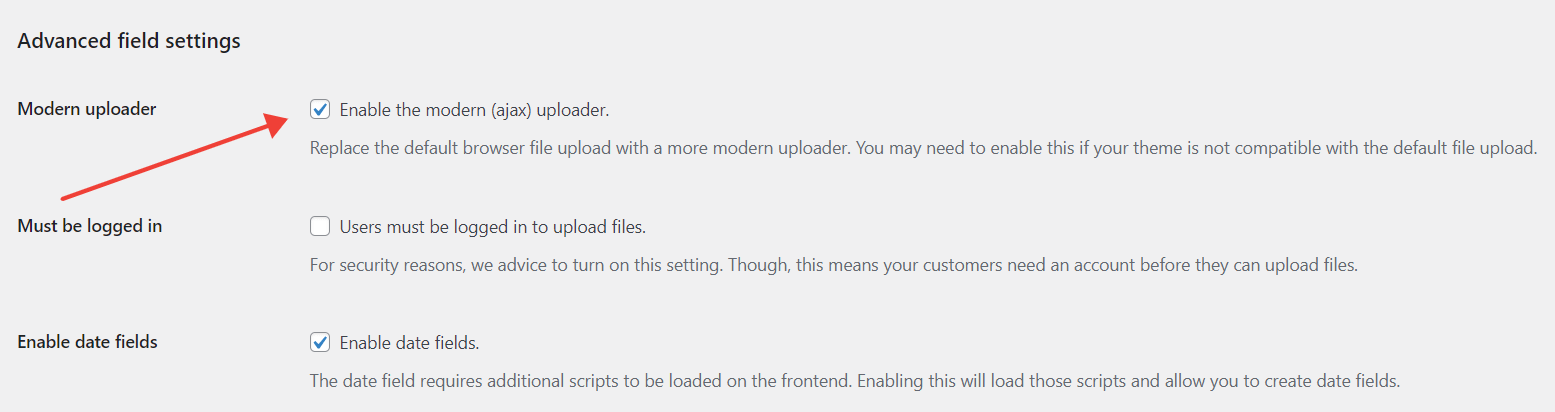
You can easily change that to a modern file uploader with drag & drop support and a progress bar. To do so, go to WooCommerce → Settings → Product fields, and enable the Modern Uploader setting there:
Make WooCommerce file uploads on the product page simple
Congratulations! Your WooCommerce store can now include a text field for product customization and pricing. Advanced Product Fields for WooCommerce makes the process quick and effortless.
That’s it! With Advanced Product Fields for WooCommerce, adding a file upload to a product on your WooCommerce store is now possible. This enables you to offer complex products customizations that require file uploads, such as Print on Demand business cards or products with complete image upload functionality.
The easiest way to add file uploads to your WooCommerce product pages. Allow customers to upload files effortlessly.
Find out more