
If you’re here, you’re probably wondering whether you can customize WooCommerce product pages in Elementor. The answer is “Yes” – you can fully customize your product page layout using Single Product templates in Elementor’s Theme Builder.
But first, some context. WooCommerce products aren’t regular WordPress pages. They’re custom post types, so you can’t click “Edit with Elementor” on an individual product to redesign it. Instead, products are rendered by templates.
If you’re using a block theme, WordPress’s Site Editor already lets you rearrange product elements, adjust colors and fonts, and create templates for specific products. For many stores, that’s enough.
So why use Elementor? The top reasons are: granular design control, display conditions, and a more consistent workflow.
If this sounds like something you need, keep reading. Today, we’ll cover both methods: editing existing templates for quick adjustments, and creating new templates for complete control. You’ll also learn how to extend your product pages with interactive options like swatches, custom fields, and dynamic pricing.
Requirements: You’ll need Elementor Pro (Theme Builder isn’t available in the free version) and WooCommerce 3.4 or later.
What native WooCommerce product pages look like
By default, WooCommerce product pages follow a fixed structure. The product image is on the left, with the title, price, and short description stacked vertically beside it. The Add to Cart button appears in a fixed position, and the product tabs (Description, Additional Information, Reviews) align below.
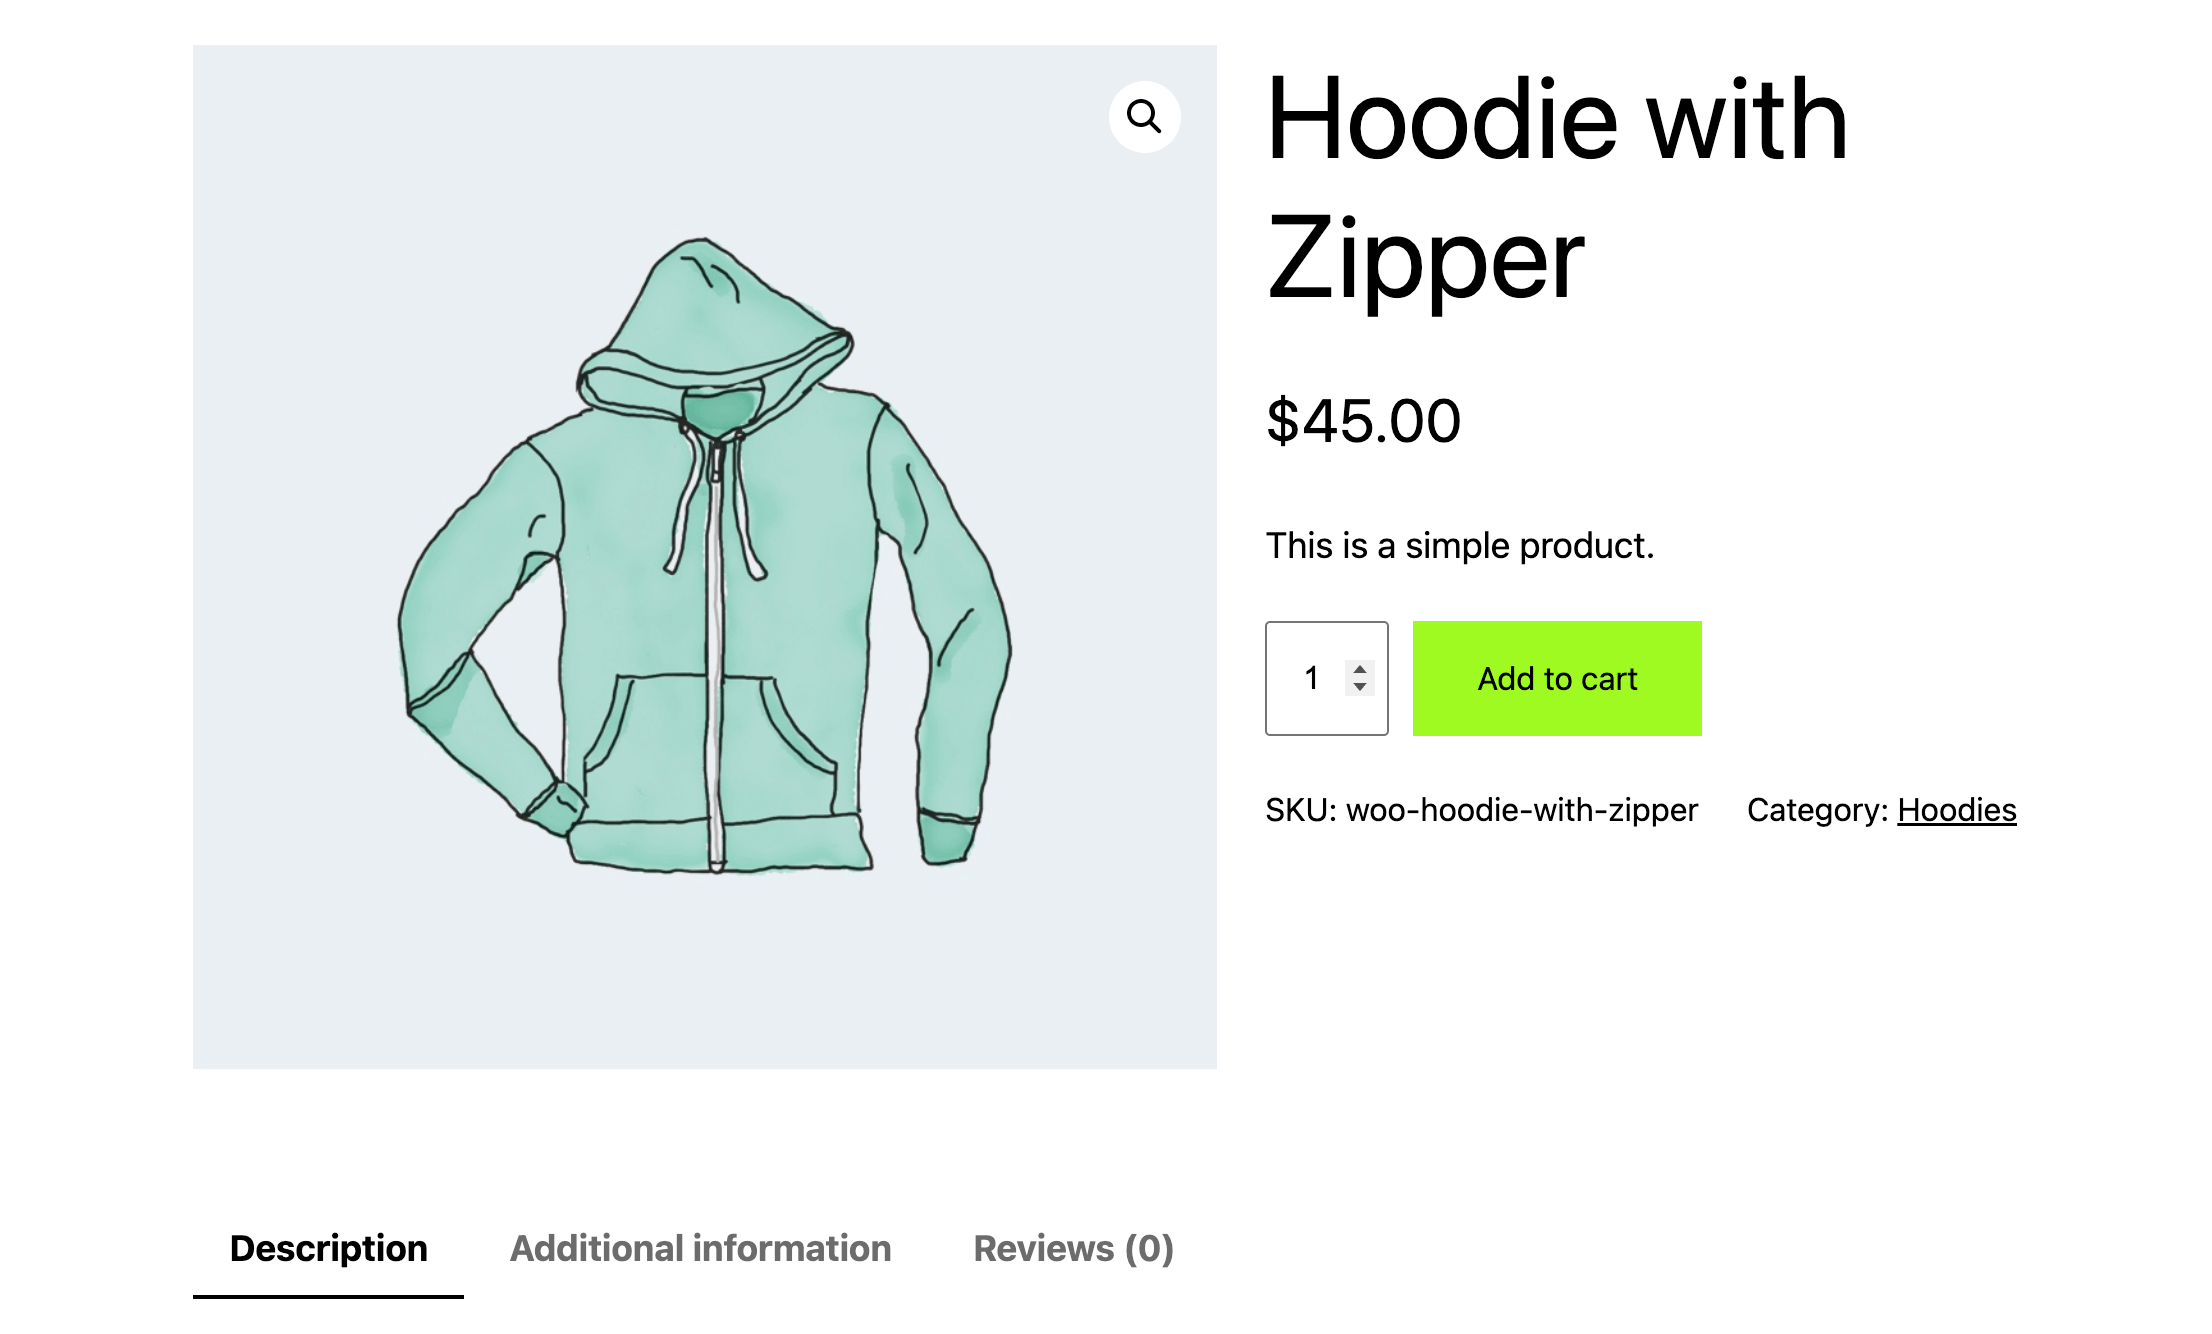
Your active WordPress theme controls the exact styling and element positioning. Behind the scenes, PHP template files like single-product.php dictate where everything goes.
Your customization options depend on your theme type.
- With a block theme, you can use the WordPress Site Editor to rearrange elements, adjust colors and fonts, and even create custom templates for specific products. You can add, remove, or rearrange elements like title, price, gallery, add-to-cart, and reviews directly in the block editor.
- With a classic theme, you’re more limited. Rearranging elements or making structural changes typically requires editing PHP template files or adding custom CSS.
Even with block themes, the Site Editor has boundaries. It only lets you edit basic settings such as colors and fonts. For advanced customization and extended functionality, you’ll need custom CSS, coding knowledge, or additional extensions.
This is where page builders like Elementor come in – offering deeper styling control, more intuitive visual editing, and features like display conditions that automatically apply different templates to different product categories.
What Elementor adds to WooCommerce product pages
The WordPress Site Editor handles basic customization, but Elementor Pro’s Theme Builder extends what’s possible – especially for stores that need precise control over design and conditional layouts.
- Deeper styling controls. Where the Site Editor offers color and font adjustments, Elementor gives you granular control over spacing, borders, shadows, hover effects, and animations for every element. You can fine-tune padding on the Add to Cart button, add background gradients to sections, or create custom hover states for product images – all without CSS.
- Category-based display conditions. This is where Elementor pulls ahead. Create a bold, image-heavy template for sale items and a detailed, spec-focused layout for technical products. Set conditions so each template automatically applies to the right category, tag, or individual product. The Site Editor requires you to manually create separate templates for each product; Elementor lets you build once and apply it by rule.
- Larger widget library. Beyond the standard WooCommerce blocks, Elementor offers widgets for countdown timers, testimonials, call-to-action buttons, and custom forms – all draggable directly into your product template. Add trust badges next to the Add to Cart button or embed a size guide accordion without hunting for additional plugins.
- Familiar visual editing. If you already use Elementor on other pages, designing product templates is similar. Same interface, same controls, same workflow. Your product pages match the rest of your site without switching between editors.
- Update-safe designs. Because your templates live in Elementor (not in your theme’s files), they remain compatible with theme and WooCommerce updates.
How do I edit the layout of my Elementor WooCommerce product pages?
You have 2 approaches, and the right choice depends on what you’re trying to accomplish.
- Method 1: Create a new template from scratch. Choose this when you need complete control over the layout, want to start fresh, or need category-specific designs (like a different look for sale items versus regular products).
- Method 2: Edit your existing template. Best for quick changes – rearranging elements, adjusting styling, or updating the layout you already have. This is the fastest path when your current template just needs refinement.
These methods aren’t mutually exclusive. Many store owners edit their default template for most products, then create custom templates for special categories or featured items.
Method 1: Create a new template from scratch
Use this approach when your theme doesn’t include an Elementor-based product template, you want a completely different layout, or you need category-specific designs.
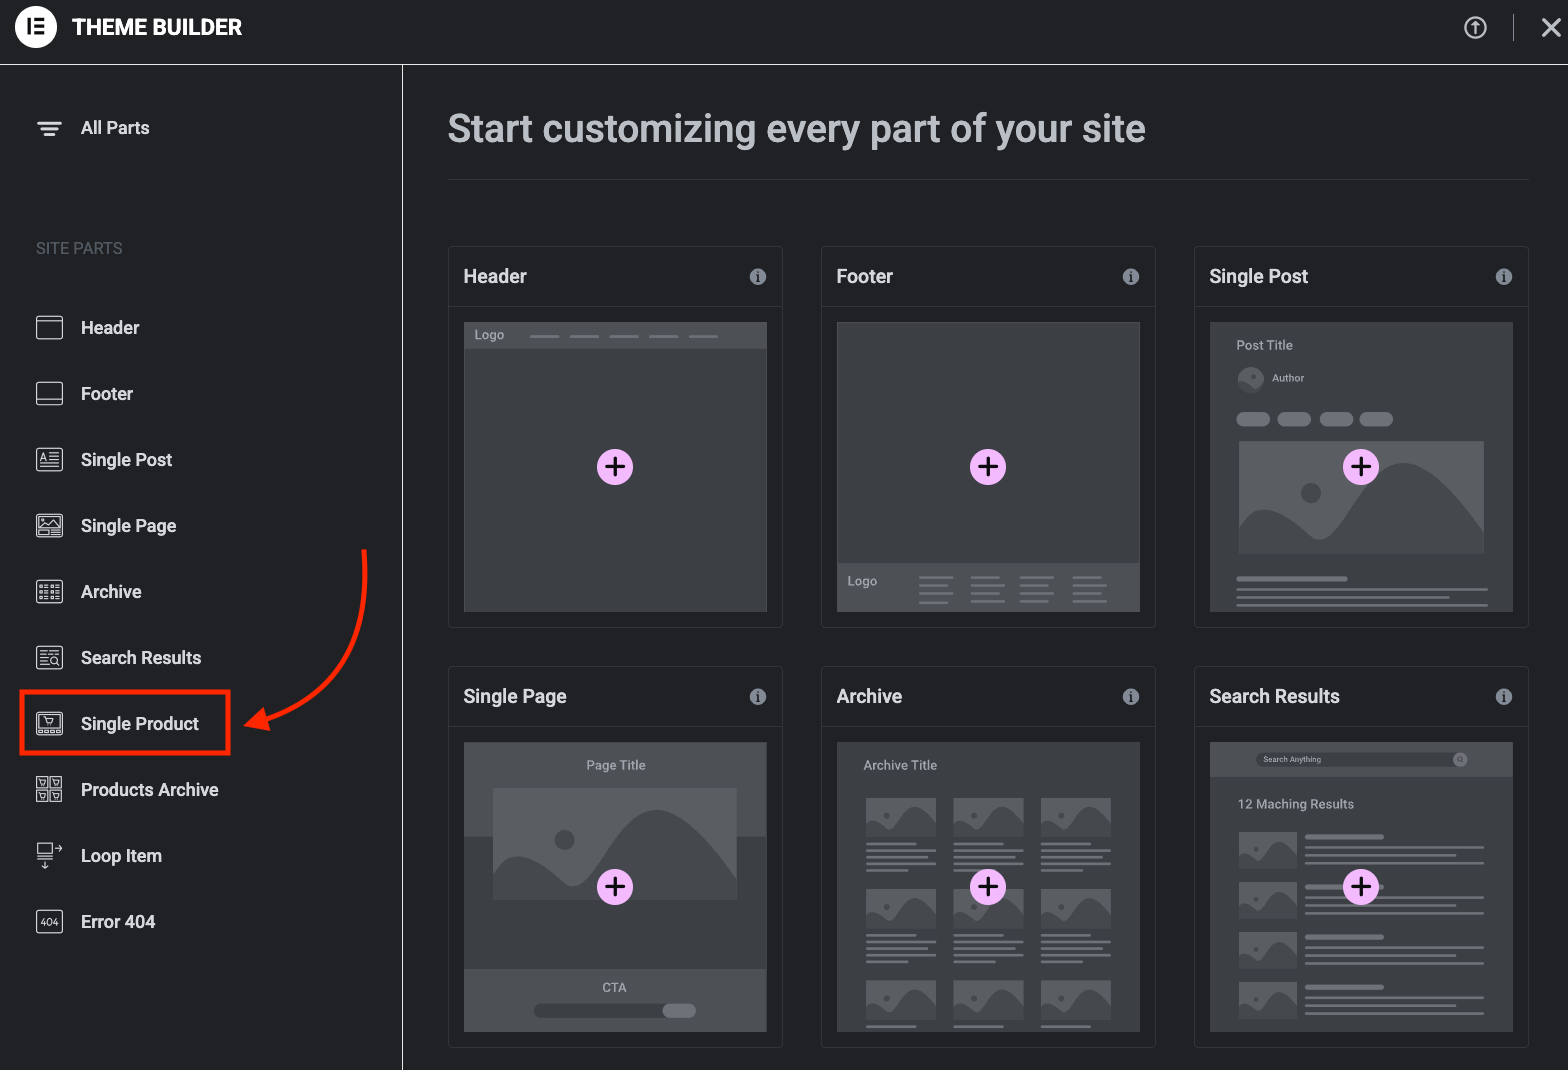
- Go to Templates → Theme Builder → Single Product.
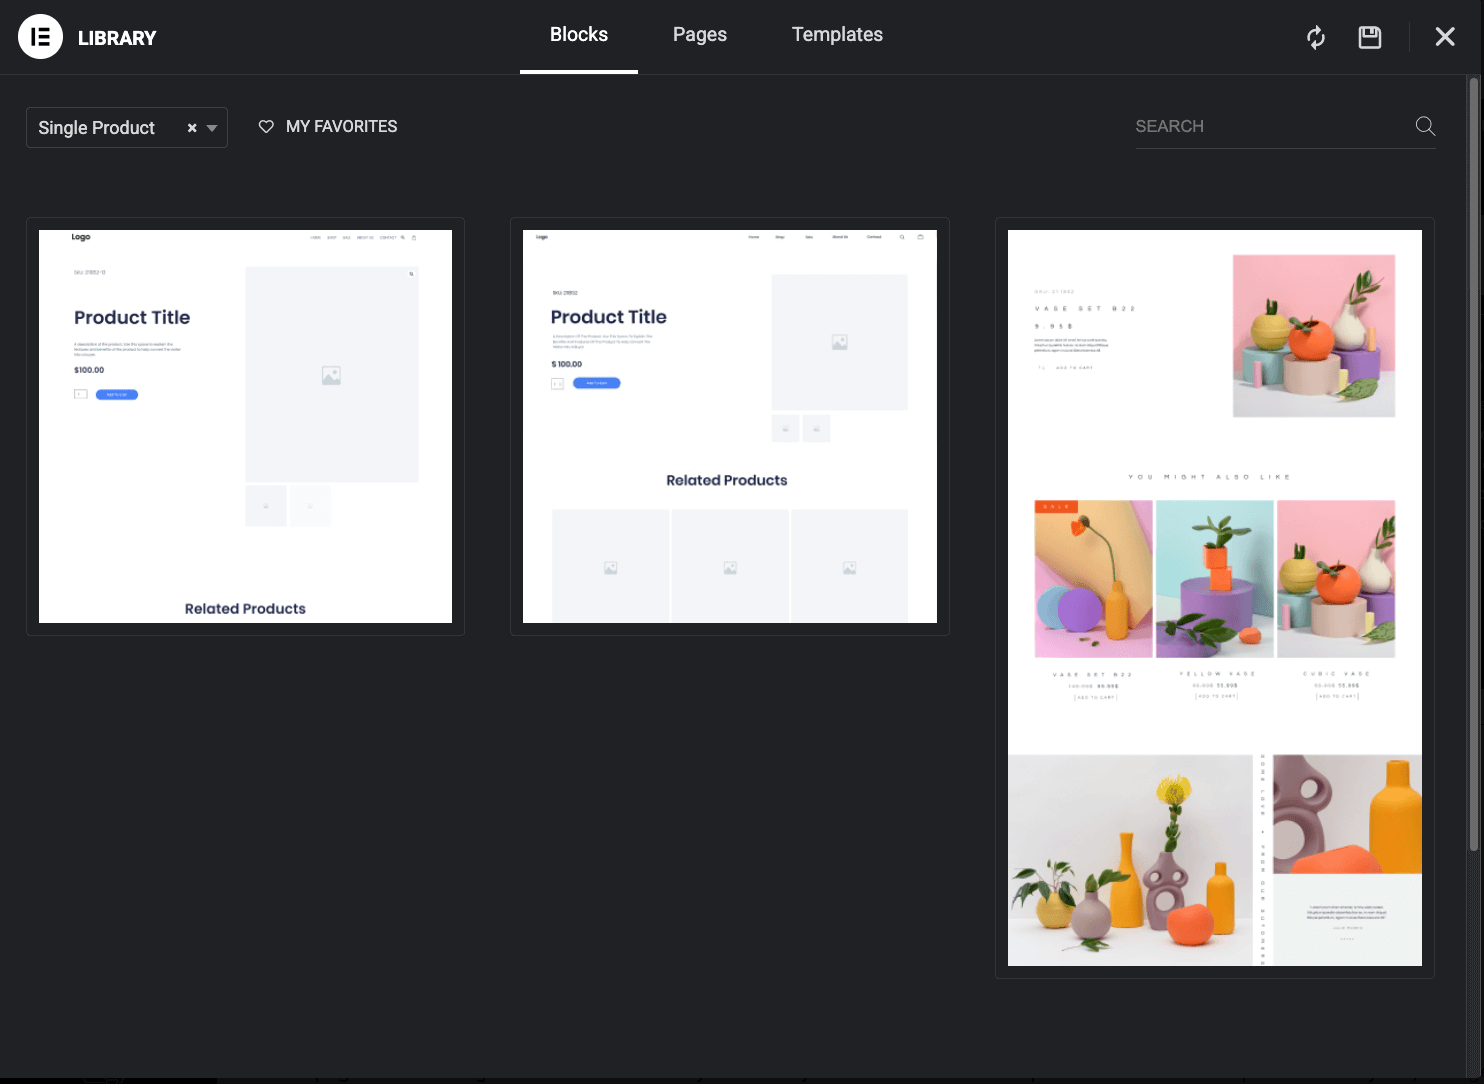
- Choose a pre-designed template from the library, or click the X to start with a blank canvas.
- Build your layout by dragging WooCommerce widgets into position. Add Product Images, Product Title, Product Price, Short Description, and Add to Cart. Arrange them however suits your design.
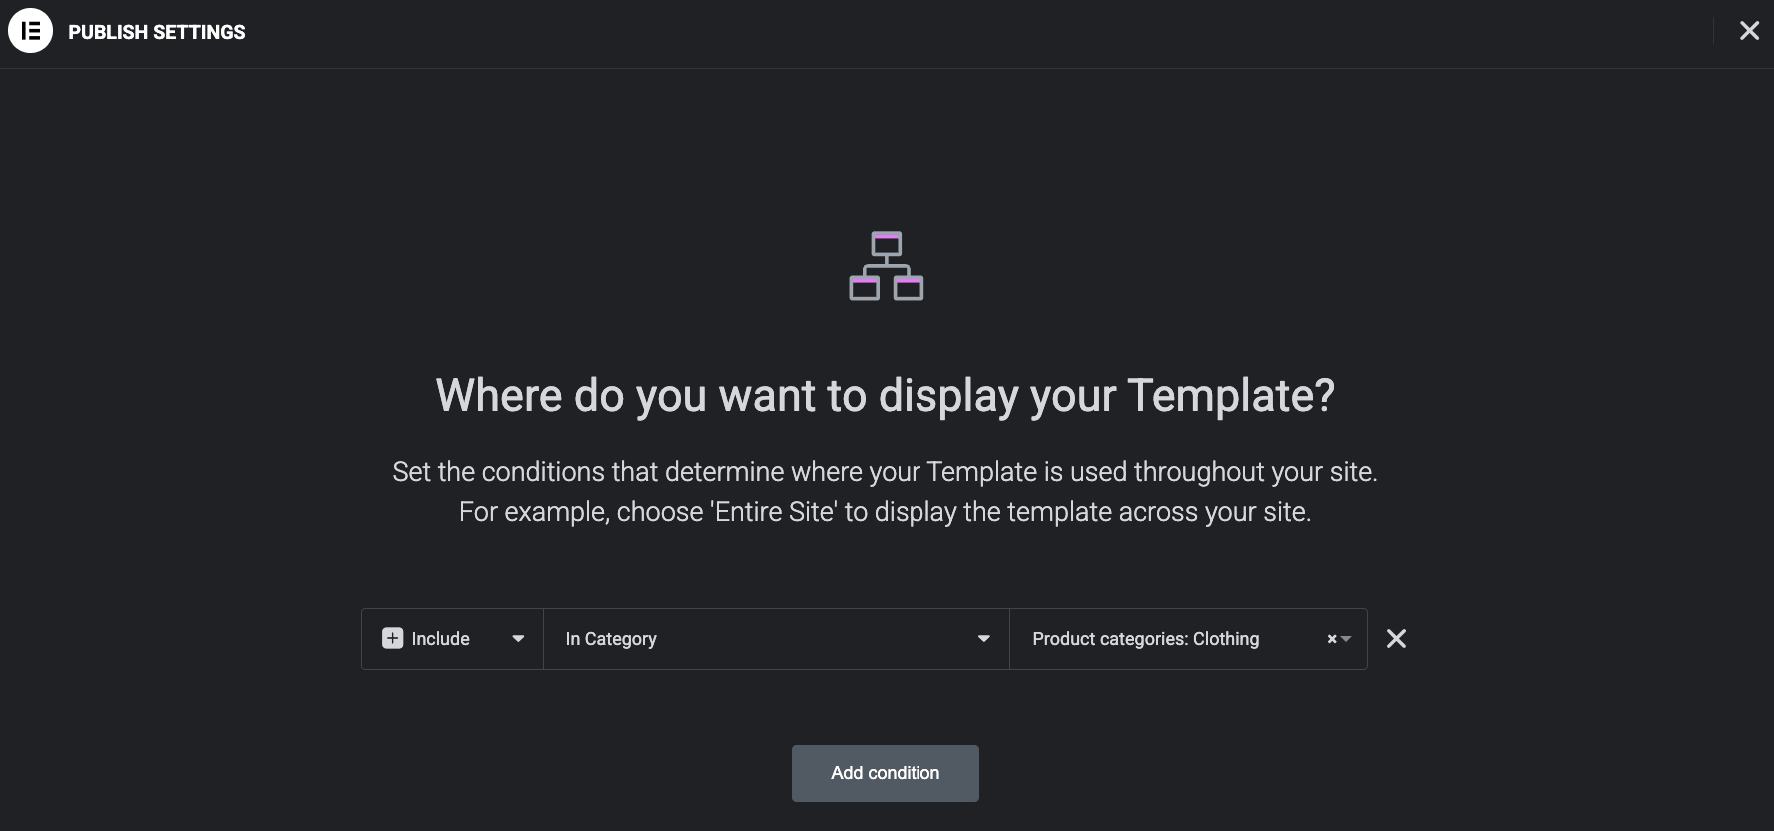
- Click Publish to set display conditions. You can apply the template to all products, a specific category, specific tags, or individual products. This is how you create layouts for different product types: Assign each template to its target category.
- Test across devices using Elementor’s responsive mode. Check tablet and mobile layouts, then preview with multiple products to catch any layout issues.
- Click Publish to make your template live.
Method 2: Edit your existing product page template
As mentioned at the beginning, to edit your single product page in Elementor, you’ll work through the Theme Builder rather than opening the individual product.
- In your WordPress dashboard, go to Templates → Theme Builder.
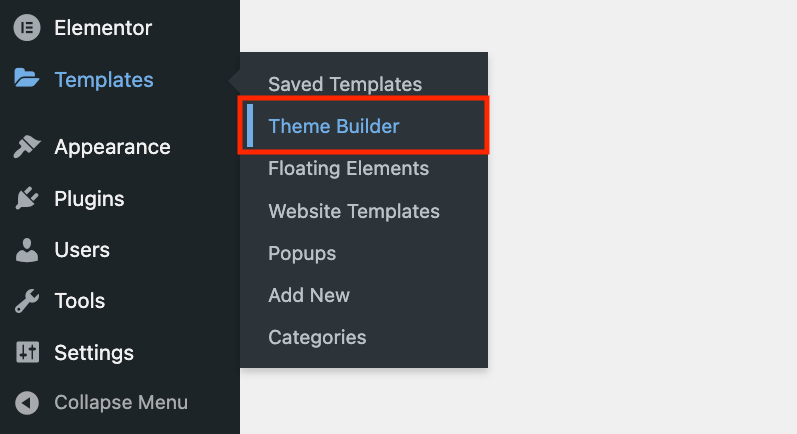
- Click the Single Product tab. You’ll see any existing product templates listed here.
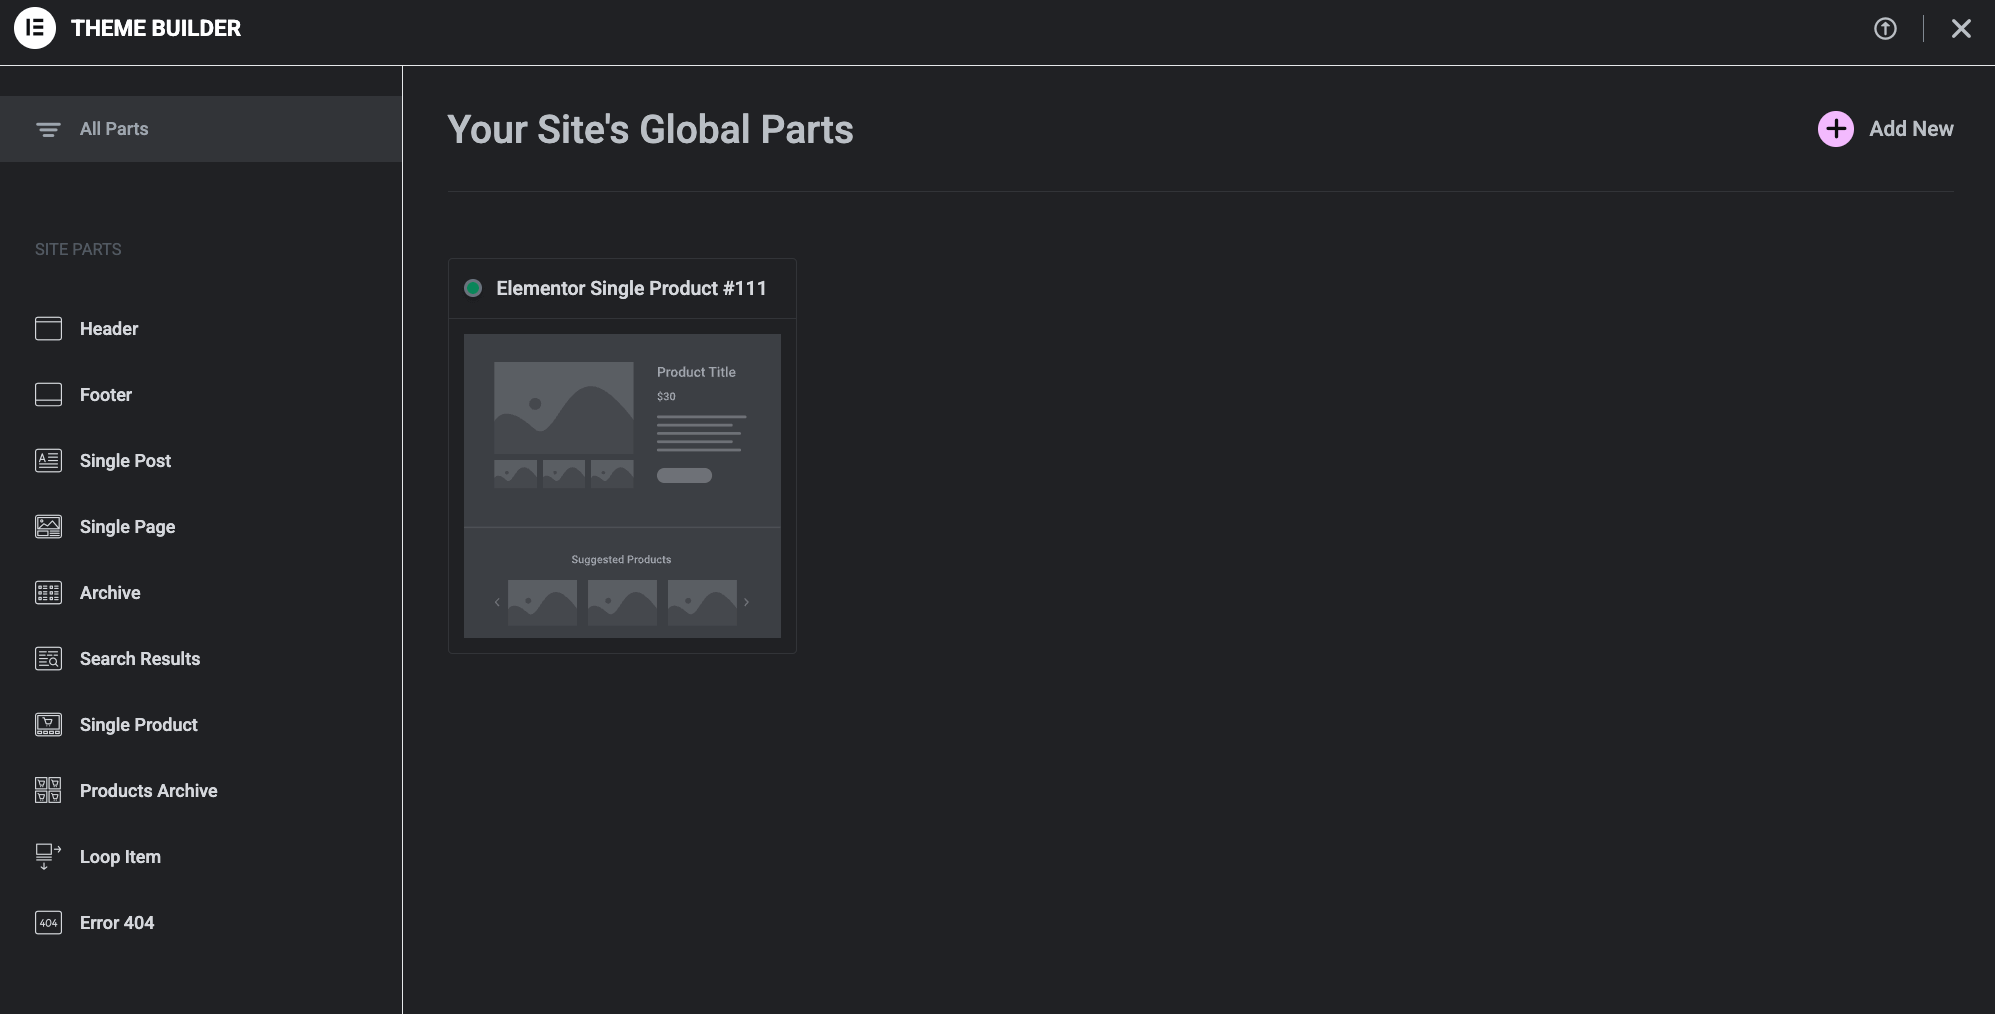
- Hover over your template and click Preview.
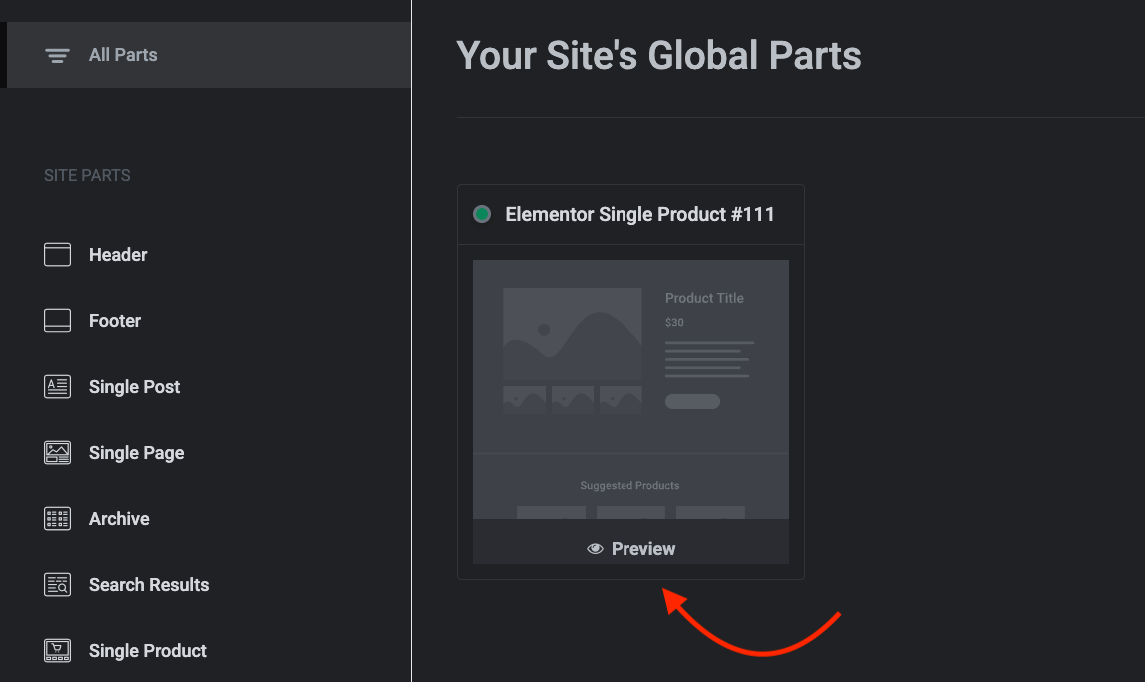
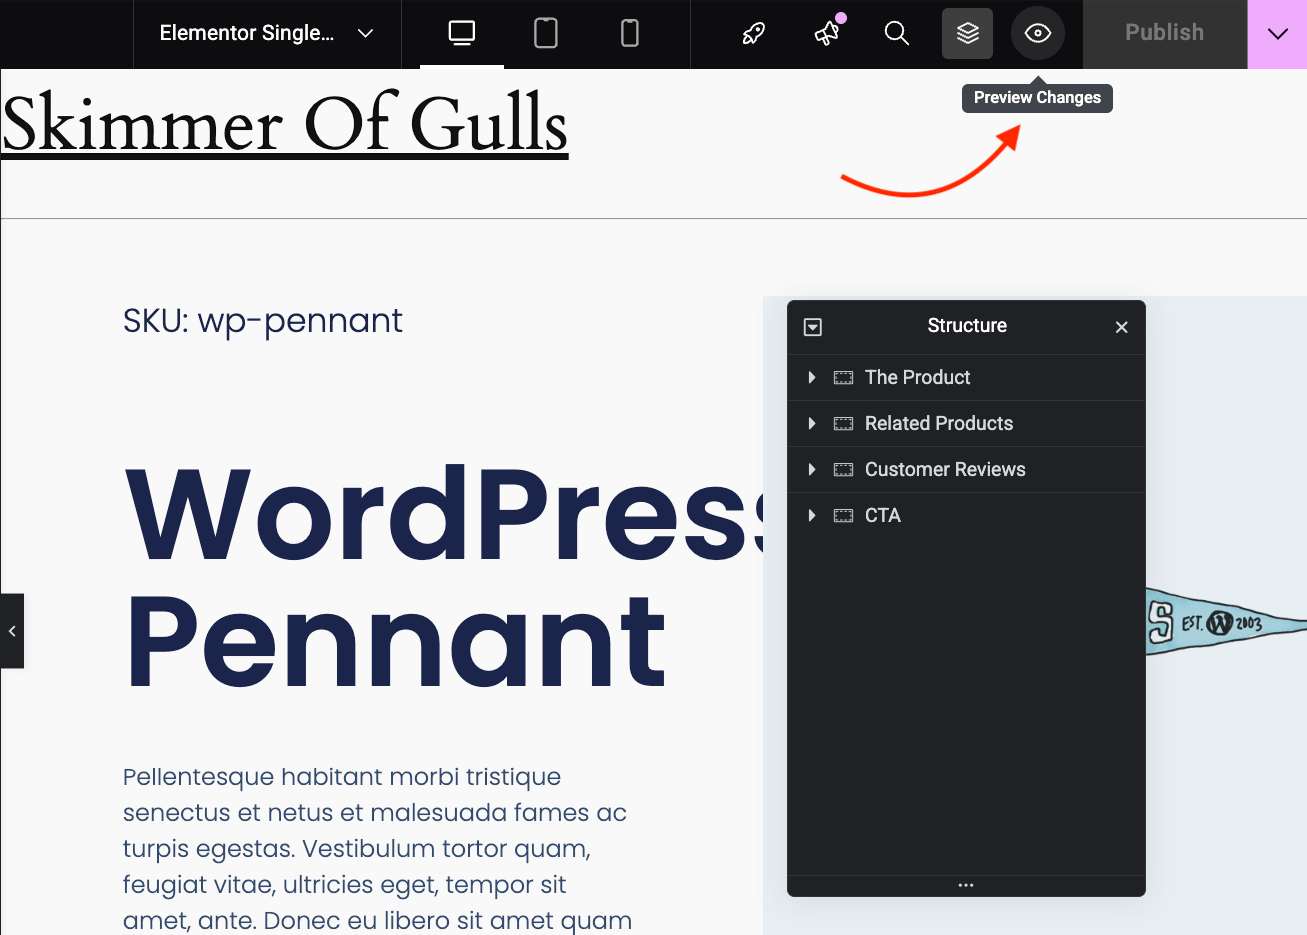
- This will open a preview of the template, which is helpful when you have many templates. Click edit to open the template in the Editor.

- Edit the template the same way you would a new one – dragging and dropping elements and then configuring their settings in the left-side panel.
- Preview with different products using the eye icon → Settings → Preview Settings. Select various products to confirm the layout works with different image sizes, title lengths, and price formats.
- Click Update to publish your changes. They’ll apply immediately to all products using this template.
Essential WooCommerce widgets for product pages

Each WooCommerce widget pulls specific data from your product settings. Understanding what they do helps you place them effectively.
| Widget | What it displays |
| Product Title | The product name from your product settings |
| Product Images | Main image and gallery with lightbox zoom |
| Product Price | Regular and sale price; updates automatically for variable products |
| Short Description | Brief product summary, typically key features above the fold |
| Add to Cart | Quantity selector, variation dropdowns, and purchase button |
| Product Rating | Star rating average and review count; links to reviews |
| Product Data Tabs | Tabbed sections for Description, Additional Information, and Reviews |
| Product Meta | SKU, categories, and tags |
| Product Stock | Current stock quantity or availability status |
| Related Products | Products from the same categories (automatic) |
| Upsells | Products you manually set as upsells |
| Breadcrumbs | Navigation path: Home → Shop → Category → Product |
At a minimum, most product pages need Product Images, Product Title, Product Price, Short Description, and Add to Cart. The rest depends on your store’s needs.
Best practices for product page templates that convert
A beautiful template means nothing if customers leave without buying. These principles help turn browsers into buyers.
Get the essentials above the fold
Before customers scroll, they should see 4 things: product image, name, price, and the Add to Cart button. On a desktop, this usually works fine. On mobile, it’s trickier.
That’s why you need to test your template on an actual phone (not just Elementor’s preview). Can you see all 4 elements without scrolling? If visitors have to hunt for the purchase button, you’re losing sales.
Guide the eye naturally
Your layout should create a clear visual path: Product image → Price → Add to Cart. Use Elementor’s column controls to make images dominant, give price text generous sizing, and add padding around buttons so they stand out. Secondary information (tabs, related products, meta details) should support this flow, not interrupt it.
Social proof works the same way. A study from Northwestern’s Medill Spiegel Research Center found a 270% increase in conversion rate for products with 5 reviews versus products with 0 reviews.But reviews only help if people see them. Position your star rating near the title or price, where eyes naturally land, rather than burying it in tabs customers may never open.
Here’s an example from Sodashi – an e-commerce site built with Elementor.
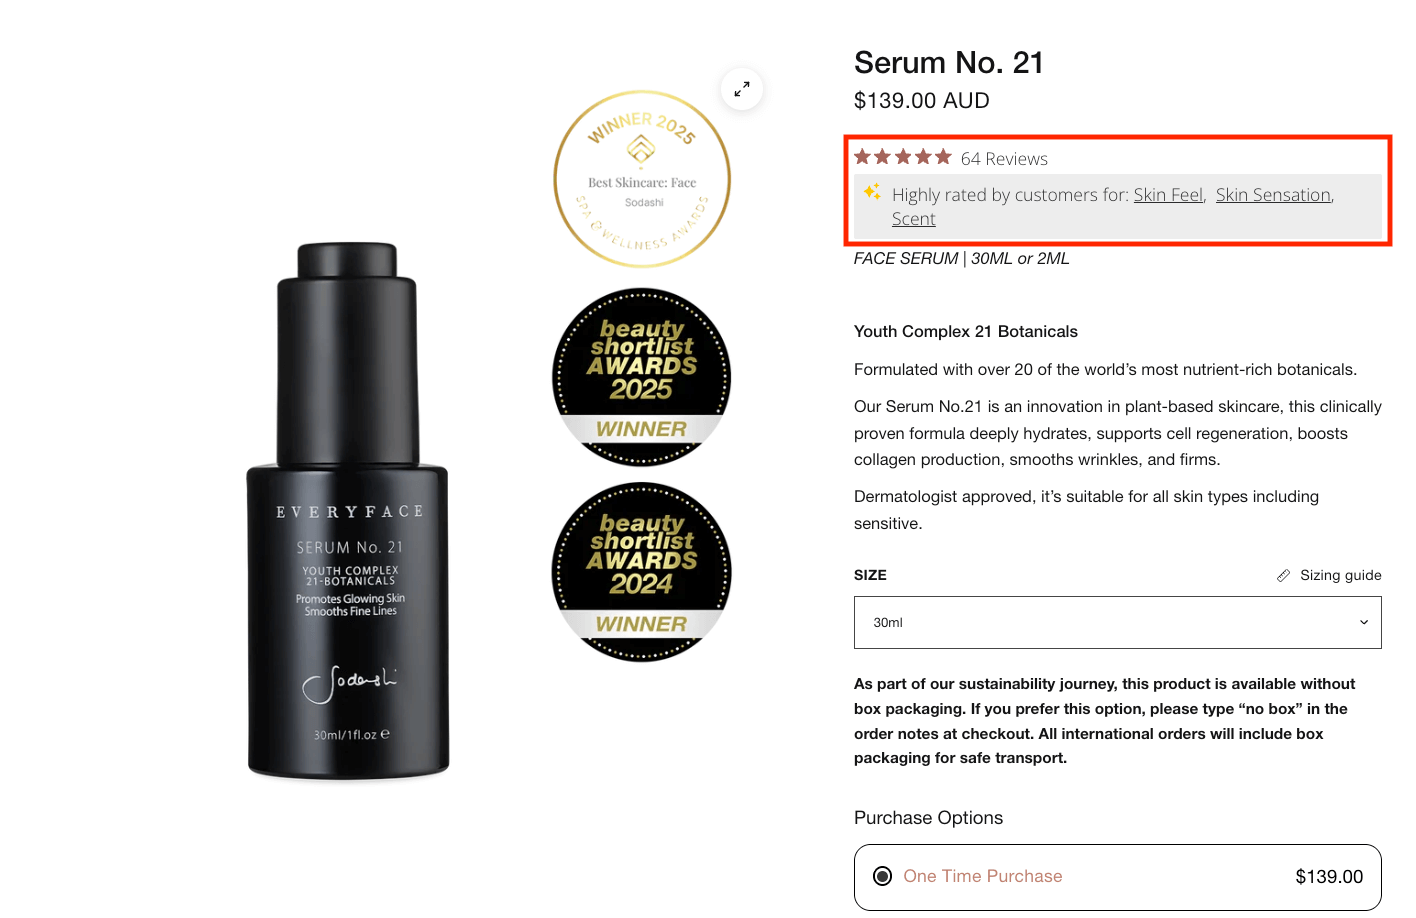
As you can see, they take it one step further than just showing reviews – they also include why this product is so highly rated among customers by using common tags like “Skin Feel,” “Skin Sensation,” and “Scent.”
Build trust where decisions happen
The moments before clicking Add to Cart are when doubt creeps in. Your layout should anticipate this hesitation and address it visually.
Start with your product gallery. Show 5 to 7 high-quality images from multiple angles so customers can examine what they’re buying. If you have video, include it – movement builds confidence in ways static images can’t.
This is a great example from AllBirds, another Elementor shop. It positions the product gallery very prominently and lets customers see the product from multiple angles.

Then consider where you place trust signals. As we mentioned, star ratings belong near the title or price, where eyes naturally land, not buried in tabs that customers may never click. Trust badges (payment icons, guarantees, security seals) work best close to the Add to Cart button – that’s where hesitation peaks, so that’s where reassurance matters most.
If you sell limited-quantity items, show the actual inventory counts. Fake urgency backfires and erodes trust. Honest “Only 3 left” messages work precisely because they’re true.
Test the mobile version properly
According to WCAG 2.1 AAA level requirements, all targets should measure at least 44 by 44px – that’s the minimum for comfortable tapping. Check that your Add to Cart button, quantity selectors, and variation dropdowns meet this threshold.
Test on actual devices, not just browser developer tools. Verify that gallery swipe gestures work, tap-to-zoom functions correctly, and form fields are easy to complete. Try Chrome, Safari, and Firefox – each renders slightly differently.
For more detailed guidance, explore our guide to creating WooCommerce product pages that convert. If you’re just getting started, our beginner’s guide to WooCommerce product page design covers the fundamentals.
Take control of your product page design today
WooCommerce products aren’t pages you edit directly – they’re controlled by templates. Once that clicks, everything else follows.
You now have 2 paths forward: edit your existing template for quick layout changes, or create new templates from scratch for complete control. Use display conditions to apply different designs by category, tag, or individual product – something Elementor handles far more efficiently than creating separate templates manually.
A successful product page does 3 things: displays correctly across devices, works reliably for every product type, and survives theme and WooCommerce updates. Elementor’s granular styling controls and responsive editing tools help you hit all of them.
Ready to go beyond layout? Elementor handles how your product pages look. Advanced Product Fields handles what customers can do on them – text inputs for personalization, color and image swatches, dynamic pricing based on selections, and conditional logic that shows options only when relevant.
Start with Advanced Product Fields to add the interactive layer your customers need.
