
Are you running a WordPress store and selling customizable products that have a lot of personalization options? Do you want to create a live preview to show customers immediately what the finished product will look like? Then you need to use a product configurator with live-preview functions in WooCommerce.
In this guide, we will go through all the steps to create a WooCommerce product with custom options and a live preview. But first, let’s dive into some examples so we’re on the same page about what a product configurator with live preview is exactly!
Examples of live preview products in WooCommerce
Two popular examples come to mind when talking about customizable products with a live preview.
Custom posters
A custom poster product allows customers to add their own text on your posters. WooCommerce generates a live preview as they type:
Custom phone cases with file upload
Another popular example is allowing customers to create personalized phone cases by uploading their own design:
Custom house or street signs
A custom house sign builder is a perfect example of a WooCommerce product with live preview features. Take a look at the below demo where font, color, and text can be changed on the fly:
In this tutorial, we will show you how to build this sign builder step-by-step. Let’s dive in!
Create a WooCommerce product configurator with live preview
There are a few steps involved in building a product configurator. It may look daunting, but it is easier than it looks. We’ll be as thorough as possible in this quide without overwhelming.
Step 1: get the necessary plugins
As you may already know, WooCommerce does not have built-in features to create customizable products on the same level as the examples you saw at the beginning of this post. This means you will need 2 extra plugins (one core plugin and one add-on plugin) to include the features you want.
We will use the powerful Avanced Product Fields for WooCommerce plugin to add extra form input fields to your products. You can add text fields, color options, checkboxes, file uploads, and a lot more! The plugin comes with a lot of additional features such as conditional logic, changing product price, and more.

The easiest way to create a product builder in WooCommerce.
Find out moreYou will also need the Live Content Preview add-on which allows to display anything the customer types (or uploads in the case of image files) onto your product images.
Display what your customer types or uploads onto your product images.
Find out moreOnce both plugins are installed and activated, the real work begins.
Step 2: create your product
In this section, we’ll create a basic product in WooCommerce to get us started. Navigate to Products → Add New to create a new product. Make sure you add the following data:
- A product name at the top.
- A regular price in the General section.
- A product image. This is the base image on which the customer’s content will appear.

Step 3: create a text input field
Next, we’ll add a text input field to the WooCommerce product so the customer can enter their text to go on the custom sign.
Open the Custom fields tab in the Product data box and click Add your first field to add your first input field to your product. You’ll notice a field appears. Add the following settings:

- In the Type list, you can select what field type this form field should be. Leave it as Text which renders a simple text input field.
- As label, we added “House sign text”. The label will appear above the input field and should describe what data the customer should enter.
- We also added some additional instructions to give the customer some more context.
- Mark the field as required so the product can’t be added to cart unless the text field is filled out.
- You can add other settings such as a minimum or maximum allowed number of characters.
When you are done, make sure to publish or update your product to save all changes. Your product page should look like this:

Your product is now personalizable by your customers! Let’s move onto the next step: displaying the user text on the product image.
Step 4: live preview text on the WooCommerce product image
In this next stage of this tutorial, you will add the live preview functionality to your product. While the user types text in the textbox, it will be displayed on the product image in real time.
To start, edit the product you created earlier and navigate back to the Custom fields tab. Scroll down to the Live Content Preview section and click Add New.
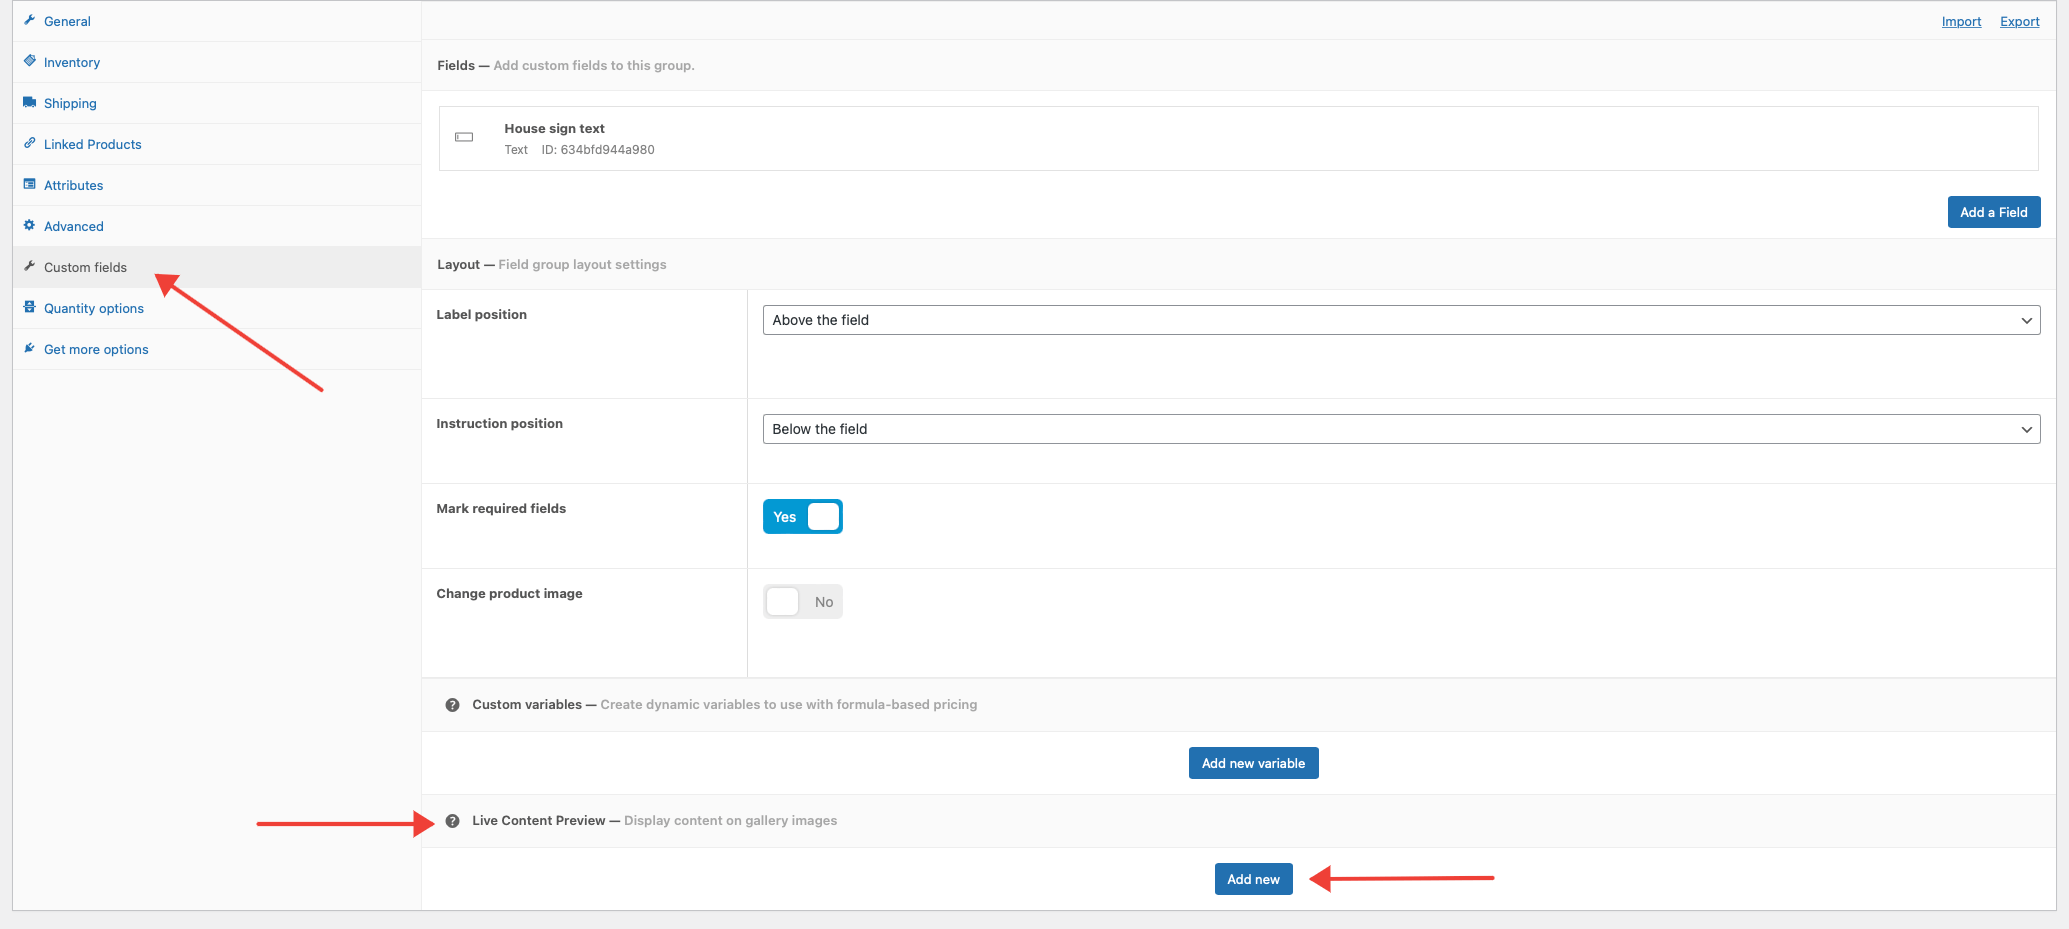
A popup wizzard appears guiding you through the configuration of your content preview. There are 3 steps and we will go over them in here:
Select image

In the first step, you can select the image on which the customer’s text should appear. In our demo, we only have one image so we can immediately press next. But if you have set more images in the Image Gallery setting of your product, you can pick any of those to display content on.
Select field

In the 2nd step, you can select the input field of which the content should appear on the image. Anything the user types in this field, will be shown on the image selected in the previous step.
Customize
This next step is where the magic happens. Here, you can configure how and where the text should appear on the image. The configuration happens in 2 steps. First, you draw a bounding box on the image to the left. This box indicates where the text should appear. Next, you can set appearance options such as font size, font style. etc… Here’s a quick demo:

Here are the settings we used for this particular demo:
- We drew a bounding box in the center of the plaque.
- Set the Color to white (#fff).
- Increase the font size on mobile to 20.
- Set Alignment to Center so the text appears centered.
Once your configuration is ready, don’t forget to update your WooCommerce product so all changes are saved. Below is a demo of the result. Notice how image zooming also works!

There is a lot more we can do with Advanced Product Fields in combination with the Live Content Preview addon. You can let customers change fonts, colors, font size, alignment, and more.
Bonus step: stackable (layered) images
In this tutorial, we looked at creating a live preview around custom text. But what if you want to create a product configurator that allows you to build your product image by using transparent PNG image layers for each product option?
This saves you countless hours creating different image combinations and we’ve got a blog post on creating a visual product configurator with layered PNG images too!
Building a product configurator with live text preview in WooCommerce is easy!
By the help of the powerful Advanced Product Fields plugin, you can turn WooCommerce products into powerful configurators to help your customers create the product they want. You can even add visual feedback by showing what the user types on top of your product image. This gives them an idea of what their final product will look like and increases their chances of ordering on your store.
You are only scratching the surface with what we have built today, Advanced Product Fields for WooCommerce along with its powerful add-ons has so many use cases.

Thank you very much for your answer! One final question and I’m ready to go… The preview I will use will have three stacked layers, two pngs (background and an icon) plus the text layer. But I would need a final png generated so I can print it… will the plugin generate that png upon check-out or that preview is for the client’s eyes only??
Thanks!
We’re working on that. It will be ready soon but if you purchase today, it won’t come with that feature yet.
Hello!
I have the “Woocommerce Custom Product Addons” plugin already installed from before. Would Live Content Preview work with that one?
Thanks!
Hi there!
No, the Live Content Preview only works with our plugin.
Can your plugin works as image upload field overlapped with text filed. I want my customer to upload their image and type their text over the uploaded image. Please let me know if your plugin can achieve this.
Yes, that’s possible! 🙂 You will also need the “Live Preview” addon if you visually want to show your visitors that overlap.
Hi does this works with variants? I have an issue whereby I need to use variants for different colors to manage stock, hence the user can select the variant and customise the text on it, is this doable?
Hi there,
Yes, it works with variants too. 🙂
Hi Ivan,
Can you repeat in English?