
Are you looking for a way to make your WooCommerce store stand out from the competition? If so, you might want to consider adding a visual product configurator to your ecommerce website. It’s a powerful tool that allows your customers to personalize their product and visualize the end result before putting money on the table.
In this tutorial, we will guide you through the process of creating a visual product configurator in WooCommerce. Each change your customer makes will be instantly visible on the product image. This allows customers to see a live preview of their custom product.
By the end of this post, you will have a fully functional tool that will enhance the shopping experience for your customers and help you increase your sales. So, let’s get started and create a product configurator that will take your online store to the next level!
Why use a WooCommerce visual product configurator?
A WooCommerce product configurator lets your customers see the changes they make to customizable products on your online store. It gives shoppers a live preview of what their changes look like on the final product. This helps them make informed purchase decisions based on the live preview rather than making purchases after seeing product images only.
For instance, let’s say you sell custom gaming controllers for which users can select their preferred skin and joystick colors from multiple product options. You can let them view the unique customizations they select applied to the final product before they add it to their shopping cart.
Benefits
Some of the major benefits of using a WooCommerce visual product configurator for businesses are that you:
- Create an interactive shopping experience. While offering extra product options that let shoppers personalize their product is a great way to provide a unique shopping experience, a visual live preview takes it to the next level. You can create a more interactive shopping experience that makes it easier for customers to better understand the extra options and what they’ll look like in real life.
- Let customers make informed purchase decisions. Since a visual live preview lets your shoppers better visualize how the extra options they select will look on the product, it enables them to make informed purchase decisions. This reduces the chances of potential order refund requests due to the product not meeting customer expectations.
- Increase customer satisfaction. Along with improving the shopping experience, you also increase customer satisfaction, as shoppers will know exactly what their product will look like. A preview helps to create realistic expectations and improves the overall user experience on your online store.
- Generate more revenue. Offering a visual live preview encourages shoppers to personalize their items before adding them to the shopping cart. You can charge a small fee for premium extra options which can help you increase the average order value on your WooCommerce site. Moreover, offering customizations of your products means they will cater to more people’s preferences. As a result, this helps your business generate more revenue by selling extra options or add-ons with base products.
Examples of visual product configurators
Let’s go over some popular examples of products with an instant live preview:
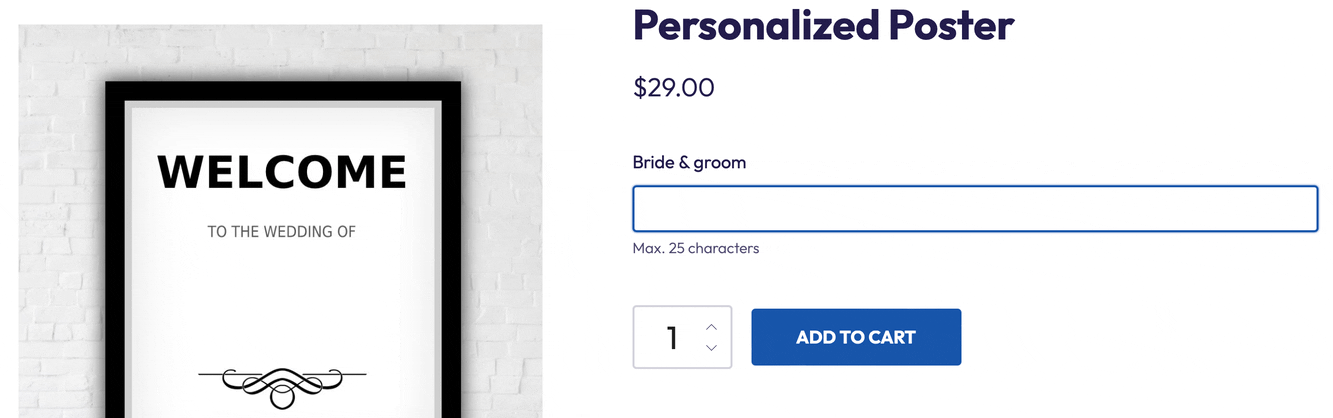
Custom posters
Custom posters are undoubtedly the most popular example of a product with live preview. A custom poster product allows customers to add their own text on your posters. WooCommerce generates a live preview as they type:
Gaming controllers

Aim Controllers is a brand dedicated to fully customizing popular gaming controllers in unique custom designs. With a visual live preview of the customizations, customers can better understand how their personalizations will look on the final controller.
Customizable (print-on-demand) clothing

Lingua Franca is an online store that sells custom apparel products. Since they let their customers customize their orders, they’ve implemented a visual product configurator so people can better understand what the final product will look like.
How to create a visual product configurator in WooCommerce
As an example, we’ll create a customizable gaming controller in WooCommerce. Here’s what the finished product will look like:

While a visual product configurator is a great feature to have in your online store, WooCommerce doesn’t offer this functionality out of the box. That is why you’ll need to use a product configurator plugin that lets you enable visual live previews for your products.
For this, we recommend using the Advanced Product Fields for WooCommerce plugin to set up WooCommerce products with visual live previews.
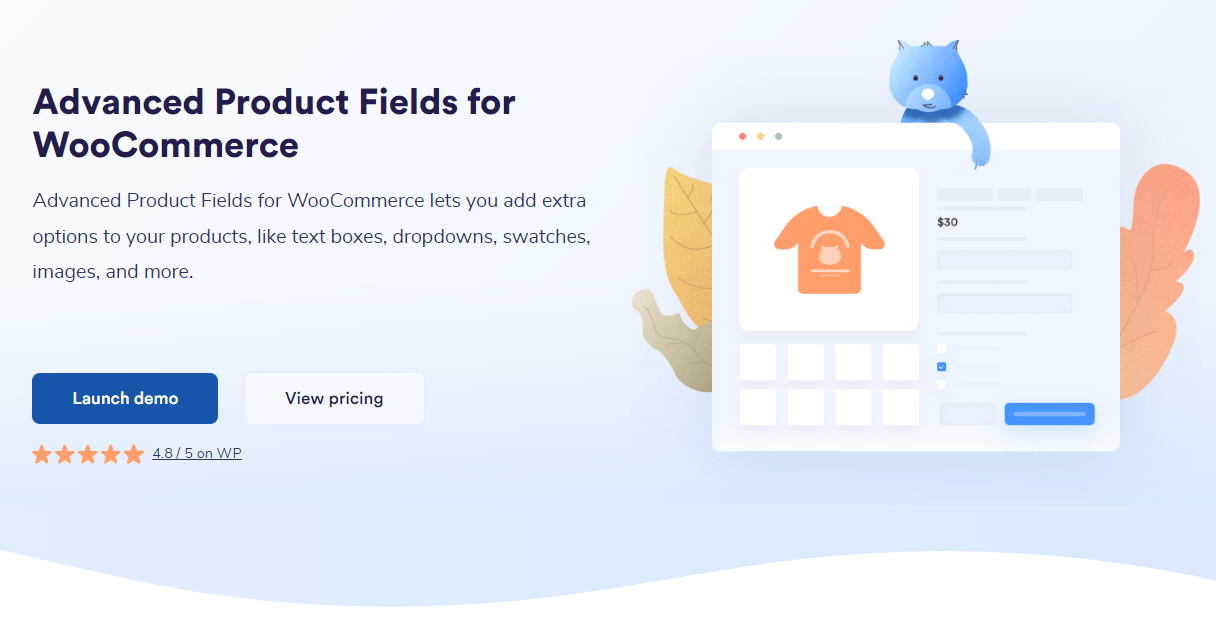
The plugin offers all the functionality you need to add extra options to your WooCommerce products. This way, you can create configurable products and let shoppers choose their desired colors, designs, or styles. Using this plugin, you can add text input fields, checkboxes, calendar (date) fields, file upload, and a lot more to your products!
Step 1: Install the plugin
Get Advanced Product Fields for WooCommerce and install it on your WooCommerce site. To do this, navigate to Plugins → Add new and upload the plugin’s zip file before clicking on the Install now button. Activate the plugin to continue.
Once the plugin is activated, navigate to WooCommerce → Settings → Product fields and paste the license key given to you at the time of purchase in the License key field.
Click on the Activate button to activate the Advanced Product Fields for WooCommerce plugin’s license on your WooCommerce site.
Step 2: Create your WooCommerce product
Once the plugin is installed and ready to go, we need to set up a WooCommerce product. For demonstration purposes, we’re going to create a “Custom Gaming Controller” product with extra product options that let customers customize their gaming controller in any way they like.
To get started, go to Products → Add new to create a new product. Configure the 3 main aspects of your product:
- Give it a title.
- Set the price in the General tab.
- Add a product image.

Step 3: Add product configuration fields
Now that our product is ready, we can add form input fields to it (often also called “product options”). The customer will be able to interact with these input fields to create the product they desire. Advanced Product Fields for WooCommerce lets you add as many extra product fields as you like!
To create your first field, go to the Custom fields tab in the Product data meta box and click Add your first field. You’ll notice a new field appears with a few more configuration options. Make the following changes:
- Type: This allows you to change the input field type. By default, a newly created field is a text input. We want to offer a multiple choice field where customers can choose a skin from a list. To create this, select Image swatches as the field type. Your customer will see a selection of clickable images they can choose from.
- Label: Enter the title of your field. We chose “Choose your skin”.
- Options: Here you can define the choices you’ll give to your customer. Each skin you want to offer is a row in the Options section.
Feel free to configure the other settings to alter the appearance of the image swatches too. When you are done, your configuration should look similar to this:

The result should look like this on your website:

If you want to give your customers more choices, you’ll need to add more fields with the APF plugin. Each field will correspond to a different option they can customize. For the purpose of this tutorial, we will not create more fields, as the process is largely the same across the board.
Step 4: Add visual layers
Now that the product with extra options is created on your WooCommerce site, it’s time to start adding visual layers to your product options. This way, your customers can view their customizations directly on top of the product image. This also saves you the hassle of adding multiple product images with different design combinations.
For this, we will use the Layered Images add-on for the Advanced Product Fields for WooCommerce plugin. With this add-on, you can create your main product image by using transparent PNG image files to specify each product option. This not only helps offer a more interactive shopping experience on your online store, but it’s also a great way to enhance customer satisfaction.
Once you activate the Layered Images add-on, it will display a new Layers section in the Custom fields tab in the same product edit screen we used earlier.

Use the toggle on the right to activate layers. You can upload the first layer or the background of your product using the Base background image section. This will allow customers to view the base product (without any customizations) before they go on and customize it.
Now, click on the Add a layer button to create a new layer for your custom fields. This will add a transparent PNG file to your product’s extra options or fields that we created earlier. It’s important to upload a PNG image file so it has a fully transparent background and doesn’t interfere with the base product background image.
You can add layers for all extra options you have added for your WooCommerce custom product. Once you’re ready, click on the Publish or Update button to continue.
Bonus step: Live preview text
We’ve demonstrated how to build a visual product configurator that can overlay PNG images on top of the product image. But what if you want to take it a step further and let customers see a live preview of custom text they type? A common example is engraving bracelets with a meaningful message. That’s also something you can do with APF, and we’ve got a step-by-step tutorial to show you how to live preview text on your WooCommerce product images.
Preview your work
This tutorial creates a WooCommerce visual product configurator that offers your shoppers a live visual preview of the customizations they make. The customer starts by visiting your product page and seeing the options you provide for the base product:

As the customer goes through the product options, they see a live preview on top of the base product image:

Creating a product configurator in WooCommerce just got easy!
A WooCommerce visual product configurator lets you create a more interactive and fun shopping experience on your online store. WooCommerce sites that sell customizable products need to offer a visual preview of the changes.
While you can manually add product images to showcase each combination of options, it’s better to use a visual live preview that automatically changes the product image as customers add extra options.
The best way to do this in WooCommerce is by using the Advanced Product Fields for WooCommerce plugin. It comes with all the features you need (and more!) to set up highly customizable products on your online store. This way, when shoppers select extra options, they know exactly what the final product will look like when they receive their order.


I have an artists website On product page I need a size box/widget for customer to click showing size of artwork. Examples- 12×24 or 16×20 and so on. Does this plugin have this widget, if that’s what it is?
Thanks Brian
Hi Brian,
Yes that sounds possible with our plugin! There’s not one “widget” though. You would have to build the form that asks the info from your customers.