
Do you run a WooCommerce store and wonder how to create top-notch engraved products for your customers? Then this tutorial is for you!
In this post, you’ll discover the best WooCommerce engraving plugin so that customers can select engraving options, add text, or change fonts and colors. Even better: they can see a live preview of the engraving on your finished product!
Offering engraved products in your WooCommerce store is not just a trend; it’s a way to stand out in a crowded online marketplace. This step-by-step guide will show you how to leverage a plugin to transform your store into a hub with personalized engraved products.
Custom engraved examples
Before we dive into the tutorial, let’s explore some popular types of engraved products. The list is endless, but here are some common examples:
- Engraved jewelry: This is a classic example where customers can add a personal message or date to their jewelry, e.g. a wedding ring. A live preview helps customers get a better idea of the final product.
- Pet tags: It’s becoming more popular to create engraved ID tags for your pets with their name, owner’s contact information, or medical details.
- Trophies and awards: It’s common to engrave the recipient’s name, event details, or achievements on trophies, plaques, and medals.
- Engraved watches: Another popular example is to engrave the back of a wristwatch with a personal message, initials, or a special date.
Building engraved products in WooCommerce
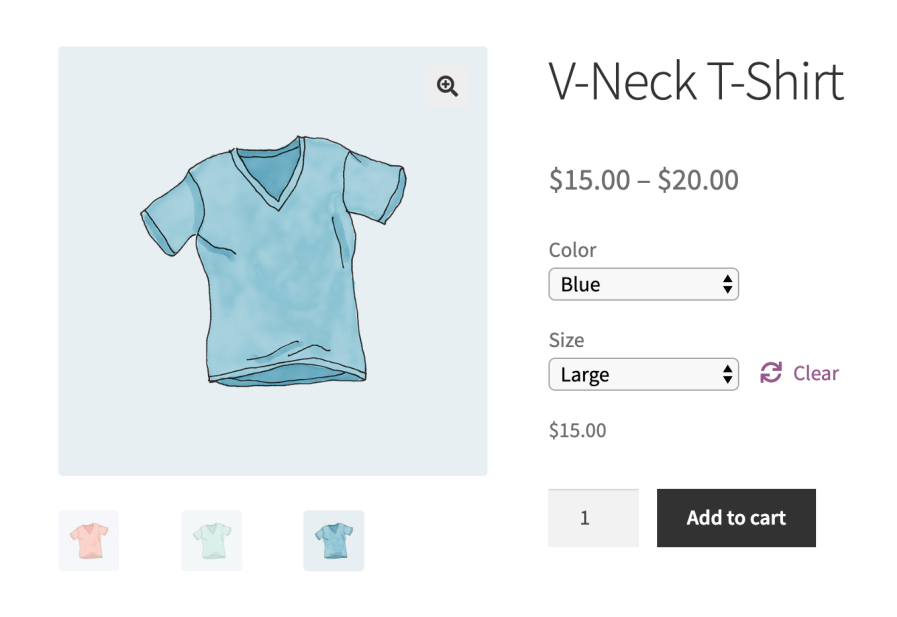
WooCommerce has a built-in way that allows some product personalization. It’s called “Variable products”, and you can use it to offer multiple variants of the same product. The classic example is a T-shirt in various sizes and colors. By default, WooCommerce adds these options as dropdowns (select lists) on the product page:
This is great, but it doesn’t really help much if you want to build engraved products. What about text input fields, file uploads, checkboxes, and other more advanced options to make your product a success? WooCommerce doesn’t support those out-of-the-box, so you’ll need a plugin.
That’s where the Advanced Product Fields for WooCommerce plugin comes in! It enables you to add various form input fields to your WooCommerce product pages, which in turn allows your customers to personalize their product before purchasing. You can add file uploads, calendars, checkboxes, and much more.
You’ll even have options to add or subtract an extra cost to your product for each field you include.

How to create engraved products in WooCommerce
For this tutorial, we’ll create a simple jewelry product that can be engraved. The user will have options to choose their desired color (gold or silver) and can add initials that will be engraved in the final product. As a bonus, they’ll be able to see a live preview of the engraving. Here’s a demo of what we’ll build:
Step 1: Install Advanced Product Fields for WooCommerce
To get started, purchase Advanced Product Fields for WooCommerce from the Studio Wombat store. The cheapest package is enough to get you started but does not include the live preview we’ll cover later in this tutorial.
Then follow these steps:
- Go to Plugins → Add New → Upload Plugin.
- Choose the newly purchased plugin, upload it, and then click Activate.
Now that you have the plugin installed, you can move on.
Step 2: Create your WooCommerce product
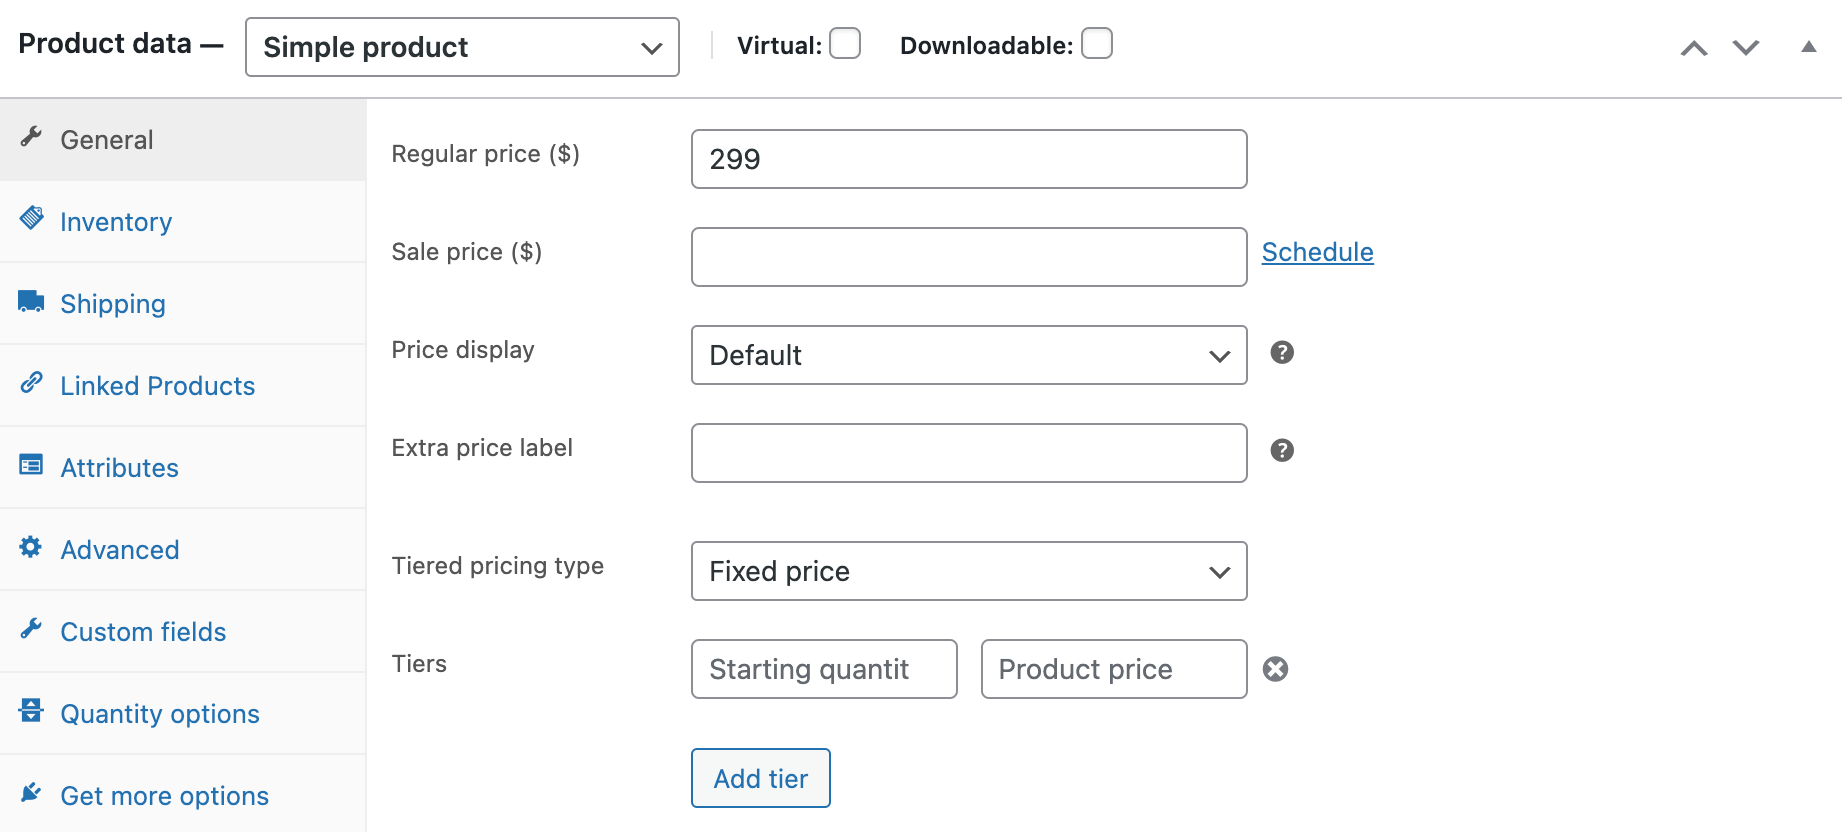
For this tutorial, we assume you know how to create a product in your store and that you have one set up and ready to go. You’ll need a simple product with at least a Regular price and a Product image defined.
Step 3: Add the product options for engraving
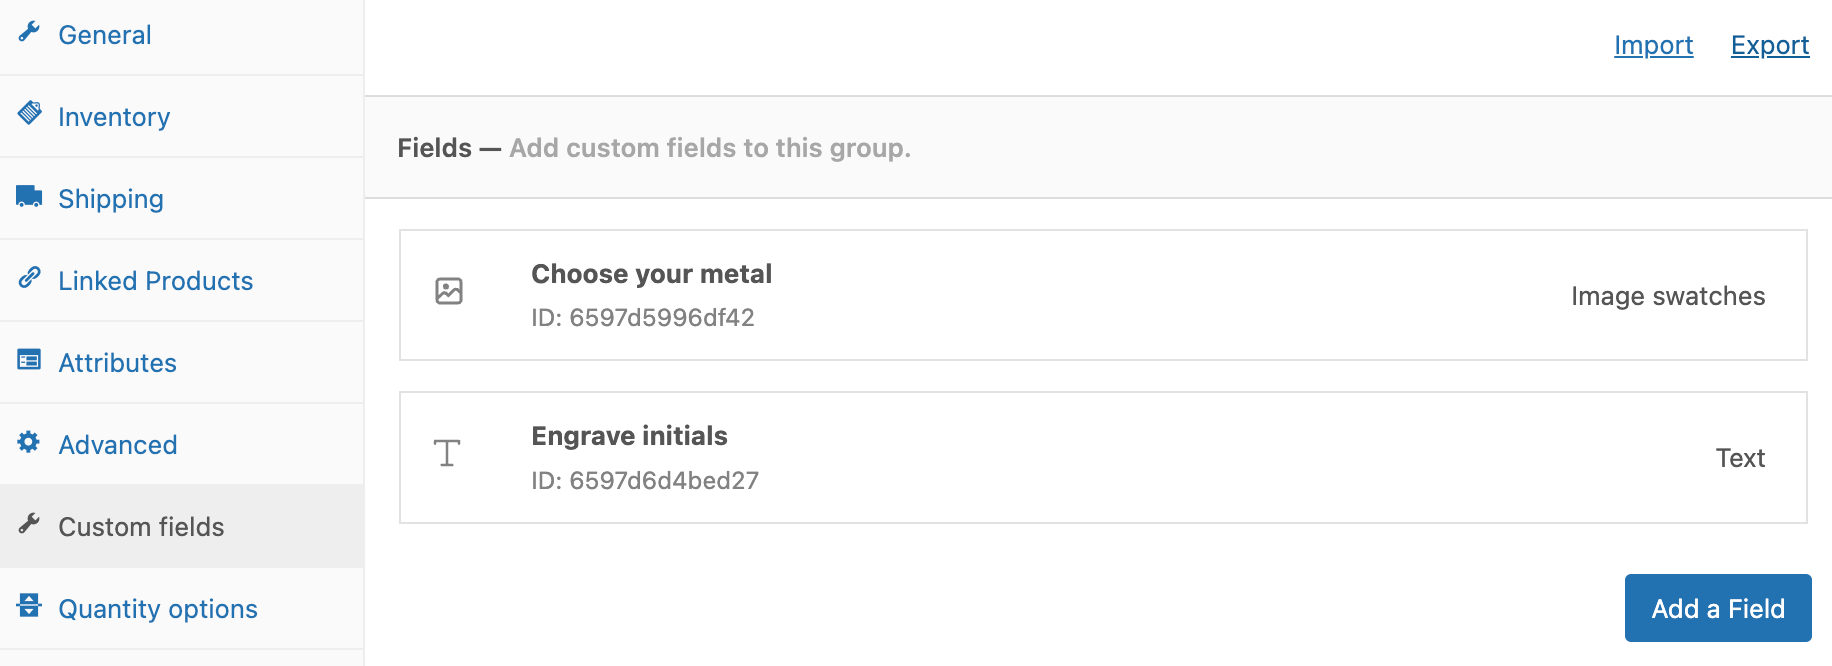
- Go to the Custom fields tab and click on Add your first field. We’ll add two fields: “Choose your metal”, which allows the customer to choose between gold or silver jewelry, and “Engrave initials”, where the customer can write their initials to be engraved inside the jewelry.
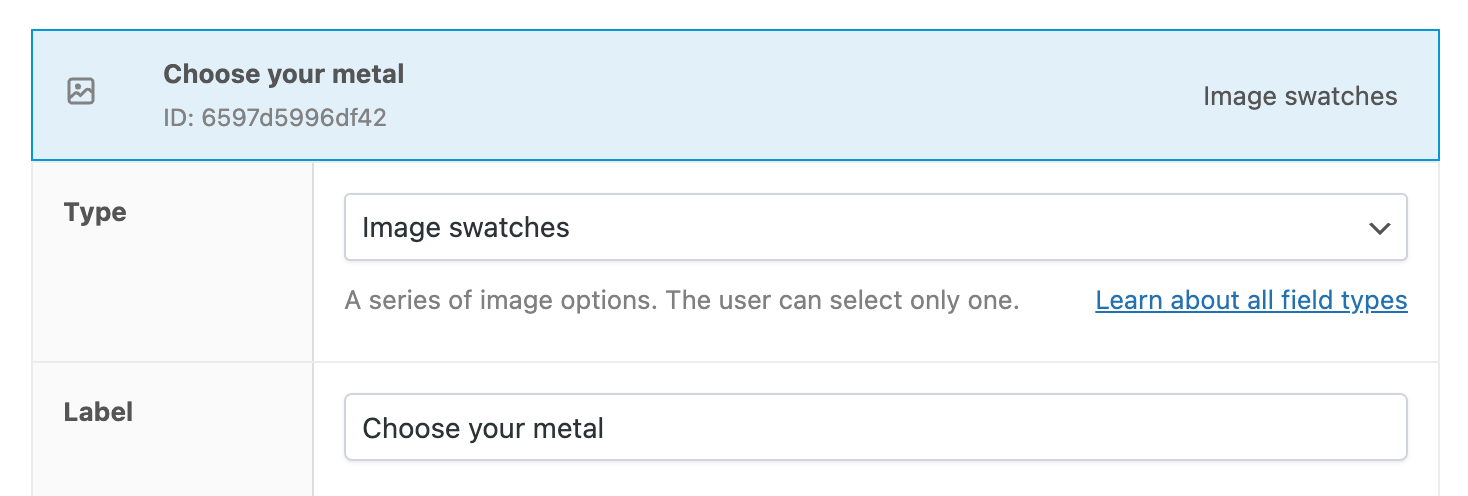
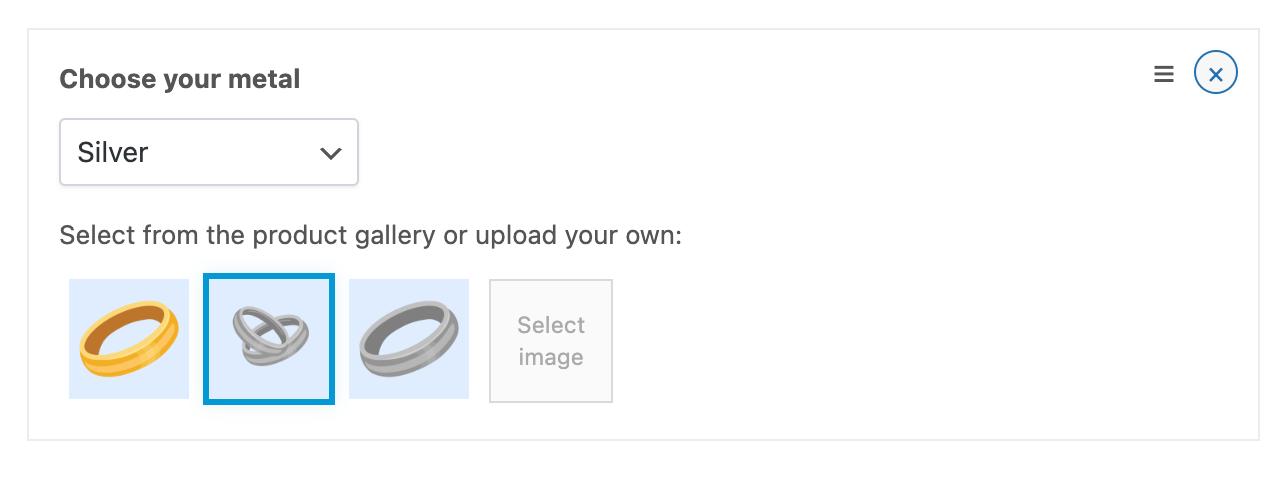
- For the first custom field, you’ll want to select the Type “Image swatches” (which display as beautiful image options on the frontend) and give the field a Label, which the customer will see on the product page, e.g. “Choose your metal”.
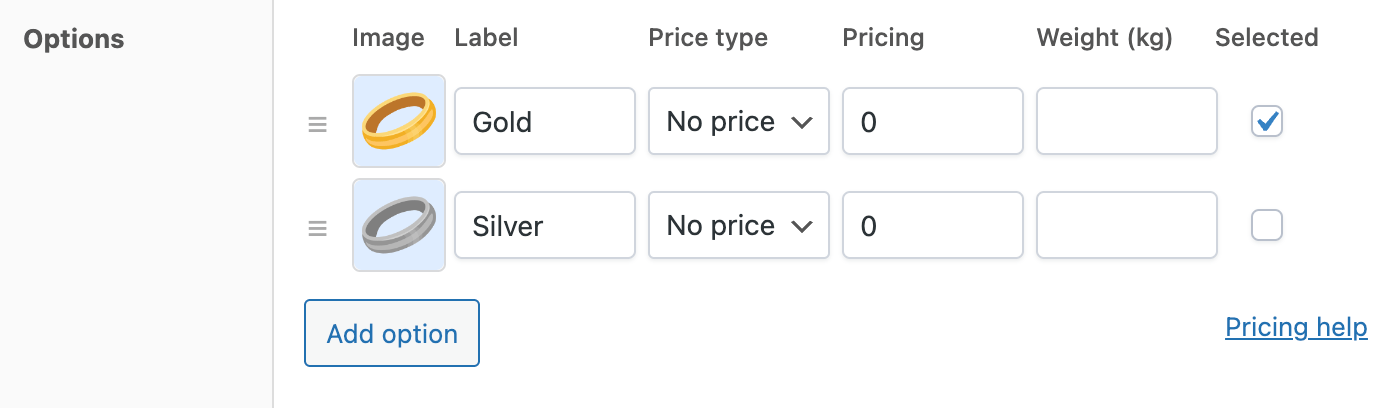
- Scroll down to the Options section of your product and add the images (and other information) you want to show on your product page. For our jewelry, we added a gold and silver option, each with a nice image to illustrate the option.
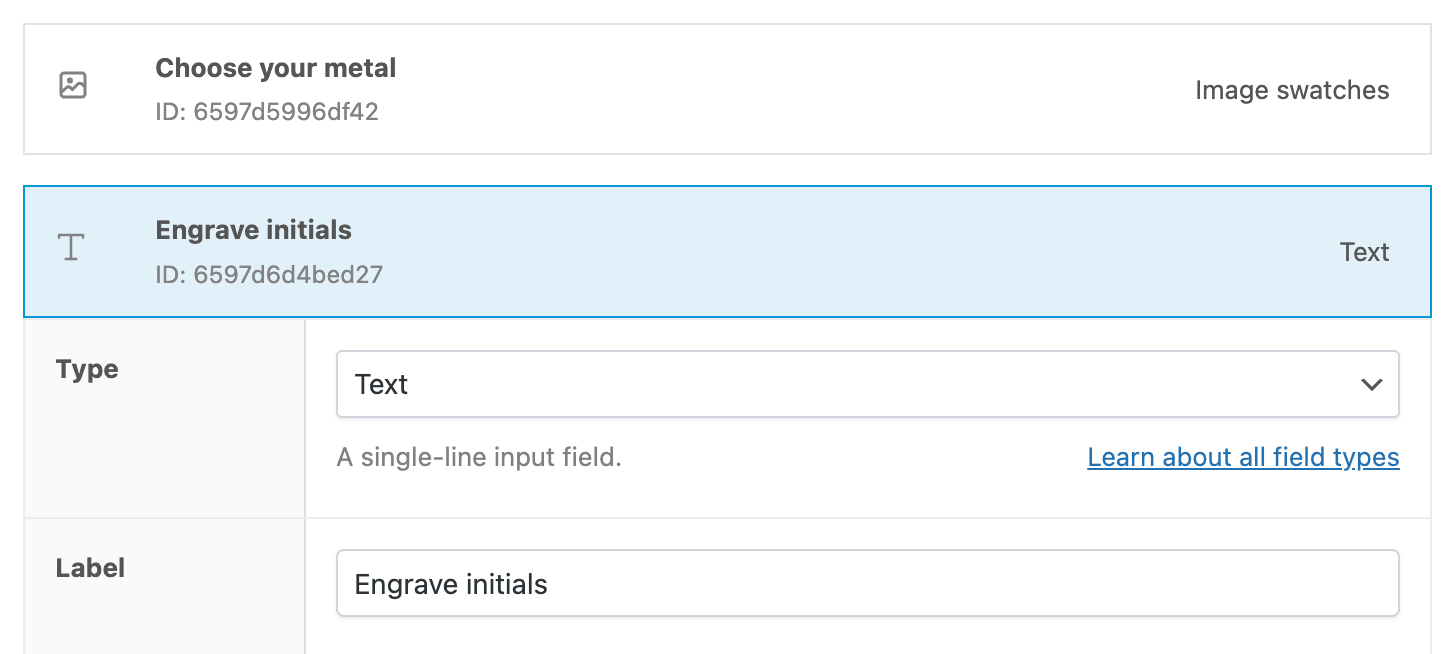
- You can then do the same thing for your second custom field, in this case “Engrave initials”. Select the Type “Text” and add a corresponding Label, e.g. “Engrave initials”.
- When you scroll further down, you can set a maximum length for the engraving (i.e. the maximum number of characters).
Step 4: Swap the product image
Just like with standard WooCommerce, customers can view a different product image based on the selected options.
In our example, we want to show an image of a golden ring when the user selects “Gold” as their prefered ring type. We want to show a silver ring if the user selects “Silver”.
To do that, enable the Change product image setting in the Layout section:
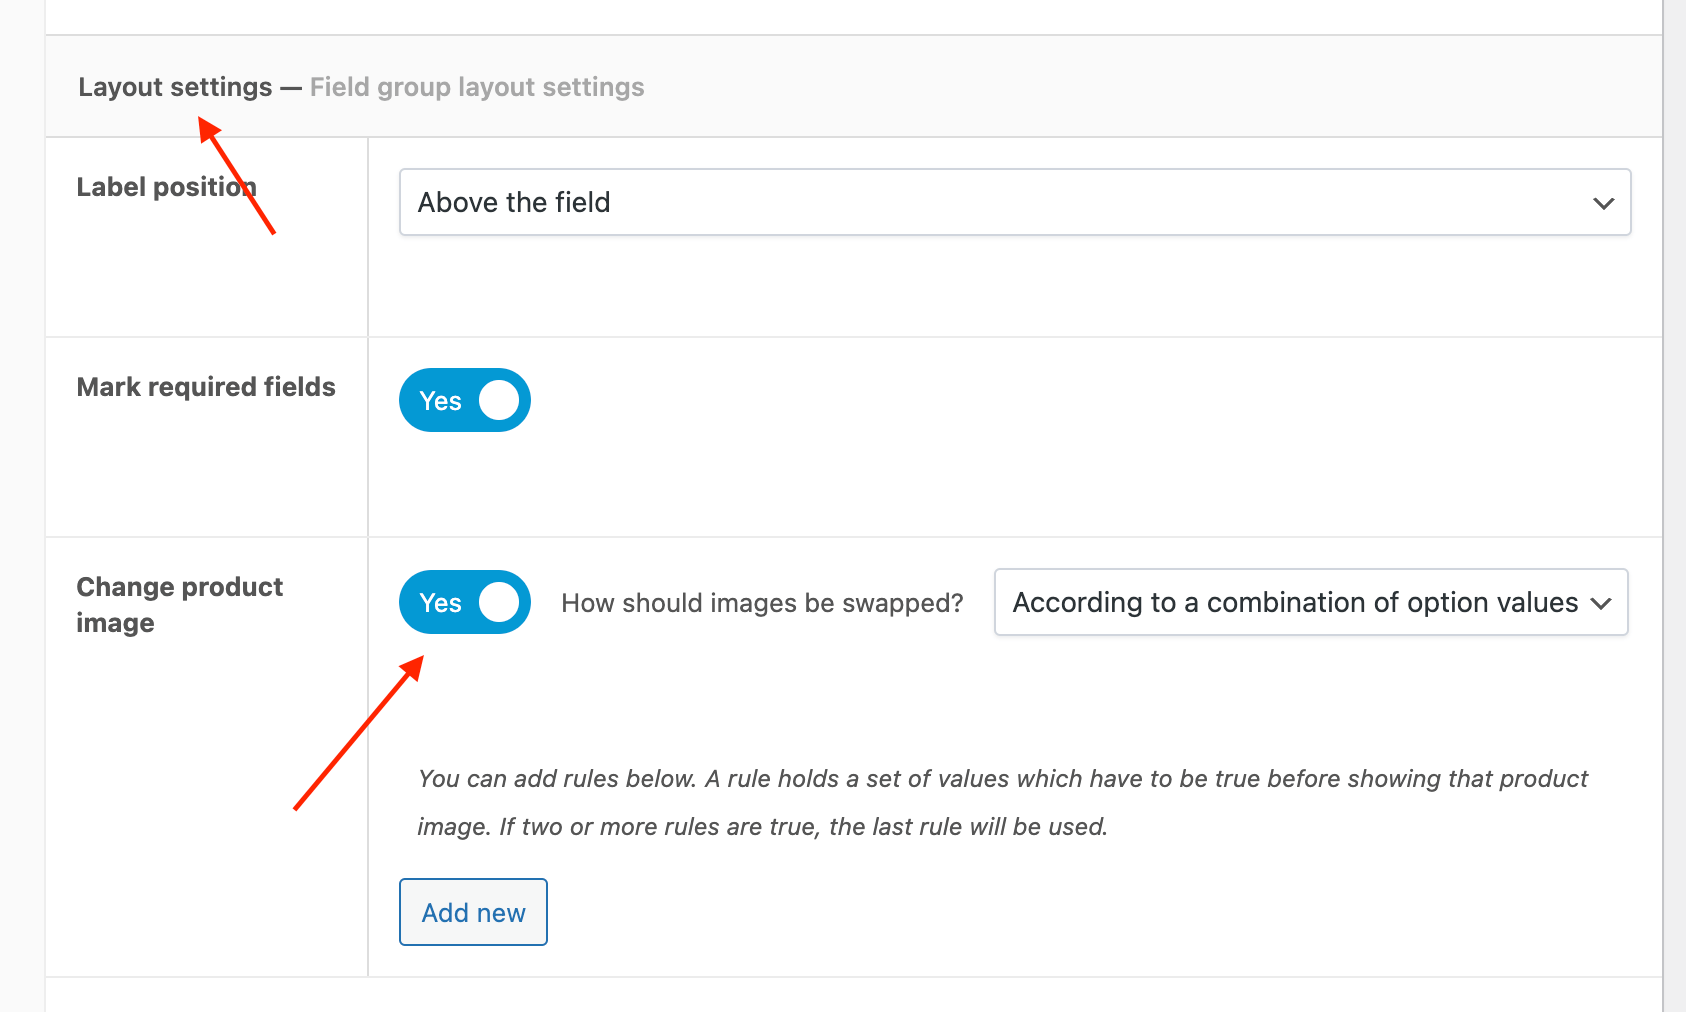
Once that’s done, you can start adding rules to define when to show a certain image. In our example, we want to switch to a silver ring from the gallery:
And you’re done! With these settings your customers can choose between gold and silver wedding bands, see the image change, and add a personalized engraving to their jewelry.
Bonus: How to show a live preview of the customizations
Of course, it’s even better if you can show a live preview of what the finished product would look like with the engraved text. This gives customers a better idea of where and how the text will be placed on their product.
Studio Wombat offers a useful Live Content Preview add-on that helps you give customers a better idea of what their final product will look like. We’ll quickly show you how to do this. If you want an in-depth guide, you can find more information on how to install and use the add-on here.
Once you’ve installed the add-on, you can easily create the settings for the live preview.
Step 1: Get familiar with the Live Preview settings
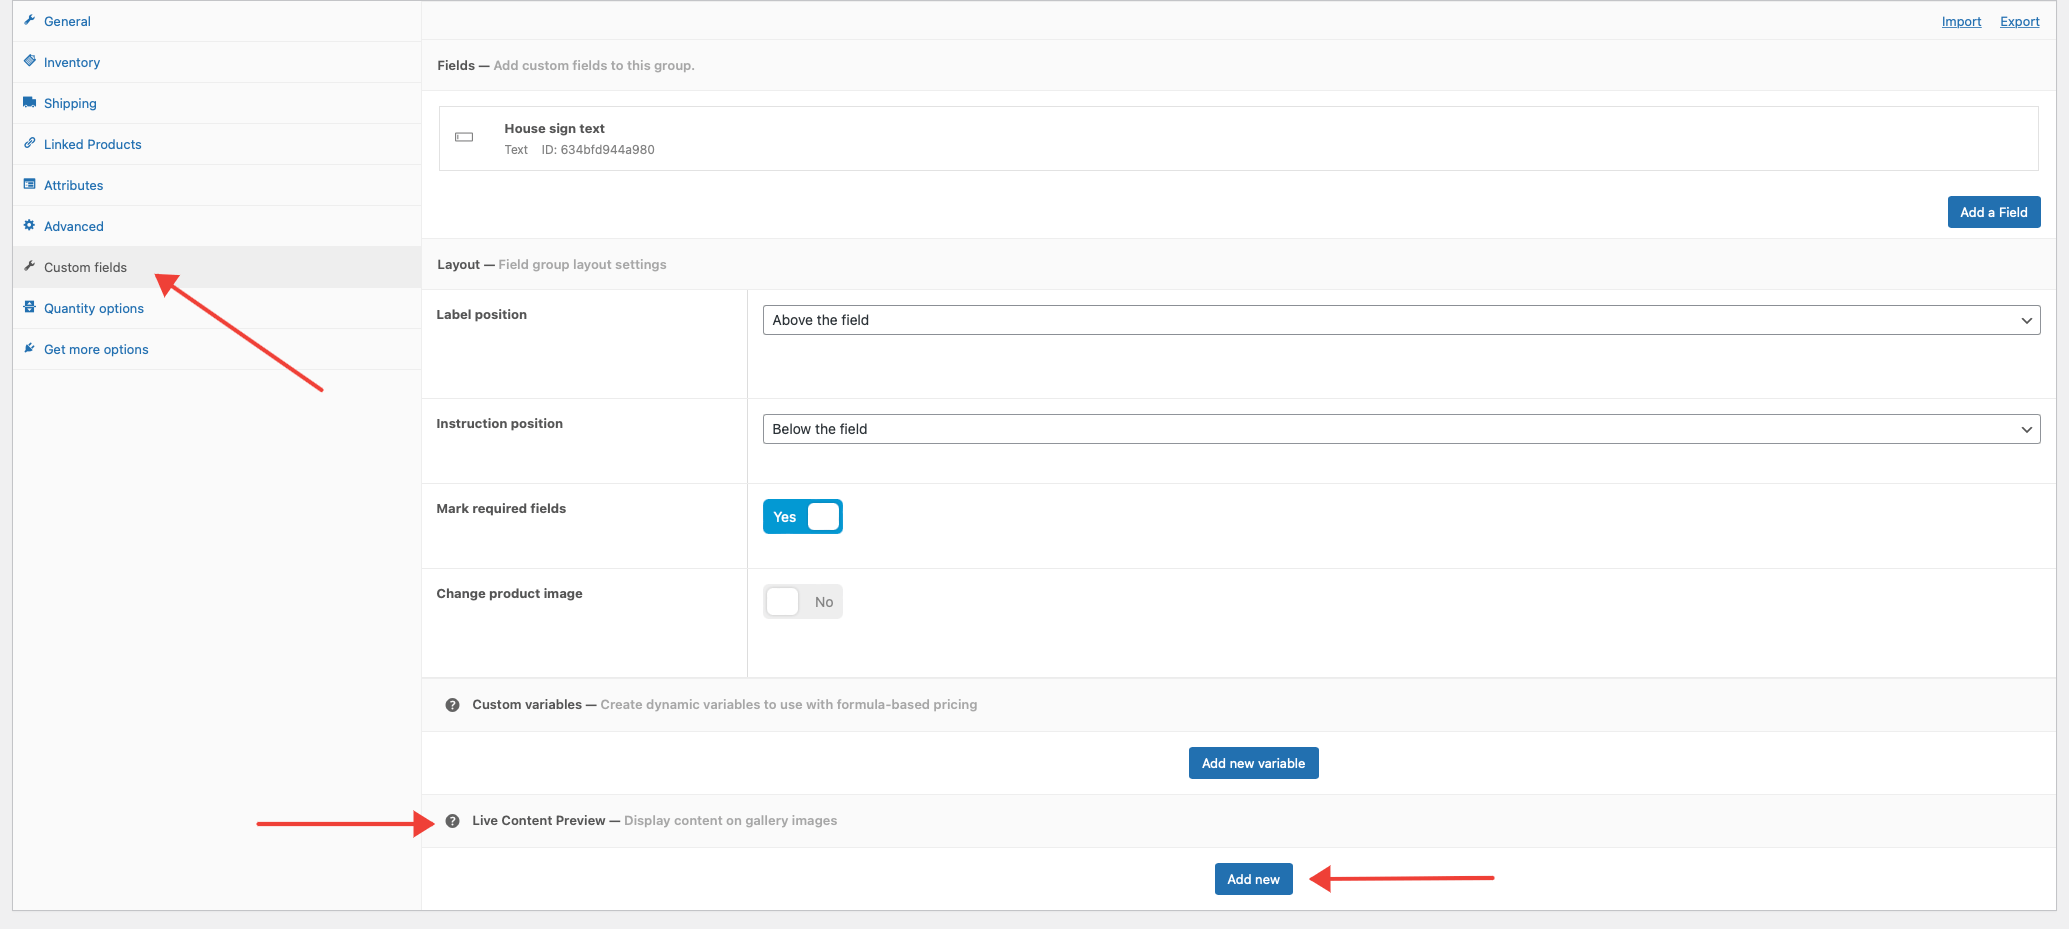
Go back to your product and scroll down to the Live Content Preview section. Click Add new.
Step 2: Set up your Live Content Preview
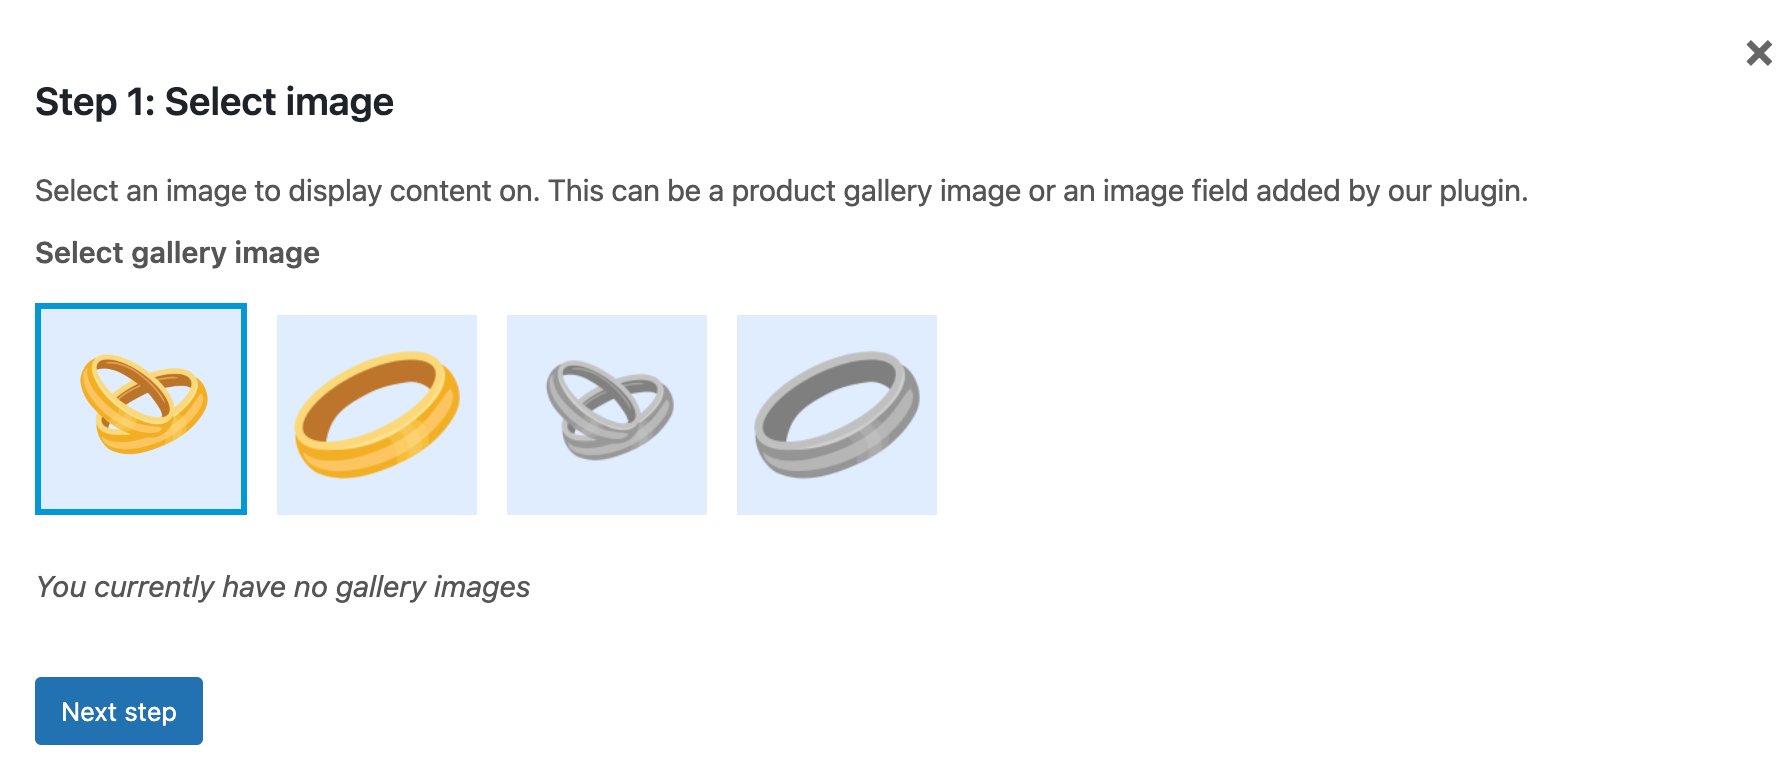
In the pop-up window that appears, select the image you want to preview your text on. This can be the product’s main image, or any of the other gallery images. Then, click on Next step.
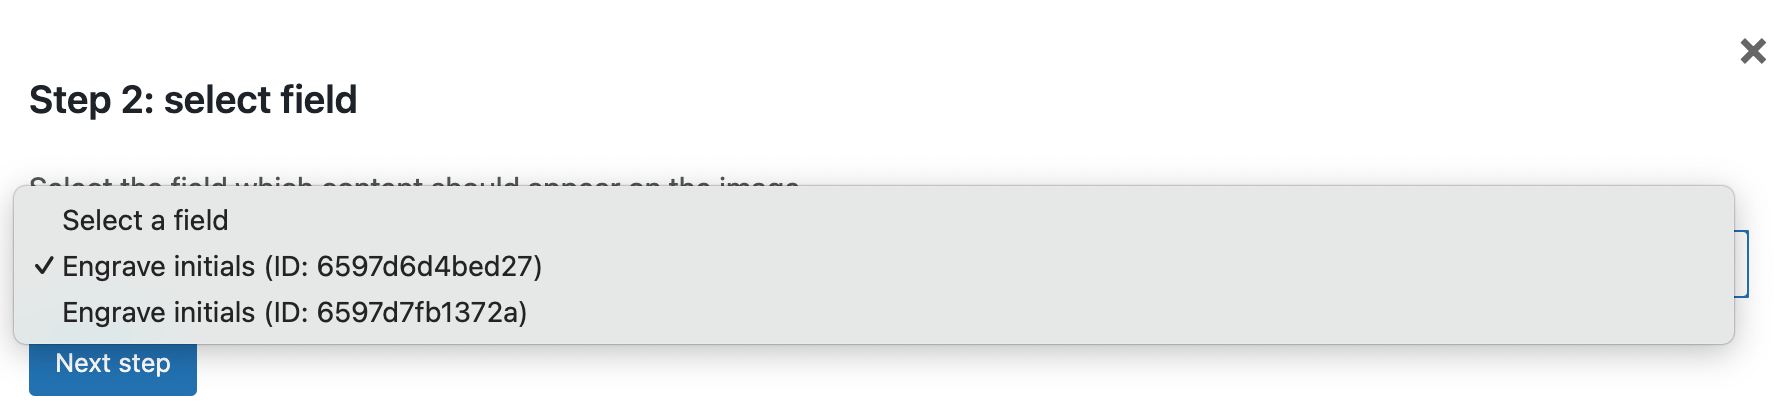
Next, select the field you want to use for the engraving on this image, then click on Next step.
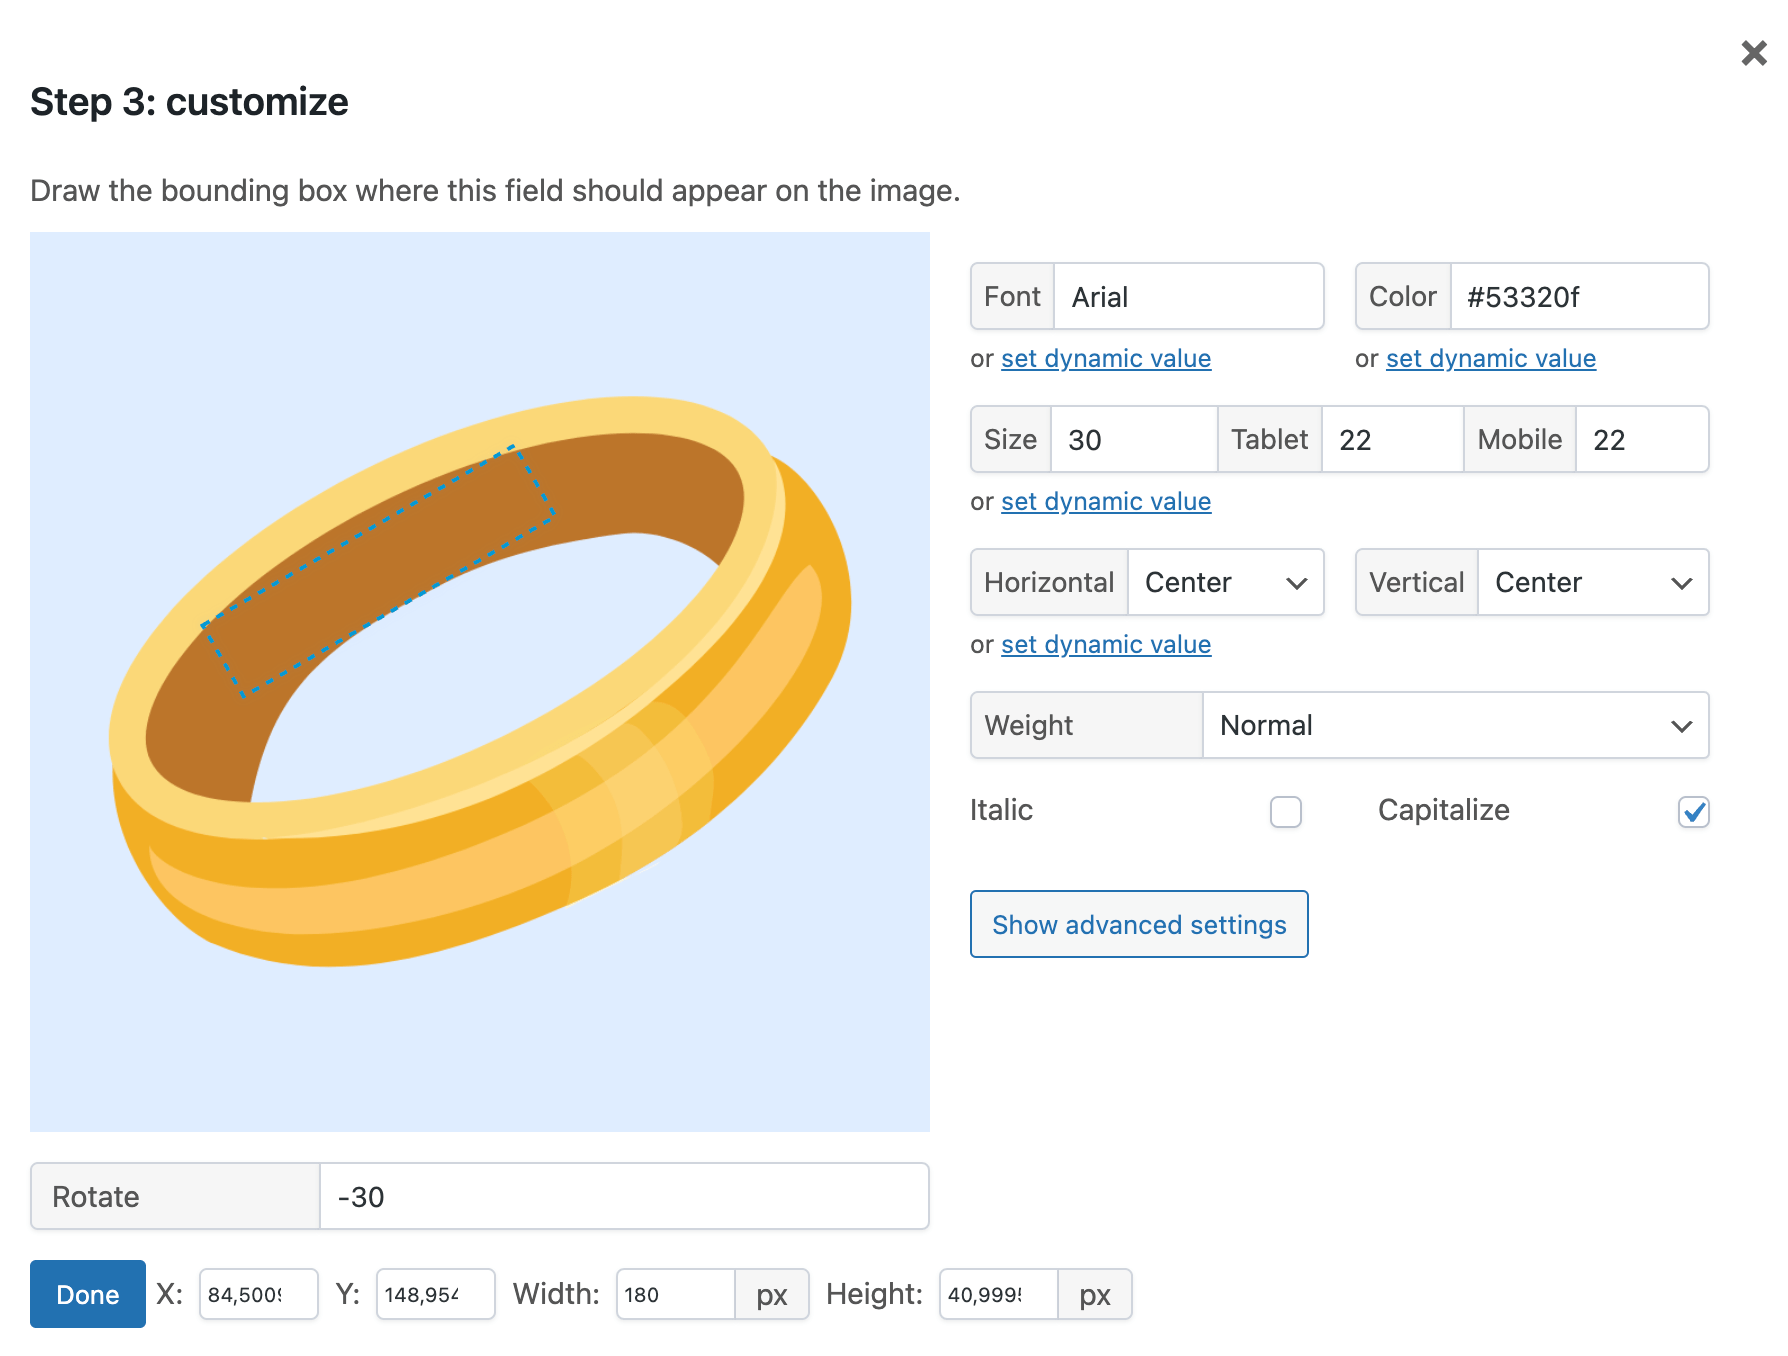
The final step of the pop-up window is the actual customization. Here you can define where the preview should appear by drawing a bounding box on the image. You can also select what font, color, and text size you want to use for the preview, etc. Once you’ve filled in the settings you want, click Done.
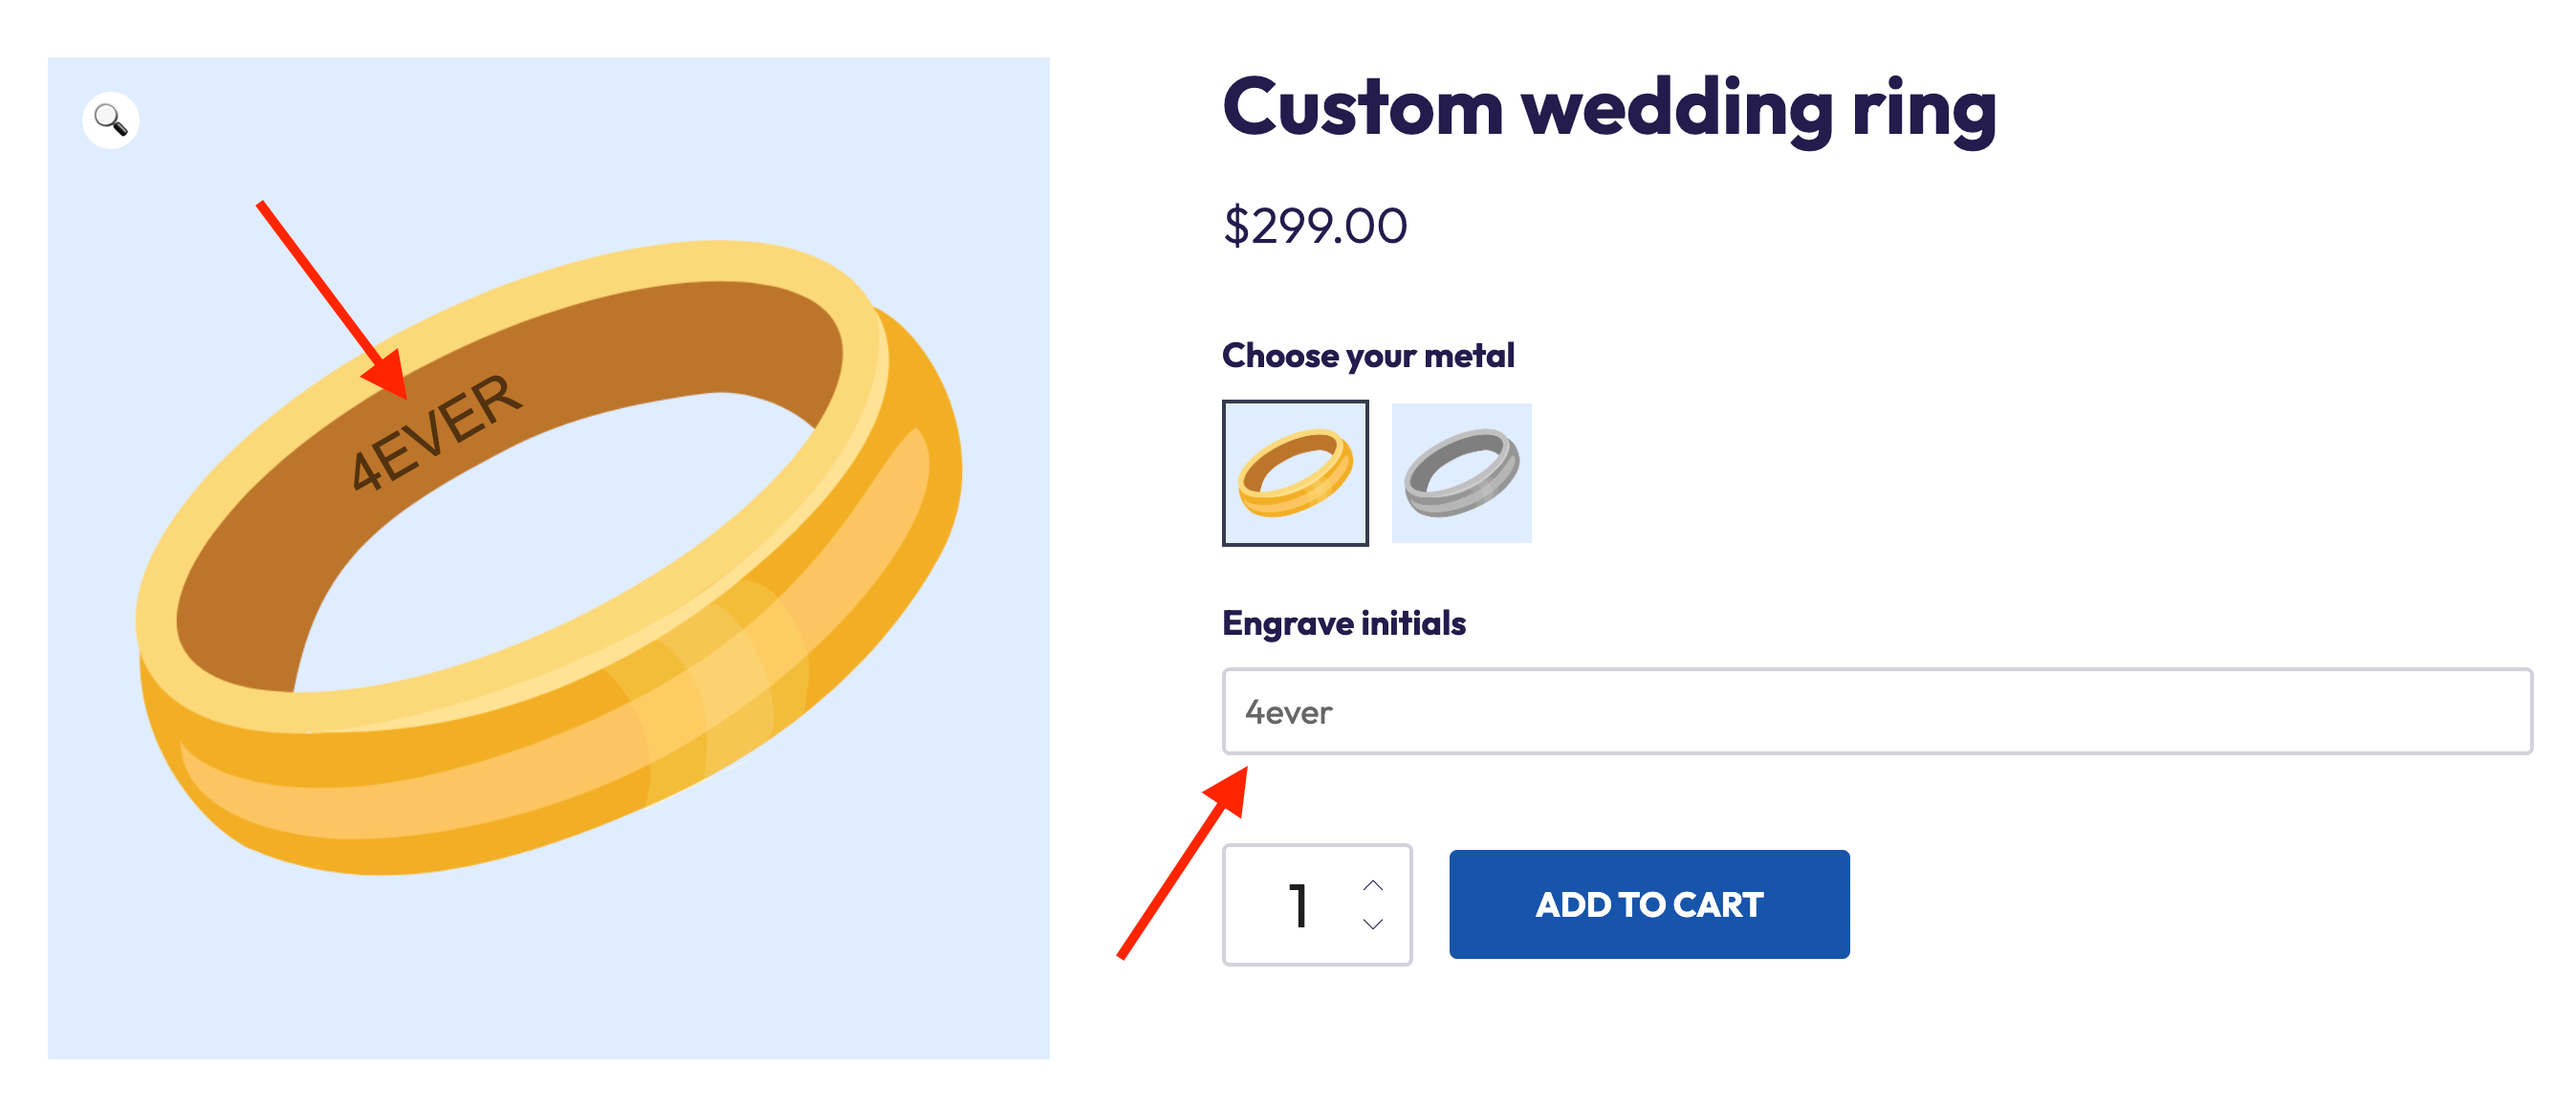
On the product page, customers can now choose their preferred metal, enter the preferred initials, and then see a preview reflecting their choice:
Start selling custom engraved products (with live preview) with WooCommerce today!
Lots of products become more valuable to people when they’re personalized. Adding WooCommerce engraving options to your online store can give you a competitive edge and attract more customers.
In this in-depth tutorial, we’ve explored the significance of WooCommerce product engraving for your e-commerce business and we’ve shared the best WooCommerce engraving plugin, featuring:
- More than 16 different field types.
- Minimum and/or maximum character limits for the engraving.
- Conditional logic to display or hide options based on the customer’s selections.
- Additional pricing options so you could charge a fee per extra character.
Give Advanced Product Fields for WooCommerce a try today to give your customers an enhanced, personalized experience!
