Create quantity swatches (a quantity selector design)
WooCommerce Quantity Discounts, Rules & Swatches allows you to replace WooCommerce’s (boring) quantity input box with a design that makes more sense for your store.
Quantity design examples
In this section, we’ll look at some examples first so you know what we mean with “quantity design”.
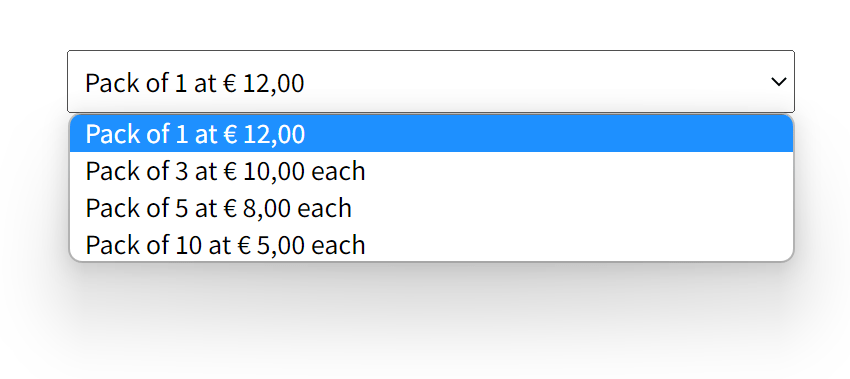
Example 1: a dropdown list
If your product can only be sold in packs of 3, 5 or 10, it makes sense to replace the quantity number input field with a dropdown list so users can only select those options. Our plugin allows you to design this dropdown, including its (dynamic) content.
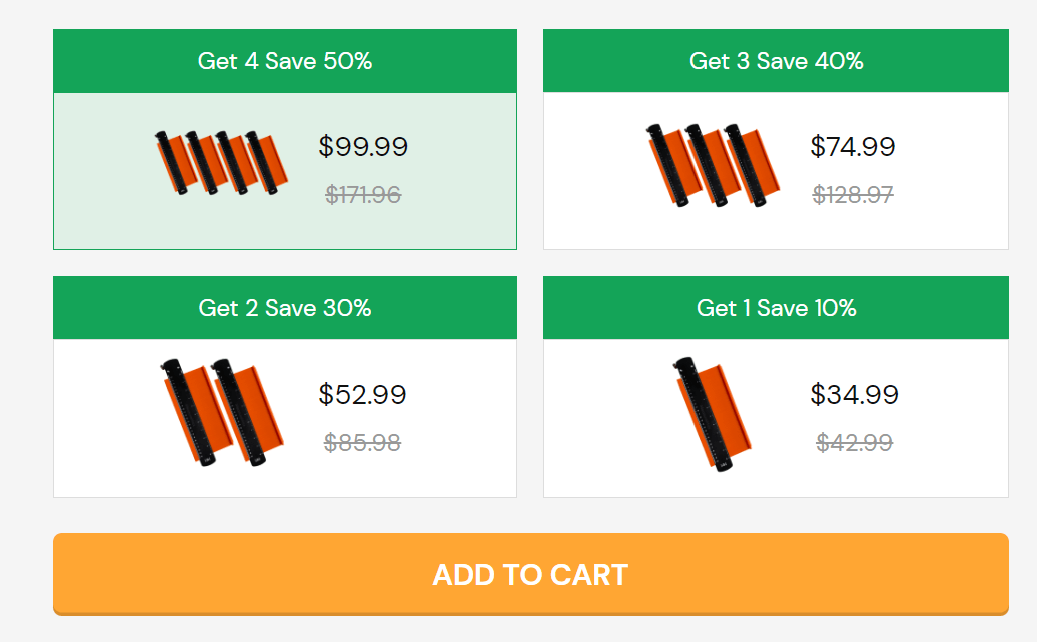
Example 2: quantity swatches
When you’re offering quantity-based discounts, it’s a huge sales booster if your customers can see visually what they’re gaining from buying more than 1 item. For this reason, our plugin allows you to create quantity swatches. Just like with the dropdown, you can control aspects of the design & content. Here are a few examples:


Designing a quantity swatch
In this section, we’ll explain how you can make your own quantity swatches. Go to Products → All Products and edit your product. Follow these steps:
- First, make sure you’ve defined your quantity pricing tiers as we explained in this document.
- Navigate to the Quantity options tab and select Swatches under the Quantity Selector Design setting:

- Notice some other settings appear:
- Quantity title: a title appearing above the swatches. It makes sense to add something like “Select your quantity” to inform visitors what to do. Leave it blank if you don’t need a title.
- Items per row: the swatches will appear next to each other. You can define how many swatches should be displayed in a row. Selecting a higher number here will make the swatches smaller. Selecting a lower number, makes them larger (in width).
- Items per row on mobile: the same setting as above, but for mobile devices (making our plugin responsive).
- At the bottom, find the Design Your Quantity Selector setting. This is where you create your swatches and add the content for each quantity swatch:

- Each row corresponds to 1 swatch and you can define 4 data points:
- Quantity: this is the only obligated field. It is the quantity corresponding to the swatch and should be a non-decimal number.
- Label: the main label of the swatch
- Byline: some additional information displayed on the swatch
- Highlight: this is highlighted text. Usually to emphasize something important.

The label, byline, and highlight, can contain dynamic codes that represent price data from your product. See the section “Dynamic shortcodes in swatch designs” below.
- When you’ve created your swatches, you can define the colors via WooCommerce → Settings → Quantity manager → Quantity settings:

Dynamic shortcodes in swatch designs
- The label, byline, and highlight settings in your swatches can contain dynamic codes that represent price data from your product. So you can create swatches without having to do calculations, or if you make changes to your product prices/sales, the swatches are automatically up to date. Here are the dynamic codes you can use:
[price]shows the product price for 1 item.[old_price]shows the old product price before the quantity discount.[total_price]shows the total price (price per item multiplied with the quantity).[old_total_price]shows the total price before the quantity discount applied.[discount]the amount of discount received for 1 item.[total_discount]the total amount of discount received.[discount_percent]the discount in percent.